MikroTik CRS326-24G-2S+RM Manual
Hide thumbs
Also See for CRS326-24G-2S+RM:
- Quick manual (9 pages) ,
- Quick start manual (21 pages) ,
- Quick manual (57 pages)
Advertisement
Table of Contents
- 1 Safety Warnings
- 2 Quick Start
- 3 Mounting
- 4 Extension Slots and Ports
- 5 Booting Process
- 6 Reset Button
- 7 Powering
- 8 Operating System Support
- 9 Federal Communication Commission Interference Statement
- 10 Innovation, Science and Economic Development Canada
- 11 Ce Declaration of Conformity
- 12 UKCA Marking
- 13 Eurasian Conformity Mark
- Download this manual
CRS326-24G-2S+RM
CRS326-24G-2S+RM
Safety Warnings
Before you work on any equipment, be aware of the hazards involved with electrical circuitry, and be familiar with standard practices for preventing
accidents.
Ultimate disposal of this product should be handled according to all national laws and regulations.
The Installation of the equipment must comply with local and national electrical codes.
This unit is intended to be installed in the rackmount. Please read the mounting instructions carefully before beginning installation. Failure to use the
correct hardware or to follow the correct procedures could result in a hazardous situation to people and damage to the system.
This product is intended to be installed indoors. Keep this product away from water, fire, humidity or hot environments.
Use only the power supply and accessories approved by the manufacturer, and which can be found in the original packaging of this product.
Read the installation instructions before connecting the system to the power source.
We cannot guarantee that no accidents or damage will occur due to the improper use of the device. Please use this product with care and operate at your
own risk!
In the case of device failure, please disconnect it from power. The fastest way to do so is by unplugging the power plug from the power outlet.
It is the customer's responsibility to follow local country regulations, including operation within legal frequency channels, output power, cabling
requirements, and Dynamic Frequency Selection (DFS) requirements. All Mikrotik devices must be professionally installed.
Quick start
Mount unit in a rackmount cabinet or place on the flat surface (see "
Connect two powering units to the AC source using power cords.
The Initial connection has to be done via the Ethernet cable, using the MikroTik Winbox utility.
Use Winbox to connect to the default IP address of 192.168.88.1 from any port, with the username
check user and wireless passwords on the sticker)
address.
Update the device by clicking the "Check for updates" button to v6.46 or the latest RouterOS software to ensure the best performance and
stability. The device needs to have an active internet connection.
To manually update the device, go to our download
Choose your architecture (ARM) and download the latest packages from any channel to your PC.
Open Winbox and upload packages in the Files menu.
Reboot the device.
Updating software will ensure the latest security fixes and regulations set by local law.
Set up your password to secure the device.
Mounting
The device is designed to use indoors and it can be mounted in a rackmount enclosure using provided rack mounts, or it can be placed on the desktop.
Use a Phillips screwdriver to attach rackmount ears on both sides of the device if designated use is for rackmount enclosure:
Attach rack ears to both sides of the device and tighten four screws to secure them in place, as shown in the picture.
Mounting
").
. If IP is no available choose the Neighbors tab and connect to the device using the MAC
page https://mikrotik.com/download
admin
and no password
(or, for some models,
Advertisement
Table of Contents

Related Manuals for MikroTik CRS326-24G-2S+RM


Summary of Contents for MikroTik CRS326-24G-2S+RM
- Page 1 Connect two powering units to the AC source using power cords. The Initial connection has to be done via the Ethernet cable, using the MikroTik Winbox utility. Use Winbox to connect to the default IP address of 192.168.88.1 from any port, with the username...
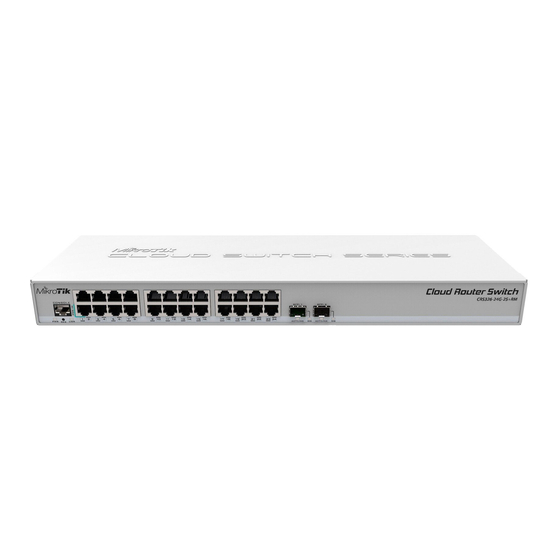
- Page 2 Extension slots and ports 24 of Gigabit Ethernet ports. Two 10G SFP+ ports. 1x RJ45 console port (set at 115200bits/s, 8 data bits, 1 stop bit no parity). Please visit wiki pages for MikroTik SFP module compatibility and configuration table: https://wiki.mikrotik.com/wiki /MikroTik_SFP_module_compatibility_table Powering The device accepts power in the following ways: Ethernet port accepts passive PoE 10-30 V DC .
- Page 3 The device supports dual boot SwOS software version 2.9 and RouterOS v6. The specific factory-installed version number is indicated in the RouterOS menu /system resource. Other operating systems have not been tested. https://wiki.mikrotik.com/wiki/SwOS Federal Communication Commission Interference Statement This equipment has been tested and found to comply with the limits for a Class B digital device, pursuant to Part 15 of the FCC Rules. These limits are designed to provide reasonable protection against harmful interference in a residential installation.
- Page 4 Информация о дате изготовления устройства указана в конце серийного номера на его наклейке через дробь. Первая цифра означает номер года (последняя цифра года), две последующие означают номер недели. Изготовитель: Mikrotikls SIA, Aizkraukles iela 23, Riga, LV-1006, Латвия, support@mikrotik.com. Сделано в Китае, Латвии или Литве. Cм. на упаковке.
- Page 5 Information contained here is subject to change. Please visit the product page on www.mikrotik.com for the most up to date version of this document.
Need help?
Do you have a question about the CRS326-24G-2S+RM and is the answer not in the manual?
Questions and answers