Advertisement
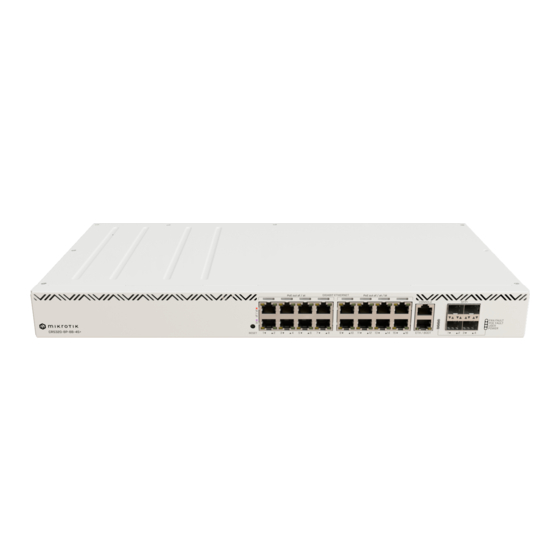
CRS320-8P-8B-4S+RM
CRS320-8P-8B-4S+RM
Safety Warnings
Before you work on any equipment, be aware of the hazards involved with electrical circuitry, and be familiar with standard practices for preventing
accidents.
Ultimate disposal of this product should be handled according to all national laws and regulations.
The Installation of the equipment must comply with local and national electrical codes.
This unit is intended to be installed in the rackmount. Please read the mounting instructions carefully before beginning installation. Failure to use the
correct hardware or to follow the correct procedures could result in a hazardous situation to people and damage to the system.
This product is intended to be installed indoors. Keep this product away from water, fire, humidity or hot environments.
Use only the power supply and accessories approved by the manufacturer, and which can be found in the original packaging of this product.
The socket-outlet shall be installed near the equipment and shall be easily accessible.
Read the installation instructions before connecting the system to the power source.
We cannot guarantee that no accidents or damage will occur due to the improper use of the device. Please use this product with care and operate at your
own risk!
In the case of device failure, please disconnect it from power. The fastest way to do so is by unplugging the power plug from the power outlet.
It is the customer's responsibility to follow local country regulations. All Mikrotik devices must be professionally installed.
This is a Class A product. In a domestic environment, this product might cause radio interference in which case the user might be required to take
adequate measures
Quick start
Connect with your computer to the device;
Connect the device to a power source;
Download the configuration tool
Start configuration within the chosen tool, using the default IP address 192.168.88.1. If the IP address is unavailable, use WinBox and choose the
"Neighbors" tab to find the device;
Proceed to connect using the MAC address. The username is "admin," and there is no password (or, for some models, check user and wireless
passwords on the sticker);
For a manual update, visit the products page at
the "Support&Downloads" menu;
Upload downloaded packages to the WinBox "Files" menu and reboot the device;
By upgrading your RouterOS software to the latest version, you can ensure optimal performance, stability, and security updates;
Set up your router password.
Mounting
The device is designed to use indoors and it can be mounted in a rackmount enclosure using provided rack mounts, or it can be placed on the desktop.
Please attach rubber pegs on the bottom of the router if the desired placement is on the flat surface or use a Phillips screwdriver to attach rackmount ears
on both sides of the device if designated use is for rackmount enclosure:
https://mt.lv/WinBox
;
https://mikrotik.com/products
to find your product. The required packages are accessible under
Advertisement
Table of Contents

Related Manuals for MikroTik CRS320-8P-8B-4S+RM


Summary of Contents for MikroTik CRS320-8P-8B-4S+RM
- Page 1 In the case of device failure, please disconnect it from power. The fastest way to do so is by unplugging the power plug from the power outlet. It is the customer's responsibility to follow local country regulations. All Mikrotik devices must be professionally installed.
-
Page 2: Operating System Support
Another configuration has to be applied according to the documentation manual linked above. The Initial connection has to be done via the Ethernet cable, using the MikroTik WinBox utility. WinBox should be used to connect to the default IP address of 192.168.88.1 from any port, with the username admin and no password (or, for some models, check user and wireless passwords on the sticker). - Page 3 Ethernet ports 1 to 8 can power 802.3 af/at devices. By default, the PoE mode is set to auto, ensuring it will not damage devices. It will auto-detect devices with PoE support and provide power. Once a PoE device is detected, it will be powered, and the PoE LEDs will turn on. Ethernet ports 9 to 16 can power 802.3 af/at/bt devices, supporting "Type 3"...
- Page 4 802.3 af/at/bt device, such as the CRS504-4XQ-OUT CRS510-8XS-2XQ-IN , or CRS504-4XQ-IN , can be connected to one of the ports, but it shouldn't be additionally connected with a grounded Use case 2: To power a Passive PoE device, the RBGPOE-CON-HP should be used.
- Page 5 Special cases for 802.3 af/at Powered Device with non-isolated PoE Use case 3 - Any ground connection should be avoided. If the ground connection is required, for a Powered Device with non-isolated PoE RBGPOE-CON-HP should be used. Grounded PSU can't be used for Powered Devices at the same time. An SFP cage, USB and RS232 ports should not have a connection to the ground.
-
Page 6: Extension Slots And Ports
Buttons Reset button: Hold this button during boot time until the USR LED light starts flashing, release the button to reset RouterOS configuration. Hold the Reset button and power on your device (wait until the "USR" led is blinking then stable "On", and when the "USR" led is "Off" - release the Reset button) - the device is booting in bootp mode to reinstall RouterOS using Netinstall MGMT/BOOT... -
Page 7: Led Indicators
The triangle SFP+ port green LEDs indicate individual SFP+ port activity. Accessories Package includes the following accessories that come with the device: Please visit help pages for MikroTik SFP module compatibility table: https://help.mikrotik.com/docs/display/ROS/MikroTik+wired+interface+compatibility Information contained here is subject to change. Please visit the product page on www.mikrotik.com...
Need help?
Do you have a question about the CRS320-8P-8B-4S+RM and is the answer not in the manual?
Questions and answers