Advertisement
Quick Links
Advertisement

Summary of Contents for RADWAG PSW
- Page 1 Weighing Tables PSW/DUAL USER MANUAL IMMU-40-03-11-19-EN www.radwag.com...
- Page 2 NOVEMBER 2019 - 2 -...
-
Page 3: Table Of Contents
1. INTENDED USE ................... 4 2. TABLE UNPACKING ................... 5 2.1. Table Equipment ..................5 2.1. PSW Table Unpacking – Steps ............... 6 2.2. PSW/DUAl Table Unpacking - Steps ............ 11 3. DIMENSIONS ..................... 16 4. PSW TABLE ASSEMBLY ................18 5. -
Page 4: Intended Use
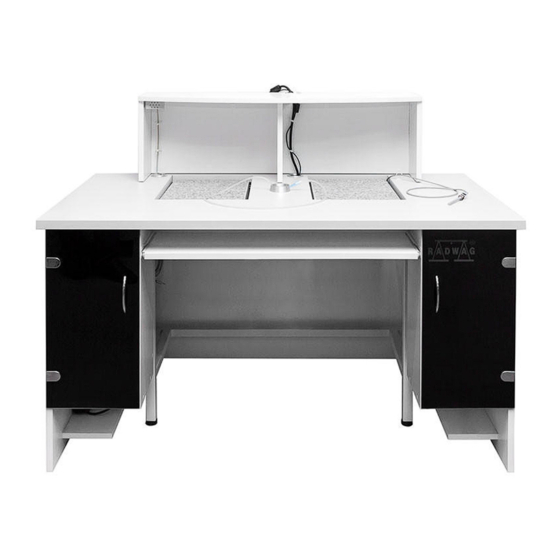
• Laboratory workstation for microbalances; • Laboratory workstation for analytical balances; There are two versions of the workstation: • PSW professional single weighing table • PSW/DUAL professional dual weighing table The workstation comprises two elements: • desk with lockers, •... - Page 5 Take all table components out of the packaging. Make sure to follow the steps described in the following sections of the user manual. Check if nothing is missing. 2.1. Table Equipment PSW/DUAL table table Internal frame supporting stone top External design of the workstation...
-
Page 6: Psw Table Unpacking - Steps
2.1. PSW Table Unpacking – Steps Undo the OSB boards (1; 2.1; 2.2; 3.1; 3.2), follow arrow-indicated direction. - 6 -... - Page 7 Remove the protective styrofoam panels (1; 2.1; 2.2; 3.1; 3.2), follow arrow- indicated direction. - 7 -...
- Page 8 Remove the monitor stand (1), follow arrow-indicated direction. Take out the table equipment (2.1; 2.2; 2.3; 2.4), follow arrow-indicated direction. -2.1- monitor -2.2- computer -2.3- keyboard -2.4- power strip - 8 -...
- Page 9 Remove the weighing table (1) from the pallet, follow arrow-indicated direction. - 9 -...
- Page 10 Remove the plate base (1) from the pallet, follow arrow-indicated direction. Take the stone (3) out of the box (2), follow arrow-indicated direction. - 10 -...
-
Page 11: Psw/Dual Table Unpacking - Steps
2.2. PSW/DUAl Table Unpacking - Steps Undo the OSB boards (1; 2.1; 2.2; 3.1; 3.2), follow arrow-indicated direction. - 11 -... - Page 12 Remove the protective styrofoam panels (1; 2.1; 2.2; 3.1; 3.2), follow arrow- indicated direction. - 12 -...
- Page 13 Remove the monitor stand (1), follow arrow-indicated direction. Take out the table equipment (2.1; 2.2; 2.3; 2.4), follow arrow-indicated direction. -2.1- monitor -2.2- computer -2.3- keyboard -2.4- power strip - 13 -...
- Page 14 Remove the weighing table (1) from the pallet, follow arrow-indicated direction. - 14 -...
- Page 15 Remove the plate base (1) from the pallet, follow arrow-indicated direction. Take the stones (3) out of the box (2), follow arrow-indicated direction. - 15 -...
-
Page 16: Dimensions
3. DIMENSIONS PSW table - 16 -... - Page 17 PSW/DUAL table - 17 -...
-
Page 18: Psw Table Assembly
4. PSW TABLE ASSEMBLY 4.1. Workstation Assembly CAUTION: Be extremely careful when assembling the workstation since some components, e.g. stone top, are heavy and may pose a hazard. Follow the below steps to assembly the workstation. - 18 -... - Page 19 Procedure: 1. Place the internal frame (1) on its target spot. 2. Place the stone top (2) onto shock absorbers. Mind that the top cannot touch side stops. 3. Install the external design (3) of the workstation. Make sure to keep about 10 mm distance between the stone top and the sides of the weighing table.
- Page 20 Connect the workstation components, refer to the schematic diagram and to the equipment and cables descriptions. - 20 -...
- Page 21 Cables Arrangement - 21 -...
- Page 22 PC computer THB-R ambient conditions recorder THB-3/3 thermo-hygro-barometer THB-2-50 sensor Power strip Keyboard Liquid container Wireless mouse 10. Liquid aspirator - 22 -...
- Page 23 WORKSTATION PERSPECTIVE VIEW: - 23 -...
-
Page 24: Psw/Dual Table Assembly
5. PSW/DUAL TABLE ASSEMBLY 5.1. Workstation Assembly CAUTION: Be extremely careful when assembling the workstation since some components, e.g. stone top, are heavy and may pose a hazard. - 24 -... - Page 25 Procedure: 1. Place the internal frame (1) on its target spot. 2. Place the stone tops (2) onto shock absorbers. Mind that the tops cannot touch side stops. 3. Install the external design (3) of the workstation. Make sure to keep about 10 mm distance between the stone top and the sides of the weighing table.
- Page 26 Connect the workstation components, refer to the schematic diagram and to the equipment and cables descriptions. - 26 -...
- Page 27 Cables Arrangement - 27 -...
- Page 28 PC computer THB-R ambient conditions recorder THB-3/3 thermo-hygro-barometer THB-2-50 sensor Power strip Keyboard Liquid container Wireless mouse 10. Liquid aspirator - 28 -...
- Page 29 WORKSTATION PERSPECTIVE VIEW: - 29 -...
-
Page 30: Maintenance
6. MAINTENANCE Prior to cleaning, disassembly the balance and the monitor. Cleaning chipboard components: Clean the table using slightly wet microfiber cloth with soap or dishwashing liquid, avoid using abrasive substances. Use clean, dry cloth to make the surface shine. Cleaning granite top: Clean the granite top using slightly wet microfiber cloth with mild dishwashing liquid or neutral PH cleaner intended for granite. - Page 31 For organic dirt use acetone first, next use water or detergent. For other than organic dirt use diluted acid solutions (soluble salts of hydrochloric or nitric acid) or base solutions (ammonium or sodium base). To remove ACIDS use protophilic solvent (sodium carbonate), to remove BASE use protogenic solvent (mineral acid of various concentration).
- Page 32 Avoid using cleanser without water since it may result with damage of the cleaned surface, please mind that large amount of water mixed with cleanser is a must. Cleaning aluminium components: While cleaning aluminium components use products acid by nature, e.g. spirit vinegar, lemon.
- Page 33 - 33 -...
- Page 34 - 34 -...


Need help?
Do you have a question about the PSW and is the answer not in the manual?
Questions and answers