Table of Contents
Advertisement
Available languages
Available languages
Quick Links
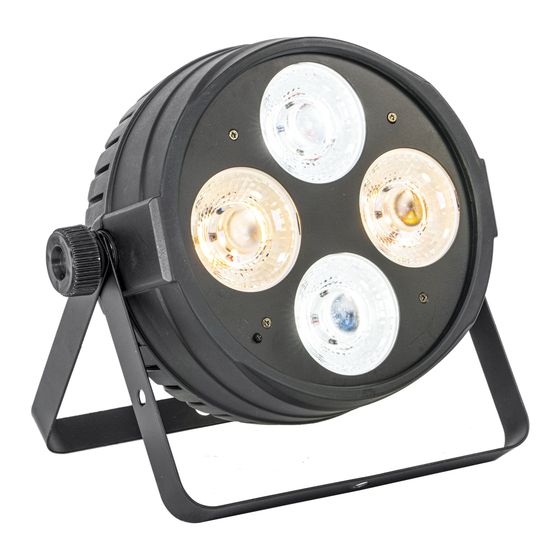
CLUB-WHITE450
CODE: 16-2011
PAR PROJECTOR 4 X 50W WARM &
COLD WHITE COB LED WITH INDIVIDUAL
CONTROL
PROJECTEUR PAR A LED COB BLANC CHAUD/
FROID 4 X 50W A DOUBLE CONTROLE INDIVIDUEL
COB LED PAR STRAHLER 4 X 50W WARM/KALTWEISS
MIT EINZELSTEUERUNG DER LEDS
COB LED PAR PROJECTOR 4 X 50W KOUD/WARMWIT
MET APARTE BESTURING
PROYECTOR PAR DE LED COB BLANCO CALIDO/FRIO 4 X 50W
CON DOBLE CONTROL INDIVIDUAL
Illustrations - p. 2
DMX Channel Chart - p. 3-4
GB - User Manual - p. 4
F - Manuel d'Utilisation - p. 8
D - Bedienungsanleitung - S. 12
NL - Handleiding - p. 16
ES - Manual de uso - p. 20
Advertisement
Table of Contents

Related Manuals for afx light CLUB-WHITE450


Summary of Contents for afx light CLUB-WHITE450
- Page 1 CLUB-WHITE450 CODE: 16-2011 PAR PROJECTOR 4 X 50W WARM & COLD WHITE COB LED WITH INDIVIDUAL CONTROL PROJECTEUR PAR A LED COB BLANC CHAUD/ FROID 4 X 50W A DOUBLE CONTROLE INDIVIDUEL COB LED PAR STRAHLER 4 X 50W WARM/KALTWEISS...
- Page 2 CONNECTORS (fig. 1) DISPLAY (fig. 2) INSTALLATION DIAGRAM (fig. 3) FIXTURE LINKING (fig. 4) DIMENSIONS (fig. 6) PHOTOMETRIC DIAGRAM (fig. 5)
-
Page 3: Dmx Channels
DMX CHANNELS... -
Page 4: Explanation Of Symbols
USER MANUAL FEATURES • 4x 50W cold/warm white COB LED • Separate control of the 4 LEDs • 7/15 DMX channels • Auto, DMX, master-slave, music and remote controlled operation • Powercon in-/outputs • IR remote control included EXPLANATION OF SYMBOLS The triangle containing a lightning symbol is used to indicate whenever your health is at risk (due to electrocution, for example). -
Page 5: Disconnect Device
are connecting to is not higher than that stated on the bottom of the fixture. • The appliance is part of class I and must exclusively connected to an earthed mains outlet. • This product is intended for indoor use only! •... -
Page 6: Power Link
INSTALLATION (FIG.3) The unit should be mounted via its screw holes on the bracket. Always ensure that the unit is firmly fixed to avoid vibration and slipping while operating. Always ensure that the structure to which you are attaching the unit is secure and is able to support a weight of 10 times of the unit’s weight. The installation must always be secured with a secondary safety attachment, e.g. -
Page 7: Installing The Batteries In The Remote Control
INSTALLING THE BATTERIES IN THE REMOTE CONTROL • Place the remote face down on a flat surface. • Push the compartment cover into the direction of the arrow. • Slide the battery compartment open. • Remove the old battery and install the new one (CR2025) with the plus (+) sym- bol facing up. -
Page 8: Manuel D'utilisation
MANUEL D'UTILISATION DESCRIPTION • 4 LED 50W Blanc chaud/froid • Contrôle séparé des LED • 7/15 canaux DMX • Fonctionnement automatique, DMX, maître-esclave, commandé par la musique ou la télécom- mande fournie • Entrées / Sorties Powercon • Livré avec télécommande IR EXPLICATION DES SYMBOLES L’éclair dans le triangle attire l’attention sur un danger physique (due à... -
Page 9: Remplacement Du Fusible
• Ne pas exposer vos yeux à la source lumineuse. • Le luminaire ne doit servir qu’à des fins décoratives et ne convient pas comme éclairage domes- tique normal. • Si le cordon secteur de l’appareil est endommagé, il ne doit être remplacé que par le fabricant ou son agent ou bien un technicien qualifié... - Page 10 PANNEAU DE CONTRÔLE (FIG. 2) Utilisez le bouton Menu pour choisir une fonction. Appuyez sur le bouton Enter pour entrer dans le menu de la fonction sélectionnée Utilisez les boutons Up et Down pour paramétrer la fonction puis appuyez sur Enter pour valider vos choix.
-
Page 11: Entretien
DESCRIPTION TÉLÉCOMMANDE ATTENTION : VOUS DEVEZ RÉGLER L'APPAREIL SUR MODE -> ADDR, SINON LA TÉLÉCOMMANDE NE FONCTIONNERA PAS 1. Réglage de LUMINOSITE & VITESSE: Appuyez sur pour ré- gler la luminosité et la vitesse en mode automatique 2. M/A des LEDs. 3. - Page 12 BEDIENUNGSANLEITUNG FEATURES • 4 x 50W warm/kaltweiße COB LEDs • Separate Steuerung der LEDs • 7/15 DMX Kanäle • Auto, DMX, Master-Slave, Musik oder ferngesteuerter Betrieb • Powercon Ein- / Ausgänge • IR Fernbedienung ZEICHENERKLÄRUNG Der Blitz im Dreieck weist auf Gesundheitsrisiken hin (z.B. Stromschlag) Das Ausrufezeichen im Dreieck weist auf besondere Gefahren im Umgang oder Betrieb des Geräts hin.
-
Page 13: Auswechseln Der Sicherung
• Beim Abziehen des Netzsteckers nur am Stecker ziehen, niemals am Kabel. • Niemals direkt in die Lichtquelle blicken. Das kann bei empfindlichen Personen zu epileptischen Anfällen führen. • Das Gerät ist nur für dekorative Zwecke und nicht als normale Haushaltsbeleuchtung geeignet. •... - Page 14 Den Haltebügel am Gerät befestigen. Das Gerät muss fest und sicher installiert werden, um Er- schütterungen und Spielraum während der Bewegungen zu vermeiden. Die Montagefläche muss stabil sein und mindestens 10-mal das Gewicht des Geräts tragen können. Bei der Montage das Ge- rät immer zusätzlich durch ein Sicherheitskabel absichern, dass mindestens 12-mal das Gewicht des Geräts tragen kann.
-
Page 15: Technische Daten
Einsetzen der Batterie in die Fernbedienung • Legen Sie die Fernbedienung mit der Vorderseite nach unten auf eine ebene Fläche. • Schieben Sie die Abdeckung des Fachs in Pfeilrichtung. • Schieben Sie das Batteriefach auf. • Entfernen Sie die alte Batterie und setzen Sie die neue (CR2025) mit dem Pluszeichen (+) nach oben ein. - Page 16 HANDLEIDING FEATURES • 4x 50W koud/warmwitte COB LED • Aparte aansturing van de leds • 7/15 DMX kanalen • Auto, DMX, master-slave, muziek besturing of afstandsbediening • Powercon in- / uitgangen • IR afstandsbediening is meegeleverd VERKLARING VAN DE TEKENS De driehoek met een bliksemschicht wordt gebruikt om aan te geven wanneer uw gezondheid gevaar loopt (bijvoorbeeld door elektrocutie).
- Page 17 lificeerd persoon om gevaar te voorkomen. • Beschadigde lenzen, behuizing of uv-filter onmiddellijk vervangen. • Houd er rekening mee dat de lamp van dit apparaat niet kan worden vervangen. Als de lamp de- fect is, moet het apparaat worden weggegooid Ontkoppeling van het net Houd er rekening mee dat het apparaat GEEN AAN/UIT-schakelaar heeft.
- Page 18 MENU OMSCHRIJVING ADDR VALU A001~A XXX (AXXX) Instellen van de DMX adres SLAV Slave modus AUTO IP1-15 ALON /(AU-A) Ingebouwde programma's (auto) SP_1~SP_5 MODE (Speed) MAST /AU-M) Automatisch (Master) SOUN IP1-5 ALON (SO-A) Geluidsbesturing (Auto) MAST/(SO-M) Geluidsbesturing (Master) M-XX Microfoongevoeligheid LODA ON/OFF Gegevens opnieuw laden...
-
Page 19: Reiniging En Onderhoud
AFSTANDSBEDIENING LET OP: U MOET HET APPARAAT OP MODE -> ADDR ZETTEN, ANDERS WERKT DE AFSTANDSBEDIENING NIET 1. HELDERHEID & SNELHEID aanpassen: Druk op om de hel- derheid en snelheid in de programmamodus in te stellen 2. AAN/UIT van de LED's. 3. -
Page 20: Explicación De Los Símbolos
MANUEL DE USO DESCRIPCIÓN • 4 LED 50W Blanco cálido/frio • Control separad de los LED • 7/15 canales DMX • Funcionamiento automático, DMX, maestro-esclavo, controlado por la música o el mando a dis- tancia incluido • Entradas / Salidas Powercon •... - Page 21 • La luminaria sólo debe utilizarse con fines decorativos y no es adecuada para la iluminación doméstica normal. • Si el cable de alimentación de la luminaria está dañado, sólo debe ser sustituido por el fabricante o su agente o por un técnico cualificado para evitar el riesgo de descarga eléctrica. •...
-
Page 22: Instalación De La Batería
Utilice los botones Arriba y Abajo para ajustar la función y pulse Enter para confirmar su elección. MENU DESCRIPTION VALU A001~A XXX (AXXX) Ajuste de la dirección DMX ADDR SLAV Modo Slave Programa interno (automático) con ALON /(AU-A) control de velocidad SP_1~SP_5 MODE AUTO... -
Page 23: Mantenimiento
DESCRIPCIÓN DEL MANDO A DISTANCIA ATENCIÓN: DEBE AJUSTAR LA UNIDAD A MODE -> ADDR, DE LO CONTRARIO EL MANDO A DISTANCIA NO FUNCIONARÁ 1. Ajuste de BRILLO Y VELOCIDAD: Pulse para ajustar el brillo y la velocidad en modo automático 2. - Page 24 View the item on our website Assembled in PRC Designed by LOTRONIC S.A. Av. Z. Gramme 9 B - 1480 Saintes © Copyright LOTRONIC 2022...
Need help?
Do you have a question about the CLUB-WHITE450 and is the answer not in the manual?
Questions and answers