Table of Contents
Advertisement
Available languages
Available languages
Quick Links
Advertisement
Table of Contents

Subscribe to Our Youtube Channel
Related Manuals for afx light IBOX-H5


Summary of Contents for afx light IBOX-H5
- Page 1 IBOX-H5 CODE: 16-2611 LED PAR CAN 5 X 12W 6-IN-1 PROJECTEUR A 5 LED 12W 6-EN-1 GB - User Manual F - Manuel d'Utilisation - p. 12 DMX Channel Chart - p. 22 Assembled in PRC Designed by LOTRONIC S.A.
-
Page 2: Unpacking Instructions
In the event that a fixture must be returned to the factory, it is important that the fixture be returned in the original factory box and packing. CONTENTS OF THE CARTON • 1x IBOX-H5 lighteffect • 1x Mains lead 1.5m • 1x IR remote control •... -
Page 3: Outdoor Use
• In the event of a serious operating problem, stop using the unit immediately. Never try to repair the unit by yourself. Repairs carried out by unskilled people can lead to damage or malfunction. Please contact the nearest authorized technical assistance center. Always use the same type of spare parts. -
Page 4: Installation
IMPORTANT NOTES ON CHARGING LITHIUM-ION BATTERIES 1. PRIOR to using the unit for the first time, please charge fully the battery 2. Charge the battery regularly after each use. Don't wait until it is discharged! 3. DON'T allow the battery to discharge completely, otherwise it will lose 20% of its capacity or even be totally damaged! If the voltage becomes too low, the internal circuits are not powered anymore and it will become impossible to recharge the battery! 4. -
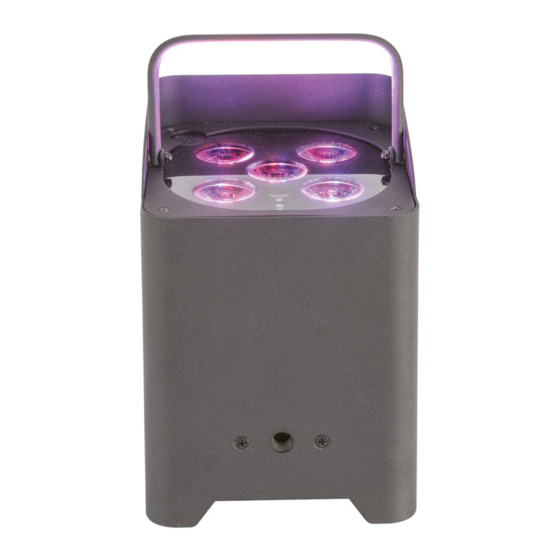
Page 5: Product Setup
• Splashwater resistent top plate • OLED display with 4 buttons • IR remote control • Control modes: DMX / WDMX / Auto / master/slave (wired or wireless) / remote control • Selection between 6, 8 & 12 DMX channels •... - Page 6 3. Up: Scroll “UP” through the menu list to increase the value of the current function 4. Down: Scroll “DOWN” through the menu list to decrease the value of current function 5. IR Infrared control sensor 6. Wireless DMX indicator OLED Display Back Light The OLED display can be set to turn off in 10-30 second or always “On”.
- Page 7 Color 01 Strobe 00 Static colors + strobe Strobe 01 ..Strobe 10 Strobe 00 Strobe 01 Color 02 Static color .... Strobe 10 Strobe 00 Strobe 01 Color 30 ..Strobe 10 Speed 01 Speed 02 Program Fade 01...
- Page 8 IR setting Menu lock Menu Lock Factory Reset Factory default setting DMX Addressing Each fixture must be given a DMX address so that the correct fixture responds to the correct control signals. This DMX address is the channel number from which the fixture starts to “listen” to the digital control information being sent out from the controller.
- Page 9 Pairing Between Master/Slave Fixtures Before pairing master and slave fixtures, make sure you have already cleared wireless DMX mem- ory of the slave fixtures. This mean that all slaves' wireless DMX indicators are off. Continue pressing “Menu” till you see “Wireless DMX”. Press Up/Down to select “Pairing” and press “Enter”.
- Page 10 Users are allowed to program their own color effects and save to your fixture in “Manual Color”. Press “Menu” button until you see “Manual Color”. Scroll “UP” or “DOWN” to select the color, then press “Enter” to confirm the color selection. Now press “UP” or “DOWN” to set color intensity. Press “ENTER”...
-
Page 11: Fuse Replacement
FUSE REPLACEMENT In case fuse is blown, you need to replace it. Unplug the fixture from power, remove the 4 screws from the housing to find the fuse holder. Open the fuse holder by turning it anticlockwise; remove the blown fuse from the holder and replace it with the exact same type and rating one. Close the fuse holder by turning it clockwise to tighten it. -
Page 12: Manuel D'utilisation
Conservez le carton et tous les matériaux d’emballage afin de pouvoir trans- porter l’appareil en toute sécurité. CONTENU DE L'EMBALLAGE • 1 effet de lumière IBOX-H5 • 1 cordon secteur de 1,5m • 1 télécommande IR • 1 fusible •... -
Page 13: Charger La Batterie
• Assurez-vous que le cordon d’alimentation n’est jamais écrasé ni endommagé. • Si le cordon secteur de l’appareil est endommagé, il ne doit être remplacé que par le fabricant ou son agent ou bien un technicien qualifié afin d’éviter tout risque d’électrocution. •... - Page 14 NOTE IMPORTANTE: Appareils contenant des batteries Lithium-ion 1. AVANT la première utilisation, chargez complètement la batterie. 2. Rechargez la batterie régulièrement après chaque utilisation sans attendre qu’elle soit dé- chargée. 3. NE JAMAIS laisser décharger complètement la batterie sous peine de perdre 20 % de sa ca- pacité, voir sa perte totale! Si la tension devient trop faible, le circuit interne n’est plus alimenté...
-
Page 15: Presentation Du Produit
• Ecran OLED avec 4 boutons • Télécommande IR • Fonctionnement DMX / WDMX / Automatique / Maître-Esclave (avec ou sans-fil) / Télécom- mande • Entre 6, 8 et 12 canaux DMX sélectionnables • Inclinable à 25° pour éclairer des arbres ou façades •... - Page 16 Rétro-Eclairage de l'écran OLED Vous pouvez régler le rétro-éclairage entre 10 et 30 secondes ou laisser l'écran toujours allumé. Procédez comme suit: • Appuyez sur MENU jusqu'à ce que “Screen saving” s'affiche. • Appuyez sur “Enter”. "IOS" s'affiche. Avancer/reculer pour régler la durée du rétro-éclairage ou sélectionnez "ON"...
- Page 17 ..Strobe 10 Strobe 00 Static color Strobe 01 Color 30 ..Strobe 10 Speed 01 Speed 02 Fade 01 ..Speed 09 Speed 01 Program Speed 02 Fade 02 Fade ..Mode Fondu ..Speed 09 Speed 01 Speed 02...
- Page 18 Réglage de l'adresse DMX Chaque appareil doit posséder sa propre adresse DMX pour pouvoir répondre aux signaux qui lui sont destinés. Cette adresse DMX est le numéro du canal à partir duquel l'appareil réagit aux com- mandes numériques qui lui sont envoyés par le contrôleur. Cet appareil offre 3 modes: 6, 8 ou 12 canaux DMX.
- Page 19 fil sur le maître et tous les esclaves commence à clignoter rapidement et reste ensuite allumé lor- sque l'appairage a réussi. Vous pouvez maintenant faire fonctionner vos appareils sans fil en mode Maître/Esclave. Effacer la mémoire DMX sans fil Pour effacer la mémoire DMX sans fil, appuyez sur MENU jusqu'à ce que "wireless DMX" s'affiche. Au moyen des touches UP/DOWN sélectionnez "Clear"...
-
Page 20: Remplacement Du Fusible
touches UP/DOWN et appuyez sur ENTER pour confirmer la sélection. Sélectionnez maintenant l'intensité de la couleur au moyen des touches UP/DOWN. Appuyez sur ENTER pour confirmer. Ap- puyez sur MENU pour quitter. Lorsque l'appareil est éteint et mis à nouveau sous tension, il revient aux derniers réglages. Télécommande IR Dans ce mode, l'utilisateur peut piloter l'appareil via la télécommande qui permet d'accéder à... -
Page 21: Entretien
la base sur le boîtier. Remplacez toujours un fusible grillé par un autre de même type et de même calibre. ENTRETIEN En raison des résidus de fumée et de poussière, il convient de nettoyer régulièrement les lentilles internes et externes pour optimiser la puissance lumineuse. •... - Page 22 Channel Mode Channel Function DMX Value Description 0-255 0-100% Green 0-255 0-100% Blue 0-255 0-100% 6 CH White 0-255 0-100% Amber 0-255 0-100% 0-255 0-100% Dimming 0-255 0-100% 0-10 No function Strobe 11-255 Strobe from slow to fast 0-255 0-100% 8 CH Green 0-255...
- Page 23 Channel Mode Channel Function DMX Value Description 251-255 White 11 0-10 No function 11-40 RGB color mixing 41-70 Cyan, orange, purple, candle- light, hot pink color changing 71-100 RGBWA color mixing Auto-run 101-130 10-color mixing 12 CH 131-160 RGB color changing 161-190 Cyan, orange, purple, candle- light, hot pink color changing...
- Page 24 View the item on our website © Copyright LOTRONIC 2020...
Need help?
Do you have a question about the IBOX-H5 and is the answer not in the manual?
Questions and answers