Extremis Sensu Manual
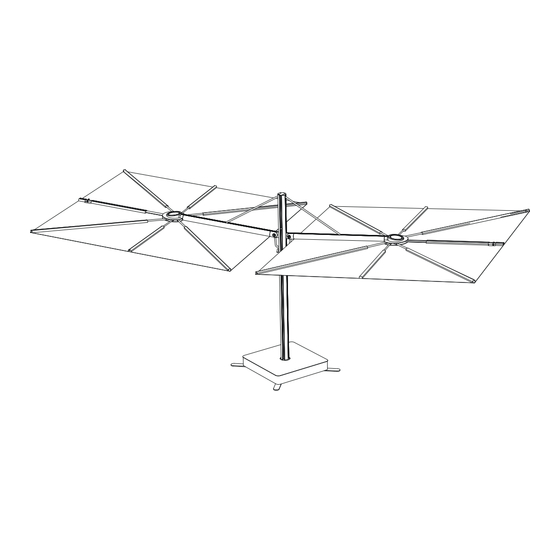
Duo square
Hide thumbs
Also See for Sensu:
- Manual (46 pages) ,
- Manual (80 pages) ,
- Assembly instructions, how to use, useful tips for keeping your tool for togetherness in shape (44 pages)

Subscribe to Our Youtube Channel
Related Manuals for Extremis Sensu


Summary of Contents for Extremis Sensu
- Page 1 Sensu Duo square Assembly instructions, how to use, useful tips for keeping MANUAL your tool for togetherness in shape. LAB164 EN – NL – DE – FR...
- Page 2 Tools for togetherness © All our designs are original creations and protected by intellectual property rights.
- Page 3 IMPORTANT! RETAIN FOR FUTURE REFERENCE: READ CAREFULLY. BELANGRIJK! LEES DIT DOCUMENT AANDACHTIG EN BEWAAR HET VOOR TOEKOMSTIGE RAADPLEGING! WICHTIG! AUFHEBEN, UM SPÄTER ETWAS NACHSEHEN ZU KÖNNEN: SORGFÄLTIG DURCHLESEN! IMPORTANT! LISEZ ATTENTIVEMENT CE MANUEL ET CONSERVEZ-LE POUR RÉFÉRENCE ULTÉRIEURE! IMPORTANTE! CONSERVARE COME RIFERIMENTO PER IL FUTURO: LEGGERE ATTENTAMENTE! ¡IMPORTANTE! CONSÉRVELO PARA...
- Page 4 Do not use power tools!
-
Page 7: Table Of Contents
Table of contents Mounting kit Assembly Duo square with base Assembly Duo square with permanent fixation Assembly Duo square with floor fastening Warnings – Assembly text instructions – Maintenance... -
Page 8: Mounting Kit
Mounting kit 4 x M10x30 din 7991 16 x M6x12 iso 10642 2 x M8 iso 7040 2 x M8x20 iso 7380 Mounting kit to fix Mounting kit to fix parasol support to the Mounting kit to fix the support feet to the base rib to the center pole base... -
Page 10: Assembly Duo Square With Base
Assembly duo square with base N° 4 - 5 - 6 30’ p 36 16 x M6x12... - Page 11 Remove the bolts but do not throw away, you need these again in step 4...
- Page 13 Insert & tighten the handles at +/- 1M height...
- Page 14 Remove the pre-mounted pin and bolt, and put aside...
- Page 15 Make sure the pin stays in position...
- Page 16 Re-mount the pin and bolt 1 x M8 1 x M8x20...
- Page 17 Repeat steps 10 - 14 for the other parasol arm...
-
Page 18: Assembly Duo Square With Permanent Fixation
Assembly duo square with permanent fixation N° 4 - 5 - 6 N° 13 45’ p ..Use tape to close the bottom side of the tube... - Page 19 40 cm...
- Page 20 GRASS GRAVEL TILES 10 cm 4 cm...
- Page 21 Insert the support and tighten the bolt...
- Page 22 4 x M10x16...
- Page 24 In case you prefer using the pole extension, first follow steps 10 - 12...
- Page 26 Insert & tighten the handles at +/- 1M height...
- Page 27 Without pole extension With pole extension Remove the pre-mounted pin and bolt, and put aside...
- Page 28 Make sure the pin stays in position...
- Page 29 Re-mount the pin and bolt 1 x M8 1 x M8x20...
- Page 30 Repeat steps 16 - 20 for the other parasol arm...
-
Page 32: Assembly Duo Square With Floor Fastening
Assembly duo square with floor fastening N° 4 - 5 - 6 30’ p 37 Fix the base plate to the ground 4 x M10x16... - Page 33 In case you prefer using the pole extension, first follow steps 4 - 6...
- Page 35 Insert & tighten the handles at +/- 1M height...
- Page 36 Without pole extension With pole extension Remove the pre-mounted pin and bolt, and put aside...
- Page 37 Make sure the pin stays in position...
- Page 38 Re-mount the pin and bolt 1 x M8 1 x M8x20...
- Page 39 Repeat steps 10 - 14 for the other parasol arm...
-
Page 40: Warnings - Assembly Text Instructions - Maintenance
5° à 10° angle. drawing. • Fix the closed Sensu with the supplied strap. 11. Slide the top of the support rib into the pole from above. Attention: make sure the hole of... - Page 41 3. Put the Sensu in a tilted position for water 17. Slide the top of the support rib into the pole from drainage & wind advantage.
- Page 42 If stains and/or mildew marks are seve- re, the quantity of bleach may be increased. Watch the maintenance video on our website: www.extremis.com/maintenance...
- Page 43 • Bind de stof vast met het bijgeleverde koord in de paal. Let op: het gat in de beugel moet naar wanneer je de Sensu sluit. boven wijzen, zoals op de tekening. 12. Schuif de parasolarm over de handgreep. Poedercoating 13.
- Page 44 19. Draai de pen en de bout opnieuw in de vast om de parasol open te houden. parasolarm om de arm vast te maken. 3. Kantel de Sensu zodat de luifels de wind beter 20. Schroef de bovenkant van de steunrib vast aan kunnen opvangen en water kunnen afvoeren.
- Page 45 Het is afgeraden om bleekmiddel te gebruiken in de buurt van water of natuurlijke omgevingen die beschadigd kunnen worden door het bleekmiddel. Bij hardnekkige vlekken en/of schimmel mag meer bleekmiddel worden gebruikt. Bekijk de onderhoudsvideo’s op onze website: www.extremis.com/maintenance...
- Page 46 Stange. Hinweis: Werfen Sie die Abdeckung und Winkel von 5° bis 10°. Schrauben nicht weg! • Fixieren Sie den geschlossenen Sensu mit dem 9. Schieben Sie die Schirmstange auf die mitgelieferten Band. Schirmstütze. 10. Entfernen Sie jetzt die Scharnierachse aus...
- Page 47 oben auf die Stange. Hinweis: Stellen Sie sicher, 17. Schieben Sie das obere Teil der Stützrippe von dass das Loch der Halterung nach oben zeigt, oben auf die Stange. Hinweis: Stellen Sie sicher, wie in der Zeichnung dargestellt. dass das Loch der Halterung nach oben zeigt, 12.
- Page 48 Öffnen Sie den Schirm, indem Sie an den äußeren Schirmspeichen ziehen. 2. Fixieren Sie den Schirm, indem Sie die beiden Speichen mit dem Haken verbinden. 3. Positionieren Sie Sensu leicht schräg, damit Wasser abfließen kann und der Schirm Wind besser standhält. PFLEGE...
- Page 49 9. Faites glisser le mât du parasol sur le support. de 5° à 10°. 10. Retirez l’axe de la charnière en acier inoxydable • Fixez Sensu refermé avec la sangle fournie. et les boulons du bras du parasol, comme indiqué sur le dessin. Thermolaquage 11.
- Page 50 13. Fixez le bras du parasol sur la poignée avec l’axe 20. Reliez ensuite le haut de la tige de support au de la charnière et le boulon. mât avec 1 boulon M8x20 et 1 écrou M8. 14. Reliez ensuite le haut de la tige de support au 21.
- Page 51 Ouvrez le parasol en tirant sur les baleines extérieures. 2. Fixez maintenant le parasol en reliant les deux baleines à l’aide du crochet. 3. Placez Sensu en position inclinée pour faciliter l’évacuation de l’eau et le protéger du vent. ENTRETIEN Thermolaquage NETTOYAGE Régulièrement...
- Page 54 All rights reserved. Unless otherwise specified, all designs and photographs contained in this publication are copyright protected and are the property of Extremis. No part of this publication may be copied or distributed without Extremis’ prior written consent. The names of the authors of photographs to which we do not hold rights are mentioned here. We have done our utmost to provide a...
Need help?
Do you have a question about the Sensu and is the answer not in the manual?
Questions and answers