Table of Contents
Advertisement
Available languages
Available languages
Quick Links
Advertisement
Table of Contents

Related Manuals for afx light HOTBEAM-10R-PACK


Summary of Contents for afx light HOTBEAM-10R-PACK
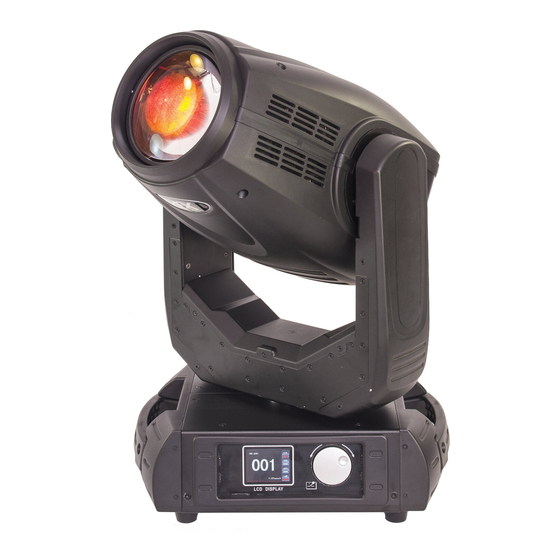
- Page 1 HOTBEAM-10R-PACK CODE: 16-2006 DMX MOVING HEAD 10R 280W LYRE DMX 10R 280W GB - User Manual F - Manuel d'Utilisation - p. 8 D - Bedienungsanleitung - S. 14 NL - Handleiding - p. 21 DMX Channel Chart - p. 28-33 Assembled in PRC Designed by LOTRONIC S.A.
-
Page 2: Unpacking Instructions
USER MANUAL UNPACKING INSTRUCTIONS Immediately upon receiving a fixture, carefully unpack the carton, check the contents to ensure that all parts are present and have been received in good condition. Notify the freight company immediately and retain packing material for inspection if any parts appear to be damaged from shipping or the carton itself shows signs of mishandling. -
Page 3: Installation
Please contact the nearest authorized technical assistance center. Always use the same type of spare parts. • Make sure the power cord is never crimped or damaged. • Never disconnect the power cord by pulling or tugging on the cord. •... -
Page 4: Front Panel
CAUTION Do not allow contact between the common and the fixture’s chassis ground. Grounding the com- mon can cause a ground loop, and your fixture may perform erratically. Test cables with an ohm meter to check correct polarity and to make sure the pins are not grounded or shorted to the shield or each other. -
Page 5: Lamp Replacement
the fuse. If the fuse is broken, change it by the same value and same size fuse LAMP REPLACEMENT IMPORTANT: Disconnect the unit from the mains prior to opening the lamp compartment. Don’t touch the lamp with bare hands. If the lamp is hot, please wait at least 20 minutes to let it cool down. - Page 6 - Runmode : Stand alone mode select ( slave ( slve ), Sound ( Musc ) or auto ( Auto )) - Sigclear : Input DMX signal select ( Keep input DMX signal ( Keep ) or clear input DMX signal ( clear )) - DMX reset : DMX reset validate ( No DMX reset ( Off ) or DMX reset ( Open ) - ▲: To return to previous menu...
-
Page 7: Specifications
• X/Y rst : reset pan / tilt ( select Exec to validate ) • Effectrst : Reset effet ( select Exec to validate ) DMX CHANNEL CHART: SEE END OF MANUAL THE FOLLOWING POINTS HAVE TO BE CONSIDERED DURING THE INSPECTION: All screws for installing the devices or parts of the device have to be tightly connected and must not be corroded. -
Page 8: Manuel D'utilisation
MANUEL D'UTILISATION DÉBALLAGE Dès réception de l’appareil, ouvrez le carton et vérifiez que le contenu est complet et en bon état. Sinon, prévenez immédiatement le transporteur et conservez l’emballage s’il montre des signes de mauvais traitements. Conservez le carton et tous les matériaux d’emballage afin de pouvoir trans- porter l’appareil en toute sécurité. - Page 9 • L’appareil possède une protection thermique qui coupe l’alimentation lorsque l’appareil chauffe trop fort. Dans ce cas, il faut vérifier le ventilateur et les trous de ventilation. • En cas de dysfonctionnement, arrêtez immédiatement l’appareil. N’essayez jamais de réparer l’appareil par vous-même. Une réparation mal faite peut entraîner des dommages et des dys- fonctionnements.
-
Page 10: Caractéristiques
ATTENTION Il ne doit y avoir aucun contact entre le commun et la masse du châssis de l’appareil. La mise à la masse du commun peut provoquer une boucle de masse et votre appareil fonctionne d’une façon étrange. Testez les câbles à l’aide d’un ohm-mètre afin de vérifier la polarité et de vous assurer que les broches ne sont pas connectées à... -
Page 11: Remplacement De La Lampe
REMPLACEMENT DE LA LAMPE Lorsque vous voulez remplacer la lampe, il est interdit de la toucher à mains nues pour éviter des taches de saleté grasses sur le filament. Le filament doit être propre 1) Débranchez le câble d'alimentation. Avant de remplacer la lampe, l’appareil a besoin de 20min pour le refroidissement de la lampe. Bloquer la tête avec le tilt lock en position 60 °... - Page 12 - Chanmode : Sélection mode DMX ( soit Simplifié ( small 16CH), soit standard ( standard 24CH)) - Recemode : Sélection mode de fonctionnement ( DMX, sans fil ou auto ) - Runmode : Sélection mode de fonctionnement en mode stand alone ( Soit Esclave ( slve ), soit musical ( Musc ) ou soit auto ( Auto )) - Sigclear : Sélection type de signal entrant ( garder le signal tels quel ( Keep ) ou nettoyer le si-...
-
Page 13: Entretien
- Xdriven : Vitesse pan en mode esclave - Ydrivin : Vitesse tilt en mode maître - Ydriven : Vitesse tilt en mode esclave - Lamppowe : Type alimentation ballast (mise à la terre (off) ou 5V (Open)) - Yangle : réglage angle tilt - ▲: Retour au menu précédent - chanleve : Mode manuel pour chaque canal - Motorst : Visualisation état de tous les capteurs... - Page 14 BEDIENUNGSANLEITUNG AUSPACKEN Sofort nach Empfang vorsichtig den Karton auspacken und den Inhalt überprüfen. Alle Teile müs- sen vollzählig und in einwandfreiem Zustand sein. Sofort die Transportfirma benachrichtigen und das Verpackungsmaterial aufbewahren, wenn Teile Transportschäden aufweisen. Verpackungsma- terial auch für späteren Transport des Geräts aufbewahren. ZEICHENERKLÄRUNG Der Blitz im Dreieck weist auf Gesundheitsrisiken hin (z.B.
-
Page 15: Anschluss Des Netzkabels
• Das Gerät mit einer Sicherheitskette befestigen. Das Gerät niemals nur am Kopf tragen, sondern auch am Sockel. • Die Raumtemperatur darf 40°C nicht überschreiten. Das Gerät niemals bei höheren Temperatu- ren betreiben. • Gerät abschalten und 15 Minuten warten, dass sich das Gerät abgekühlt hat, bevor Wartungs- arbeiten vorgenommen werden können. -
Page 16: Anschlüsse Auf Der Rückseite
Ausgang des Master-Geräts wird an den Eingang des ersten Slave-Geräts angeschlossen usw. An den Ausgang des letzten Slave-Geräts muss ein Endwiderstand angeschlossen werden, um Störungen zu verhindern. Dieser End- widerstand besteht aus einem XLR Stecker, der einen 120Ω Wider- stand zwischen Pin 2 und 3 besitzt. S. Abb. Die Kabel müssen abgeschirmt, 2-adrig sein und einen XLR Stecker auf der einen und eine XLR Buchse auf der anderen Seite besitzen. -
Page 17: Betrieb
6) 5-pol. DMX-Ausgang 7) Sicherung Wenn sich das Gerät nicht einschalten lässt, bitte die Sicherung prüfen. Wenn die Sicherung durchgebrannt ist, durch eine Neue mit denselben technischen Daten ersetzen. AUSWECHSELN DES LEUCHTMITTELS WICHTIG: Gerät vorm Öffnen des Gehäuses vom Netz trennen. •... - Page 18 - X / Y setup : Pan & Tilt Einstellung - Xreverse : Pan Drehrichtung (entweder normal, oder umgekehrt) - Yreverse : Tilt Drehrichtung (entweder normal, oder umgekehrt) - XY speed : Pan / Tilt Geschwindigkeit (entweder schnell (fast), oder normal, oder langsam (slow)) - Angle Pan : Pan Winkeleinstellung (360°, 540°, oder 630°) - XY Fback : Pan / Tilt Test (ON oder OFF)
- Page 19 - Chdefine : Zuweisung einer DMX Kanalnummer - Brighne : Passwort eingeben () dann - Timelimi : Einstellen der maximalen Betriebsdauer der Lampe - Timslimi : Einstellen der maximalen Betriebsdauer des Moving Heads - Timeclea : Reset der Betriebsdauer - Passwor1 : Ändern von Passwort 1 - Passwor2 : Ändern von Passwort 2 - Passwor3 : Ändern von Passwort 3 - Passwor4 : Ändern von Passwort 4...
-
Page 20: Technische Daten
ABMESSUNGEN TECHNISCHE DATEN Leistung des Leuchtmittels ........................280W Modell .....................ULTRA BRIGHT 10R 280W OSRAM Lampe Pan ............................360°/ 540° / 630° Tilt ................................270° Versorgung .....................220-240V / 110-120V 50-60Hz Verbrauch ..............................470W Abmessungen ........................323 x 247 x 540mm Gewicht ................................ 19kg WICHTIGER HINWEIS: Elektrogeräte gehören nicht in den Hausmüll. -
Page 21: Verklaring Van De Tekens
HANDLEIDING UITPAKKEN Onmiddellijk naar de aankoop van het toestel, verwijder voorzichtig de verpakking en wees zeker dat het toestel in goede toestand is. Breng direct uw dealer op de hoogte en bewaar het verpak- kingsmateriaal indien onderdelen of het karton door het transport beschadigd zijn. Bewaar het karton en alle verpakkingsmaterialen. - Page 22 • Nooit het netsnoer beschadigen of platdrukken. • Nooit aan de kabel trekken. • Nooit in de lichtbron kijken. Gevoelige personen kunnen een epileptische shock ondergaan (vooral bedoeld voor epileptici) • Het product is uitsluitend bedoeld voor decoratieve doeleinden en niet geschikt als verlichting van de huiskamer.
-
Page 23: Aansluitingen Op De Achterkant
van de kabel moet tenminste 0,5mm bedragen. Gebruik kabel met individuele afscherming van iedere ader. Een DMX signaal afsluitweerstand moet aan de uitgang van het laatste toestel aangesloten worden. Een DMX afsluitweerstand is een XLR connec- tor met een 120 ohm weerstand tussen pin 2 et 3. De eindweerstand ver- mindert signaalfouten. - Page 24 Als het toestel niet inschakelt, controleer de zekering. Als de zekering doorgebrand is, gebruik een nieuwe met dezelfde specificaties VERVANGING VAN DE LAMP Niet de unit aanschakelen indien geen lamp geplaatst of de lamp defect is. Ontkoppel de unit van het lichtnet tijdens de installatie van de lamp.
- Page 25 - Features : - X / Y setup : Pan & Tilt instelling - Xreverse : Pan Draairichting (normaal of omgekeerd) - Yreverse : Tilt Draairichting (normaal of omgekeerd) - XY speed : Pan / Tilt snelheid (ofwel snel (fast), of normaal, of langzaam (slow)) - Angle Pan : Pan hoek aanpassing (360°, 540°, of 630°) - XY Fback : Pan / Tilt test (ON of OFF) - ▲: Terug naar het vorige menu...
- Page 26 - Timeclea : Reset de bedrijfstijd - Passwor1 : Wachtwoord 1 wijzigen - Passwor2 : Wachtwoord 2 wijzigen - Passwor3 : Wachtwoord 3 wijzigen - Passwor4 : Wachtwoord 4 wijzigen - Xdrivin : Pansnelheid in mastermodus - Xdriven : Pansnelheid in slavemodus - Ydrivin : Tilt snelheid in mastermodus - Ydriven : Tilt snelheid in slavemodus - Lamppowe : Type ballastvoeding (aarde (off) of 5V (open))
- Page 27 AFMETINGEN SPECIFICATIES Lamp vermogen ............................280W Lamp model ..................ULTRA BRIGHT 10R 280W OSRAM Lampe Pan ............................360°/ 540° / 630° Tilt ................................270° Voeding ......................220-240V / 110-120V 50-60Hz Opgenomen vermogen ..........................470W Afmetingen ........................323 x 247 x 540mm Gewicht ................................ 19kg BELANGRIJK: De elektrische producten mogen niet naast het huisvuil geplaatst worden.
-
Page 28: Dmx Channel Chart
DMX CHANNEL CHART 20-CH CHART DMX channel Function DMX channel Description 0-255 Pan Fine 0-255 Pan Fine Tilt 0-255 Tilt Tilt Fine 0-255 Tilt Fine Pan/Tilt speed 0-255 Pan/Tilt speed 0-19 No function 20-24 Energy-saving mode (230W) 25 - 129 No function 130 - 139 Lamp on by dmx... - Page 29 181-185 Deep blue + Deep red 186-189 Deep red + white 190-220 unclockwise rotation of colors from fast to slow Colours 221-250 Empty 251-255 Clockwise rotation of colors from slow to fast 218-243 Backwards rainbow, speed up 244-255 Random color Empty 0-255 No function...
- Page 30 81 - 89 Gobo 9 90 - 97 Shake Gobo 1 ( from slow to fast ) 98 - 106 Shake Gobo 2 ( from slow to fast ) 107 - 115 Shake Gobo 3 ( from slow to fast ) 116 - 124 Shake Gobo 4 ( from slow to fast ) 125 - 133...
- Page 31 16-CH CHART Function DMX channel Description channel 0-255 Tilt 0-255 Tilt Pan / tilt speed 0-355 Pan and Tilt speed setup 0-19 Empty 20-24 Energy saving mode ( 230W ) 25-129 Empty 130-139 Lamp on by DMX 140-149 Reset Pan / tilt 150-159 Empty Lamp and reset...
- Page 32 181-185 Deep blue + Deep red 186-189 Deep red + white Colours 190-220 unclockwise rotation of colors from fast to slow 221-250 Empty 251-255 Clockwise rotation of colors from slow to fast Empty 0-255 Empty Empty Gobo 1 10-15 Gobo 2 16-21 Gobo 3 22-27...
- Page 33 90-97 Shake Gobo 1 ( from slow to fast ) 98-106 Shake Gobo 2 ( from slow to fast ) 107-115 Shake Gobo 3 ( from slow to fast ) 116-124 Shake Gobo 4 ( from slow to fast ) 125-133 Shake Gobo 5 ( from slow to fast ) 134-142...
- Page 34 View the product on our website and download the manual in more languages Retrouvez le produit sur notre site Internet et télé- chargez le mode d'emploi dans d'autres langues © Copyright LOTRONIC 2022...
Need help?
Do you have a question about the HOTBEAM-10R-PACK and is the answer not in the manual?
Questions and answers