Table of Contents
Advertisement
Available languages
Available languages
Quick Links
WATERBAR
CODE: 16-2706
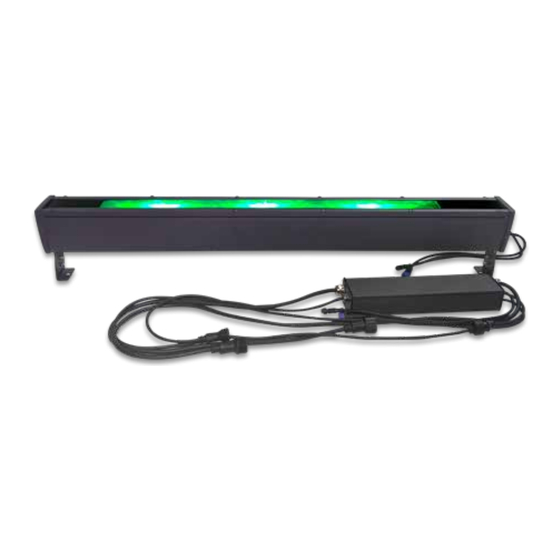
WATERBAR LIGHT EFFECT 120W - IP65
EFFET "MOUVEMENT D'EAU" PUISSANT 120W
- IP65
WATERBAR LICHTEFFEKT 120W - IP65
WATERBAR LICHT EFFECT 120W - IP65
EFECTO "MOVIMIENTO DE AGUA" POTENTE 120W - IP65
View the product on our website
Download the manual in other languages
Téléchargez le manuel dans les autres langues
Deutsche Anleitung von unserer Website herunterladen
Nederlandse handleiding van onze website downloaden
GB - User Manual - p. 2
Descargue el manual en español de nuestro sitio web
F - Manuel d'Utilisation - p. 5
Assembled in PRC
D - Bedienungsanleitung - S. 9
Designed by LOTRONIC S.A.
Rue F. Englert 17 · Bt 2
NL - Handleiding - p. 13
B - 1480 TUBIZE
E - Manual de Instrucciones - p. 17
FR
Advertisement
Table of Contents

Related Manuals for afx light 16-2706


Summary of Contents for afx light 16-2706
- Page 1 WATERBAR CODE: 16-2706 WATERBAR LIGHT EFFECT 120W - IP65 EFFET “MOUVEMENT D’EAU” PUISSANT 120W - IP65 WATERBAR LICHTEFFEKT 120W - IP65 WATERBAR LICHT EFFECT 120W - IP65 EFECTO “MOVIMIENTO DE AGUA” POTENTE 120W - IP65 View the product on our website Download the manual in other languages Téléchargez le manuel dans les autres langues...
-
Page 2: Unpacking Instructions
USER MANUAL UNPACKING INSTRUCTIONS Immediately upon receiving a fixture, carefully unpack the carton, check the contents to ensure that all parts are present and have been received in good condition. Notify the freight company immediately and retain packing material for inspection if any parts appear to be damaged from shipping or the carton itself shows signs of mishandling. -
Page 3: Installation
by the manufacturer or his service agent or a similar qualified person in order to avoid a hazard. • The appliance must be replaced if it is damaged or thermally deformed. • The LED protection screen must be replaced if it is visibly damaged to the point of impairing its effectiveness, for example due to cracks or deep scratches. -
Page 4: Level 2 Menu
function <ENTER>: Enables the currently displayed menu or sets the currently selected value in to the cur- rent function MENU STRUCTURE LEVEL 1 MENU Press the menu button once to access level 1 menu DISPLAY SETTING RANGE FUNCTION AND EXPLANATION A001 001- 512 DMX512 address code setting... -
Page 5: Specifications
lows: If the DMX indicator is on but does not respond to channel control, check that the address code setting is correct. If the DMX signal is intermittent, check that the DMX cable connector is properly connected to the signal cable. b) Connect a 120 ohm terminator between pin 2 and 3 of the DMX connector of the last fixture. -
Page 6: Consignes De Securite
CONSIGNES DE SECURITE • Lisez attentivement ce manuel qui contient des informations importantes sur l’installation, l’uti- lisation et l’entretien de cet appareil. • Conservez le manuel pour référence ultérieure. Si l’appareil change un jour de propriétaire, assu- rez-vous que le nouvel utilisateur est en possession du manuel. •... - Page 7 ATTENTION Il ne doit y avoir aucun contact entre le commun et la masse du châssis de l’appareil. La mise à la masse du commun peut provoquer une boucle de masse et votre appareil fonctionne d’une façon étrange. Testez les câbles à l’aide d’un ohm-mètre afin de vérifier la polarité et de vous assurer que les broches ne sont pas connectées à...
-
Page 8: Caractéristiques Techniques
Une fois que vous êtes dans le numéro 1 du niveau 2, maintenez la touche ENTER enfoncée pen- dant 3 secondes pour accéder au MENU ELARGI où vous pouvez régler la luminosité des différentes couleurs en fonction de vos besoins. CANAUX DMX CANAL FONCTION... - Page 9 BEDIENUNGSANLEITUNG AUSPACKEN Sofort nach Empfang vorsichtig den Karton auspacken und den Inhalt überprüfen. Alle Teile müssen vollzählig und in einwandfreiem Zustand sein. Sofort die Transportfirma benachrichtigen und das Verpackungsmaterial aufbewahren, wenn Teile Transportschäden aufweisen. Verpackungsmaterial auch für späteren Transport des Geräts aufbewahren. VERPACKUNGSINHALT •...
- Page 10 • Das Netzkabel niemals quetschen oder beschädigen. • Beim Abziehen des Netzsteckers nur am Stecker ziehen, niemals am Kabel. • Niemals direkt in die Lichtquelle blicken. Das kann bei empfindlichen Personen zu epileptischen Anfällen führen. • Das Gerät ist nur für dekorative Zwecke und nicht als normale Haushaltsbeleuchtung geignet. NETZTRENNUNGSVORRICHTUNGEN a) Wenn das Gerät über den Netzstecker ausgeschaltet wird, muss die Steckdose jederzeit leicht zugänglich bleiben...
- Page 11 MENÜ STRUKTUR LEVEL 1 MENU 1 Mal die MENÜ Taste drücken, um in die 1. Menü Ebene zu gehen DISPLAY EINSTELLBE- FUNKTION UND ERKLÄRUNG REICH A001 001- 512 Einstellung des DMX512-Adresscodes R000 0-255 Von dunkel nach hell G000 0-255 Von dunkel nach hell B000 0-255 Von dunkel nach hell...
-
Page 12: Technische Daten
FEHLERDIAGNOSE 1. Das Gerät wird nach einem normalen Reset nicht von der Konsole gesteuert. Mögliche Ursache: a) Wenn das DMX-Signalkabel defekt ist oder die Geräteparameter nicht korrekt eingestellt sind, gehen Sie wie folgt vor: Wenn die DMX-Anzeige leuchtet, aber nicht auf die Kanalsteuerung reagiert, prüfen Sie, ob der Adresscode korrekt eingestellt ist. -
Page 13: Verklaring Van De Tekens
HANDLEIDING UITPAKKEN Onmiddellijk naar de aankoop van het toestel, verwijder voorzichtig de verpakking en wees zeker dat het toestel in geode toestand is. Breng direct uw dealer op de hoogte en bewaar het verpak- kingsmateriaal indien onderdelen of het karton door het transport beschadigd zijn. Bewaar het karton en alle verpakkingsmaterialen. - Page 14 lichteffect worden weggegooid. • Sluit het toestel niet op een dimmer pack aan. • Nooit het netsnoer beschadigen of platdrukken. • Nooit aan de kabel trekken. • Nooit in de lichtbron kijken. Gevoelige personen kunnen een epileptische shock ondergaan (vooral bedoeld voor epileptica) •...
-
Page 15: Controle Paneel
4. LED-display voor de menu-instellingen 5. DMX OUT: verbind deze uitgang met de DMX-ingangsconnector van een slave-eenheid 6. POWER OUT: verbind deze stroomuitgang met de POWER IN-connector van een slave-een- heid 7. Veiligheidshaak: voor extra bevestiging van de unit aan een truss-systeem om te voorko- men dat de unit per ongeluk valt. - Page 16 DMX KANALEN KANAAL FUNCTIE WAARDE VERKLARING Total dimming 0-255 0-100% linear dimming Rood 0-255 0-100% linear dimming Groen 0-255 0-100% linear dimming Blauw 0-255 0-100% linear dimming 0-255 0-100% linear dimming Motor 0-130 Draaien van langzaam naar snel. 131-255 Achteruit draaien van langzaam naar snel TROUBLE-SHOOTING 1.
-
Page 17: Instrucciones De Seguridad
MANUAL DE INSTRUCCIONES PREPARATIVOS A la recepción del equipo, abra el embalaje y compruebe que todas las piezas están en buen estado y que está todo el equipo completo. Conserve el embalaje, para poder trasladar el equipo con toda seguridad. DESEMBALAJE •... - Page 18 • La luminaria no se ha de usar con fines decorativos y no es adecuada como iluminación domes- tica normal. DISPOSITIVO DE CORTE Cuándo el cable de corriente o el interruptor del equipo, sean utilizados como método de des- conexión, este dispositivo debe permanecer fácilmente accesible; INSTALACION Fije el equipo por medio de los agujeros de tornillo en el soporte.
-
Page 19: Estructura Del Menú
dente en caso de caída. DISPLAY DE LED El display cuenta con 4 botones: MENU / UP / DOWN / ENTER Encienda la unidad, presione MENÚ para ingresar a los MENÚS SECUNDARIOS, presione UP / DOWN para elegir un submenú, luego confirme su elección con ENTRAR. 8.8.8.8. -
Page 20: Solución De Problemas
CANALES DMX CANAL FUNCIÓN VALOR EXPLICACIÓN Total dimming 0-255 0-100% de regulación lineal 0-255 0-100% de regulación lineal Green 0-255 0-100% de regulación lineal Blue 0-255 0-100% de regulación lineal White 0-255 0-100% de regulación lineal Motor 0-130 Rotación hacia delante de lento a rápido 131-255 Giro inverso de lento a rápido SOLUCIÓN DE PROBLEMAS... - Page 21 www.afx-light.com...
- Page 22 Assembled in PRC Designed by LOTRONIC S.A. Rue F. Englert 17 · Bt 2 B - 1480 TUBIZE © Copyright LOTRONIC 2023...
Need help?
Do you have a question about the 16-2706 and is the answer not in the manual?
Questions and answers