Table of Contents
Advertisement
Quick Links
Advertisement
Chapters
Table of Contents

Related Manuals for Dvico TViX M-3100U


Summary of Contents for Dvico TViX M-3100U
- Page 1 T V i X M - 3100U ENGLISH...
-
Page 2: Table Of Contents
Table of Contents Introduction ....................3 What the TViX is? ........................3 Specification .......................... 3 TViX Connection........................4 Caution ......................5 Safety notice.......................... 5 Note for Win98SE USB user ....................5 Name of each part ..................6 Control Panel......................... 6 Cable connection ( Audio, Video, Power, USB interface ) ............6 Package contents ........................ -
Page 3: Introduction
1 Introduction What the TViX is? Enjoy your digital movies, music and photos on your TV!! TViX can be used as a multimedia jukebox, music tank, photo album and even as a portable storage. TViX brings all of your digital contents to the living room so that you can enjoy movie, music and photos with your family, friends or colleagues. -
Page 4: Tvix Connection
TViX Connection When TViX is connected to PC, it is recognized as a USB external storage. Multimedia Player Mode ( Connecting with the Video or Audio Cable ) [ Connecting TViX to a TV ] TViX serves as a player and you can playback multimedia files(movie, music, picture). Portable Storage Mode ( Connecting with USB/ Cable ) [ Connecting TViX to a Computer ] When the TViX is connected to USB port and Video port at the same time, if you press the “Power button”,... -
Page 5: Caution
2 Caution Safety notice Magnetic material may erase the data in TViX. Do not disassemble the device; it may Keep any magnetic material away from TViX. cause malfunction or fire Keep TViX away from heat or fire. Do not expose TViX to oil, smoke, water, Do not block any ventilation openings. -
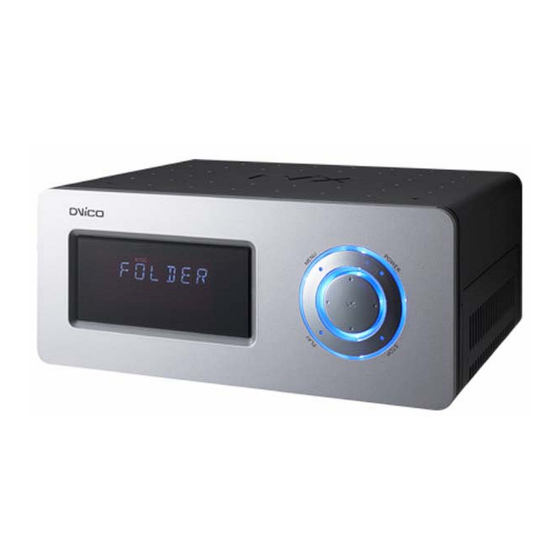
Page 6: Name Of Each Part
3 Name of each part Control Panel You can do basic operation without remote controller. Cable connection ( Audio, Video, Power, USB interface ) Please connect appropriate output to a TV or a digital decoder/amp. Package contents TViX main unit Power cable A/V cable USB Cable... -
Page 7: Installation And Connection
4 Installation and connection Video Connection 4.1.1 Connection with ordinary(Composite) TV output Connect TViX and your TV using the yellow video cable. Turn on the TViX and TV. Select appropriate video input mode on your TV until you can get the initial TViX screen. - Page 8 4.1.3 Connection to component output Connect TViX and your TV with component cable as the image above. Turn on the TViX and TV. Select appropriate video input mode on your TV ( in this case, Component input mode ) NOTE: After you connect the video cable to your TV, press the TV out button repeatedly on your remote controller until you can get stable TViX initial screen.
-
Page 9: Audio Connection
Audio connection 4.2.1 Connection to 2 CH of normal TV Connect left(white), right(red) sound output to the appropriate terminal of your TV or Hi-Fi. 4.2.2 Connection to 5.1CH amplifier(Digital) Optical cable When you have a multi channel decoder/amplifier with optical/coaxial input, you can enjoy 5.1 CH high quality sound through coaxial or optical cable. -
Page 10: Hdd Installation/Exchange
HDD Installation/Exchange Warning: If you change the HDD of a TViX equipped with an HDD, the warranty will be voided. Power Connector 1. Assembling the TViX HD is very easy. Just follow the instructions below: Use a driver and screw the hard disk on to the guide board. Set the jumper to ‘Single Master’. - Page 11 3. Set the jumper to Master and connect power cable and IDE cable 4. Put the HDD into the TViX after spreading the IDE cable to avoid damage 5. Close the lid of TViX. 6. To change the hard disk, pull the hdd’s guide while pushing the locking.
-
Page 12: Tvix Setup Menu
TViX Setup Menu 4.4.1 Audio/Video Setting * Analog/DPCM Select this when you connect the audio with stereo RCA cable.(RED and White)Output PCM data. * Encoded Digital Select this when you connect the audio with optical or coaxial cable for digital audio connection to the Decoder/Amplifier. - Page 13 4:3 Letter letter box can show the original ratio f the multimedia file of 16:9. ① 4:3 Pan & Scan adjust the image of the 16 :9 multimedia file to the 4:3 of the TV screen by cutting the ② image.
- Page 14 4.4.2 MISC1 setting * Slide Show Delay Time: You can set the slide show time interval (1 sec – 10 sec) * Subtitle Font Size: You can select the subtitle font size * Subtitle/Outline: You can change the color of the subtitle and its outline * Font Color : You can change the color of font.
-
Page 15: Using Remote Controller
5 Using remote controller Basic function SETUP Power MUTE Number button File Info GOTO Play/Pause STOP Go to Previous Menu Image Rotate Navigation Arrow Button Audio Volume SKIP Show Only Still Pictures Show Only Audio Files Random Play Show Only Video Files FAST FORWARD Rewind Subtitle Sync... -
Page 16: Descriptions On Each Buttons
Descriptions on each buttons Playback of Multimedia files Basically you can point the file you want and press OK button. For playback of DVD files copied to HDD, please locate the cursor to VIDEO_TS.IFO file and press OK. You can do the full DVD navigation like you do with DVD player. 5.2.1 Video Playback File info... - Page 17 • PAL format .SUB subtitles are not supported in this version. In cases where the outline cannot be applied clearly to .SUB subtitles, you can change the color of the outline in setup. ZOOM button : • First Press – Zoom, you can change the size by pressing the arrow buttons. •...
- Page 18 5.2.2 Audio Playback Displays audio file information being played Go to the designate time frame Input time and press OK Stop Play/ Stop Stop Playing and return to the previous menu Confirm Selection. Arrow Keys to move the cursor position Volume Go to Previous or Next music Audio File Filter...
- Page 19 5.2.3 Image Playback Show still image or stop slide show Stop playing and return to the Rotate image 90° Clockwise previous menu Filter Image files only <NOTE> You can set the slide show time interval in the SETUP menu. Some non-standard JPEG files may not be displayed If you press PICTURE button, you can see the Contrast Brightness Saturation menus in sequence.
-
Page 20: Extra Feature
Extra feature 5.3.1 Using AutoRun When you want to play music with the TViX, if you don’t have any display devices, you can use this function usefully. 1. Make folder & name it as an “autorun” on root directory of First partition. 2. - Page 21 5.3.2 Lock the TViX with password 1. First scan the media files with the TViX Manager. And right-click on the file. When the menu appears, click on ‘Set Password’. 2. Set the 4 digit number for password. 3. While you are playing TViX, if you click on the folder that you set the password before, TViX will ask you the password to get in that folder.
- Page 22 5.3.3 Using Wallpaper (1) If you put a JEPG file at the name of "tvix.jpg" under the folder you want to change the wallpaper, the wallpaper of the folder is changed. (2) You can select any wallpaper you want by using the various JEPG files of the different folders. <Tip>...
- Page 23 (2) Copy the MP3 files into automp3 folder (3) While users are watching the picture slide show, the MP3 files in automp3 will be played as its background music [ Set the existing folder for background music ] (1) Move the curser to the folder that users wish to set as the background music. (2) On the folder, push number 0 button to set (3) Make sure that TViX show the message that the folder is set.
- Page 24 5.3.5 Displaying picture slide show while playing MP3 [ Creating the default slide show folder ‘autojpg” in the TVIX directory ] (1) Connect TVIX to PC. (2) In the TVIX root directory (if your HDD is multi-partitioned, use the first partition), create a folder called “autojpg”...
- Page 25 (3) After starting the music slideshow, the displayed list will automatically disappear after 5 seconds. If you wish to display the MP3 list again, press the “0” button on the remote control. (4) TVIX will display “AUTO JPG” confirming that the folder your have selected is set as a picture slide show folder.
-
Page 26: Firmware Upgrade
6 Firmware upgrade Firmware version check. 1. Connect TViX to your TV and turn on TViX 2. Press menu button on the top panel and the setup screen will be displayed. 3. Navigate with buttons to move to ‘MISC’ menu and check your current firmware version. 4. - Page 27 TViX Firmware Update (Version : 1.X.X , Date : 2006-04-30) ERASING… (Please wait…) WRITING… Flashing tvixfw.bin When the upgrade is finished successfully, turn off TViX and turn it on again TViX Firmware Update (Version : 1.X.X , Date : 2006-04-30) Update successfully done ! Power off your TViX player ! You can now use TViX with a new firmware.
-
Page 28: Using Usb Connection With Pc
7 Using USB connection with PC Windows 98SE Driver Installation Press “Next” on the following pop up screen. 2) Please reboot after pressing “Finish” button. 3) After rebooting the system, please connect TViX. Add New Hardware Wizard will pop up automatically. 4) Select “Search for the best driver for your device”... - Page 29 5) Do not check any of the menus. Just press “Next”. 6) The system will find DVICO USB-ATA Bridge automatically as the pop up shows. Press “Next” button. 7) By pressing the “Finish” button, the driver installation is done.
- Page 30 8) You will be able to see the disk drive inside the TViX on the Device Manager tab. T I P Windows ME or Windows 2000, XP offer driver by itself. so you don’t need to install software. If connect TViX, run Plug &...
-
Page 31: Making Partition And Formatting The Hdds Under Windows 98Se / Me
Making partition and formatting the HDDs under Windows 98SE / Click “Start” and select “Run” and the “Run” window will appear as shown below. Type “fdisk” in the text box of the “Run” window then click the “OK” button 1) The DOS window will appear as shown below for the partition program. 2) Choose number 5 to select the HDD in TViX to make new partition. - Page 32 5) Run window explorer and you will find the new disk created. Right click the new disk and choose “Format” from pop up menu. Then start format your HDD in TViX.
-
Page 33: Making Partition And Formatting The Hdds Under Windows 2000 / Xp
Making partition and formatting the HDDs under Windows 2000 / 1) Under Windows 2000, you can make partition and format the HDD using Disk Manager utility. 2) Right click “My Computer” Choose “manage” from the pop up menu and “Computer Management” widow will appear choose “Disk Management”... - Page 34 6) Select the partition Size. If you want one partition, Press the “Next>”. For the FAT32, it is limited under 32000MB 7) Select the Driver letter. We recommend to press the “Next>”. 8) Select the partition Format. If you want the FAT32, it is limited under 32GB. 9) When it is completed, detailed information will appear as shown below.
-
Page 35: Unplug Or Eject Hardware
7.4 Unplug or eject hardware 1) On the window tray, double the click hot swap icon and the “Unplug or Eject Hardware” window will show. Press Stop button if you want to unplug the device. 2) Press OK on the “Stop a Hardware device” window. 3) Press OK and unplug the device. -
Page 36: Appendix - Technical Terms
8 Appendix - Technical Terms DivX -------------------------------------------------------------------------------- DivX is the name of a revolutionary new video codec which is based on the new MPEG-4 compression standard for video. When you install a video codec on your system it basically works as an add-on to your system with instructions how to compress/decompress video in that video format. - Page 37 DTS digital sound is now featured on virtually 100% of major Hollywood releases. Although the technology used for motion pictures differs from that featured in consumer and professional audio music and home theater systems, their DTS heritage means end users can enjoy sound that closely matches the original. -------------------------------------------------------------------------------- WMA stands for Windows Media Audio.
-
Page 38: Gnu General Public License
9 GNU General Public License Dvico Co., Ltd is using a part of Free Software code under the GNU General Public License in operating TViX player. This General Public License applies to most of the Free Software Foundation’s code and to any other program whose authors commit by using it. - Page 39 TERMS AND CONDITIONS FOR COPYING, DISTRIBUTION AND MODIFICATION 0. This License applies to any program or other work which contains a notice placed by the copyright holder saying it may be distributed under the terms of this General Public License. The "Program", below, refers to any such program or work, and a "work based on the Program"...
- Page 40 b) Accompany it with a written offer, valid for at least three years, to give any third party, for a charge no more than your cost of physically performing source distribution, a complete machine-readable copy of the corresponding source code, to be distributed under the terms of Sections 1 and 2 above on a medium customarily used for software interchange;...
- Page 41 explicit geographical distribution limitation excluding those countries, so that distribution is permitted only in or among countries not thus excluded. In such case, this License incorporates the limitation as if written in the body of this License. 9. The Free Software Foundation may publish revised and/or new versions of the General Public License from time to time.
- Page 42 T V i X M - 3100U FRENCH...
- Page 43 Table des matières Introduction ....................3 Quelles sont les fonctions du TViX ? ..................3 Spécifications ........................3 Connexion du TViX........................ 4 Avertissement .....................5 Mesures de précaution ......................5 Remarque pour les utilisateurs de Win98SE USB ..............5 Nom de chaque pièce.................6 Panneau de commande......................
-
Page 44: Introduction
1 Introduction Quelles sont les fonctions du TViX ? Profitez de vos films, de votre musique et de vos photos numériques sur votre téléviseur et/ou sur votre chaîne Hifi !! Le TViX se présente comme un véritable juke-box multimédia, un réservoir de musiques, un album photos et même une unité... -
Page 45: Connexion Du Tvix
Connexion du TViX Lorsque le TViX est connecté à un PC, il est reconnu comme un périphérique de stockage externe compatible USB. Mode Lecteur Multimédia ( Connexion avec le vidéo ou un câble audio ) [ Connexion du TViX à une TV ] Le TViX sert de lecteur et vous permettant de lire des fichiers multimédia (films, musiques, images). -
Page 46: Avertissement
2 Avertissement Mesures de précaution Un matériau magnétique pourrait effacer les Ne démontez pas le boîtier ; il pourrait données du TViX. Ne placez pas de matériau être endommagé ou prendre feu magnétique à proximité du TViX. Conservez le TViX à l’abri de l’huile, de Conservez-le à... -
Page 47: Nom De Chaque Pièce
3 Nom de chaque pièce Panneau de commande Vous pouvez effectuer certaines opérations de base sans la télécommande. Connectique (Audio, Vidéo, Alimentation, Interface USB) Veuillez brancher la sortie appropriée sur une TV ou un décodeur/amplificateur numérique. Contenu de l’emballage Unité principale TviX câbles d’alimentation A/V Câble Câble USB Manuel Télécommande... -
Page 48: Installation Et Connexion
4 Installation et connexion Connexion vidéo 4.1.1 Connexion à une sortie TV ordinaire (Composite) Connectez votre TViX à la TV à l’aide du câble vidéo jaune. Allumez le TViX ainsi que la TV. Sélectionnez le mode d’entrée vidéo approprié sur votre TV jusqu’à ce que l’écran initial du TViX apparaisse. -
Page 49: Connexion Audio
Connexion audio 4.2.1 Connexion à 2 canaux d’une TV normale Connectez la sortie son gauche (blanche) et la sortie droite (rouge) à l’endroit prévu sur votre TV ou votre chaîne Hi-Fi. 4.2.2 Connexion à l’ampli 5,1 canaux (Numérique) optique câble Si vous disposez d’un ampli/décodeur multicanaux avec entrée optique/coaxiale, vous pourrez bénéficier d’une qualité... - Page 50 HDD Installation Attention : Si vous changez le disque dur installé, le produit ne sera plus sous garantie. Connecteur alimentation 1. L'assemblage du TViX HD est très simple. Il vous suffit de suivre les instructions suivantes. Dévissez le disque dur du rack. Réglez le jumper sur ‘Single Master’.
- Page 51 4. Replacez le disque dur à l'intérieur du TViX après avoir écarté le câble IDE pour éviter qu'il ne soit endommagé. 5. Refermez le couvercle du TViX. 6. Pour changer le disque dur, appuyez sur le verrou et retirez le disque dur.
-
Page 52: Menu De Configuration Du Tvix
Menu de configuration du TViX 4.4.1 Paramètres Audio/Vidéo Analogique Choisissez ceci lorsque vous connectez l’audio avec le câble stéréo RCA (Rouge et blanc) Output PCM data. * Digital Choisissez ceci lorsque vous connectez l’audio avec le câble optique ou coaxial pour une connexion audio numérique à... - Page 53 4.4.2 Paramètres MISC1 (Divers) * Intervalle du diaporama : Vous pouvez définir le temps d’intervalle du diaporama (1 à 10 sec) * Taille de police des sous-titres : Vous pouvez sélectionner la taille de police de caractère des sous-titres * Sous-titres/Contours : Vous pouvez modifier la couleur des sous-titres ainsi que les contours * Couleur de police de caractère : Vous pouvez changer la couleur de la police de caractère * Choix de la langue : Sélectionnez la langue de votre choix.
-
Page 54: Utilisation De La Télécommande
5 Utilisation de la télécommande Fonction de base CONFIGURATION Alimentation MUET Touches numérotées Info fichier Aller à Lecture/Pause STOP Retourner au menu précédent Rotation image Flèches de navigation Volume audio PASSER Afficher les fichiers audio seulement Afficher images fixes seulement Lecture aléatoire Afficher les fichiers vidéo seulement AVANCE RAPIDE... -
Page 55: Descriptions De Chaque Touche
Descriptions de chaque touche 5.2.1 Lecture vidéo Lecture de fichiers multimédia Il vous suffit de sélectionner le fichier et d'appuyer sur la touche OK. Pour la lecture de fichiers DVD copiés sur le disque dur, placez votre curseur sur le fichier VIDEO_TS.IFO et appuyez sur OK. - Page 56 • Première pression - Zoom, vous pouvez changer la taille en appuyant sur les flèches. • Deuxième pression – Plein écran • Troisième pression – Plein écran PAN&SCAN • Quatrième pression – Arrête la fonction Zoom Bouton PICTURE • Réglage de l’image. Contraste Luminosité...
- Page 57 5.2.2 Lecture audio Appuyez sur la touche AUDIO pour filtrer les fichiers audio parmi tous les fichiers enregistrés dans le TViX. Cette fonction ne s’applique qu’à la partition active si vous avez plusieurs partitions. Se rendre à la scène voulue Affichage des infos du fichier audio en lecture Introduire le temps et appuyer sur OK Arrêt...
- Page 58 5.2.3 Lecture image Lorsque vous appuyez sur la touche IMAGE de la télécommande, seuls les fichiers images enregistrés dans le TViX sont pris en compte. Cette fonction ne s’applique qu’à la partition active si vous avez plusieurs partitions. Affiche l’image fixe ou arrête le diaporama Arrêt de la lecture et retour au Rotation à...
-
Page 59: Additionnel Caractéristique
Additionnel caractéristique 5.3.1 Utilisation de la fonction AutoRun Lorsque vous souhaitez lire de la musique avec le TViX sans écran, cette fonction peut se révéler utile. 1. Créez un répertoire et nommez-le « autorun » dans la racine de votre première partition. 2. - Page 60 5.3.2 Bloquer le TViX à l’aide d’un mot de passe 1. Scannez l’ensemble des fichiers média avec le TViX Manager. Faites un clic droit sur le fichier. Lorsque le menu apparaît, cliquez sur « Set Password » (Définir mot de passe). Vérifiez s’il existe une mise à...
- Page 61 5.3.3 Utilisation de fonds d’écran Pour changer le fond d’écran d’un répertoire, placez un fichier JPEG que vous aurez nommé « tvix.jpg » dans ce répertoire. Vous pouvez choisir le fond d’écran que vous désirez en utilisant les différents fichiers JPEG des répertoires. <REMARQUE>...
-
Page 62: Mise À Jour Du Firmware
6 Mise à jour du firmware Vérification de la version du firmware. 1. Connectez le TViX à votre TV et allumez-le 2. Appuyez sur la touche MENU de la partie supérieure et l’écran de configuration s’affichera. 3. Utilisez les boutons pour vous rendre au menu ‘MISC’ et vérifiez la version actuelle du firmware. 4. - Page 63 TViX Firmware Update (Version : 1.x.x , Date : 2006-04-30) ERASING… (Please wait…) WRITING… Flashing tvixfw.bin Lorsque la mise à jour est terminée, éteignez le TViX et rallumez-le TViX Firmware Update (Version : 1.x.x , Date : 2006-04-30) Update successfully done ! Power off your TViX player ! Vous pouvez à...
-
Page 64: Annexe - Termes Techniques
7 Annexe – Termes techniques DivX -------------------------------------------------------------------------------- DivX est le nom d’un nouveau codec révolutionnaire reposant sur la norme de compression MPEG-4 pour la vidéo. Lorsque vous installez un codec vidéo sur votre système, il fonctionne dans les grandes lignes comme un add-on de votre système et contient des instructions sur la manière de compresser/décompresser de la vidéo dans ce format. - Page 65 -------------------------------------------------------------------------------- WMA désigne Windows Media Audio. Il s’agit d’un format de fichier propriétaire développé par Microsoft pour le contenu audio transmis en continu et pour la compression. Les fichiers WMA ont en théorie un taux de compression double par rapport au MP3, même si ceci est discutable. Ogg Vorbis -------------------------------------------------------------------------------- Ogg Vorbis est un nouveau format de compression audio.
- Page 66 T V i X M - 3100U GERMANY...
- Page 67 Inhaltsverzeichnis Einführung ....................3 Was kann TViX? ........................3 Spezifikationen ........................3 Verbindung des TViX ......................4 Sicherheitsvorkehrungen ................5 Sicherheitshinweise ....................... 5 Anmerkung für Win98SE USB Benutzer................. 5 Bezeichnungen der Geräteteile ..............6 Bedienungsfeld........................6 Kabelanschlüsse (Audio, Video, Strom, USB/-Interface)............6 Lieferumfang ......................... 6 Installation und Anschlüsse ..............7 Videoanschluss ........................
-
Page 68: Einführung
1 Einführung Was kann TViX? Genießen Sie digitale Filme, Musik und Fotos in Ihrem Fernseher!! TViX kann als Multimedia Jukebox, Musikalbum, Fotoalbum und sogar als tragbarer Datenspeicher verwendet werden. TViX bringt Ihnen alle digitalen Inhalte in Ihr Wohnzimmer, damit Sie Filme, Musik und Fotos zusammen mit Ihrer Familie, Freunden oder Kollegen genießen können. -
Page 69: Verbindung Des Tvix
Verbindung des TViX Wenn der TViX mit einem PC verbunden ist, wird er als externer USB-Speicher erkannt. Multimedia-Abspielmodus ( Verbindung über Video- oder Audio-Kabel ) [ Anschluss des TViX an einen Fernseher ] Der TViX dient als Abspielgerät und kann Multimediadateien (Filme, Musik, Bilder) wiedergeben. Tragbarer Speichermodus ( Anschluss über ein USB/-Kabel ) [ Anschluss des TViX an einen Computer ] Wenn der TViX gleichzeitig mit dem USB-Port und dem Video-Port verbunden ist, dient der TViX als... -
Page 70: Sicherheitsvorkehrungen
2 Sicherheitsvorkehrungen Sicherheitshinweise Magnetisches Material kann die im TViX Bauen Sie das Gerät nicht auseinander. Dies gespeicherten Daten löschen. Halten Sie jedes kann Funktionsstörungen oder einen Brand magnetische Material von TViX fern verursachen Schützen Sie den TViX vor Kontakt mit Öl, Schützen Sie den TViX vor Wärme Rauch, Wasser, Feuchtigkeit und Staub oder Feuer... -
Page 71: Bezeichnungen Der Geräteteile
3 Bezeichnungen der Geräteteile Bedienungsfeld Basisfunktionen können mit der Fernbedienung gesteuert werden. Kabelanschlüsse (Audio, Video, Strom, USB/-Interface) Bitte verbinden Sie die entsprechenden Anschlüsse mit einem Fernseher oder einem digitalen Decoder/Verstärker. Lieferumfang TViX Hauptgerät Stromkabel A/V-Kabel USB-Kabel Handbuch Fernbedienung * Multi In/Out is optional. -
Page 72: Installation Und Anschlüsse
4 Installation und Anschlüsse Videoanschluss 4.1.1 Anschluss an normalen (Composite) TV Eingang Schließen Sie den TViX mit dem gelben Videokabel an Ihren Fernseher an. Schalten Sie TViX und Fernseher ein. Wählen Sie den entsprechenden Video Eingang Ihres Fernsehers, bis Sie den TViX Startbildschirm sehen. -
Page 73: Audio-Anschluss
Audio-Anschluss 4.2.1 Anschluss an Stereo-Eingang eines normalen Fernsehers Verbinden Sie den linken (weiß) und rechten (roten) Audio-Ausgang mit dem entsprechenden Anschluss ihres Fernsehers oder Ihrer Hi-Fi-Anlage. 4.2.2 Anschluss an 5.1 Kanal Verstärker (Digital) optischem Wenn Sie einen Multi Channel Decoder/Verstärker mit optischem/Koaxial Eingang haben, können Sie den 5.1 Kanal Digitalsound über Koaxial- oder Glasfaserkabel genießen. - Page 74 HDD Installation Warnung: Austausch einer HDD im TViX mit HDD führt zum Verfall der Garantie. Stromkabel 1. Zusammenbau des TViX HD ist kinderleicht. Folgen Sie nachstehenden Anweisungen: Mit einem Schraubenzieher schrauben Sie die Festplatte auf die Führung. Stellen Sie die Brücke auf ‘Single Master’ ein. <Einstellungen Brücke>...
- Page 75 4. Beim Einsetzen der HDD ins TViX achten Sie bitte darauf, das IDE-Kabel vor Beschädigung zu schützen. 5. Schließen Sie das TViX wieder. 6. Zum Auswechseln der Festplatte drücken Sie auf den Verschluss und ziehen die Festplattenführung heraus.
-
Page 76: Tvix Setup Menü
TViX Setup Menü 4.4.1 Audio/Video Einstellungen *Analog/DPCM Wählen Sie diesen Modus, wenn Sie Audio mit dem Stereo-RCA-Kabel verbinden. (Rot und Weiß) Ausgang PCM Daten. Encoded Digital Wählen Sie diesen Modus, wenn Sie Audio für die digitale Audioverbindung durch ein Glasfaser- oder Koaxialkabel mit dem Decoder/Verstärker verbinden. - Page 77 4.4.2 Verschiedene Einstellungen1 * Dia Show Intervallzeit: Sie können die Dia Show Intervallzeit einstellen (1 - 10 Sekunden). * Untertitle Schriftgrad: Sie können die Fontgröße der Untertitel einstellen. * Untertitle/Kontur: Sie können Farbe und Kontur des Untertitels ändern. * Schriftfarbe: Sie können die Farbe der Schrift verändern * Sprache Auswahl: Wählen Sie Ihre bevorzugte Sprache.
-
Page 78: Verwendung Der Fernbedienung
5 Verwendung der Fernbedienung 5.1 Basisfunktion SETUP Ein/Aus Ton aus Zahlentasten Datei Info GOTO Play/Pause STOP Zum vorherigen Menü gehen Bildrotation Navigationsp feiltast Audio Lautstärke Überspringen Nur Standbilder anzeigen Nur Audio Dateien anzeigen Zufallswiedergabe Nur Video Dateien anzeigen Schnellvorlauf Rücklauf Untertitel Sync Einzoomen Lesezeichen... -
Page 79: Beschreibung Der Einzelnen Tasten
Beschreibung der einzelnen Tasten Playback von Multimedia Dateien. Grundsätzlich können Sie die Datei zeigen, die Sie wünschen, und die OK-Taste drücken. Für die Wiedergabe der auf Festplatte kopierten DVD Dateien, stellen Sie den Cursor auf Datei VIDEO_TS.IFO und drücken OK. Sie können die gesamte DVD Navigation genauso durchführen, wie mit dem DVD Player. - Page 80 • ZOOM Taste: • Erster Druck - Zoom. Sie können die Größe durch Drücken der Pfeiltasten ändern. • Zweiter Druck - Vollbildschirm • Dritter Druck - PAN&SCAN Vollbildschirm • Vierter Druck - Zoom ausgeschaltet. • PICTURE Taste: • Bildeinstellung. Kontrast → Helligkeit → Sättigung. •...
- Page 81 5.2.2 Audio Wiedergabe Gehen bezeichneten Zeigt Informationen über die aktuell abgespielte Zeitrahmen, geben Sie die Zeit ein Stop und drücken OK Play/ Stop Play Modus stoppen und zum vorherigen Menü zurückkehren Auswahl bestätigen. Pfeiltasten für die Cursorposition Lautstärke vorherigen oder nächsten Musikstück gehen Audio Dateifilter...
- Page 82 5.2.3 Bild Wiedergabe Standbild anzeigen oder Dia Show stoppen Abspielen stoppen Bild um 90° im Uhrzeigersinn drehen vorherigen Menü zurückkehren Nur Bilddateien filtern Bildschirmzoom Bildschirm Scroll Modus <ANMERKUNG> • Sie können die Dia Show Intervallzeit im SETUP Menü einstellen. • Einige nicht standardgemäße JPEG Dateien könnten nicht angezeigt werden.
-
Page 83: Extra Feature
Extra feature 5.3.1 Verwendung von AutoRun Wenn Sie mit dem TViX Musik abspielen möchten und kein Displaygerät haben, können Sie diese Funktion verwenden. 1. Legen Sie einen Ordner an und bezeichnen Sie ihn im Root Directory als "autorun". 2. Kopieren Sie eine Media Datei in den "autorun" Ordner oder legen Sie in ihm einen Unterordner an. 3. - Page 84 5.3.3 Verwendung von Hintergründen Wenn Sie den Hintergrund eines Ordners ändern wollen, speichern Sie dort eine JEPG-Datei mit dem Namen „tvix.jpg" ab. Mit verschiedenen JEPG-Dateien für die unterschiedlichen Ordner können Sie beliebige Hintergründe auswählen. <ANMERKUNG> Wollen Sie den gesamten Hintergrund ändern, speichern Sie eine JPEG-Datei mit dem Namen tvix.jpg im Stammverzeichnis ab.
-
Page 85: Firmware Upgrade
6 Firmware upgrade Überprüfung der Firmware Version. 1. Schließen Sie TViX an Ihren Fernseher an und schalten Sie TViX ein. 2. Drücken Sie die Menütaste auf der Oberseite und der Setup-Bildschirm wird angezeigt. 3. Navigieren Sie mit den Tasten bis zum 'MISC' Menü und überprüfen Sie Ihre derzeitige Firmware Version. - Page 86 TViX Firmware Update (Version : 1.x.x, Date : 2006-04-30) ERASING… (Please wait…) WRITING… Flashing tvixfw.bin Wenn das Upgrade erfolgreich abgeschlossen ist, schalten Sie TViX aus und wieder ein. TViX Firmware Update (Version : 1.x.x , Date : 2006-04-30) Update successfully done ! Power off your TViX player ! Sie können TViX jetzt mit einer neuen Firmware verwenden.
-
Page 87: Anhang - Technische Begriffe
7 Anhang - Technische Begriffe DivX -------------------------------------------------------------------------------------------------- DivX ist die Bezeichnung für einen revolutionären neuen Video Codec, der auf dem neuen MPEG-4 Kompressionsstandard für Video basiert. Wenn Sie in Ihrem System einen Video Codec installieren, arbeitet er im Grunde wie ein Add-on zu Ihrem System, mit Anweisungen, wie Video in dem Videoformat zu komprimieren/dekomprimieren ist. - Page 88 -------------------------------------------------------------------------------------------------- WMA steht für Windows Media Audio. Es ist ein von Microsoft entwickeltes gesetzlich geschütztes Format für Audio Streaming und Kompression. WMA Dateien haben theoretisch eine doppelt so hohe Kompressionsrate wie MP3s, obwohl dies fraglich ist. Ogg Vorbis -------------------------------------------------------------------------------------------------- Ogg Vorbis ist ein neues Audio Kompressionsformat. Es ist im Großen und Ganzen vergleichbar mit anderen Formaten zum Speichern und Abspielen digitaler Musik wie MP3, VQF, AAC und andere digitale Audioformate.
Need help?
Do you have a question about the TViX M-3100U and is the answer not in the manual?
Questions and answers