Table of Contents
Advertisement
Quick Links
the
Installation and Operation Manual
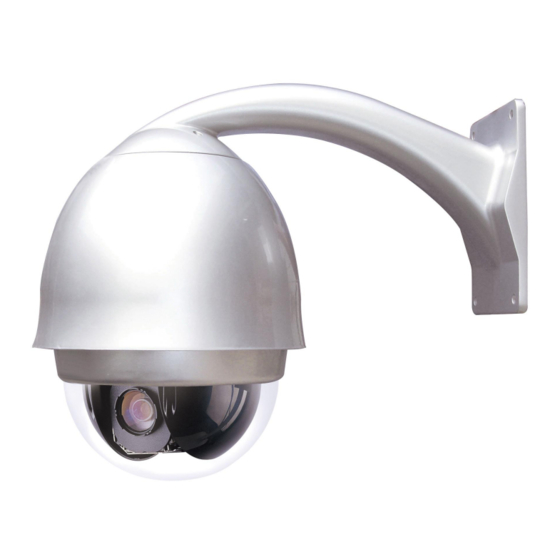
PTZ505 Iridium Silver / PTZ508 Ivory
Six-inch Standard Speed PTZ Dome
Optical
Zoom
Option F
22x
Option J
22x
Option K
27x
Option N
30x
Version 3
For updates to these instructions visit
excelPTZ
PTZ500 series
Total
Day/Night
Zoom
352x
YES
352x
YES
270x
YES
324x
YES
www.excelPTZ.com
range
IR
Minimum
Sensitive
Lux
NO
0.5
YES
0.5
YES
0.001
YES
0.0015
Last Revised: 10.02.2011
TVL
Nite
Plus
480
NO
500
NO
500
YES
580
YES
Advertisement
Table of Contents

Related Manuals for excelPTZ PTZ508 Series


Summary of Contents for excelPTZ PTZ508 Series
- Page 1 Installation and Operation Manual PTZ500 series PTZ505 Iridium Silver / PTZ508 Ivory Six-inch Standard Speed PTZ Dome Optical Total Day/Night Minimum Nite Zoom Zoom Sensitive Plus Option F 352x Option J 352x Option K 270x 0.001 Option N 324x 0.0015...
-
Page 2: Please Read The Following
Please read this operation manual carefully before installing and using this unit !!!! Please read the following; 1. Please read the operation manual carefully before installing and operating the product. 2. The actual dome requires a 24v AC power supply. The rated input voltage of the camera is 12V!!!! This gets its power from the dome and does not require a separate PSU. - Page 3 KEY FUNCTIONS The excelPTZ dome range – The PTZ500 range of domes are hi-tech CCTV products. They incorporate a high-clarity colour camera, panoramic speed-variable PAN/TILT, multifunctional decoder and on-board processor for logic handling. The domes are easy to connect, install, maintain and operate and have many features.
-
Page 4: Overview- Introduction To Fitting Ptz Equipment
Getting the dome up and running! You MUST connect up the dome and your control equipment on a workbench or kitchen table before the actual site installation and CHECK YOU KNOW HOW TO INSTALL IT CORRECTLY!!!!!!!!!!!!!!!!!. By doing this you can set-up any DIP switches, adjust the camera, and learn about how it operates before taking it to site. - Page 5 The following diagram indicates the basic cable requirements for a PTZ system. Equipment Cable Needed Dome 1. Data signal CAT5 cable Keypad or You can also send the video signal back along a second pair in a CAT5 cable using baluns. Note you cannot send 24v AC power down CAT5.
-
Page 6: Rs485 Wiring Methods & Tips
CAT 5 DOME CCT CAMERA 24V AC CAT5 Carries Video & LOCAL Control Data 240V --- Video & Power RG59+2 Video & Power BALUN DOME TRADITIONAL CAT5 Carrying Data CAMERA 240V JUNCTION BOX CO-AX RG59 Free Lead Supplied KEYPAD MONITOR Many installation companies can get the power and video signal correct, but struggle with the control of the dome using the keypad or DVR using the RS485 data. - Page 7 PLEASE NOTE - Using inferior cables, or installing the dome in an environment with strong electromagnetic interference, or connecting a lot of PTZ domes to the same cable carrying the RS485 signal will reduce the maximum transmitting distance. 3. RS485 Connection methods METHOD 1 –...
- Page 8 ..Main controller Daisy-Chain connection WITH SHORT SPURS for the RS485 PTZ control signal (one main radial with very short spurs to each dome off it, keeping the spurs to less than 10 meters) TIP - The connection of a 120 termination resistor: The termination resistor is ready fitted on the domes pcb, all you have to do set it is move the jumper from Pins 2 &3 to pins 1 &...
- Page 9 If your STAR circuit is not too extensive with each spur in the region of 20-50 meters expect quite good reliable performance using this technique. If you experience any problems though, there is a RS485 distribution box available CODE PT750 to help overcome any problems. The Star circuit for wiring PTZ’s.
- Page 10 separate spurs, each spur can have up to 4 domes. This means that you could theoretically have up to 4 individual spurs of over 1000mtrs each to control up to 16 PTZ domes in total. Ideally you would put just one dome on each spur from the PTZ750 but up to 4 domes is generally acceptable.
-
Page 11: Setting Up The Dome Camera
Setting up the Dome Camera 1. Connection of the System There are many ways to wire up a PTZ system. If you have read the introduction at the beginning of these instructions you should have got a good idea what your options are. Below is a general schematic diagram showing you some of these options. - Page 12 okay in the summer but when winter kicks in and the dome’s current draw jumps from 400ma to 1.7A and an inadequate power supply or a cable with too much voltage drop may stop the dome from working properly. When winter comes don’t be suddenly caught off guard when your customer rings you to say the dome has suddenly packed in because it’s gone cold!! A popular way to power the domes is using our COMPOSITE VIDEO cable (or shotgun as its also known) as this cable can carry the power to the dome...
- Page 13 You should initially be wiring the dome to the keyboard or DVR on your workshop bench or at least your kitchen table to prove you know how to get everything to work. Once you have done this, it is just a job of extending the cables and physically installing the domes on site. You must obviously take note of the RS485 wring techniques mentioned at the beginning of these instructions and get the 120ohm resistors correct in the “End of line”...
-
Page 14: Connecting The Video Out Of The Dome
Connecting the video out of the dome. The dome has a short BNC lead attached to it, this is the lead that carries the video signal from the built-in camera. You need to extend this lead to the “VIDEO-IN” of the DVR or monitor. Use a good quality RG59 coax cable or similar to do this. - Page 15 24V AC INPUT 24V AC RS485 RS485 INPUT - ‘B’ + ‘A’ YELLOW ORANGE RS485 RS485 - “B” + “A” RS485 INPUT ON RS485 INPUT ON DVR Last Revised 10/02/2011...
-
Page 16: Setting Up A Unique Address In A Dome
If you’re using more than one dome on a site Each dome has a unique “address” so that if you are using more than one on a site the keyboard “talks” to the right dome when you want it to PTZ. If you only have the one dome on the site then the default “address”... - Page 17 Dome ID-CODE Status Address DIP-1 DIP-2 DIP-3 DIP-4 DIP-5 DIP-6 DIP-7 DIP-8 DIP-9 DIP-10 … … … … … … … … … … … 1023 Table 1 2. Setup of the Protocol and the Default Baud Rate. As shown in Table 2, SW2 is used to set the protocol of communication and the baud rate used by the dome camera.
- Page 18 Table 2 Some protocols and the states of the coding switches of normal baud rates of these protocols are shown as follows: Setup of the Baud Rate of Communication. As shown in Figure 2, SW2 is used to set the protocol of communication and the baud rate used by the dome camera.
-
Page 19: Using The Ptz730 Keypad With The Excelptz Series
Using the PTZ730 keypad with the excelPTZ series NOTE 1: For more detailed instructions in setting up the keypad or using one of our other keypads, please refer to the instruction manual supplied with the product. NOTE 2: The PTZ730 keypad requires you to press the function key first followed by the value e.g <CAM>... -
Page 20: Presets And Other Functions
PRESETS and other functions. The dome has up to 64 presets that once programmed will stay in the domes non-volatile memory so they will be retained even after a power cut. What is a preset? A preset is a particular area or object that the dome was looking at and has been stored into its memory so when the preset is “called-up”... -
Page 21: Presets -How To Set Up A Preset
* Code 57 Preset switches off screen displays on the N module or 57 Call switches them on. ** If you wish to use the auto scan function YOU MUST USE preset 52 as the starting point of the scan and preset 53 as the ending point of the scan. Note that when using the Pelco-D, Pelco-P or Santachi protocols, an alternative preset number 64 may be more suitable in some keypads. -
Page 22: Deleting A Preset
Tours – How to set them up and use them A tour is simply a collection of preset camera locations that are run in sequence with the dome stopping at each location for a brief period then moving on to the next preset. For example, you could use a tour so that an outside dome camera points at a gate, then at a side doorway then zooms out to get an overall shot of a car park finally zooming in on a delivery bay before repeating the whole cycle again. -
Page 23: Controlling One Camera Then Another
On Screen Graphics (OSD) – changing the modules settings The zoom module within the dome has a built in camera. You can adjust some of its parameters by entering its On-Screen-Graphics display. (OSD) To bring up the camera menu press CALL 57 Enter. The camera’s OSD is then displayed on the screen. -
Page 24: The Installation Of The System
The Installation of the System 1. Type of Installation a) Wall Installation 103. 4 Figure 1 b) In-Ceiling Installation Figure 2 2. Installation Steps (taking wall installation as example) a) Preparation before installation --- dome setting Turning the dome cover anticlockwise (Figure 3) and take out the inner black cover (Figure 4). - Page 25 Figure 3 Figure 4 Install the inner black cover (Figure 5). Install the dome cover (Figure 6). Figure 5 Figure 6 b) Installation of the bracket Make four M8 holes on the wall, and put the four M8 bolts into the holes as Figure 7. Make a hole at the center of the four holes to connect the cable of the bracket as Figure 7.
- Page 26 Aim the “ ” of the bracket to the “ ” of the dome as Figure 9. iii. Push the dome up and turning it anticlockwise as Figure 10. Figure 9 Figure 10 Lock the housing as Figure 11. Tighten M4×18 screws as Figure 12. Figure 11 Figure 12 Connect the control cable as Figure 15.
-
Page 27: Appendix A: General Information
Appendix A: General Information The Cleaning of Clear Dome Cover To obtain constant clear images, the user should clean the down cover periodically. Be very careful when cleaning. Hold the down cover ring only to avoid touching the acrylic dome cover.
Need help?
Do you have a question about the PTZ508 Series and is the answer not in the manual?
Questions and answers