
Related Manuals for Miller Robotic Interface II


Summary of Contents for Miller Robotic Interface II
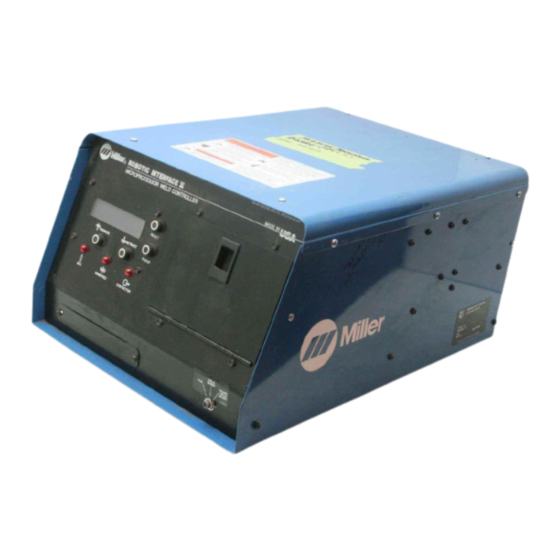
- Page 1 OM-172 324D September1998 Processes MIG (GMAW) Welding Pulsed MIG (GMAW-P) Automatic Welding Description Automatic Welding Interface Robotic Interface II Visit our website at www.MillerWelds.com...
- Page 2 They had to be the best you could buy. Today, the people that build and sell Miller products continue the tradition. They’re just as committed to providing equipment and service that meets the high standards of quality and value established in 1929.
-
Page 3: Table Of Contents
TABLE OF CONTENTS SECTION 1 – SAFETY PRECAUTIONS - READ BEFORE USING ......1-1. - Page 4 TABLE OF CONTENTS SECTION 8 – TEACHING A MIG WELDING PROGRAM ........8-1.
- Page 5 Please fill out the following information when setting up your equipment. It can be used for your records and also be valuable if you ever need to call for service. Model: ROBOTIC INTERFACE II, Serial Number: Software Version SET-UP INFORMATION (found in set-up menu)
- Page 7 Declaration of Incorporation for European Community (CE) Products Miller Electric Mfg. Co. Manufacturer’s Name: 1635 W. Spencer Street Manufacturer’s Address: Appleton, WI 54914 USA Robotic Interface II Declares that the product: conforms to the following Directives and Standards: Directives Electromagnetic Compatibility Directives: 89/336/EEC, 92/31/EEC...
-
Page 9: Section 1 - Safety Precautions - Read Before Using
SECTION 1 – SAFETY PRECAUTIONS - READ BEFORE USING som _nd_5/97 1-1. Symbol Usage Means Warning! Watch Out! There are possible hazards with this procedure! The possible hazards are shown in the adjoining symbols. This group of symbols means Warning! Watch Out! possible Y Marks a special safety message. - Page 10 ARC RAYS can burn eyes and skin. BUILDUP OF GAS can injure or kill. D Shut off shielding gas supply when not in use. Arc rays from the welding process produce intense D Always ventilate confined spaces or use visible and invisible (ultraviolet and infrared) rays that can burn eyes and skin.
-
Page 11: Additional Symbols For Installation, Operation, And Maintenance
1-3. Additional Symbols For Installation, Operation, And Maintenance FIRE OR EXPLOSION hazard. MOVING PARTS can cause injury. D Do not install or place unit on, over, or near D Keep away from moving parts such as fans. combustible surfaces. D Keep all doors, panels, covers, and guards D Do not install unit near flammables. -
Page 12: Emf Information
1-5. EMF Information Considerations About Welding And The Effects Of Low Frequency 1. Keep cables close together by twisting or taping them. Electric And Magnetic Fields 2. Arrange cables to one side and away from the operator. Welding current, as it flows through welding cables, will cause electro- magnetic fields. -
Page 13: Section 1 - Consignes De Securite - Lire Avant Utilisation
SECTION 1 – CONSIGNES DE SECURITE – LIRE AVANT UTILISATION som _nd_fre 5/97 1-1. Signification des symboles Signifie Mise en garde ! Soyez vigilant ! Cette procédure présente des risques de danger ! Ceux-ci sont identifiés par des symboles adjacents aux directives. Ce groupe de symboles signifie Mise en garde ! Soyez vigilant ! Il y a des Y Identifie un message de sécurité... - Page 14 LES RAYONS DE L’ARC peuvent pro- LES ACCUMULATIONS DE GAZ ris- voquer des brûlures dans les yeux et quent de provoquer des blessures ou sur la peau. même la mort. Le rayonnement de l’arc du procédé de soudage D Fermer l’alimentation du gaz protecteur en cas de génère des rayons visibles et invisibles intenses non utilisation.
-
Page 15: Dangers Supplémentaires En Relation Avec L'installation, Le Fonctionnement Et La Maintenance
1-3. Dangers supplémentaires en relation avec l’installation, le fonctionnement et la maintenance Risque D’INCENDIE OU DES ORGANES MOBILES peuvent D’EXPLOSION. provoquer des blessures. D Ne pas placer l’appareil sur, au-dessus ou à proxi- D Rester à l’écart des organes mobiles comme le mité... -
Page 16: Principales Normes De Sécurité
1-4. Principales normes de sécurité Safety in Welding and Cutting, norme ANSI Z49.1, de l’American Wel- Safe Handling of Compressed Gases in Cylinders, CGA Pamphlet P-1, ding Society, 550 N.W. Lejeune Rd, Miami FL 33126 de la Compressed Gas Association, 1235 Jefferson Davis Highway, Suite 501, Arlington, VA 22202. -
Page 17: Section 2 - Installation
SECTION 2 – INSTALLATION 2-1. Specifications Specification Description Type Of Input Power From Welding Single-Phase 115 Volts AC, 5 Amperes, 50/60 Hertz Power Source Welding Power Source Type Constant Voltage (CV) DC, With Contactor And 14-Pin Remote Control For GMAW Welding Constant Voltage (CV)/Constant Current (CC) DC Inverter, With Contactor And 14-Pin Remote Control For GMAW-P Welding Wire Feed Speed Range*... -
Page 18: Rear Panel Connections
2-3. Rear Panel Connections Receptacle Keyway 14-Pin Receptacle (Connec- tion To Welding Power Source) 17-Pin Receptacle (Connec- tion To Welding Power Source With 17-Pin Receptacle) 19-Socket Receptacle (Motor/ Shielding Gas Control Connection To Motor Drive Assembly) 10-Socket Receptacle (Op- Example Receptacle tional Remote Program Select Connection To Robot Control) To connect matching interconnect-... -
Page 19: Connecting Optional Emergency Stop Push Button
2-4. Connecting Optional Emergency Stop Push Button Terminal strip 2T provides connec- tion points for an optional normally closed Emergency Stop (E-stop) push button. To make connections, proceed as follows. Remove top cover. Terminal Strip 2T Strain Relief Loosen strain relief and insert leads from normally closed E-stop push button. - Page 20 Setup Screen Terms: Access Code NOTE: The optional Data Card is required to activate this feature. With code off, access to the setup displays is not restricted. With code on, the operator must know and enter the access code to access or change any of the setup displays.
-
Page 21: Section 4 - Operation
SECTION 4 – OPERATION 4-1. Safety Equipment Wear the following while welding: Dry, Insulating Gloves Safety Glasses With Side Shields Welding Helmet With Correct Shade Of Filter (See ANSI Z49.1) sb3.1 1/94 4-2. Work Clamp Work Clamp Connect work clamp to a clean, paint-free location on workpiece, as Tools Needed: close to weld area as possible. -
Page 22: Controls
4-3. Controls Front Panel Display Reset Button After clearing an error, press this button to reset the display. Purge Button Push to energize gas valve. If a purge time value is programmed, the gas will flow for the programmed length of time. If a value is not pro- grammed, the gas flows until the Purge button is released. -
Page 23: Shielding Gas
4-4. Shielding Gas Shielding Gas Cylinder Valve Open valve on cylinder just before welding. Close valve on cylinder when fin- ished welding. sb5.1* 6/92 – S-0621-C 4-5. Sequence Of Gas Metal Arc (GMAW), Gas Metal Arc - Pulse (GMAW-P), And Flux Cored Arc Welding (FCAW) Install &... -
Page 24: Control Settings On Dimension 452 Or 652 Ampere Model Welding Power Source
4-7. Control Settings On Dimension 452 Or 652 Ampere Model Welding Power Source Arc Force (Dig) Control Dimension 452 Model Hot Start Switch Amperage/Voltage Adjustment Control Setting at controls and switch posi- tion does not matter when Process Selector switch is in GMAW posi- tion and remote Amperage/Voltage Set controls as shown for all Control switch is in REMOTE posi-... -
Page 25: Control Settings On Xmt 304 Inverter Model Welding Power Source
4-8. Control Settings On XMT 304 Inverter Model Welding Power Source Set controls as shown for all welding processes when using this interface unit. ST-801 192 / Ref. ST-175 086 Voltage/Amperage Adjustment Control For remote control, make connections to assist with arc starts as well as reduce stick- Remote 14 receptacle, and place switch in ing while welding. -
Page 26: Control Settings On Invision 456P Inverter Model Welding Power Source
4-9. Control Settings On Invision 456P Inverter Model Welding Power Source Set controls as shown for all welding processes when using this interface unit. ST-801 718 / ST-180 311-B Voltage Adjustment Control Remote On/Off Receptacle (Optional) a remote switch to the receptacle and place front panel Power On/Off switch in Off posi- Inductance Control tion. -
Page 27: Setting Switches On Maxtron 450 Ampere Inverter Model Welding Power Source
4-10. Setting Switches On Maxtron 450 Ampere Inverter Model Welding Power Source Set switches as shown for all welding processes when using this interface unit. Ref. ST-150 171-C / Ref. SC-154 197 SECTION 5 – INTRODUCTION TO PROGRAMMING 5-1. Interface Unit Interface Unit The interface unit is designed for use in pulse MIG welding (adaptive... -
Page 28: Pulse Mig Programs
5-2. Pulse MIG Programs The eight pulse programs are shown in the table. Each program can be used in standard pulse MIG Program Hardwire Selected* Softwire Selected* or adaptive pulse MIG. In an adaptive pulse MIG program, .035” Steel, Argon – Oxy .045”... - Page 29 Program 1 – .035 Steel, Argon-Oxy Wire Size/Type: .035” Steel Gas: Ar - Oxy / 40 CFH IPM / MPM PWms COMMENTS 750 / 19.1 700 / 17.8 650 / 16.5 600 / 15.2 550 / 14.0 500 / 12.7 450 / 11.4 400 / 10.2 350 / 8.9...
- Page 30 Program 3 – .035 Steel, Argon-CO Wire Size/Type: .035” Steel Gas: Ar - CO / 40 CFH IPM / MPM PWms COMMENTS 750 / 19.1 700 / 17.8 650 / 16.5 600 / 15.2 550 / 14.0 500 / 12.7 450 / 11.4 400 / 10.2 350 / 8.9...
- Page 31 Program 5 – .035” ER 309, Argon - CO Wire Size/Type: .035” ER 309 Gas: Ar - CO / 40 CFH IPM / MPM PWms COMMENTS 750 / 19.1 700 / 17.8 650 / 16.5 600 / 15.2 550 / 14.0 500 / 12.7 450 / 11.4 400 / 10.2...
- Page 32 Program 7 – 3/64” ER 5356, Argon Wire Size/Type: 3/64” ER 5356 Gas: Argon / 40 CFH IPM / MPM PWms COMMENTS 750 / 19.1 700 / 17.8 650 / 16.5 600 / 15.2 550 / 14.0 500 / 12.7 450 / 11.4 400 / 10.2 350 / 8.9...
- Page 33 NOTE The next 8 programs are available after changing software wiretype (see Section 10-13). Program 1 – .035” ER 4043, Argon Wire Size/Type: .035” ER 4043 Gas: Argon / 40 CFH IPM / MPM PWms COMMENTS 750 / 19.1 730 / 18.5 720 / 18.3 710 / 18.0 655 / 16.6...
- Page 34 160 / 4.1 105 / 2.7 Program 3 – 1/16” ER 4043, Argon Wire Size/Type: 1/16” ER 4043 Gas: Argon / 40 CFH IPM / MPM PWms COMMENTS 770 / 19.6 730 / 18.5 710 / 18.0 655 / 16.6 600 / 15.2 545 / 13.8 490 / 12.4...
- Page 35 160 / 4.1 105 / 2.7 Program 5 – 3/64” ER 5356, Argon Wire Size/Type: 3/64” ER 5356 Gas: Argon / 40 CFH IPM / MPM PWms COMMENTS 755 / 19.2 730 / 18.5 700 / 17.8 680 / 17.3 655 / 16.6 600 / 15.2 545 / 13.8...
- Page 36 105 / 2.7 75 / 1.9 Program 7 – 3/64” ER 5356, Argon Wire Size/Type: 3/64” ER 5356 Gas: Argon / 40 CFH IPM / MPM PWms COMMENTS 750 / 19.1 720 / 18.3 700 / 17.8 680 / 17.3 655 / 16.6 600 / 15.2 545 / 13.8...
-
Page 37: Pulse Panel Mode Select Button
160 / 4.1 105 / 2.7 5-4. Pulse Panel Mode Select Button Y Control circuit and interface op- erational power are On when using or changing the micro- processor settings. Mode Display Mode Select Button Press Mode Select button to move indicator in left window display. -
Page 38: Pulse Panel Parameter Select Button
5-5. Pulse Panel Parameter Select Button Y Control circuit and interface op- erational power are On when using or changing the micro- processor settings. Parameter Display Moving Line Moving line is under value that can be changed. Pulse Panel Parameter Select Button Press pulse panel parameter select button to move indicator in right win-... -
Page 39: Pulse Panel Parameter Increase And Decrease Buttons
5-6. Pulse Panel Parameter Increase And Decrease Buttons Y Control circuit and interface op- erational power are On when using or changing the micro- processor settings. Use mode select button to select mode to be changed (see Section 5-4). Use pulse panel parameter select button to select parameter to be changed (see Section 5-5). -
Page 40: Section 6 - Getting Started For Pulse Welding
SECTION 6 – GETTING STARTED FOR PULSE WELDING 6-1. Weld Cycle Weld Time Start Time Crater Time Start Burnback Time Speed Preflow Time Postflow Time Time Weld Start Weld Stop Start Ref. S-0271 NOTE The type of robot being used is defined during the setup process (see Section 10). The Robot type indicates which parts of the weld cycle the robot controls. -
Page 41: Setting Preflow Sequence Display
6-2. Setting Preflow Sequence Display Mode Select Button When unit is turned On, Process is P r o c e s s >P r e f l o w the default mode, at other times, use mode select button to select C a r d 0 . -
Page 42: Setting Crater Sequence Display
6-4. Setting Crater Sequence Display Crater Parameters Display Parameter ranges are as follows: Seconds, 0-2.50 Sec. If value set is >C r a t e r C r a t e r C r a t e r zero (0), there is no Crater 0 . -
Page 43: Section 7 - Teaching A Pulse Welding Program
SECTION 7 – TEACHING A PULSE WELDING PROGRAM Control circuit and interface operational power are On when using or changing the microprocessor settings. NOTE See GMAW-P (Pulsed MIG) Process Guide supplied with unit for more information. 7-1. Pulse Waveforms And Explanation Of Terms The interface, not the welding pow- er source, controls weld output for pulsed welds. -
Page 44: Typical Teach Point Settings And Resulting Synergic Setting
7-2. Typical Teach Point Settings And Resulting Synergic Setting Example Of A Synergic Setting For 425 IPM With All Teach Points Set At 50 IPM Increments PWms PWms The teach mode allows the user to create point, and above the wire feed speed of the pulse parameters. -
Page 45: Selecting Teach Point Wire Feed Speed
7-3. Selecting Teach Point Wire Feed Speed Process Display When unit is first turned On, Pro- cess is the default screen, at other times use mode select button to se- lect Process. Teach Display Use parameter select button to se- P u l s e >P r o c e s s >P r g... -
Page 46: Setting Teach Point Parameters On The Pulse Panel
7-4. Setting Teach Point Parameters On The Pulse Panel Increase/ Decrease >P r o c e s s T e a c h T e a c h T e a c h 4 5 0 I P M C a r d >4 5 0 I P M 4 5 0... - Page 47 NOTE Make copies of this chart for future use. Program # Wire Size/Type Program Name Card # Gun Model Flowrate PWms COMMENTS Preflow: Sec. Run-In Trim: IPM: Sec.: Crater Trim: IPM: Sec.: Postflow: Sec. OM-172 324 Page 39...
-
Page 48: Changing To Adaptive Pulse Welding
7-5. Changing To Adaptive Pulse Welding Welding parameters are the same for both a Pulse and an Adaptive Pulse welding program. While welding adaptively, the unit uses feedback to attempt to maintain a constant arc length. To change to Adaptive Pulse welding, proceed as shown: Pulse Panel Display Default display when unit is first... -
Page 49: Section 8 - Teaching A Mig Welding Program
SECTION 8 – TEACHING A MIG WELDING PROGRAM Control circuit and interface operational power are On when using or changing the microprocessor settings. 8-1. Weld Cycle Weld Time Start Time Crater Time Start Burnback Time Speed Preflow Time Postflow Time Time Weld Start... -
Page 50: Changing To Mig In The Process Mode
8-2. Changing To MIG In The Process Mode Pulse Panel Display Default display when unit is first turned On, at other times use mode select button to select Process. Go to Section 8-3A. Mode Select >P r o c e s s >P r g C a r d P u l s e... -
Page 51: Setting Sequence Mig Welding Parameters
8-3. Setting Sequence MIG Welding Parameters Control circuit and interface operational power are On when using or changing the microprocessor settings. A. Setting Preflow Sequence Display Pulse Panel Display When unit is turned On, Process is the default mode. Use mode select button to select Sequence. - Page 52 B. Setting Start Sequence Display Start Parameters Display Parameter ranges are as follows: Seconds, 0-2.5 Sec. If value set is >S t a r t S t a r t S t a r t zero (0), there is no Run-In 0 .
- Page 53 D. Setting Crater Sequence Display Crater Parameters Display Parameter ranges are as follows: Seconds, 0-2.50 Sec. If value set is zero (0), there is no Crater sequence. >C r a t e r 0 . 0 2 S e c Volts, 10.0-38.0 Volts.
- Page 54 F. Setting Postflow Sequence Display Postflow Parameters Display Postflow can be adjusted from 0-9.9 seconds. If value set is zero (0), there is no Postflow sequence. >P o s t f l o w P o s t f l o w >P o s t f l o w 0 .
-
Page 55: Section 9 - Using The Optional Data Card
SECTION 9 – USING THE OPTIONAL DATA CARD 9-1. Installing Data Card Label Peel backing from label and apply to data card with THIS SIDE UP by metal pins. Write the names of the programs stored on the card on the label. Write the name of the piece of equipment the card is used with on the label. -
Page 56: Naming Programs And Writing To Card
9-3. Naming Programs And Writing To Card NOTE All program types (Pulse, Adaptive Pulse, and MIG) can be stored on a data card and retrieved. Card Display Use Mode Select button to select Card. P r o c e s s Moving Line >C a r d Moving line is under value that can... -
Page 57: Reading From Card
9-4. Reading From Card Use Mode Select button to select Card. Card Display P r o c e s s >C a r d Moving Line S e q u e n c e P r e s s Moving line is under value that can B e l o w be changed. -
Page 58: Deleting Programs From Card
9-6. Deleting Programs From Card Use Mode Select button to select Card. Card Display Moving Line Moving line is under value that can P r o c e s s be changed. >C a r d S e q u e n c e P r e s s Delete Display B e l o w... -
Page 59: Section 10 - Setup
SECTION 10 – SETUP 10-1. Setup Flow Chart Display Selections Features >R a n g e V o l t M i n S e c u r i t y 1 0 . 0 V o l t Settings A c c e s s To set up features that customize M i g... -
Page 60: Using Setup Displays
10-2. Using Setup Displays Front Panel Setup Display Front panel display during setup. Pulse Panel Mode And Para- meter Select Buttons Power Switch On Rear Panel Mode Parameter Select Select Press and hold down both buttons while turning On unit. Pulse Panel Setup Display Follow this procedure any time ac- cess is required. -
Page 61: Selecting Welding Power Source Range
10-3. Selecting Welding Power Source Range NOTE Welding power source minimum and maximum voltage values are always required. Amperage values are required for pulse welding. Range Display See welding power source Owner’s Manual for voltage and amperage ranges. Set values to match weld- ing power source ranges. -
Page 62: Selecting Security Lock
10-4. Selecting Security Lock NOTE Security lock works only when a data card is inserted (see Section 9). Security Display Use this display to lock a program’s weld parameters so that changes Access can not be made using pulse panel Setup controls. -
Page 63: Selecting Or Changing Access Code
10-5. Selecting Or Changing Access Code NOTE Access code works only when a data card is inserted (see Section 9). Code Display Access With code off, access to the setup Setup displays is not restricted. Display With code on, the operator must know and enter the access code to access or change any of the setup displays. -
Page 64: Selecting Voltage Correction
10-6. Selecting Voltage Correction Mig Type Display With DVC Voltage Correction On, the unit uses closed-loop feedback from the 17-pin cord or voltage sensing leads to maintain set volt- age parameters. With DVC Voltage Correction Off, feedback from the arc is not used for closed-loop feedback to main- tain voltage parameters. -
Page 65: Selecting Voltage Sensing Method
10-9. Selecting Voltage Sensing Method Voltage Feedback Display When using the 17 Pin setting, arc voltage feedback is through the welding power source and the feed- back signal is sent through the 17-pin cord to the feeder. If the 17 Pin setting is used, it is rec- ommended that the voltage sens- ing terminals on the welding power source be used to monitor arc volt-... -
Page 66: Resetting Arc Time
10-11.Resetting Arc Time Arc Time Display The unit accumulates arc hours up to 9999.99 hours or 999999 weld cycles before rolling over to zero (0). The arc timer can be reset using this display. Press V o l t a g e 0 . -
Page 67: Selecting Wire Type
10-13.Selecting Wire Type NOTE If wire type is changed, perform a memory reset (see Section 10-15) immediately after selecting wire type to bring up the correct welding programs. Wire Type Display Select soft wire when using alumi- num wire in the wire feeder. Select hard wire when using any other kind of wire. -
Page 68: Resetting Memory
10-15.Resetting Memory No Reset Memory cannot be reset. Press Program Reset Mode Select W i r e t y p e >N o R e s e t Access Press Parameter Select button to D i s p l a y Setup reset last active program to original >M e m o r y... -
Page 69: Selecting Program Name Feature
10-17.Selecting Program Name Feature Name Display When a data card is used, the pro- grams written from the unit to the card can be named. Press Mode Select M e m o r y Ca r d Ca r d Access S h u t d o w n Pr o g r a m s... -
Page 70: Jog Wire Feed Speed Selection
10-20.Jog Wire Feed Speed Selection Jog IPM Display This feature is only used with Jog wire feed speed can be varied arc-On style robots. between 50 and 780 inches per minute, IPM. Press Mode Select P r o g r a m Access S t i c k I P M... -
Page 71: Arc Voltage Error Selection
10-22.Arc Voltage Error Selection Monitor Display Provides a means to enable/dis- When a system reset is done, Monitor is set to Off. Access able the arc voltage error feature Setup and to set an acceptable range of Display deviation from set arc voltage or arc length (trim) before the error will ac- tuate. -
Page 72: Section 11 - Control Menu
SECTION 11 – CONTROL MENU The control menu allows the user access to rise time setting that controls rise and fall time of the pulse square wave. Changing the rise time setting changes the square wave shape by rounding off the corners, and makes it possible to quiet the pulse arc by just changing the rise time. -
Page 73: Setting Rise Time
11-2. Setting Rise Time NOTE Maximum Rise Time setting will make the welding power source go to its maximum output. Rise Time Display Setting is depend on desired arc characteristics. Make a sample weld after each setting until desired arc characteristics are obtained. >R i s e T i m e >1 2 5 0... -
Page 74: Section 12 - Maintenance & Troubleshooting
SECTION 12 – MAINTENANCE & TROUBLESHOOTING 12-1. Routine Maintenance Turn Off all power before maintaining. 3 Months 6 Months 3 Months Tape Or Blow Out Replace Replace Unreadable Cracked Vacuum Labels Weld Inside Cable During Heavy Service, Replace Clean Monthly Cracked Parts 14-Pin Cord... -
Page 75: Front Panel Error Displays
12-3. Front Panel Error Displays Memory CRC Error Display Corrupted program data has been detected or loaded. The “X” value in- dicates the program number. May be caused by incompatible in- M e m o r y P r g formation on the data card or bad memory. -
Page 76: Error Displays (Continued)
12-4. Error Displays (Continued) Stop Weld Cycle Error Display An error has been detected and the robot hasn’t stopped the weld cycle, causing the interface unit to stop the weld cycle and wait for the robot to stop. S t o p W e l d C y c l e Error Card Read Display... -
Page 77: Interface Board Pc5 Diagnostic Led's
12-5. Interface Board PC5 Diagnostic LED’s Diagnostic LED’s Cover Remove cover. Interface Board PC5 Diagnostic LED’s are visible inside unit, located on edge of Interface Board PC5 facing front of unit. Refer to Section 12-6 for information on diagnostic LED’s. Reinstall cover after checking diag- nostic LED’s. -
Page 78: Customer Interface Board Pc4 Diagnostic Led's
12-7. Customer Interface Board PC4 Diagnostic LED’s Robotic Interface II Customer Interface Board PC4 Diagnostic LED’s are visible inside unit, located on PC4 mounted to cen- ter panel facing front of unit. Refer to Section 12-8 for information on diagnostic LED’s. -
Page 79: Diagnostic Led's On Interface Board Pc4
12-8. Diagnostic LED’s On Interface Board PC4 Status Diagnosis Input signal On for RPS8-A. Input signal Off for RPS8-A. Input signal On from robot for shielding gas valve. Input signal Off from robot for shielding gas valve. Input signal On for welding power source contactor. Input signal Off for welding power source contactor. -
Page 80: Section 13 - Electrical Diagrams
SECTION 13 – ELECTRICAL DIAGRAMS Figure 13-1. Circuit Diagram For Robotic Interface Unit OM-172 324 Page 72... - Page 81 SD-185 806 OM-172 324 Page 73...
- Page 82 Figure 13-2. Circuit Diagram For Microprocessor Board PC1 OM-172 324 Page 74...
- Page 83 SD-161 039-A OM-172 324 Page 75...
- Page 84 Figure 13-3. Circuit Diagram For Motor Board PC3 OM-172 324 Page 76...
- Page 85 SD-083 388-B OM-172 324 Page 77...
- Page 86 Figure 13-4. Circuit Diagram For Customer Interface Board PC4 (Part 1 of 2) OM-172 324 Page 78...
- Page 87 SD-180 191 (Part 1 of 2) OM-172 324 Page 79...
- Page 88 Figure 13-5. Circuit Diagram For Customer Interface Board PC4 (Part 2 of 2) OM-172 324 Page 80...
- Page 89 SD-180 191 (Part 2 of 2) OM-172 324 Page 81...
- Page 90 Figure 13-6. Circuit Diagram For Interface Board PC5 OM-172 324 Page 82...
- Page 91 SD-165 466 OM-172 324 Page 83...
- Page 92 SB-179 739 Figure 13-7. Circuit Diagram For Filter Board PC6 OM-172 324 Page 84...
- Page 93 SC-165 462-A Figure 13-8. Circuit Diagram For Display Board PC7 OM-172 324 Page 85...
- Page 94 SA-156 626-A Figure 13-9. Circuit Diagram For Data Card Board PC8 SA-158 163 Figure 13-10. Circuit Diagram For Pulse Display Board PC9 OM-172 324 Page 86...
- Page 95 SC-176 534 Figure 13-11. Circuit Diagram For Junction Board PC10 OM-172 324 Page 87...
-
Page 96: Section 14 - Parts List
SECTION 14 – PARTS LIST Hardware is common and not available unless listed. ST-801 142 Figure 14-1. Case Section w/Components OM-172 324 Page 88... - Page 97 Item Dia. Part Mkgs. Description Quantity Figure 14-1. Case Section w/Components ... . 071 642 CIRCUIT CARD ASSEMBLY, motor speed control ....
- Page 98 Item Dia. Part Mkgs. Description Quantity Figure 14-2. Panel, Front w/Components . . . DSPL1 . . . 165 459 CIRCUIT CARD ASSEMBLY, display .......
- Page 99 Item Dia. Part Mkgs. Description Quantity Figure 14-3. Panel, Center w/Components ....099 037 EDGE TRIM, style 62-1/16 black w/clips (order by ft) ....
- Page 100 Hardware is common and not available unless listed. ST-801 145 Figure 14-4. Panel, Rear w/Components OM-172 324 Page 92...
- Page 101 Item Dia. Part Mkgs. Description Quantity Figure 14-4. Panel, Rear w/Components ....171 363 PANEL, rear ........... . .
- Page 102 Hardware is common and not available unless listed. ST-801 153 Figure 14-5. Motor & Drive Assembly OM-172 324 Page 94...
- Page 103 Item Part Description Quantity Figure 14-5. Motor & Drive Assembly ..046 779 DRIVE ASSEMBLY, wire (consisting of) ........
- Page 104 Notes OM-172 324 Page 96...
- Page 105 Effective January 1, 2000 (Equipment with a serial number preface of “LA” or newer) This limited warranty supersedes all previous Miller warranties and is exclusive with no other Warranty Questions? guarantees or warranties expressed or implied. Call LIMITED WARRANTY – Subject to the terms and conditions APT, ZIPCUT &...
-
Page 106: Options And Accessories
Distributor Address City State For Service Call 1-800-4-A-Miller or see our website at www.MillerWelds.com to locate a DISTRIBUTOR or SERVICE AGENCY near you. Always provide Model Name and Serial/Style Number. Contact your Distributor for: Welding Supplies and Consumables Options and Accessories...
Need help?
Do you have a question about the Robotic Interface II and is the answer not in the manual?
Questions and answers