Table of Contents
Advertisement
Quick Links
Advertisement
Table of Contents

Related Manuals for Planet IKVM-8010


Summary of Contents for Planet IKVM-8010
- Page 1 User’s Manual IKVM-8010 / IKVM-16010 8/16-Port IP KVM Switch...
- Page 2 Copyright Copyright © 2011 by PLANET Technology Corp., All rights reserved. No part of this publication may be reproduced, transmitted, transcribed, stored in a retrieval system, or translated into any language or computer language, in any form or by any means, electronic, mechanical, magnetic, optical, chemical, manual or otherwise, without the prior written permission of PLANET.
- Page 3 Do not dispose of WEEE as unsorted municipal waste and have to collect such WEEE separately. Revision 8/16-Port IP KVM Switch Model: IKVM-8010 / IKVM-16010 Rev: 1.0 (March. 2011) Part No. EM-IKVM-8010 / IKVM-16010...
-
Page 4: Table Of Contents
8/16-Port IP KVM Switch Table of Content Introduction ..........................6 Product Features ......................6 Package Contents ......................6 Product Specifications ..................... 7 Front Panels ........................8 Port LED Indications ......................8 7-seg BANK LED......................8 Buttons and Operations....................9 Back Panels ........................9 Hardware Installation ...................... - Page 5 8/16-Port IP KVM Switch 4.4.7 Video Modes ......................25 Remote Usage........................26 Prerequisite ........................26 Login and Logout......................27 5.2.1 Login..........................27 5.2.2 Logout ........................28 5.2.3 The Remote Console....................29 5.2.4 Remote Console Control Bar ................29 5.2.5 Remote Console Status Line .................34 Appendix A Cable Connectors Specifications ..............35 Appendix B Troubleshooting &...
-
Page 6: Introduction
1600 x 1200 with a frame rate of 60 Hz. Built-in 8/16-Port KVM switch, user can connect up to 8/16 PCs to IKVM-8010 / IKVM-16010. It can apply to the IP network and fully control the PCs of any platform through any at-hand browser or just work as a normal 8/16-Port KVM Switch in local. -
Page 7: Product Specifications
Microsoft Java VM, Sun Java VM (Plug in), Netscape Java VM Front Panels of the Product Line IKVM-8010 (8 ports combo VGA KVM switch with USB local console) IKVM-16010 (16 ports combo VGA KVM switch with USB local console) Back Panels of the Product line... -
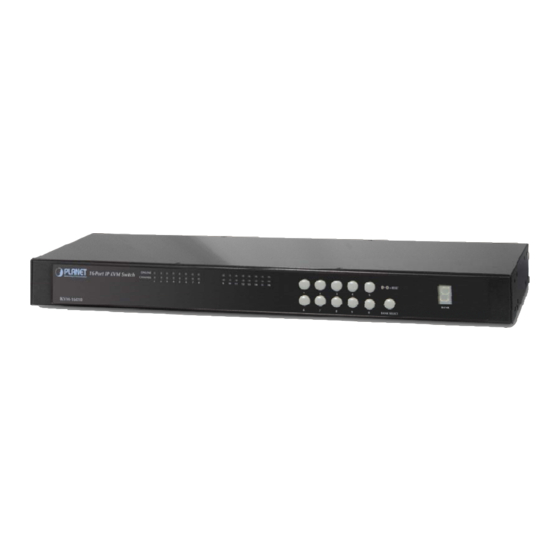
Page 8: Front Panels
8/16-Port IP KVM Switch 1.4 Front Panels 7-seg LED for Bank Identification LEDs for each Host Port BANK SELECT Button Port Number Select Button Reset Button 1.5 Port LED Indications There are two LED’s for each port: ■ ONLINE LED: The Red LED on indicating a Computer is connecting to the port. Notice: The PC99 Computer always power on the USB or PS/2 ports and turn on Red LED even if the Computer is not power on. -
Page 9: Buttons And Operations
8/16-Port IP KVM Switch 1.7 Buttons and Operations There are 11 push buttons on the front panel. The operations described in below. (1) The “BANK SELECT” is the Bank Select Button. You can select to the required bank number by press the “BANK SELECT” button. The current accessed bank will be displayed at the 7-Segment LED. -
Page 10: Hardware Installation
Screw the mounting brackets into the sides of the unit at the front, as shown in the diagram below. Take note of the length of your cables so that your computers, IKVM-8010/16010 Switch, keyboard, mouse and monitor are distanced properly. - Page 11 8/16-Port IP KVM Switch Rack Mount Installation -2 11 / 38...
-
Page 12: Computer/Server Installation
8/16-Port IP KVM Switch 2.2 Computer/Server Installation 2.2.1 CAT5 KVM on Host Side Please refer to the “CAT5 Extender User Manual” for details. The figure below depicts the computer/server installation. Computer/Server Installation 12 / 38... -
Page 13: 3-In-1 Vga Cable Installation
8/16-Port IP KVM Switch 2.2.2 3-in-1 VGA Cable Installation Each computer port connector is HDDB15 type. The 3-in-1 VGA cable has a HDDB15 male connector at one end. Plug it into computer port on the rear of KVM switch. The other end of input cable has three connectors: a HDDB15 male type for computer video, a purple mini din 6-pin PS/2 connector for keyboard and a green mini din 6-pin PS/2 connector for mouse. -
Page 14: Console Installation
8/16-Port IP KVM Switch 2.3 Console Installation 2.3.1 Local Console Connect the monitor to the HDDB15 female port on the back of the KVM unit labeled with the monitor symbol at the Local Console connector. There may be USB local console or PS/2 local console. For USB local console, connect the USB keyboard to either one of USB local port and USB mouse to the other USB port. -
Page 15: Cat5 Transmitter Module
8/16-Port IP KVM Switch IP-Module Serial Power Control The IP Module comes with a serial port for connecting to any serial device, such as serial PDU (Power Distribution Unit) to provide remote power control, such as power on, power off, and power cycle for the connected computers/servers. -
Page 16: Power Up Sequence
8/16-Port IP KVM Switch 2.5 Power Up Sequence Double check whether all cables/connectors are properly connected. You can check the color of keyboard and mouse connectors to ensure the connectors and cables are connected correctly. The recommended Power Up sequence is as follows: Monitor, KVM Switch, finally the Computers. Verify that all servers connected to the KVM Switch are powered on. -
Page 17: Daisy Chain Connection
8/16-Port IP KVM Switch 2.6 Daisy Chain Connection Use one end of daisy chain cable to connect to the Daisy Chain port of Master KVM switch and connect the other end of daisy chain cable to the Local Console port of the next Slave KVM switch. Please repeat the connection procedures for next Slave KVM switch. - Page 18 8/16-Port IP KVM Switch You can also daisy chain through computer port. This daisy chain can work with other brand of KVM switch, but you need to change the Hotkey of slave KVM switches so that the master and slave KVM switches do not use the same Hotkey.
-
Page 19: Usage
8/16-Port IP KVM Switch 3 Usage Now that you have connected your console and servers to your KVM Switch, it is ready for use. You can control the KVM switch by three methods: Using push buttons located on the front panel of the KVM Switch Through the OSD (On-Screen Display) Using hot-key commands through the console keyboard It takes approximately 1-2 seconds for the video signal to refresh after switching servers. -
Page 20: Firmware Upgrade
8/16-Port IP KVM Switch 3.4 Firmware Upgrade Please follow the following procedures: Power off the KVM switch. Prepare the DC2.5M/DB9F cable, plug the DC2.5 end to the KVM switch’s phone jack (marked Flash) and the DB9F end to PC serial DB9 port. Power on the KVM unit. -
Page 21: Initial Configuration
4.2 Configuration via Setup Utility By default, the IKVM-8010 / IKVM-16010 will obtain its IP address from a DHCP server in the network. If a DHCP server is found, it may provide a valid IP address, gateway address and net mask. Before you connect IKVM-8010 / IKVM-16010 to your local network, please make sure the corresponding configuration of your DHCP server is completed. -
Page 22: Configuration Via Serial Port
8/16-Port IP KVM Switch 4. On the upper left corner, the MAC addresses of the IKVM-8010 / IKVM-16010 are displayed. To manually detect the MAC address again, press the button “Refresh Devices”. The displayed MAC address is the same MAC address printed on the sticker placed on the bottom of the IKVM-8010 /16010. If the IKVM-8010 / IKVM-16010 are connected via USB, it is classified as an USB device and an appropriate drive letter is chosen for this device. -
Page 23: Keyboard, Mouse, And Video Configuration
IP auto configuration is disabled and subsequently you will be asked for the following network settings. IP [192.168.1.1]: This is the current IP address of the IKVM-8010 / IKVM-16010. This option is only available if IP auto configuration is disabled. Net mask [255.255.255.0]: This is the net mask of the connected IP subnet. -
Page 24: Remote Mouse Settings
Auto Adjust Button once. 4 .4.4 Host System Mouse Settings While the IKVM-8010 / IKVM-16010 works with accelerated mice and are able to synchronize the local with the remote mouse pointer, there are the following limitations, which may prevent this synchronization from working properly: (the following limitations do not apply in case of USB and Mouse Type “MS Windows 2000... -
Page 25: Single And Double Mouse Mode
The IKVM-8010 / IKVM-16010 recognize a limited number of common video modes. When running X11 on the host system, please do not use any custom mode lines with special video modes. If you do, the IKVM-8010 /16010 may not be able to detect them. We recommend using any of the standard VESA video modes, instead. -
Page 26: Remote Usage
Whenever possible, use HTTPS. Telnet A standard Telnet client can be used to access an arbitrary device connected to the IKVM-8010 / IKVM-16010 port via a terminal mode. The primary interface of the IKVM-8010 / IKVM-16010 is the HTTP interface. This is covered extensively in this chapter. -
Page 27: Login And Logout
The address used might be a plain IP address or a host and domain name, in the case where you have given your IKVM-8010 / IKVM-16010 a symbolic name in the DNS. For instance, type the following in the address line of your browser when establishing an unsecured connection: http://<IP address of IKVM-8010 / IKVM-16010 >... -
Page 28: Logout
IKVM-8010 / IKVM-16010. Within the right frame, task-specific information is displayed that depends on the section you have chosen before. Warning: If there is no activity for half an hour, the IKVM-8010 /16010 will log you out, automatically. A click on one of the links will bring you back to the login screen. -
Page 29: The Remote Console
Remote Console window. The Remote Console window is a Java Applet that tries to establish its own TCP connection to the IKVM-8010 /16010. The protocol that is run over this connection is neither HTTP nor HTTPS, but RFB (Remote Frame Buffer Protocol). Currently, RFB tries to establish a connection to port number 443. - Page 30 Auto Adjust Button If the video display is of bad quality or distorted in some way, press this button and wait a few seconds while the IKVM-8010 / IKVM-16010 tries to adjust itself for the best possible video quality. Mouse Synchronize Button Pressing this button to activate the mouse synchronization process.
- Page 31 8/16-Port IP KVM Switch Click on this button, an Options menu will appear: A short description of the options follows. • Monitor Only Toggles the Monitor only filter on or off. If the filter is switched on, no remote console interaction is possible, and monitoring is possible.
- Page 32 8/16-Port IP KVM Switch • Mouse Handling The submenu for mouse handling offers two options for synchronizing the local and the remote mouse pointer. Fast Sync--The fast synchronization is used to correct a temporary, but fixed skew. Intelligent Sync--Use this option if the fast sync does not work or the mouse settings have been changed on the host system.
- Page 33 8/16-Port IP KVM Switch • Video Settings Opens a panel for changing the IKVM-8010 / IKVM-16010 video settings. Brightness--Controls the brightness of the picture. Contrast--Controls the contrast of the picture. Clock--Defines the horizontal frequency for a video line and depends on the video mode. Different video card types may require different values here.
-
Page 34: Remote Console Status Line
8/16-Port IP KVM Switch • Soft Keyboard Opens up the Menu for the Soft-Keyboard. Show--Pops up the Soft-Keyboard. The Soft-Keyboard is necessary in case your host system runs a completely different language and country mapping than your administration machine. Mapping--Used for choosing the according language and country mapping of the Soft-Keyboard. •... -
Page 35: Appendix A Cable Connectors Specifications
8/16-Port IP KVM Switch Appendix A Cable Connectors Specifications Cable Connectors 1. 3-in-1 VGA Cable HDDB15 male to one HDDB15 male plus two minis din 6-pin PS/2 connectors. 3-in-1 VGA Cable Connectors 2. PS/2 keyboard to USB Changer PS/2 (keyboard) to USB (keyboard and mouse) changer. PS/2 keyboard to USB Changer 3. -
Page 36: Appendix B Troubleshooting & Frequently Asked Questions
Appendix B Troubleshooting & Frequently Asked Questions Question Answer Make sure the mouse settings in IKVM-8010 / IKVM-16010 match the mouse model. There are some circumstances where the mouse The remote mouse doesn’t synchronization process could behave incorrectly, refer to Section 3.4.3 for work or is not synchronous further explanation. -
Page 37: Appendix C Specifications
8/16-Port IP KVM Switch Appendix C Specifications Feature Specification Model IKVM-8010 Host Port Connector Host Ports Console Type USB or PS/2 Max. Distance (KVM switch -- 16 feet (5m) Host) Video Resolution(Local Console) 1920 x 1440 Video Resolution(Remote 1680 x 1050 for CAT5-Based 500 feet remote console... - Page 38 8/16-Port IP KVM Switch Feature Specification Model IKVM-16010 Host Port Connector Host Ports Console Type USB or PS/2 Max. Distance (KVM switch -- 16 feet (5m) Host) Video Resolution(Local 1920 x 1440 Console) Video Resolution(Remote 1680 x 1050 for CAT5-Based 500 feet remote console Console) 1280 x 1024 for CAT5-Based 1000 feet remote console 1600 x 1200 for IP-Based remote console...
Need help?
Do you have a question about the IKVM-8010 and is the answer not in the manual?
Questions and answers