Panasonic NV-GS35GN Operating Instructions Manual
Hide thumbs
Also See for NV-GS35GN:
- Operating instructions manual (56 pages) ,
- Service manual (110 pages)

Related Manuals for Panasonic NV-GS35GN


Summary of Contents for Panasonic NV-GS35GN
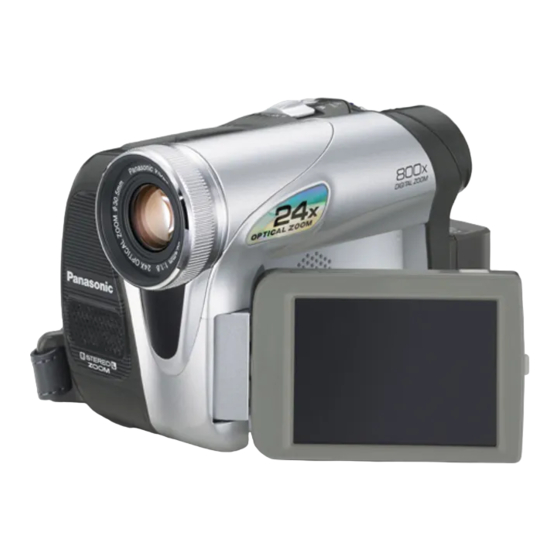
- Page 1 Operating Instructions Digital Video Camera NV-GS35GN Model No. NV-GS25GN Before use, please read these instructions completely. LSQT0893 A...
-
Page 2: Information For Your Safety
Information for your safety Carefully observe copyright laws. Recording of pre-recorded tapes or discs or other published or broadcast material for purposes other than your own private use may infringe As this equipment gets hot during use, copyright laws. Even for the purpose of private operate it in a well-ventilated place;... -
Page 3: Table Of Contents
Contents Information for your safety ........2 Playback mode Playing back tape..........30 Before using Slow-motion playback/ frame-by-frame playback......... 30 Accessories............4 Variable-speed search function......31 Optional..............4 Playback on TV ..........32 Parts identification and handling ......4 Playing back card..........32 Fitting the lens cap.......... -
Page 4: Before Using
Before using Before using Parts identification and handling Accessories ª Camera The followings are the accessories supplied with this product. Built-in LED video light (NV-GS35 only) CGR-D08R -17- Microphone (built-in, stereo) -22- -24- Grip belt Lens ≥Fit the MC protector (VW-LMC30E; optional), the ND filter (VW-LND30E;... - Page 5 Before using (17) (18) (19) (12) (20) (33) (21) (34) (22) (13) (14) (23) (24) (15) (32) (35) (36) (16) (12) Viewfinder -52- (32) Cassette holder Due to limitations in LCD production (33) Cassette eject lever [OPEN/EJECT] technology, there may be some tiny bright or (34) Cassette cover dark spots on the Viewfinder screen.
-
Page 6: Fitting The Lens Cap
Before using (38) The grip belt Shoulder strap fixture Adjust the belt length so it fits your hand. Adjust the belt length. ≥Put the strap through the fixture 1 and through the stopper 2 so it will not come off. Extend part 3 by at least 2 cm. -
Page 7: Using The Viewfinder
Charge the battery before using this product. ≥Battery charging time ( ≥We recommend using Panasonic batteries. ≥If you use other batteries, we cannot guarantee the quality of this product. ≥If the DC input lead is connected to the AC adaptor, then the battery will not get charged. -
Page 8: Charging Time And Recordable Time
Before using Charging time and recordable time Connect the DC input lead to this product. ≥The output plug of the AC mains lead is not The times shown in the table below show the completely connected to the AC adaptor times at a temperature of 25oC and a humidity of socket. -
Page 9: Inserting/Removing A Cassette
Before using ≥The recordable time will become shorter in the ≥After using, make sure to rewind the cassette following cases: completely, remove it, and put it in a case. Store ≥When you use both the viewfinder and the the case in an upright position. ( -51- ≥When condensation is formed on the lens or the LCD monitor simultaneously while rotating... -
Page 10: Inserting/Removing A Card
Before using Inserting/removing a card ª Card access lamp Before inserting/removing a card, be sure to turn the power [OFF]. ≥If the card is inserted or removed with the power turned on, this camera may malfunction or the data recorded on the card may be lost. Open the LCD monitor and then slide the ≥When the camera accesses the card (reading, [2OPEN] Lever to open the card slot cover. -
Page 11: Turning The Camera On
Before using Turning the camera on Selecting a mode When the camera is turned on with the lens cap Rotate the mode dial to select the desired mode. fitted, the automatic white balance adjustment Rotate the mode dial. ≥Set your desired mode to 1. may not function properly. - Page 12 Before using ª Joystick and screen display 4) Card recording mode ([AUTO/MANUAL/FOCUS] switch is set to Push the centre of the joystick, and icons will be [AUTO]) displayed on the screen. Each push switches the display as follows depending on the mode. (In the Tape playback mode or the Picture playback mode, the icons will be automatically displayed on the screen.)
-
Page 13: Switching The Language
Before using Switching the language Move the joystick right or press it to set the selection. You can switch the language on the screen display or the menu screen. Set [LANGUAGE] >> select the desired language. Move the joystick up or down in order to select the item to be set. -
Page 14: Setting Date And Time
[OFF], the battery is still being recharged.) WARNING THE LITHIUM BATTERY IN THIS UNIT MUST ONLY BE REPLACED BY QUALIFIED PERSONNEL. IF THIS IS NECESSARY, CONTACT THE PANASONIC CUSTOMER CARE CENTRE ON 132600 FOR YOUR NEAREST AUTHORIZED SERVICE CENTRE. LSQT0893... -
Page 15: Using The Remote Control
Before using Using the remote control (14) Recording start/stop button [START/STOP] ¢ ª Remote control (15) Playback button [1] (16) Fast forward/cue button [5] Using the remote control supplied will enable (17) Enter button [ENTER] controlling almost all the functions of this camera -13- ¢... -
Page 16: Free Style Remote Control
Before using ª Selecting the remote control mode Free style remote control If 2 cameras are used simultaneously, set the This controller can be used from different high mode for one pair of movie camera and remote and low angles. It is also handy when a tripod is control to [VCR1] and that of the other pair to used. -
Page 17: Recording With The Built-In Led Video Light (Nv-Gs35 Only)
Before using Recording with the built-in LED video light (NV-GS35 only) Gain up mode works with the built-in LED video light to enhance the light’s brightness and brighten the natural colours in a scene. Press the [LIGHT] button. 1 LIGHT ≥The built-in LED video light lights up and the gain up mode is set to on. -
Page 18: Record Mode
≥We recommend using the SP mode for important recording. ≥In order to fully exhibit the performances of the LP mode, we recommend using Panasonic 1) Hold the camera with both hands. cassettes marked LP mode. 2) Run your hand through the grip belt. -
Page 19: Recording On A Tape
Record mode Recording on a tape ª Concerning the remaining tape time indication on the screen Remove the lens cap. ( ≥The remaining tape time is indicated in minutes. (When the camera is turned on with the lens cap (When it reaches less than 3 minutes, the fitted, the automatic white balance adjustment indication starts flashing.) may not function properly. -
Page 20: Check The Recording
Record mode Check the recording Recording still pictures onto a card (Photoshot) The last image recorded is played back for 2 to 3 seconds. After checking, the camera will be set ≥Set to Card Recording Mode. to a recording pause. ≥Set to Tape Recording Mode. -
Page 21: Zoom In/Out Function
Record mode Zoom in/out function 1) Still picture size 2) Number of recordable still pictures You can zoom in up to 30k (24kon NV-GS25) (When no pictures can be recorded, the red optically. light will flash.) ≥Set to Tape/Card Recording Mode. 3) Quality of still pictures Wide-angle recording (zoom out): ª... -
Page 22: Recording Yourself
Record mode ª To use the zoom microphone function Quick start Interlocked with the zooming operation, the This camera will be put into standby in approx. microphone will collect sounds clearly far away 1.7 seconds (1.3 seconds on NV-GS25) after the with the tele-shot or those in the vicinity with the power is turned on. -
Page 23: Backlight Compensation Function
Record mode ≥The zoom magnification may differ from when it ª To cancel the colour night view is in the quick start standby mode and when the function recording starts. Select the night view icon until the night view ≥Since about half the power of normal recording indication disappear. -
Page 24: Fade In/Fade Out Function
Record mode Fade in/fade out function Wind noise reduction function Fade in This reduces the wind noise coming into the The image and audio gradually appear. microphone when recording. ≥Set to Tape Recording Mode. Fade out The image and audio gradually disappear. Set [BASIC] >>... -
Page 25: Recording Images For Wide-Screen Tvs
Record mode Recording images for wide-screen Image stabilizer function Reduces the image shaking due to hand movement when recording. This allows you to record images compatible with ≥Set to Tape Recording Mode. wide-screen TVs. Set [ADVANCE] >> [SIS] >> [ON]. Cinema Function Images are recorded with a black belt appearing along the top and bottom of the screen so that... -
Page 26: Continuous Photoshot
≥Intervals between recording pictures may there are quick motions become longer depending on the card. We 2) [ ] Portrait mode recommend using a Panasonic SD Memory ≥To make persons stand out against the Card. background ≥When using the card formatted by other... -
Page 27: Recording In Natural Colours (White Balance)
Record mode ª To cancel the scene mode function Recording in natural colours Set [BASIC] >> [SCENE MODE] >> [OFF] or set (White balance) the [AUTO/MANUAL/FOCUS] switch to [AUTO]. The automatic white balance function may not Sports mode reproduce natural colours depending on the ≥For slow-motion playback or playback pause scenes or lighting conditions. -
Page 28: Manual Focus Adjustment
Record mode ª About flashing of the [ ] indication ª To restore to the automatic When the manual adjustment mode is adjustment selected Set the [AUTO/MANUAL/FOCUS] switch to ≥Flashing indicates that the white balance [AUTO] or [FOCUS]. previously adjusted is stored. This setting is Manual shutter speed/aperture stored until the white balance is adjusted again. - Page 29 Record mode ª To restore to automatic adjustment Set the [AUTO/MANUAL/FOCUS] switch to [AUTO]. Manual shutter speed adjustment ≥Avoid recording under fluorescent light, mercury light or sodium light because the colour and brightness of the playback image may change. ≥If you increase the shutter speed manually, the sensitivity lowers and accordingly the gain value increases automatically, which may increase the noises on the screen.
-
Page 30: Playback Mode
Playback mode ≥The [ Playback mode ] indication appears. (In order to cancel the repeat playback mode, set Playing back tape [REPEAT PLAY] >> [OFF] or set [OFF/ON] switch to [OFF].) ≥Set to Tape Playback Mode. ≥When you set [USB FUNCTION] >> [WEBCAM] and then connect the USB connection cable, the repeat playback mode is canceled. -
Page 31: Variable-Speed Search Function
Playback mode Variable-speed search function Frame-by-frame playback During playback, press the [;] button on The speed of cue/review playback can be varied. the remote control. (This operation is only available when using Press the [E] button or the [D] button on the remote control.) the remote control. -
Page 32: Playback On Tv
Playback mode Playback on TV Press the [OSD] button on the remote control. Images recorded by this camera can be played back on a TV. ≥Insert a recorded tape into this camera. START/ Connect the movie camera and a TV. PHOTO DATE/ STOP... -
Page 33: Deleting Files Recorded On A Card
Playback mode ª To display multiple playback files Deleting files recorded on a card Multiple files on the card (6 files on 1 screen) are The deleted files cannot be restored. displayed. ≥Set to Picture Playback Mode. Move the [s /VOLr] lever to switch the Move the joystick left or right to select a file images. -
Page 34: Formatting A Card
Playback mode Formatting a card Protecting files on a card Please be aware that if a card is formatted, then Files recorded on a card can be locked so that they all the data recorded on the card will be erased. may not be deleted by mistake. - Page 35 Playback mode ª To complete the settings Press the [MENU] button. ≥DPOF setting made on another camera may not be recognised by this camera. Please perform the DPOF settings on your movie camera. ª To set so that all pictures are not printed Select [CANCEL ALL] in Step 1.
-
Page 36: Edit Mode
Edit mode ≥Connect the movie camera and the recorder Edit mode by using the AV cable 1. Recording from a tape onto a card ≥If the recorder has an S-Video terminal, then also connect an S-Video cable 2 (optional). It Still pictures can be recorded on a memory card allows you to copy clearer image. -
Page 37: Using The Dv Cable For Recording (Digital Dubbing)
Edit mode Using the DV Cable for Recording ª To cancel the standby for recording When the camera is standby for recording, move (Digital Dubbing) the joystick down and select the [∫] icon. By connecting other digital video equipment with ≥Do not plug or unplug the DV cable during DV terminal and the movie camera by using the DV cable VW-CD1E (optional) 1, high-image-... -
Page 38: Audio Dubbing
Edit mode ≥If a tape has a non-recorded portion when the Audio dubbing tape is dubbed, images and sounds may be You can add music or narration to the recorded disturbed when this portion of the tape is played cassette. back. -
Page 39: Menu
Menu Menu ª [TAPE PLAYBACK MENU] Menu list Menu figures and illustrations are provided for easy-to-understand explanations, and so they are different from the actual menu indications. ª [TAPE RECORDING MENU] 1) [BASIC] [DATE/TIME] -41- [USB FUNCTION] (Refer to the operating instructions for PC connection.) 2) [ADVANCE] [BLANK SEARCH]... - Page 40 Menu ª [CARD RECORDING MENU] ª [PICTURE PLAYBACK MENU] 1) [BASIC] 1) [BASIC] [DATE/TIME] -41- [SCENE MODE] -26- [PROTECT] -34- [PICT. QUALITY] -21- [SELF TIMER] -24- 2) [ADVANCE] [CLOCK SET] -14- [DPOF SET] -34- [CARD FORMAT] -34- 2) [ADVANCE] [BURST MODE] -26- 3) [SETUP] [SHTR EFFECT]...
-
Page 41: Menus Related To Taking Pictures
Menu ≥In the following cases, the power may not turn Menus related to taking pictures off even when set [POWER SAVE] >> ª [DATE/TIME] [5 MINUTES]. ≥When connecting to the AC outlet This switches between date and time indications. ≥The movie camera automatically records the (When using the AC adapter) ≥When connecting the USB cable or the DV date and time of picture taking on the tape. -
Page 42: Others
Others Others Outdoor mode -27- White balance adjustment mode Indications -27- WEB CAMERA mode (recording) Various functions and the movie camera status are shown on the screen. Playback indications ¥: Basic indications Recording underway Remaining battery power Playback -30- 0h00m00s00f: Time code Pause -30- 15:30:45:... -
Page 43: Warning/Alarm Indications
Others Warning/alarm indications UNABLE TO A.DUB (LP RECORDED): Audio dubbing cannot be performed If any one of the following indications lights up or because the original recording was in LP flashes, please check the movie camera. mode. Confirmatory indications UNABLE TO A.DUB: Y: A cassette with the accidental erasure You are attempting to perform audio prevention slider placed in the [SAVE]... -
Page 44: Functions Cannot Be Used Simultaneously
Others CHANGE TO MANUAL MODE: ≥Image stabilizer ≥When the Card Recording You are attempting to select the item on the mode is used [SCENE MODE] when the [AUTO/ ≥When the colour night MANUAL/FOCUS] switch is set to [AUTO]. view function is used CAN NOT OPERATE (MOTION DV MODE): ≥When the built-in LED You are attempting to change [D.ZOOM]... -
Page 45: Before Requesting Repair (Problems And Solutions)
Others Before requesting repair (Problems ≥Adjusting the ≥When the colour night and solutions) shutter speed, view function is used ≥When the scene mode is iris/gain Power/Body used 1: The movie camera power cannot be turned ≥When the built-in LED video light lights and the •... - Page 46 Others 5: The movie camera cannot be operated 2: The screen has changed suddenly. though powered up. • Has the demonstration started? In the Tape The movie camera does not operate Recording mode, if you set [DEMO MODE] >> normally. [ON] without inserting a cassette and a card, •...
- Page 47 Others Playback (Sound) Playback (Pictures) 1: Sound is not played back from the built-in 1: Mosaic-pattern noise appears on images speaker of the movie camera. during cue or review playback. 0 Is the volume too low? During playback, push • This phenomenon is characteristic of digital video systems.
- Page 48 Others 5: During playback, [UNPLAYABLE CARD] is 5: The movie camera malfunctions on editing, displayed. dubbing from digital video equipment, or • The image was either recorded in a different using “MotionDV STUDIO 5.3E LE for DV”. format, or data is damaged. •...
-
Page 49: Cautions For Use
1 hour. emits smoke or an unusual smell), immediately When the lens temperature becomes close to the stop operating the unit and consult the Panasonic ambient temperature, the fogging disappears Customer Care Centre on 132600. - Page 50 Others ≥Recordings on the tape may be damaged, or Do not use this movie camera for surveillance images may be distorted, by strong magnetic purposes or other business use. ≥If you use the movie camera for a long time, the fields created by speakers or large motors.
- Page 51 Others ≥To store the battery for a long period of time, we ≥Dust, direct sunlight (ultraviolet rays), and recommend you charge it once every year and humidity may damage the tape. Such usage store it again after you have completely used up may cause damage to the movie camera and the charged capacity.
-
Page 52: Explanation Of Terms
Others ª LCD monitor/viewfinder Explanation of terms LCD monitor ≥When the LCD monitor gets dirty, wipe it with a ª Automatic white balance dry soft cloth. White balance adjustment recognizes the colour ≥In a place with drastic temperature changes, of light and adjusts so the white colour will condensation may form on the LCD monitor. - Page 53 Others ª White balance Recording a subject with little contrast ≥A subject with little contrast, such as a white The image recorded by the movie camera may wall, may become blurry because the movie become bluish or reddish under the influence of camera achieves focus based upon the light sources.
-
Page 54: Specifications
Digital component Please confirm the latest information on the Television system: following website. CCIR: 625 lines, 50 fields PAL colour signal http://panasonic.co.jp/pavc/global/cs Audio (This Site is English only.) Recording system: PCM digital recording 16 bit (48 kHz/2 ch), 12 bit (32 kHz/4 ch) - Page 55 Specifications AC adaptor Information for your safety Power source: AC 110–240 V, 50/60 Hz Power consumption: 19 W DC output: DC 7.9 V, 1.4 A (Movie camera operation) DC 8.4 V, 0.65 A (Battery charging) Dimensions: 61 mm (W) 32 mm (H) 91 mm (D) Weight: Approx.
- Page 56 LSQT0893 A F0105Ke0 ( 7000 A ) Matsushita Electric Industrial Co., Ltd. Web site: http://www.panasonic.co.jp/global/...
Need help?
Do you have a question about the NV-GS35GN and is the answer not in the manual?
Questions and answers