Sign In
Upload
Download
Table of Contents
Contents
Add to my manuals
Delete from my manuals
Share
URL of this page:
HTML Link:
Bookmark this page
Add
Manual will be automatically added to "My Manuals"
Print this page
×
Bookmark added
×
Added to my manuals
Manuals
Brands
Clarion Manuals
Car Video System
VX402E
Owner's manual
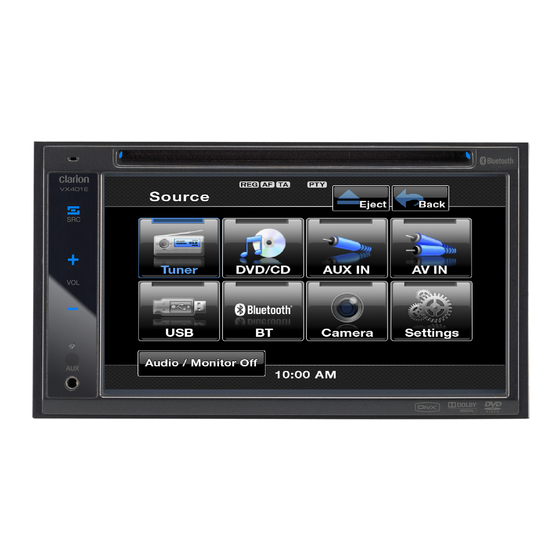
Clarion VX402E Owner's Manual
2-din dvd multimedia station with 6.2-inch
Hide thumbs
1
Table Of Contents
2
3
4
5
6
7
8
9
10
11
12
13
14
15
16
17
18
19
20
21
22
23
24
25
26
27
28
29
30
31
32
33
34
35
36
37
38
39
40
41
42
43
44
45
46
47
48
49
page
of
49
Go
/
49
Contents
Table of Contents
Troubleshooting
Bookmarks
Table of Contents
Table of Contents
Features
Expanding Systems
Precautions
Controls
Operational Panel
Functions of Buttons
Remote Control
Functions of Remote Control Buttons
Cautions on Handling
Operation Panel
USB Port
Cleaning
Handling Discs
DVD Video System
DVD Video Features
Discs
Operations
Basic Operations
DVD Video Player Operations
USB Operations
Ipod Operations
Bluetooth Mode
Radio Operation
DVB-T Operations
Aux In/ Av in
Camera in Operations
Settings Operations
Troubleshooting
General
DVD Player
Usb Device
Bluetooth
TV/VTR (When Connecting an Optional TV Tuner, Etc.)
Error Display
DVD Player
Specifications
Wire Connection Guide
Advertisement
Quick Links
Download this manual
Owner's manual
VX402E
VZ402E
2-DIN DVD MULTIMEDIA STATION WITH 6.2-inch
TOUCH PANEL CONTROL
DVD MULTIMEDIA STATION WITH 7-inch
TOUCH PANEL CONTROL
Table of
Contents
Previous
Page
Next
Page
1
2
3
4
5
Advertisement
Table of Contents
Need help?
Do you have a question about the VX402E and is the answer not in the manual?
Ask a question
Questions and answers
Related Manuals for Clarion VX402E
Car Video System Clarion VX401 Owner's Manual & Installation Manual
2-din dvd multimedia station with 6.2" touch panel control (56 pages)
Car Video System Clarion VX401 Owner's Manual & Installation Manual
2-din dvd multimedia station with 6.2-inch touch panel control (58 pages)
Car Video System Clarion VX409 Owner's Manual & Installation Manual
2-din dvd multimedia station & 6.5-inch touch panel control (140 pages)
Car Video System Clarion VT1010B Brochure
Clarion vt1010b: product brochure (6 pages)
Car Video System Clarion VX400 Owner's Manual & Installation Manual
2-din dvd multimedia station with 6.5-inch touch panel control (161 pages)
Car Video System Clarion VX400 Owners And Installation Manual
2-din dvd multimedia station with 6.5-inch touch panel control (55 pages)
Car Video System Clarion VX404E Owner's Manual
Dvd multimedia station with 6.2" touch panel control (58 pages)
Car Video System Clarion VX402A Owner's Manual
Dvd multimedia station (48 pages)
Car Video System Clarion VX401A Owner's Manual & Installation Manual
2-din dvd multimedia station with 6.2-inch touch panel control, dvd multimedia station with 7-inch touch panel control (50 pages)
Car Video System Clarion VX709 Owner's Manual & Installation Manual
2-din dvd multimedia station with 7-inch touch panel control (82 pages)
Car Video System Clarion VX709 Service Manual
2-din dvd multimedia station with cenet & 7-inch touch panel control (8 pages)
Car Video System Clarion VX316A Owner's Manual
(47 pages)
Car Video System Clarion VX603AU Owner's Manual
Dvd multimedia station with built-in bluetooth & 6.2" touch panel control navigation ready (42 pages)
Car Video System Clarion VX316AU Owner's Manual
Dvd multimedia station with 6.2” touch panel control (47 pages)
Car Video System Clarion VX709E Owner's Manual & Installation Manual
2-din dvd multimedia station with 7-inch touch panel control (85 pages)
Car Video System Clarion VX387AU Owner's Manual
Dvd multimedia station with 6.2” touch panel contro (46 pages)
This manual is also suitable for:
Vz402e
Table of Contents
Print
Rename the bookmark
Delete bookmark?
Delete from my manuals?
Login
Sign In
OR
Sign in with Facebook
Sign in with Google
Upload manual
Upload from disk
Upload from URL


Need help?
Do you have a question about the VX402E and is the answer not in the manual?
Questions and answers