Table of Contents
Advertisement
Quick Links
Advertisement
Table of Contents

Related Manuals for Clarion VX387AU


Summary of Contents for Clarion VX387AU
- Page 1 Owner’s manual VX387AU DVD Multimedia Station With 6.2” Touch Panel Control...
-
Page 2: Table Of Contents
Loading a CD ...............................19 Eject the CD.................................19 USB ..................................19 USB Digital Media Streaming ..........................19 Hot plugging function ............................19 Connecting a USB memory/MTP device ......................20 Watching/Listening to a track with USB memory device ..................20 Unplug the USB memory/MTP device .........................20 VX387AU... - Page 3 14. iPod/iPhone OPERATIONS ..........................27 Select iPod Mode..............................27 Play/Pause Playback ............................27 Switch to Previous/Next Track ..........................27 Fast Forward/Backward ............................27 Tag Display Function ............................27 Repeat Play .................................27 Shuffle Play................................27 Selecting a Song from iPod Menu ........................28 Available iPod Categories ............................28 Supported iPod/iPhone Devices ..........................28 VX387AU...
- Page 4 19. SETTINGS OPERATIONS ..........................36 Select Settings ..............................36 Balance/Fader Adjustment...........................36 Time Alignment Adjustment ..........................36 Sound Effect Controls ............................37 Subwoofer Controls .............................37 Graphic Equalizer ..............................37 Clock Adjustment ..............................38 General Settings ..............................38 About ...................................39 20. TROUBLESHOOTING ............................40 21. ERROR DISPLAY ...............................44 22. SPECIFICATIONS ...............................45 VX387AU...
-
Page 5: Features
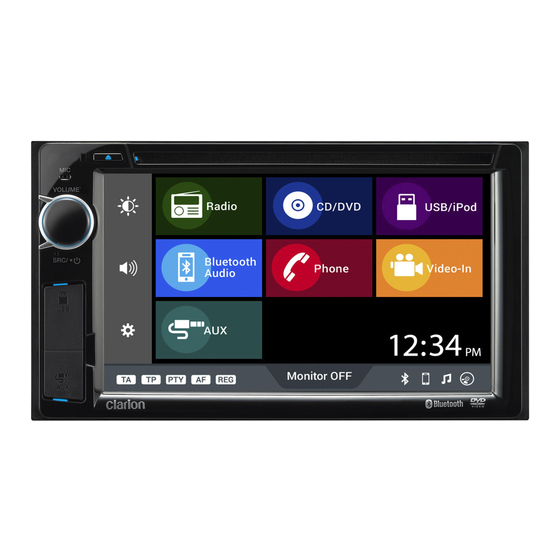
DVB T-2 receiver Programmable steering remote control not available in all countries iPod/iPhone CD/DVD VOLUM Handsfree/Audio Mobile phone via USB flash memory Streaming via Bluetooth USB (MTP) Note: The items listed outside of the unit are the commercial products generally sold. VX387AU... -
Page 6: Precautions
For the installation of this unit or a change in the installa- This unit uses a precision mechanism. Even in the event tion, ask your authorized dealer or a nearest Clarion ser- that trouble arises, never open the case, disassemble the vice center for safety. -
Page 7: Cautions On Handling
Do not use benzene, thinner, car cleaner, etc., as these substances may damage the cabinet or cause the paint to peel. Also, leaving rubber or plastic products in contact with the cabinet for long periods of time may cause stains. VX387AU... - Page 8 Bluetooth SIG, Inc. and any ly to iPod or iPhone, respectively, and has been certified use of such marks by Clarion Malaysia Sdn. Bhd. is under by the developer to meet Apple performance standards. license. Other trademarks and trade names are those of their respective owners.
-
Page 9: Panel Controls
Press and hold the knob to turn off the power. Rotate the knob left or right to decrease or increase the volume. RESET hole Reboot the system. Note: When the RESET button is pressed, all saved memory in the unit are cleared. VX387AU... -
Page 10: Remote Control
Use only the designated battery. When replacing the battery, insert properly, with +/- polarities oriented correctly. Do not subject battery to heat, or dispose of in fire or water. Do not attempt to disassemble the battery. Rear cover Dispose of used batteries properly. VX387AU... -
Page 11: Remote Control Functions
• Press the button in CD/DVD/USB/MTP/iPod/Bluetooth Audio modes switch between pause and playback. [ AUDIO ] • Press the button in DVD video to toggle available audio. [ SUBTITLE ] • Press the button in CD/DVD/USB/MTP video to toggle available subtitles. [ ANGLE ] No function. VX387AU... -
Page 12: Basic Operations
14. Mute button. screen for 4 seconds. Press any area of the touch screen to immediately cancel the volume display. The volume level is from 0 (minimum) to 33 (maximum). The fac- tory default setting for this volume is “13”. VX387AU... -
Page 13: Screen Adjustment
1. When the vehicle is set to reverse gear, the unit will dis- play the reverse camera view. 2. All video display will be disabled and audio will be muted during reverse camera view. 3. The system will return to the previous display after the reverse gear is released. VX387AU... -
Page 14: Radio Mode Operations
2. Press the [FM1/FM2/FM3/AM] button to select the de- 4. Save Button sired band. 5. Autostore Button 3. Press the button to begin auto store. The 6 stations with the strongest reception are stored automatically into 6. TA Button the preset channels. VX387AU... -
Page 15: Storing Preset Memory
EON : Enhanced Other Network TP : Traffic Programme TA : Traffic Announcement * RDS interrupt does not function during AM radio reception. * When set receives RDS signal, and can read PS data, PS appears in the display. VX387AU... -
Page 16: Ta (Traffic Announcement)
2. If a TP station is not received, the unit continues the 2. During PTY standby mode, press the button. The search operation. Press the button to stop the TP “PTY” indicator in the display goes off and PTY standby station searching. mode is cancelled. VX387AU... -
Page 17: Volume Setting Of Ta, Emergency Broadcast, And Pty
2. During PTY standby mode, press the button to search for a PTY broadcast in the direction of a higher frequency. If no station with the selected PTY broadcast can be received, the unit returns to the previous receiving station. VX387AU... -
Page 18: Cd/Usb Mode Operation
Mode The folder name and file name can be displayed as the ISO 9660 Level 1, 2, File System title during MP3/WMA/AAC play. Romeo or Joliet VX387AU... -
Page 19: Watching/Listening To A Disc
If a CD (12 cm) is left in the ejected position for 15 seconds, the CD is automatically reloaded (Auto reload). If you leave the ejected CD without removing it, it will be drawn into the unit automatically after about 15 seconds. VX387AU... -
Page 20: Connecting A Usb Memory/Mtp Device
CAUTION For safety driving purpose, avoid inserting the USB mem- ory/MTP device directly into the USB port. Please use an USB extension cable instead for USB con- nection. Always backup and save important data on your com- puter. VX387AU... -
Page 21: Dvd Video Player Operations
TITLE RPT (Title Repeat) The current playing title will be played repeatedly. The button will be displayed as “TITLE RPT” RPT OFF (Repeat Off) Disengage the unit from repeat play. During repeat off- mode, the button will be displayed as “RPT OFF”. VX387AU... -
Page 22: Switching Audio
Zoom Operation 1. Press the button to zoom the picture. The text will change accordingly. 2. Every time the button is pressed, the text will change as: ZOOM 2x ZOOM 3x ZOOM 1/2x ZOOM 1/3x ZOOM 1/4x VX387AU... -
Page 23: Cd/Usb Video Operations
2. Every time the button is pressed, the text will change as: Switch to Previous/Next File ZOOM 2x ZOOM 3x ZOOM 1/2 ZOOM 1. Press button during playback to play ZOOM 1/4 previous/next file. VX387AU... -
Page 24: Cd/Usb/Mtp Audio Operations
3. When fast backward reach the beginning of the track, the fast backward will be cancelled and restart the track. Note: The fast forward and fast backward speed may differ depending on the media device. VX387AU... -
Page 25: Selecting A Track On The Directory View
Tag Display Function 1. Each time the button is pressed, the display is toggled in the following order: (Album Art + Song Title) (Song Title + Album Name + Artist Name + File Name + Folder Name) VX387AU... -
Page 26: Cd/Usb/Mtp Picture Operations
FLD RPT (Folder Repeat) The pictures in current folder will be played repeatedly. The button will be displayed as “FLD RPT”. OFF (Repeat Off) Disengage the unit from repeat play. During repeat off mode, the button will be displayed as “OFF”. VX387AU... -
Page 27: Ipod/Iphone Operations
“SHUFFLE OFF”. 2. Press the button to resume playback. Note: Shuffle Play for Audiobooks and Podcasts may not be available Switch to Previous/Next Track depending on the device. Press during playback to play previous/ next file. VX387AU... -
Page 28: Selecting A Song From Ipod Menu
Menu will be exited automatically. 6. Press the button to go to the previous category. 7. Press the button to exit iPod Menu. Available iPod Categories Playlists Artists Albums Songs Genres Composers Audiobooks Podcasts* * Availability depends on iPod VX387AU... -
Page 29: Bluetooth® Audio Player Operations
After the connection with a Bluetooth audio player is estab- lished, the play mode is automatically engaged. When playback is not started for some devices, press the button manually. Play/Pause Playback 1. Press the button during playback. 2. To resume playback, press the button. VX387AU... -
Page 30: Bluetooth® Telephone Operations
2. Display returns to previous mode. Ending a call This function allows you to end a call conversation via the car stereo. 1. During an ongoing call conversation, press the button to end the call. 2. Display returns to previous mode. 1. Voicedial Button VX387AU... -
Page 31: Key Input
Only contacts stored in the memory of the phone will be synchronized in the unit’s memory. The synchronization is limited to 240 numbers for the paired phone. This unit only support VCARD 3.0 device. Device with other version of VCARD might not work properly. VX387AU... -
Page 32: History
History. The display will change accordingly. 2. Press the button to download the History manually. Notes: Upon selecting download History manually, all existing call log informa- tion will be erased and replaced with the new downloaded History. VX387AU... -
Page 33: Bluetooth Settings
1. In the Bluetooth Settings tab, select “Pair Device” to enter Pairing mode. 2. Activate Bluetooth on your device and search for “CLARI- ON” on the device. Select “CLARION” to begin pairing. 4. Press button to browse the list. 5. Press the desired contact number button to call the num- ber. -
Page 34: Disconnecting A Bluetooth Device
Auto Answer feature. Reset Bluetooth Information 1. Select “Reset Bluetooth” in the Bluetooth Settings tab. A confirmation screen will be displayed on the unit. 2. Press to confirm, or to cancel the process. Notes: All pairing information will be deleted. VX387AU... -
Page 35: Aux Operations
Notes: Notes: DVB-T2 content availability may vary depending on country/region. Use a composite video connection (CVBS) jack for the video input. For detailed operations, please refer to the user manual of the DVB-T2 receiver. VX387AU... -
Page 36: Settings Operations
0.05 milliseconds (ms). 2. Right Button 5. Press the button to reset the time alignment on all 3. Center Buttons speakers to “0”. 4. Front Button Note: 5. Pointer Display This feature is not available in Phone mode. 6. Rear Button VX387AU... -
Page 37: Sound Effect Controls
High Pass and Low Pass Filters 1.Press the button to select a higher frequency value. 2. Press the button to select a lower frequency value. 3. The ascending order of the phase options are: THROUGH 60 Hz 90 Hz 120 Hz THROUGH… VX387AU... -
Page 38: Clock Adjustment
6. Select one of the 17 functions available to be stored into the selected button: Source/Power Volume Up Volume Down Pause/Play Next Previous Right Left 3. Press the [UP]/[DOWN] buttons to go to the previous/next page. Enter Page Up Page Down Band VX387AU... -
Page 39: About
About tab to view the unit information. the unit. 3. Press the button to save calibration adjustment. 4. Press the button during the calibration process to cancel progress and return to the previous display. VX387AU... -
Page 40: Troubleshooting
Let dry for about 1 hour with the is turned on. internal lens when the car is power on. parked in a humid place. Video images are not displayed. The parking brake is not Check that the parking brake is engaged. engaged. VX387AU... - Page 41 Audio streaming is choppy when This is due to excessive It is advisable not to use the using the connected phone. Bluetooth activity on a low mobile phone while the audio is bandwidth link. Some mobile streaming. phones will face this problem. VX387AU...
- Page 42 Bluetooth is connected but Handsfree (HFP) may not be Make sure Handsfree (HFP) unable to make calls. connected. is connected by checking the display indication. Connect HFP from the device if allowed; otherwise try disconnecting and reconnecting the device again. VX387AU...
- Page 43 Adjust the Brightness properly. The headlight of the vehicle is lit. The display is made dark at night to prevent the glare (When the headlight of the vehicle is lit in the daytime, the display gets dark). Adjust the Brightness properly. VX387AU...
-
Page 44: Error Display
A2DP is not connected to the Disconnect and reconnect the unit. device to the unit. NO VIDEO SIGNAL DVB-T2 receiver is not Connect the receiver/input to connected to the unit. the unit. Video input is not connected to the unit. VX387AU... -
Page 45: Specifications
MPG (.mpg, .mpeg), Operating Temperature : -20ºC ~ +70ºC VOB (.vob), DAT (.dat) Playable image format : JPEG (.jpeg) Rear USB port (Charging only) Specification : USB 2.0 Charging Power : 1.5A iPod/ iPhone Refer to “Supported iPod/iPhone Devices”. VX387AU... - Page 46 VX387AU Printed in Malaysia...
Need help?
Do you have a question about the VX387AU and is the answer not in the manual?
Questions and answers