Advertisement
Quick Links
Part No:
BB1225
TEMP1
Temperature sensor
included
RoHS
compliant
www.sterling-power.com
www.sterling-power-usa.com
Warranty (2 years return to factory)
Copyright © 2023
Sterling Power
All Rights Reserved
Sterling Power Products
12V to 12V 25A Battery to Battery Charger
latest instructions
Handbook
BB1225
Advertisement

Subscribe to Our Youtube Channel
Related Manuals for Sterling Power Products BB1225


Summary of Contents for Sterling Power Products BB1225
- Page 1 Part No: BB1225 latest instructions TEMP1 Temperature sensor included Sterling Power Products 12V to 12V 25A Battery to Battery Charger Handbook BB1225 RoHS compliant www.sterling-power.com www.sterling-power-usa.com Warranty (2 years return to factory) Copyright © 2023 Sterling Power All Rights Reserved...
- Page 2 Safety and Legal Legal Guidelines / Warranty Statement Safety Guidelines Product Information Basic Wiring Diagram / Installation Orientation Annotated diagram of front section of BB1225 Annotated diagram of connector panel Front digital display functions 3 type of product activation Troubleshooting Troubleshooting and fault finding...
- Page 3 This 12V to 12V battery to battery charger is a device typically installed between a starter battery (input) and a house / domestic / service battery (output). The BB1225 is designed to charge up your 12V domestic / service / auxiliary battery from the power generated from your alternator, whilst your engine is running.
- Page 4 STERLING POWER SAFETY AND LEGAL LEGAL GUIDELINES Warranty and Terms Your 100 % satisfaction is our goal. We realise that every customer and circumstance is unique. If you have a problem, question, or comment please do not hesitate to contact us. We welcome you to contact us even after the warranty and return time has passed.
- Page 5 STERLING POWER SAFETY AND LEGAL SAFETY GUIDELINES Product Guidelines Your Sterling Power product should only be utilised for it’s designated purpose. Use the Battery to Battery Charger ONLY : For DC to DC power conversion With fuses protecting both the input and output DC cables In a well ventilated, dry, dust-free and condensation free environment When the Owners Handbook has been read and wholly understood Transport and Storage...
- Page 6 When the input then drops below 12.8V the BB will stop charging. Recommended installation orientation The BB1225 can be mounted in any orientation. However, if the area is prone to getting wet or damp, we recommend the first or second install.
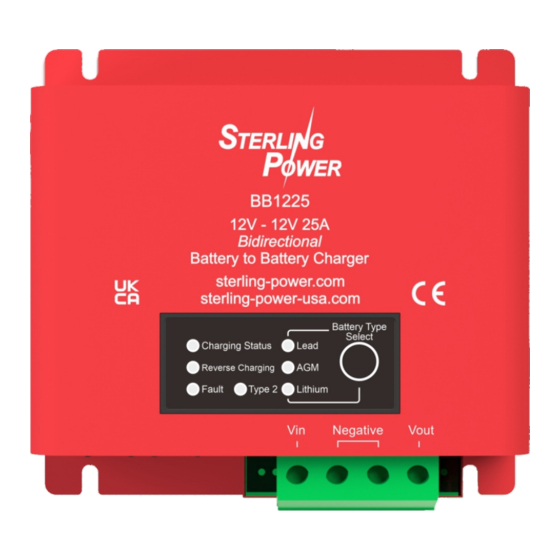
- Page 7 Display panel. More information on page 9. Connection blocks. This region is described in more detail overleaf. This is the area where all the physical installation connections to the BB1225 are made. Also, this region contains additional 2x 5mm mounting feet. PRODUCT INFORMATION...
- Page 8 (Euro 6 engine). Wire a feed from your ignition into this terminal. Ensure that this feed is ~12V when the ignition is live and goes to 0V when ignition is turned off. Once the BB1225 receives its first successful ignition signal it shall render the unit dependent on an ignition signal going forward.
- Page 9 STERLING POWER PRODUCT INFORMATION PANEL Controls | Battery Type Select LED panel Lead Acid Charging Profiles Lithium Charging Profiles Orange LED status: Orange LED status: Fast flashing = Bulk / Fast Charge Fast flashing = Bulk / Fast Charge Slow flashing = Absorption Slow flashing = Absorption...
- Page 10 STERLING POWER PRODUCT INFORMATION Charge control modes - how to get the BB1225 to turn on and begin charging Automatic Mode (Default) Input voltage Charger on - 13.5 -> 16V This mode is the simplest way to install Charger off - <12.8V...
- Page 11 Troubleshooting & Faults Troubleshoot - checks to ensure the Firstly, ensure the BB1225 is wired up correctly. Ensure negatives are common and the BB charger’s negative is BB is installed correctly and receiving connected to the starter battery’s negative - avoid connecting to chassis negative. Voltages between common the correct input and output voltages.
Need help?
Do you have a question about the BB1225 and is the answer not in the manual?
Questions and answers