
Subscribe to Our Youtube Channel
Related Manuals for Leviton EV800


Summary of Contents for Leviton EV800
- Page 1 ® evr-green Electric Vehicle Charging Station Installation Manual Cat. Nos. EV320, EV32W, EV480, EV48W, EV800, EV80W 32A / 48A / 80A EVSE PK-A3429-10-00-5C...
-
Page 3: Table Of Contents
TABLE OF CONTENTS 1 Warnings ............................4 Safety and Specifications ......................5 3 Tools Needed ..........................6 Basic Interface ..........................7 Dimensions ............................8 Status Light Key ..........................9 6.1 Status Description of the Charger Indication Light ..............9 Installation ............................ 10 7.1 Wiring ............................10 7.2 Wall-Mounted Bracket Installation ..................11 Operating Instructions ........................ -
Page 4: Warnings
Model Circuit Breaker/Fuse Rating EV320, EV32W EV480, EV48W EV800, EV80W 100A Incorrect installation and testing of the charger could potentially damage either the vehicle’s battery and/or the device itself. Any resulting damage is excluded from the warranty for the device Ensure that the charging cable is well positioned during charging so it will not be stepped on, tripped over, or subjected to damage or stress. -
Page 5: Safety And Specifications
NFPA 70 Article 625: National Electrical Code, Electric Vehicle Charging System UL840 (Clearance and Creepage) Specifications Model Name EV320, EV32W, EV480, EV48W, EV800, EV80W Rated Input Voltage 200-240 VAC / Single Phase Rated Output Current 32A / 48A / 80A... -
Page 6: Tools Needed
3 TOOLS NEEDED Tools required before installing Product Name Quantity the Wall-Mounted charger: • Wire stripper AC Charger (With Charging Cable) • Phillips screwdriver • Adjustable Wrench User Manual • Voltmeter or digital multimeter (for measuring AC voltage at the installation site) Wall Mounted Bracket •... -
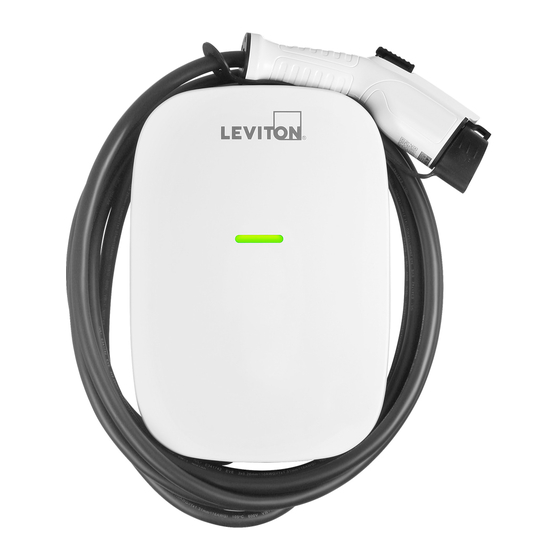
Page 7: Basic Interface
4 BASIC INTERFACE EV320 EV32W EV480 EV48W EV800 LED Light EV80W Indication RFID Card Reader SAE J1772 AC Charging Connector Rear Notch Charging Cable Inlet AC Power Inlet LAN Cable Inlet... -
Page 8: Dimensions
5 DIMENSIONS Main Size of Charger - EV320, EV32W, EV480, EV48W, EV800 and EV80W 3.4 in. (8.6 cm) 9.8 in. Mounting Bracket (24.9 cm) 2.83 in. (7.2 cm) 14.2 in. Ø 0.35 in. (36.1 cm) (0.89 cm) 4.8 in. (12.2 cm) -
Page 9: Status Light Key
6 STATUS LIGHT KEY 6.1 Status Description of the Charger Indication Light Status of Charger Indication Light Standby - Blue Light The READY light stays steady in standby mode. Blue Light Waiting for Charge - Green Light After the vehicle connector is connected to the vehicle inlet, the CHARGE light is Green Light constantly lit. -
Page 10: Installation
7 INSTALLATION 7.1 Wiring 240V Single Phase - 208V 3-Phase, Wye-Connected - CAUTION: The two phases used must each CAUTION: The 208V feed is from a y-connection measure 120V to Ground. Earth ground power grid, and the AC charger can connect to must be connected to neutral at only one L1 and L2, L2 and L3, L1 and L3. -
Page 11: Wall-Mounted Bracket Installation
7 INSTALLATION 7.2 Wall-Mounted Bracket Installation • Set the positions of the four (4) screw holes and drill them, with a diameter of .33 in. (8.5 mm) and a depth of 2.05 in. (52 mm). • Use 4 sets expansion screw and M6 screw to fix the wall-mounted bracket on the wall. •... -
Page 12: Operating Instructions
8 OPERATING INSTRUCTIONS 8.1 Operating Procedures • User authorization • Connect to Vehicle Charging Inlet • Charging Message • Charging completed NOTE: Device may need to be activated or de-activated with RFID cards. NOTE: RFID access control is disabled by default on all units. See section 8.2 for operation with RFID enabled. -
Page 13: To Restrict User Activation Via Rfid Card
8 OPERATING INSTRUCTIONS 8.2 To Restrict User Activation via RFID Card Activation and Usage NOTE: Activation of RFID access control is ONLY required when access to charging will be restricted only for RFID card holders. If no restriction is required (open charging) this step is NOT required. 1. - Page 14 8 OPERATING INSTRUCTIONS 3. To enable charging with RFID card(s) • Charging can be enabled with your standard RFID cards Enable charging. TAP your RFID card to the front of the charger over the image of the RFID. The POWER light will turn solid green when the RFID card has enabled the unit to charge.
-
Page 15: Error And Warning Messages
9 ERROR AND WARNING MESSAGES Status Blue Green Remark 1 flash followed Input OVP Auto Recover by 3 sec pause 2 flashes followed Input UVP Auto Recover by 3 sec pause 3 flashes followed Output OCP Auto Recover by 3 sec pause 4 flashes followed Auto Recover by 3 sec pause... -
Page 16: Maintenance And Repair
10 MAINTENANCE AND REPAIR 10.1 Daily Maintenance WARNING • Avoid moisture or water in the charger. If there is water or moisture, it is necessary to immediately power off to avoid immediate danger, and notify professional personnel to carry out maintenance before next use. -
Page 17: Fcc And Warranty
LIMITED 2 YEAR WARRANTY AND EXCLUSIONS Leviton warrants to the original consumer purchaser and not for the benefit of anyone else that this product at the time of its sale by Leviton is free of defects in materials and workmanship under normal and proper use for two years from the purchase date. Leviton’s only obligation is to correct such defects by repair or replacement, at its option.
Need help?
Do you have a question about the EV800 and is the answer not in the manual?
Questions and answers