
Related Manuals for Daewoo O6HD51H1BG


Summary of Contents for Daewoo O6HD51H1BG
- Page 1 BG Вградена фурна / Ръководство за потребителя EN Built-in Oven / User Manual O6HD51H1BG...
- Page 2 Благодари Ви, че закупихте този продукт. Това ръководство за потребителя съдържа важна информация за безопасността и инструкции относно работата и поддръжката на Вашия уред. Моля, отделете време да прочетете това ръководство за потребителя, преди да използвате уреда си и го запазете за бъдещи справки. Икона...
-
Page 3: Table Of Contents
СЪДЪРЖАНИЕ 1.ПРЕДУПРЕЖДЕНИЯ ЗА БЕЗОПАСНОСТ ..............4 1.1 Общи предупреждения за безопасност ..............4 1.2 Готвене на пара ......................6 1.3 Предупреждения при монтажа ..................7 1.4 По време на употреба ....................8 1.5 По време на почистване и поддръжка ................ 9 2.МОНТАЖ... -
Page 4: Предупреждения За Безопасност
1. ПРЕДУПРЕЖДЕНИЯ ЗА БЕЗОПАСНОСТ • Внимателно прочетете всички инструкции преди да използвате уреда и ги запазете на удобно място за справка при необходимост. • Настоящото ръководство е подготвено за повече от един модел и вашият уред е възможно да няма някои от описаните тук функции. Поради тази... - Page 5 • Не работете с уреда при използване на външен таймер или отделна система за дистанционно управление. • По време на използване уредът се нагорещява. Необходимо е да бъдете внимателни и да не докосвате нагревателните елементи във фурната. • Дръжките могат да се нагорещят след кратък период...
-
Page 6: Готвене На Пара
• Преди да свържете уреда се уверете, че местното захранване (вид на газа и газово налягане или електрическо напрежение и честота) и спецификациите на уреда са в съответствие. Спецификациите на уреда са посочени на етикета. ВНИМАНИЕ: Този уред е създаден само за приготвяне... -
Page 7: Предупреждения При Монтажа
• Не добавяйте вода в резервоара, докато фурната е нагорещена. • При отваряне на вратата на фурната, от вътрешността може да бъде изпусната пара. Отваряйте вратата на фурната с повишено внимание. Съществува риск от изгаряне. • След готвене на пара, във фурната може да остане... -
Page 8: По Време На Употреба
с квалифициран сервизен агент незабавно. Използваните за опаковане на уреда материали (найлон, телбодове, стиропяна и др.) могат да бъдат вредни за децата и трябва да се събират и отстраняват незабавно. • Защитете уреда от влиянията на атмосферата. Не излагайте на въздействия като слънце, дъжд, сняг, прах... -
Page 9: По Време На Почистване И Поддръжка
прегрее. • Не поставяйте чинии или тави за печене директно върху основата на фурната докато готвите. Основата става много гореща и може да причини повреда на продукта. Не оставяйте фурната без наблюдение, когато готвите с твърди или течни масла.. Те могат да... - Page 10 • За да поддържате ефективността и безопасността на уреда, препоръчваме винаги да използвате оригинални резервни части и да се свързвате с упълномощен сервизен агент, в случай че е необходимо. • Не се опитвайте да изстъргвате варовиковите остатъци, които може да се образуват на дъното на...
- Page 11 EО Декларация за съответствие Декларираме, че продуктите ни отговарят на приложимите европейски директиви, решения, регламенти и изискванията, изброени в посочените стандарти. Този уред е проектиран да се използва само за домашно готвене Всяка друга употреба (като отопление на стая) е неправилна и опасна. Инструкциите...
-
Page 12: Монтаж И Подготовка За Употреба
2. МОНТАЖ И ПОДГОТОВКА • Уредът не трябва да се монтира директно над съдомиялни машини, ЗА УПОТРЕБА хладилници, фризери, перални или ПРЕДУПРЕЖДЕНИЕ: Монтирането сушилни. на уреда трябва да се извърши от упълномощен сервиз или квалифициран 2.2 мОнтаж на фурната електротехник, съгласно инструкциите в Уредите... - Page 13 Монтаж под работен плот В Монтаж в отделение в стената След като направите електрическите връзки, вкарайте фурната в шкафа, като я натиснете напред. Отворете вратата на фурната и вкарайте два винта в отворите, разположени на рамката на фурната. Затегнете винтовете, докато рамката...
-
Page 14: Електрическа Връзка И Безопасност
2.3 електрическа връзка шкафа. и безОпаснОст • Уверете се. че всичките връзки са ПРЕДУПРЕЖДЕНИЕ: затегнати адекватно. Електрическото свързване на този • Фиксирайте захранващия кабел уред трябва да се извърши от в кабелната скоба, след което оторизиран сервиз или квалифициран затворете капака. електротехник, съгласно... -
Page 15: Характеристики На Продукта
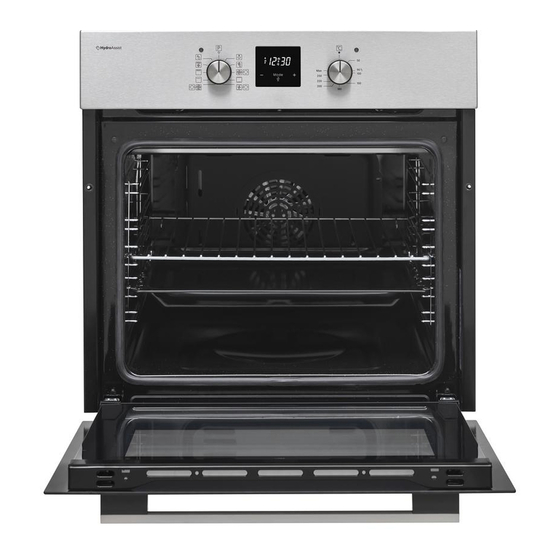
3. ХАРАКТЕРИСТИКИ НА ПРОДУКТА Важно: Спецификациите на продукта са различни и изгледът на продукта може да се различава от показания на следващите фигури. Списък на компонентите 1. Контролен панел 2. Дръжка на вратата на фурната 3. Врата на фурната Контролен панел 4. -
Page 16: Използване На Продукта
4. ИЗПОЛЗВАНЕ НА ПРОДУКТА функцията разпределя равномерно топлината във фурната, готвейки равномерно храната върху всички 4.1 бутОни за управление на фурната решетки. Препоръчва се да подгреете Бутон за управление на функциите на фурната за около 10 минути. фурната С този режим може да бъде използвана Завъртете... - Page 17 храни, като пица. Води до равномерно бъде настроена на 190°C. изпичане за кратко време. Докато Функция за двойно вентилаторът разпределя равномерно изпичане с топлината във фурната, долният вентилатор: нагревателен елемент осигурява Включват се изпичането на храната. термостатът и С този режим може да бъде използвана предупредителните...
-
Page 18: Таблица За Готвене
4.2 таблица за ГОтвене Ястия Бутер тесто 2 - 3 - 4 170-190 35-45 Кекс 2 - 3 - 4 170-190 30-40 Бисквити 2 - 3 - 4 170-190 30-40 Задушаване 175-200 40-50 Пиле 2 - 3 - 4 45-60 Бутер... -
Page 19: Функция Пара
4.3 функция пара Време за Времетраене Тегло Положение Температура Количество добавяне на готвене (прибл. Функция на (⁰C) вода (мл) на вода (мин) грамаж на поставката (мин) (прибл.) храната) Преди Функция включване Вентилатор 30-50 на + Пара фурната. Преди Функция включване Вентилатор... - Page 20 Употреба на Дигитален сензорен таймер 3. След няколко секунди, точката ще спре да премигва и ще продължи да свети. Блокиране на бутоните Блокирането на бутоните автоматично се активира ако таймерът не е бил използван в продължение на 7 Описание на функциите секунди.
- Page 21 спрете предупредителния звук. готвене и температурата като използвате Натиснете „MODE“ за 2 секунди контролните копчета. символът ще изчезне и на дисплея ще 2. Натиснете „MODE“ се появи часовник. докато видите Полуавтоматична настройка на символа „end“ на времето (период на готвене) екрана...
-
Page 22: Употреба На Функция Пара
3. Изберете желания покаже текущият сигнален звук. След времеви период на това, при всяко натискане на бутона „-“, готвене с помощта на ще прозвучава различен сигнал. Има три копчетата „+“ и „-“. различни типа звукови сигнали. Изберете желания звук и не натискайте други бутони. -
Page 23: Аксесоари
4.5 аксесОари поставена правилно. Метална решетка EasyFix Преди първоначална употреба почистете аксесоарите добре с топла вода, почистващ препарат и мека кърпа. Малката тава Малката тава е подходяща предимно за печене на сладкиши. • Поставете този аксесоар на Поставете тавата в центъра на телената правилното... -
Page 24: Почистване Иподдръжка
5. ПОЧИСТВАНЕ И Почистване на стъклените части ПОДДРЪЖКА • Редовно почиствайте стъклените части на уреда. 5.1 пОчистване • Използвайте препарат за почистване ПРЕДУПРЕЖДЕНИЕ: Изключете на стъкло, за да почистите уреда и го оставете да се охлади стъклените части отвън и отвътре. преди... - Page 25 показано по-долу. Отстраняване на вратата на фурната 1. Бутнете стъклото по посока на B и го Преди почистване на стъклото на освободете от фиксиращата скоба (x). вратата на фурната, трябва да Дръпнете стъклото навън по посока на отстраните вратата на фурната както е показано...
-
Page 26: Поддръжка
,Отстраняване на теления рафт За да отстраните телената решетка, дръпнете телената решетка както е показано на фигурата. След като я освободите от скобите (a) я повдигнете нагоре. Сменяем източник на светлина от професионалист Крушката е предназначена специално за употреба в домакински... -
Page 27: Отстраняване На Неизправности И Транспортиране
6. ОТСТРАНЯВАНЕ НА НЕИЗПРАВНОСТИ И ТРАНСПОРТИРАНЕ 6.1 Отстраняване на неизправнОсти Ако все още имате проблем с уреда след проверка на основните стъпки за отстраняване на неизправности, се свържете с упълномощен сервизен техник или квалифициран техник. Проблем Възможна причина Решение Проверете дали има захранване. Фурната... -
Page 28: Технически Данни
7. ТЕХНИЧЕСКИ ДАННИ 7.1 таблица с енерГийната ефективнОст Марка Модел O6HD51H1BG Тип на фурната EЛЕКТРИЧЕСКИ Маса 29.5 Индекс на енергоефективност - обикновени фурни 103.6 Индекс на енергоефективност - с вентилатор 94.0 Енергиен клас Енергоконсумация (електрическа) - обикновени фурни kWh/цикъл 0.87 Енергоконсумация... - Page 29 Thank you for choosing this product. This User Manual contains important safety information and instructions on the operation and maintenance of your appliance. Please take the time to read this User Manual before using your appliance and keep this book for future reference. Icon Type Meaning...
- Page 30 CONTENTS 1.SAFETY INSTRUCTIONS ....................3 1.1 General Safety Warnings ....................3 1.2 For steam cooking ......................5 1.3 Installation Warnings ...................... 6 1.4 During Use........................6 1.5 During Cleaning and Maintenance ................. 8 2.INSTALLATION AND PREPARATION FOR USE ............10 2.1 Instructions for the Installer ..................
-
Page 31: Safety Instructions
1. SAFETY INSTRUCTIONS • Carefully read all instructions before using your appliance and keep them in a convenient place for reference when necessary. • This manual has been prepared for more than one model therefore your appliance may not have some of the features described within. - Page 32 the oven. • Handles may get hot after a short period during use. • Do not use harsh abrasive cleaners or scourers to clean the oven door glass and other surface. They can scratch the surfaces which may result in shattering of the door glass or damage to surfaces.
-
Page 33: For Steam Cooking
heating a room. • Do not use the oven door handles to lift or move the appliance. • All possible measures have been taken to ensure your safety. Since the glass may break, care should be taken while cleaning to avoid scratching. Avoid hitting or knocking the glass with accessories. -
Page 34: Installation Warnings
this remaining water should not be used in the next cooking. 1.3 inStallation WarninGS • Do not operate the appliance before it is fully installed. • The appliance must be installed by an authorised technician. The manufacturer is not responsible for any damage that might be caused by defective placement and installation by unauthorised people. - Page 35 • Take care when opening the oven door during or after cooking. The hot steam from the oven may cause burns. • Do not put flammable or combustible materials in or near the appliance when it is operating. • Always use oven gloves to remove and replace food in the oven.
-
Page 36: During Cleaning And Maintenance
1.5 DurinG cleaninG anD maintenance • Make sure that your appliance is turned off at the mains before carrying out any cleaning or maintenance operations. • Do not remove the control knobs to clean the control panel. • To maintain the efficiency and safety of your appliance, we recommend you always use original spare parts and to call our authorised service agents in case of need. - Page 37 CE Declaration of conformity We declare that our products meet the applicable European Directives, Decisions and Regulations and the requirements listed in the standards referenced. This appliance has been designed to be used only for home cooking. Any other use (such as heating a room) is improper and dangerous.
-
Page 38: Installation And Preparation For Use
2. INSTALLATION AND 2.2 inStallation of the oven PREPARATION FOR USE The appliances are supplied with installation kits and can be installed in a WARNING : This appliance must be worktop with the appropriate dimensions. installed by an authorised service The dimensions for hob and oven person or qualified technician, according to installation are given below. - Page 39 Installation under a worktop Installation in a wall unit After making the electrical connections, insert the oven into the cabinet by pushing it forward. Open the oven door and insert 2 screws in the holes located on the oven frame. While the product frame touches the wooden surface of the cabinet, tighten the screws.
-
Page 40: Electrical Connection And Safety
2.3 electrical connection anD Safety WARNING: The electrical connection Blue of this appliance should be carried out by an authorised service person or qualified electrician, according to the instructions in this guide and in compliance with the current local regulations. WARNING: THE APPLIANCE MUST BE EARTHED. -
Page 41: Product Features
3. PRODUCT FEATURES Important: Specifications for the product vary and the appearance of your appliance may differ from that shown in the figures below. List of Components 1. Control Panel 2. Oven Door Handle 3. Oven Door Control Panel 4. Oven Function Control Knob 5. -
Page 42: Use Of Product
4. USE OF PRODUCT Static Cooking Function: The oven’s thermostat and 4.1 oven controlS warning lights will Oven function control knob switch on, and the Turn the knob to the corresponding symbol lower and upper of the desired cooking function. For the heating elements will details of different functions see ´Oven start operating. -
Page 43: Cooking Table
of oil or fat. It is recommended that you 4.2 cookinG table preheat the oven for about 10 minutes. Warning: When grilling, the oven door must be closed and the oven Dishes temperature should be adjusted to 190°C. Puff Pastry 2 - 3 - 4 170-190 35-45... -
Page 44: For Steam Function
4.3 for Steam function Water Cooking Weight Rack Temp. Amount of Function addition Time (min) (approximate Position (⁰C) water (ml) time (min.) (approx.) food weight g) Before FunFunction starting the 30-50 + Steam oven. Before Fun Function starting the 30-40 1500 + Steam oven. - Page 45 Use of the Digital Touch Timer 3. After a few seconds, the dot will stop flashing and will remain illuminated. Key Lock The key lock automatically activates after the timer has not been used for 7 Function Description seconds. “ ” symbol will appear and remain illuminated.
- Page 46 period of time. A time range between 0 and 3. Use the “+” and 10 hours can be set. Prepare the food for “-” buttons to set the cooking and put it in the oven. desired finishing time. 1. Select the desired cooking function and the temperature using the control knobs.
-
Page 47: Using The Steam Function
4. Press “MODE” until 4.4 uSinG the Steam function you see “end” symbol on the screen. The • Your oven has steam cooking feature. time and the symbols “A” will flash. • The water poured into the water reservoir on the base of the oven creates hot steam during cooking and allows you to obtain a better cooking result from your food. -
Page 48: Accessories
4.5 acceSSorieS The Shallow Tray The EasyFix Wire Rack The shallow tray is best used for baking pastries. Clean the accessories thoroughly with warm water, detergent and a soft clean Put the tray into any rack and push it to the cloth on first use. -
Page 49: Cleaning And Maintenance
5. CLEANING AND and outside of the glass parts. Then, rinse and dry them thoroughly with a dry MAINTENANCE cloth. Cleaning the Stainless Steel Parts (if 5.1 cleaninG available) WARNING: Switch off the appliance and allow it to cool before cleaning is •... - Page 50 3. Place the glass under the location bracket (x) in the direction of C. Removal of the Wire Shelf To remove the wire rack, pull the wire rack as shown in the figure. After releasing it from the clips (a), lift it up. If the oven door is a triple glass oven door, the third glass layer can be removed the same way as the second...
-
Page 51: Maintenance
5.2 maintenance WARNING: The maintenance of this appliance should be carried out by an authorised service person or qualified technician only. Changing the Oven Lamp WARNING: Switch off the appliance and allow it to cool before cleaning your appliance. • Remove the glass lens, then remove the bulb. -
Page 52: Troubleshooting&Transport
6. TROUBLESHOOTING&TRANSPORT 6.1 troubleShootinG If you still have a problem with your appliance after checking these basic troubleshooting steps, please contact an authorised service person or qualified technician. Problem Possible Cause Solution Check whether there is power supplied. Oven does not switch Power is switched off. - Page 53 https://daewooelectronics.com/ Service: https://daewooelectronics.com/service 52408910...
- Page 54 Thank you for choosing this product. This User Manual contains important safety information and instructions on the operation and maintenance of your appliance. Please take the time to read this User Manual before using your appliance and keep this book for future reference. Icon Type Meaning...
- Page 55 CONTENTS 1.SAFETY INSTRUCTIONS ....................3 1.1 General Safety Warnings ....................3 1.2 For steam cooking ......................5 1.3 Installation Warnings ...................... 6 1.4 During Use........................6 1.5 During Cleaning and Maintenance ................. 8 2.INSTALLATION AND PREPARATION FOR USE ............10 2.1 Instructions for the Installer ..................
-
Page 56: Safety Instructions
1. SAFETY INSTRUCTIONS • Carefully read all instructions before using your appliance and keep them in a convenient place for reference when necessary. • This manual has been prepared for more than one model therefore your appliance may not have some of the features described within. - Page 57 the oven. • Handles may get hot after a short period during use. • Do not use harsh abrasive cleaners or scourers to clean the oven door glass and other surface. They can scratch the surfaces which may result in shattering of the door glass or damage to surfaces.
-
Page 58: For Steam Cooking
heating a room. • Do not use the oven door handles to lift or move the appliance. • All possible measures have been taken to ensure your safety. Since the glass may break, care should be taken while cleaning to avoid scratching. Avoid hitting or knocking the glass with accessories. -
Page 59: Installation Warnings
this remaining water should not be used in the next cooking. 1.3 inStallation WarninGS • Do not operate the appliance before it is fully installed. • The appliance must be installed by an authorised technician. The manufacturer is not responsible for any damage that might be caused by defective placement and installation by unauthorised people. - Page 60 • Take care when opening the oven door during or after cooking. The hot steam from the oven may cause burns. • Do not put flammable or combustible materials in or near the appliance when it is operating. • Always use oven gloves to remove and replace food in the oven.
-
Page 61: During Cleaning And Maintenance
1.5 DurinG cleaninG anD maintenance • Make sure that your appliance is turned off at the mains before carrying out any cleaning or maintenance operations. • Do not remove the control knobs to clean the control panel. • To maintain the efficiency and safety of your appliance, we recommend you always use original spare parts and to call our authorised service agents in case of need. - Page 62 CE Declaration of conformity We declare that our products meet the applicable European Directives, Decisions and Regulations and the requirements listed in the standards referenced. This appliance has been designed to be used only for home cooking. Any other use (such as heating a room) is improper and dangerous.
-
Page 63: Installation And Preparation For Use
2. INSTALLATION AND 2.2 inStallation of the oven PREPARATION FOR USE The appliances are supplied with installation kits and can be installed in a WARNING : This appliance must be worktop with the appropriate dimensions. installed by an authorised service The dimensions for hob and oven person or qualified technician, according to installation are given below. - Page 64 Installation under a worktop Installation in a wall unit After making the electrical connections, insert the oven into the cabinet by pushing it forward. Open the oven door and insert 2 screws in the holes located on the oven frame. While the product frame touches the wooden surface of the cabinet, tighten the screws.
-
Page 65: Electrical Connection And Safety
2.3 electrical connection anD Safety WARNING: The electrical connection Blue of this appliance should be carried out by an authorised service person or qualified electrician, according to the instructions in this guide and in compliance with the current local regulations. WARNING: THE APPLIANCE MUST BE EARTHED. -
Page 66: Product Features
3. PRODUCT FEATURES Important: Specifications for the product vary and the appearance of your appliance may differ from that shown in the figures below. List of Components 1. Control Panel 2. Oven Door Handle 3. Oven Door Control Panel 4. Timer 5. -
Page 67: Use Of Product
4. USE OF PRODUCT Static Cooking Function: The oven’s thermostat and 4.1 oven controlS warning lights will Oven function control knob switch on, and the Turn the knob to the corresponding symbol lower and upper of the desired cooking function. For the heating elements will details of different functions see ´Oven start operating. -
Page 68: Cooking Table
of oil or fat. It is recommended that you 4.2 cookinG table preheat the oven for about 10 minutes. Warning: When grilling, the oven door must be closed and the oven Dishes temperature should be adjusted to 190°C. Puff Pastry 2 - 3 - 4 170-190 35-45... -
Page 69: For Steam Function
4.3 for Steam function Water Cooking Weight Rack Temp. Amount of Function addition Time (min) (approximate Position (⁰C) water (ml) time (min.) (approx.) food weight g) Static Before Cooking starting the 30-50 Function + oven. Steam Static Before Cooking starting the 30-40 1500 Function +... - Page 70 Use of the Digital Touch Timer 3. After a few seconds, the dot will stop flashing and will remain illuminated. Key Lock The key lock automatically activates after the timer has not been used for 7 Function Description seconds. “ ” symbol will appear and remain illuminated.
- Page 71 period of time. A time range between 0 and 3. Use the “+” and 10 hours can be set. Prepare the food for “-” buttons to set the cooking and put it in the oven. desired finishing time. 1. Select the desired cooking function and the temperature using the control knobs.
-
Page 72: Using The Steam Function
4. Press “MODE” until 4.4 uSinG the Steam function you see “end” symbol on the screen. The • Your oven has steam cooking feature. time and the symbols “A” will flash. • The water poured into the water reservoir on the base of the oven creates hot steam during cooking and allows you to obtain a better cooking result from your food. -
Page 73: Accessories
4.5 acceSSorieS The Shallow Tray The EasyFix Wire Rack The shallow tray is best used for baking pastries. Clean the accessories thoroughly with warm water, detergent and a soft clean Put the tray into any rack and push it to the cloth on first use. -
Page 74: Cleaning And Maintenance
5. CLEANING AND and outside of the glass parts. Then, rinse and dry them thoroughly with a dry MAINTENANCE cloth. Cleaning the Stainless Steel Parts (if 5.1 cleaninG available) WARNING: Switch off the appliance and allow it to cool before cleaning is •... - Page 75 3. Place the glass under the location bracket (x) in the direction of C. Removal of the Wire Shelf To remove the wire rack, pull the wire rack as shown in the figure. After releasing it from the clips (a), lift it up. If the oven door is a triple glass oven door, the third glass layer can be removed the same way as the second...
-
Page 76: Maintenance
5.2 maintenance WARNING: The maintenance of this appliance should be carried out by an authorised service person or qualified technician only. Changing the Oven Lamp WARNING: Switch off the appliance and allow it to cool before cleaning your appliance. • Remove the glass lens, then remove the bulb. -
Page 77: Troubleshooting&Transport
6. TROUBLESHOOTING&TRANSPORT 6.1 troubleShootinG If you still have a problem with your appliance after checking these basic troubleshooting steps, please contact an authorised service person or qualified technician. Problem Possible Cause Solution Check whether there is power supplied. Oven does not switch Power is switched off. - Page 78 https://daewooelectronics.com/ Service: https://daewooelectronics.com/service 52408910...
Need help?
Do you have a question about the O6HD51H1BG and is the answer not in the manual?
Questions and answers