Table of Contents
Advertisement
Quick Links
Assembly and
owner's manual
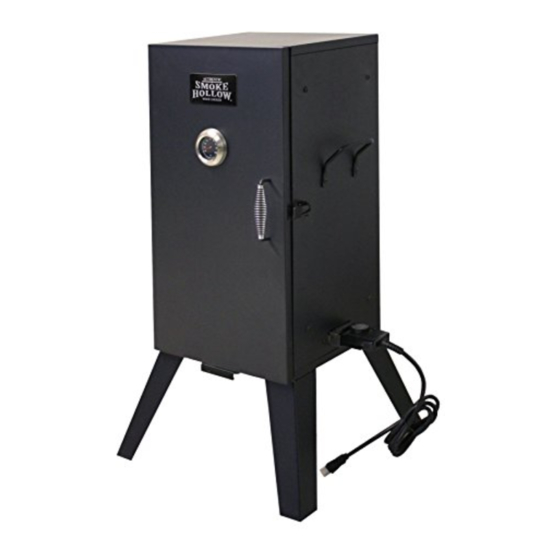
Smoke Hollow Model
30168E
Important safeguards
Household type.
Do not immerse in water .
Unplug from outlet when not in
use before cleaning.
Do not move smoker while unit
is hot.
Failure to follow these instructions could result in fire, electric
shock, personal injury or death.
Outdoor Leisure Products
Outdoor use only.
Keep extension cord connection dry
and off the ground.
Do not touch hot surfaces during use.
Do not use smoker when raining.
Read all of these instructions and
keep them in a safe place for future
reference.
Warning
Advertisement
Table of Contents

Subscribe to Our Youtube Channel
Related Manuals for Smoke hollow 30168E


Summary of Contents for Smoke hollow 30168E
- Page 1 Outdoor Leisure Products Assembly and owner’s manual Smoke Hollow Model 30168E Important safeguards Warning Household type. Outdoor use only. Do not immerse in water . Keep extension cord connection dry and off the ground. Unplug from outlet when not in use before cleaning.
- Page 3 Save this manual and read all instructions and warnings! Warning Read and follow all assembly and operating, care and maintenance instructions in this manual to avoid personal injury or property damage. The purpose of this symbol( )is to call your attention to possible hazards as you assemble and use your smoker.
- Page 4 Save this manual and read all instructions and warnings! Warning The cord should be marked with suffix letter “W-A” and with a tag stating “Suitable for Use with Outdoor Appliances.” Keep cord connection dry and off the ground. Do not allow cord to touch hot surfaces and place it in such a manner so it will not be tripped over or tugged on by children or pets.
- Page 5 Electric Smoker Assembly Instructions Assembly Step 1- Identifying 30166E parts Check your package contents for these parts, make sure you have all of the parts listed below. If not, please call us at 866-475-5180 Hardware bags(30168E): Heat indicator(1set) Name plate(1set) Air vent tube...
- Page 6 Electric Smoker Assembly Instructions Assembly Step 2- Legs Locate these parts: The legs (4pcs), Hardware bag A; Hardware bag A : 1/4-20x5/8” bolts(8pcs) Tools: Phillips head screwdriver 1. With the cabinet in the upright position,begin by removing the door panel from the cabinet assembly by lifting it from the hinges.
- Page 7 Electric Smoker Assembly Instructions Assembly Step 4- Side handles Locate these parts: Side handles (2pcs), H ardware bag C; Hardware 10-24x1/2” bolts/ (4pcs) bag C Tools: Phillips head screwdriver / 3/8” wrench 1. Line up the side handle with the corresponding holes on the side of the cabinet as shown.
- Page 8 Electric Smoker Assembly Instructions Assembly Step 6- Side racks Locate these parts : side racks (6pcs) Insert the rack supports into the mounting holes inside the smoker cabinet as shown. Assembly Step 7- Water pan/Wood chip box/Protective mesh Locate these parts: water pan(1pc)/wood chip box with lid(1set)/Protective mesh (1pc) Tools: Phillips head screwdriver/ 3/8”...
- Page 9 Electric Smoker Assembly Instructions Assembly Step 8- Cooking grids Locate these parts : cooking grids (3pcs) 1. Insert the cooking grids into rack supports as desired. 2. Make sure all cooking grids are level. Assembly Step 9- Door handle Locate these parts: Door handle (1set), Hardware bag E;...
- Page 10 Electric Smoker Assembly Instructions Assembly Step 10- Heat indicator Locate these parts: Heat indicator (1 set) Tools: Wrench Inside of door 1. Insert heat indicator probe through the mounting hole in the front of the door. 2. From the inside of the door panel, place nut onto the mounting thread pole and tighten firmly.
- Page 11 Electric Smoker Assembly Instructions Assembly Step 12- Controller Locate these parts : Controller (1set) Locate the controller and insert the probe into the bracket of the heat element as shown. make sure the connection is secure and tight. Assembly is now complete! Please follow all instructions and safeguards in this manual during operation and storage.
- Page 12 Electric Smoker Operating Instructions Smoker is intended for outdoor use only and should be used on a hard, level, non- combustible surface away from roof overhangs and/or any combustible material. Do not use smoker on wooden surface or any other surface that could burn. Place the smoker in an outdoor area that is protected from the wind and keep the smoker away from open windows or doors to prevent smoke from entering your home.
-
Page 13: Temperature Chart
Electric Smoker Operating Instructions 5. Place food on cooking grid(s) in a single layer and leave room between each piece to allow smoke and moisture to circulate evenly. Slide cooking grid into the wire cooking grid support brackets. Repeat steps for each cooking grid that is used. 6. -
Page 14: Safety, Care And Maintenance
Safety, Care and Maintenance Safety Warning : Always allow the smoker and all components to completely cool before handling or cleaning. Before storing smoker or leaving unattended, remaining embers, hot coals, and ashes must be removed. Be careful to protect yourself and your property. Any remaining embers, hot ashes or hot coals should be placed in a non-combustible metal container and completely saturated with water. -
Page 15: Limited Warranty
Limited Warranty This Smoke Hollow Smoker is guaranteed against broken or damaged parts at time of purchase. All parts carry a 1-year limited warranty with the exception of the water bowl, which is guaranteed to be free of defects for 90 days. Paint is guaranteed to be free of defects for 90 days except for rust, which may appear after repeated use.
Need help?
Do you have a question about the 30168E and is the answer not in the manual?
Questions and answers