Page 1
Fertilizer Applicator NutriMax Liquid Applicator ® 1800 & 2600 Models Serial Number B40640100 & Higher Operator’s Manual Part No. 415257 Refer to Part No. 415258 for Parts Catalog...
— Introduction 1800 & 2600 NutriMax Liquid Applicator Foreword This symbol identifies important safety messages. When you see it, read the message that follows and be alert to the possibility of personal injury. Remember, safety instructions stated in this manual are for your protection. Read them care- fully and follow them closely when working around or using this machine.
The information, specifications, and illustrations in the manual are based on information available at the time it was written. Due to continuing improvements in the design and manufacture of Unverferth products, all specifications and information contained herein are subject to change without notice.
— Introduction 1800 & 2600 NutriMax Liquid Applicator Table of Contents Introduction Foreword ..............................2 Product Information ..........................3 Section I Safety General Hazard Information ........................1-2 Safety Decals ............................1-3 Following Safety Instructions ........................1-4 Before Operating ............................ 1-5 Before Servicing .............................
Page 5
— Introduction 1800 & 2600 NutriMax Liquid Applicator Table of Contents Section II Set Up Pre-Delivery Checklist ........................2-2 Dealer Set Up ........................... 2-3 Closer Wheel Tank Guard Installation (Optional) ................2-11 Tongue Adjustment .......................... 2-14 Units with Fixed Position Hitch (80’/88’/90’ Units) ..............2-14 Units Equipped with Steerable Hitch ..................
Page 6
— Introduction 1800 & 2600 NutriMax Liquid Applicator Table of Contents Section III Operation Preparing Tractor ..........................3-2 Preparing Applicator .......................... 3-2 Hardware ............................. 3-2 Pivot Pins ........................... 3-2 Hitch ............................3-2 Hydraulic System ........................3-2 Tires/Wheels ..........................3-3 Lubrication ..........................3-3 Hitching to the Tractor ........................
— Safety 1800 & 2600 NutriMax Liquid Applicator Section I Safety General Hazard Information ......................1-2 Safety Decals ..........................1-3 Following Safety Instructions ......................1-4 Before Operating ..........................1-5 Before Servicing ..........................1-6 During Operation ..........................1-7 Before Transporting ......................... 1-7 During Transport ..........................
It is true that the designer, the manufacturer, and the safety engineer can help; and they will help, but their combined efforts can be wiped out by a single careless act of the operator. It is said that, “the best kind of a safety device is a careful operator.” We, at Unverferth Mfg.
— Safety 1800 & 2600 NutriMax Liquid Applicator Safety Decals • REPLACE LOST, DAMAGED, PAINTED, OR UNREADABLE DECALS IMMEDIATELY. IF PARTS THAT HAVE DECALS ARE REPLACED, ALSO MAKE SURE TO INSTALL NEW DECALS. THESE DECALS INFORM AND REMIND THE OPERATOR WITH OPERATIONAL INFORMATION AND SAFETY MESSAGES. Part No. 9008715 (20 mph wheels) Part No.
— Safety 1800 & 2600 NutriMax Liquid Applicator Following Safety Instructions • Read and understand this operator’s manual before operating. • All machinery should be operated only by trained and authorized personnel. • To prevent machine damage, use only attachments and service parts approved by the manufacturer.
— Safety 1800 & 2600 NutriMax Liquid Applicator Before Operating • Do not stand between towing vehicle and implement during hitching. • Always make certain everyone and everything is clear of the machine before beginning operation. • Ensure that all applicable safety decals are installed and legible. •...
— Safety 1800 & 2600 NutriMax Liquid Applicator Before Servicing • Avoid working under an implement; however, if it becomes absolutely unavoidable, make sure the implement is safely blocked. • Ensure that all applicable safety decals are installed and legible. •...
— Safety 1800 & 2600 NutriMax Liquid Applicator During Operation • Comply with all laws and product label directions governing safe product application. • Regulate speed to field conditions. Maintain complete control at all times. • Never service or lubricate equipment when in operation. •...
— Safety 1800 & 2600 NutriMax Liquid Applicator Pressurized Oil • Relieve pressure before disconnecting hydraulic lines from tractor, loosening any hydraulic fittings or servicing hydraulic system. See hydraulic power unit manual for procedure to relieve pressure. • High-pressure fluids can penetrate the skin and cause serious injury or death. Seek medical treatment immediately if injured by high-pressure fluids.
— Safety 1800 & 2600 NutriMax Liquid Applicator Chemical Hazards • Always wear personal protective equipment when working with or near chemicals. This equipment includes, but is not limited to: protective eye wear, gloves, shoes, socks, long-sleeved shirt, and long pants. Additional protection may be required for many types of chemicals.
— Safety 1800 & 2600 NutriMax Liquid Applicator Preparing for Emergencies • Keep a first aid kit and properly rated fire extinguisher nearby. • Keep emergency numbers for fire, rescue, and poison control personnel near the phone. Wearing Protective Equipment •...
Page 19
— Set Up 1800 & 2600 NutriMax Liquid Applicator Section II Set Up Pre-Delivery Checklist ........................ 2-2 Dealer Set Up ..........................2-3 Closer Wheel Tank Guard Installation (Optional) ..............2-11 Tongue Adjustment ........................2-14 Units with Fixed Position Hitch (80’/88’/90’ Units) ............2-14 Units Equipped with Steerable Hitch ................
— Set Up 1800 & 2600 NutriMax Liquid Applicator Pre-Delivery Checklist o For units equipped with single wheels, ensure wheel offset is outward. o Torque wheel nuts as as specified in MAINTENANCE section. o Check tire pressure as specified in MAINTENANCE section. o Check track alignment.
— Set Up 1800 & 2600 NutriMax Liquid Applicator Dealer Set Up • EYE PROTECTION AND OTHER APPROPRIATE PERSONAL PROTECTIVE EQUIPMENT MUST BE WORN WHILE SERVICING IMPLEMENT. • KEEP HANDS CLEAR OF PINCH POINT AREAS. • FALLING OBJECTS CAN CAUSE SERIOUS INJURY OR DEATH. DO NOT WORK UNDER THE MACHINE AT ANY TIME WHILE BEING HOISTED.
Page 22
— Set Up 1800 & 2600 NutriMax Liquid Applicator Dealer Set Up (continued) 3. After the transport brackets have been relocated, remove the safe lifting device and lower the toolbar into the wing transport brackets. 4. UNITS WITH TRACKS The tracks are shipped in the narrowest setting. Refer to “Axle Tread Setting” in this section for proper spacing.
Page 23
— Set Up 1800 & 2600 NutriMax Liquid Applicator Dealer Set Up (continued) 7. Unfold the applicator to access the toolbar. Front Wing Hook Plates 8. 80’/88’/90’ TOOLBARS ONLY (411390G or 411390R) Attach the front wing hook plates (411390G or 411390R) as shown in FIG. 2-4 with 3/4”- 10UNC x 3 1/4”...
Page 24
— Set Up 1800 & 2600 NutriMax Liquid Applicator Dealer Set Up (continued) 10. Engage toolbar main lift circuit to raise center section and main wings fully out of the transport rest. 11. Engage the main wing unfold circuit. The toolbar transport latch will unlatch and then swing the main wings forward.
Page 25
— Set Up 1800 & 2600 NutriMax Liquid Applicator Dealer Set Up (continued) 15. Re-engage the main wing unfold circuit. Finish unfolding the wings. Then the pivot- ing coulter tube will rotate down and the outer wings will unfold. Transport Stand in 16.
Page 26
— Set Up 1800 & 2600 NutriMax Liquid Applicator Dealer Set Up (continued) 19. Pivot the coulter arms into working posi- tion. Secure into position by placing the roll Hole 4: 40’ toolbar deeper pin (9501441-210) into the retaining hole. coulter position (see notes) Then install the spiral pin (9501442-209) Hole 3: 40’...
Page 27
— Set Up 1800 & 2600 NutriMax Liquid Applicator Dealer Set Up (continued) 22. Using a safe lifting device rated at a FIG. 2-13 minimum of 125 lbs., install the main wing gauge wheel assembly with the pin handle to the outside of the post (FIG. 2-13 and 2-14).
Page 28
— Set Up 1800 & 2600 NutriMax Liquid Applicator Dealer Set Up (continued) 25. Remove the SMV emblem film and make sure the SMV emblem is visible from the rear of the unit. (FIG. 2-15) NOTE: Ensure front and rear SIS decals are clean and visible after shipping.
— Set Up 1800 & 2600 NutriMax Liquid Applicator Closer Wheel Tank Guard Installation (Opt.) • KEEP HANDS CLEAR OF PINCH POINT AREAS. • SHARP EDGES ON COULTER BLADES CAN CAUSE SERIOUS INJURY. BE CAREFUL WHEN WORKING AROUND COULTER BLADES. 1.
— Set Up 1800 & 2600 NutriMax Liquid Applicator Closer Wheel Tank Guard Installation (Opt.) (continued) NOTE: Closer wheel assembly (69386B) removed FIG. 2-19 1/2-13UNC x 4 1/8 from coulter assembly for clarity. (FIG. 2-19) U-Bolt (901897) 5. Attach the tank guard bracket (415414G/R) 1/2-13UNC to the right-hand wing mast using 1/2”- Lock Nut...
Page 31
— Set Up 1800 & 2600 NutriMax Liquid Applicator Closer Wheel Tank Guard Installation (Opt.) (continued) 7. Secure the top of the right-hand tank guard FIG. 2-21 using two 1/2”-13UNC lock nuts (9003397) 1/2-13UNC and two 1/2”-13UNC x 1” capscrews Lock Nut (9390-099).
— Set Up 1800 & 2600 NutriMax Liquid Applicator Tongue Adjustment Units with Fixed Position Hitch (80’ / 88’ / 90’ Units) 1. Pull applicator in a straight line for a few hundred feet and note how applicator is trailing directly behind the tractor. 2.
— Set Up 1800 & 2600 NutriMax Liquid Applicator Axle Tread Setting Wheel Spacing Combinations • USE EXCEPTIONAL CARE WHEN OPERATING APPLICATOR EQUIPPED WITH SINGLE TIRES AND SET AT NARROW WHEEL SPACING. THE POSSIBILITY OF TIPPING OVER DURING TURNS OR TRAVEL ON ROUGH ROADS IS INCREASED UNDER THESE CON- DITIONS.
— Set Up 1800 & 2600 NutriMax Liquid Applicator Axle Tread Setting (continued) Adjustment • IMPROPER AXLE ADJUSTMENT CAN CAUSE AXLE TO SEPARATE FROM APPLICATOR, RESULTING IN PERSONAL INJURY OR DEATH DUE TO APPLICATOR OR AXLE FALL- ING. • USE CARE THAT APPLICATOR DOES NOT FALL FROM SUPPORT STANDS DURING ADJUSTMENT.
Page 35
— Set Up 1800 & 2600 NutriMax Liquid Applicator Axle Tread Setting (continued) • Always adjust axles equally. 1. Hitch applicator to tractor to help stabilize unit. Refer to “Hitching to the Tractor” in OPERATION section. Ensure tractor is in park and remove key. 2.
Page 36
— Set Up 1800 & 2600 NutriMax Liquid Applicator Axle Tread Setting (continued) Track Tread Toolbar Widths Section A-A 5 1/8 Centerline Outer Axle Plate to End of Fork Tube End of Receiver Tube to Inner Axle Plate 88” Tread Width Section A-A Shown SECTION A-A ead Width 1 3/8...
— Set Up 1800 & 2600 NutriMax Liquid Applicator Axle Tread Setting (continued) Tracks Toe In Adjustment • IMPROPER AXLE ADJUSTMENT CAN CAUSE AXLE TO SEPARATE FROM APPLICATOR, RESULTING IN PERSONAL INJURY OR DEATH DUE TO APPLICATOR OR AXLE FALL- ING.
Page 38
— Set Up 1800 & 2600 NutriMax Liquid Applicator Axle Tread Setting (continued) Tracks Toe In Adjustment (continued) • Always adjust axles equally. 1. Hitch applicator to tractor to help stabilize unit. Refer to “Hitching to the Tractor” in OPERATION section. Ensure tractor is in park and remove key.
— Set Up 1800 & 2600 NutriMax Liquid Applicator Belt Conditioning Condition Track Prior to Initial Usage A new rubber track, fresh from the mold, will be slightly “tacky”. This is a standard con- sequence of the vulcanization (curing) process. The rubber track will perform better if this tackiness is removed, and thus it is recommended that all new rubber tracks be “conditioned”...
— Set Up 1800 & 2600 NutriMax Liquid Applicator Pump Set Up For set up of a PWM (Pulse Width Modulated) or non-PWM pump, refer to your Rate con- troller manual for details. For specific details related to your product pump, please refer to your pump manual.
— Set Up 1800 & 2600 NutriMax Liquid Applicator RCM Set Up Whenever the tractor is turned off or the ECU FIG. 2-28 for the applicator loses power, the following steps will have to be performed in order for the RCM to function properly right away. NOTE: Before programming the RCM, ensure the RCM monitor is connected to the battery.
Page 43
— Set Up 1800 & 2600 NutriMax Liquid Applicator RCM Set Up (continued) NOTE: 40 FT. - 66 FT. units will have 5 sections. 80 FT. - 90 FT. units will have 6 sections. 4. Under “Number of Sections”, select 5 for 40 FT.
Page 44
— Set Up 1800 & 2600 NutriMax Liquid Applicator RCM Set Up (continued) 7. No action required on this screen. Make sure this matches toolbar size and section widths. Continue to next page. (FIG 2-34) FIG. 2-34 8. Under “Pressure Sensor 1”, select “0-250 psi (1-5V)”.
Page 45
— Set Up 1800 & 2600 NutriMax Liquid Applicator RCM Set Up (continued) 10. For the auxilary functions: uncheck both boxes. Click next page. (FIG. 2-37) FIG. 2-37 11. “Product 1” is the set up for the liquid. For “Control Valve Type”, always select “PWM”. (FIG.
Page 46
— Set Up 1800 & 2600 NutriMax Liquid Applicator RCM Set Up (continued) 16. For “Flowmeter Calibration”, check the tag on the flowmeter and enter the value. (FIG. 2-40) 17. Under “Flowmeter Pulse/Units” enter 10 gal. Click next page. (FIG. 2-40) FIG.
Page 47
— Set Up 1800 & 2600 NutriMax Liquid Applicator RCM Set Up (continued) 27. Enter 20 for “Off Rate Alarm” and check FIG. 2-43 box. Click next page. (FIG. 2-43) NOTE: Alarm prompts when over 20% off target rate. NOTE: “Number of Products” corresponds to liquid application.
— Set Up 1800 & 2600 NutriMax Liquid Applicator RCM Set Up (continued) PWM Pump Start Up Procedure (Rate Control Module) Whenever the tractor is turned off or the ECU for FIG. 2-45 the PWM Pump loses power, the following steps will have to be performed in order for the PWM Pump to function properly right away.
— Set Up 1800 & 2600 NutriMax Liquid Applicator Applicator Calibration Determine Required Nozzle Size Use the following procedure to assist with sizing the nozzle and calibrating the applicator. Additional information can be found in the rate controller owner’s manual and also obtained from nozzle manufacturers.
— Operation 1800 & 2600 NutriMax Liquid Applicator Preparing Tractor • Before operating applicator, read the tractor operator’s manual and gain an understanding of its safe methods of operation. • Check the tractor brakes and transport lights. Make sure they are in proper working order. •...
— Operation 1800 & 2600 NutriMax Liquid Applicator Preparing Applicator (continued) Tires/Wheels Check tire pressures and maintain at recommended values listed in the MAINTENANCE section. • IMPROPERLY TORQUED WHEEL NUTS/BOLTS CAN CAUSE A LOSS OF IMPLEMENT CONTROL AND MACHINE DAMAGE. WHEEL NUTS/BOLTS MUST BE CHECKED REGU- LARLY.
— Operation 1800 & 2600 NutriMax Liquid Applicator Hitching to the Tractor Drawbar Hitching (60’, 66’, 80’, 88’, 90’ Toolbars) • DO NOT STAND BETWEEN THE APPLICATOR AND TRACTOR WHEN HITCHING. ALWAYS ENGAGE PARKING BRAKE AND STOP ENGINE BEFORE INSERTING HITCH PIN. Connect the hitch to the tractor drawbar.
— Operation 1800 & 2600 NutriMax Liquid Applicator Hitching to the Tractor (continued) Drawbar Hitching (1800 - 40’/44’ Toolbars) • DO NOT STAND BETWEEN THE APPLICATOR AND TRACTOR WHEN HITCHING. ALWAYS ENGAGE PARKING BRAKE AND STOP ENGINE BEFORE INSERTING HITCH PIN. FIG.
— Operation 1800 & 2600 NutriMax Liquid Applicator Hitching to the Tractor (continued) Transport Chain Always use a transport chain when connecting Transport chain connection shown for the applicator directly to a tractor. Make sure illustration purposes only. Refer to the intermediate chain support is in use.
— Operation 1800 & 2600 NutriMax Liquid Applicator Hitching to the Tractor (continued) Hydraulic Connections After cleaning hydraulic hose couplers, connect to tractor hydraulic circuits as follows: Applicator Solution Pump Hydraulics • The applicator pump is hydraulically driven, and needs to be configured correctly to match FIG.
Page 78
— Operation 1800 & 2600 NutriMax Liquid Applicator Hitching to the Tractor (continued) (continued) Applicator Solution Pump Hydraulics Function Settings Hose Connenctions For Tractors Hose Indentification Extend Retract Flow Detent (Time) Main Lift Up / Down Down 30 GPM Maximum Constant 60 seconds or Wing Fold In / Out...
— Operation 1800 & 2600 NutriMax Liquid Applicator Hitching to the Tractor (continued) Toolbar Hydraulics • DO NOT UNFOLD OR FOLD TOOLBAR WITHOUT HITCHING TO THE TRACTOR. The applicator has 4 sets of hydraulic hoses (5 if equipped with steerable hitch). NOTE: It is recommended to pressurize all hydraulic circuits using the retract outlets on the SCV’s.
— Operation 1800 & 2600 NutriMax Liquid Applicator Jack Usage • UNHITCHING A LOADED APPLICATOR CAN CAUSE SERIOUS INJURY OR DEATH DUE TO TONGUE RISING OR FALLING. ALWAYS HAVE A LOADED APPLICATOR ATTACHED TO A TRACTOR. Use jack to support an empty applicator, never a loaded applicator. Always have a loaded applicator hooked to tractor.
— Operation 1800 & 2600 NutriMax Liquid Applicator Jack Usage (continued) Parked Position (1800 - 40’/44’ Toolbars) Remove jack retaining pin while supporting bottom of jack. Move the jack from storage FIG. 3-9 bushing to lower jack bushing and reinstall pin. Crank jack leg downward to completely remove the hitch weight from tractor drawbar.
— Operation 1800 & 2600 NutriMax Liquid Applicator Transporting Drawbar Connection FIG. 3-11 • USE EXCEPTIONAL CARE WHEN OP- ERATING APPLICATOR EQUIPPED WITH SINGLE TIRES AND SET AT NARROW WHEEL SPACING. THE POSSIBILITY OF TIPPING OVER DURING TURNS OR TRAVEL ON ROUGH ROADS IS IN- CREASED UNDER THESE CONDITIONS.
— Operation 1800 & 2600 NutriMax Liquid Applicator Toolbar Operation (60’, 66’, 80’, 88’, 90’ Toolbars) • PERFORM TOOLBAR UNFOLDING AND FOLDING OPERATIONS ONLY IN AREAS WITH ADEQUATE HEIGHT, WIDTH AND LENGTH CLEARANCES. IN PARTICULAR, BE MIND- FUL OF LOCATION OF OVERHEAD POWER LINES. FAILURE TO DO SO CAN RESULT IN PERSONAL INJURY AND PROPERTY DAMAGE.
— Operation 1800 & 2600 NutriMax Liquid Applicator Toolbar Operation (60’, 66’, 80’, 88’, 90’ Toolbars) (continued) Raising/Lowering Toolbar In The Field • If unit is equipped with injection knives, the tractor must be moving forward when lowering toolbar into the ground. 1.
— Operation 1800 & 2600 NutriMax Liquid Applicator Toolbar Operation (1800 - 40’/44’ Toolbars) • PERFORM TOOLBAR UNFOLDING AND FOLDING OPERATIONS ONLY IN AREAS WITH ADEQUATE HEIGHT, WIDTH AND LENGTH CLEARANCES. IN PARTICULAR, BE MIND- FUL OF LOCATION OF OVERHEAD POWER LINES. FAILURE TO DO SO CAN RESULT IN PERSONAL INJURY AND PROPERTY DAMAGE.
— Operation 1800 & 2600 NutriMax Liquid Applicator Toolbar Operation (1800 - 40’/44’ Toolbars) (continued) Raise/Lower Toolbar In The Field NOTE: The tractor SCV 2 main wing fold/unfold circuit must be running in float at all times. NOTE: If unit is equipped with injection knives, the tractor must be moving forward when lowering toolbar into the ground.
— Operation 1800 & 2600 NutriMax Liquid Applicator Toolbar Operation (1800 - 40’/44’ Toolbars) (continued) Dual Width Toolbar 1. Fold the toolbar to 30’ for the dual width application. (FIG. 3-14) 2. Turn off sections 1 and 5 on the flow con- troller, and turn on the chemsaver valves to the outside coulters on each main wing.
— Operation 1800 & 2600 NutriMax Liquid Applicator Filling Applicator Quick Fill • NEVER LEAVE APPLICATOR UNATTENDED WHILE FILLING. TANK CONTENTS MAY SPILL OUT OF AIR VENTS IF OVERFILLED. • The tank is designed with additional air expansion space in excess of the rated capacity. The full capacity can be reached with the level approximately 6”- 8”...
— Operation 1800 & 2600 NutriMax Liquid Applicator Inductor Basic Operation FIG. 3-16 • The main solution tank should contain at least 50 gallons of liquid. The INDUCTION VALVE, INDUCTOR MIX VALVE, and tank are shown in FIG. 3-16 and 3-17 for reference.
— Operation 1800 & 2600 NutriMax Liquid Applicator Inductor (continued) Jug and Inductor Tank Rinsing • ALWAYS WEAR PERSONAL PROTECTIVE EQUIPMENT WHEN WORKING WITH OR NEAR CHEMICALS. THIS EQUIPMENT INCLUDES, BUT IS NOT LIMITED TO: PROTECTIVE EYE WEAR, GLOVES, SHOES, SOCKS, LONG-SLEEVED SHIRT, AND LONG PANTS. AD- DITIONAL PROTECTION MAY BE REQUIRED FOR MANY TYPES OF CHEMICALS.
— Operation 1800 & 2600 NutriMax Liquid Applicator Orifice and Nozzle Installation • KEEP HANDS CLEAR OF PINCH POINT AREAS. 1. Attach the nozzle body to the nozzle mount plates at the top of the coulter post using FIG. 3-20 two 1/4”...
— Operation 1800 & 2600 NutriMax Liquid Applicator Flow Ball Indicator • ALWAYS WEAR PERSONAL PROTECTIVE EQUIPMENT WHEN WORKING WITH OR NEAR CHEMICALS. THIS EQUIPMENT INCLUDES, BUT IS NOT LIMITED TO: PROTECTIVE EYE WEAR, GLOVES, SHOES, SOCKS, LONG-SLEEVED SHIRT, AND LONG PANTS. AD- DITIONAL PROTECTION MAY BE REQUIRED FOR MANY TYPES OF CHEMICALS.
Page 93
— Operation 1800 & 2600 NutriMax Liquid Applicator Flow Ball Indicator (continued) 2. Select the flow indicator ball required for you application using the calculated flow rate and the guide below. Flow Indicator Ball Selector Guide Part Number Color Flow Rate - U.S. GPM Range 9007782 Green Polyproplene 0.05 - 0.18...
Page 94
— Operation 1800 & 2600 NutriMax Liquid Applicator Flow Ball Indicator (continued) 3. Rotate the manifold assembly down carefully FIG. 3-25 to avoid any residual liquid that may be in the manifold to avoid coming in contact with exposed skin, eyes, or other sensitive areas.
— Maintenance 1800 & 2600 NutriMax Liquid Applicator Lubrication (For 60’, 66’, 80’, 88’, 90’ Toolbars) (continued) To keep your applicator in top operating condition and to assure its proper performance and reliability for a long period of time, periodic inspection and lubrication is a must. Use EP-2 lubricant at the locations described in the chart.
Page 98
— Maintenance 1800 & 2600 NutriMax Liquid Applicator Lubrication (For 1800 40’/44’ Toolbars) To keep your applicator in top operating condition and to assure its proper performance and reliability for a long period of time, periodic inspection and lubrication is a must. The lubrication locations and recommended schedule are as follows: ITEM DESCRIPTION...
— Maintenance 1800 & 2600 NutriMax Liquid Applicator Applicator Maintenance • ELECTROCUTION WILL CAUSE SERIOUS INJURY OR DEATH. THE APPLICATOR IS NOT INSULATED. KEEP AWAY FROM ALL ELECTRI CAL LINES AND DEVICES. ELECTROCUTION CAN OCCUR WITHOUT DIRECT CONTACT. • TIPPING OR MOVEMENT OF THE MACHINE CAN CAUSE SERIOUS INJURY OR DEATH. BE SURE MACHINE IS SECURELY BLOCKED.
— Maintenance 1800 & 2600 NutriMax Liquid Applicator Applicator Maintenance (continued) Coat exposed cylinder piston rods with rust preventative material. Inspect machine for parts that may need to be replaced so they may be ordered in the off season. Lubricate machine at all points outlined. FIG.
— Maintenance 1800 & 2600 NutriMax Liquid Applicator Hydraulically Driven Centrifugal Pump ACE HYD 750 Barrier Fluid Charge • Inflation valve must be assembled in the “IN” port of the regulating valve. 1. Turn regulating valve adjusting knob coun- terclockwise until it is at the minimum FIG.
— Maintenance 1800 & 2600 NutriMax Liquid Applicator Tracks Refer to the Equalizer Track System manual 411200 for proper procedures. ® Toolbar & Wing Adjustments Several areas of adjustment have been designed into the toolbar to maintain proper wing folding operation throughout the life of the toolbar. •...
— Maintenance 1800 & 2600 NutriMax Liquid Applicator Toolbar & Wing Adjustments (continued) Main Wing & Wing Mast Adjustment Stop Bolts The stop bolts on the upper, front side of the Wing Mast Assembly center toolbar align wing mast assemblies so they can lower into the saddle area on the Stop Bolts toolbar.
— Maintenance 1800 & 2600 NutriMax Liquid Applicator Toolbar & Wing Adjustments (continued) Diverter Valve (60’, 66’, 80’, 88’, 90’ Toolbars) The diverter valve relieves the down pressure on the main wing tilt cylinders so that full pressure is not applied to the wing tilt cylinders when the wings are lowered in to the wing rests.
— Maintenance 1800 & 2600 NutriMax Liquid Applicator Toolbar & Wing Adjustments (continued) Center Toolbar & Main Wing Down Pressure (60’, 66’, 80’, 88’, 90’ Toolbars) Proper down pressure is achieved when the gauge wheels contact the ground and maintain the coulter depth.
— Maintenance 1800 & 2600 NutriMax Liquid Applicator Toolbar & Wing Adjustments (continued) Pivoting Coulter Tube Adjustment The pivoting coulter tubes and main wings are parallel to each other when in the working position. The pivoting coulter tubes can be adjusted if the pivoting coulter tubes and main wings are not parallel by adding or removing the shims.
— Maintenance 1800 & 2600 NutriMax Liquid Applicator Toolbar & Wing Adjustments (continued) Outer Wing Adjustment (continued) Outer Wing Down Pressure Main Wing Down Pressure Adjustment Outer wing down pressure is determined by Port 7A how much pressure it takes to fold the outer Outer Wing wings into the operating position.
— Maintenance 1800 & 2600 NutriMax Liquid Applicator Toolbar & Wing Adjustments (continued) Sequence Valve Adjustments (40’ Toolbars / 1800 Models) During sequence valve adjustment, disengage hydraulics, use ¼ turn adjustment, and then engage to check. Smaller increments may be used for fine tuning if needed. Cartridge adjustment requires the following tools (FIG.
— Maintenance 1800 & 2600 NutriMax Liquid Applicator Toolbar & Wing Adjustments (continued) Sequence Valve Adjustments (60’, 66’, 80’, 88’, 90’ Toolbars) During sequence valve adjustment, disengage hydraulics, use ¼ turn adjustment, and then engage to check. Smaller increments may be used for fine tuning if needed. Cartridge adjustment requires the following tools (FIG.
— Maintenance 1800 & 2600 NutriMax Liquid Applicator Center Toolbar & Wing Mast Cylinder End Replacement (80’, 88’, 90’ Toolbars) The following instructions are for replacing the center toolbar cylinder end weldments and cylinder pins. • TIPPING OR MOVEMENT OF THE MACHINE CAN CAUSE SERIOUS INJURY OR DEATH. BE SURE MACHINE IS SECURELY BLOCKED.
Page 111
— Maintenance 1800 & 2600 NutriMax Liquid Applicator Center Toolbar & Wing Mast Cylinder End Replacement (80’, 88’, 90’ Toolbars) (Continued) 2. Unscrew the 3/8-16UNC lock nut (9928) and remove hose holder (9006039), 3/8 FIG. 4-17 flat washer (9006212) and 3/8-16UNC x 3 3/8 Flat Hose Holder capscrew (9390-063).
Page 112
— Maintenance 1800 & 2600 NutriMax Liquid Applicator Center Toolbar & Wing Mast Cylinder End Replacement (80’, 88’, 90’ Toolbars) (Continued) NOTE: Ensure the clevis is removed from hydraulic cylinder rod end. (FIG. 4-20) FIG. 4-20 Clevis NOTE: Ensure cylinder end weldment grease FIG.
— Maintenance 1800 & 2600 NutriMax Liquid Applicator Coulter Hub Adjustment and Replacement The following instructions are for adjusting and lubricating the hub and replacing the “O”-ring and seal. After the first 100 acres, the hubs should be checked for tightness and wear. •...
Page 114
— Maintenance 1800 & 2600 NutriMax Liquid Applicator Coulter Hub Adjustment and Replacement (continued) • Always replace the “O”-ring and seal if dismantling the hub. Failure to do so could result in premature failure of hub and its components. D. Replace any damaged parts before reassembling the components. Be sure to remove any debris or dirt and repack bearings with an SAE approved hub grease.
— Maintenance 1800 & 2600 NutriMax Liquid Applicator Coulter Spring Replacement The following guidelines are for replacing the spring on the coulters. • KEEP HANDS CLEAR OF PINCH POINT AREAS. • SHARP EDGES ON COULTER BLADES CAN CAUSE SERIOUS INJURY. BE CAREFUL WHEN WORKING AROUND COULTER BLADES.
— Maintenance 1800 & 2600 NutriMax Liquid Applicator Coulter Post Mount Bracket Adjustment • The following instructions are for installing a bolt-on coulter post shim kit (414905B) for original style coulter post mounts. This kit is not for current style coulter post mounts. •...
Page 117
— Maintenance 1800 & 2600 NutriMax Liquid Applicator Closer Wheel Adjustment and Replacement (Opt.) The following guidelines are for adjusting and replacing the closer wheel on the coulters. • KEEP HANDS CLEAR OF PINCH POINT AREAS. • SHARP EDGES ON COULTER BLADES CAN CAUSE SERIOUS INJURY. BE CAREFUL WHEN WORKING AROUND COULTER BLADES.
Page 118
— Maintenance 1800 & 2600 NutriMax Liquid Applicator Closer Wheel Adjustment and Replacement (Opt.) (continued) 3. Remove four 1/2”-13UNC x 1 1/2” carriage FIG. 4-29 bolts (9501993-104) and four 1/2”-13UNC lock nuts (9501443-034) retaining the hub 1/2-13UNC 1/2-13UNC x 1 1/2 assembly (69161B) on the closer wheel Lock Nut Carriage Bolt...
— Maintenance 1800 & 2600 NutriMax Liquid Applicator Filters (For 1800 - 40’ & 44’ Toolbars) This applicator uses two filters to help ensure proper operation. These filters will need to be cleaned periodically during use and prior to applicator storage. •...
— Maintenance 1800 & 2600 NutriMax Liquid Applicator Filters (For 1800 - 40’ & 44’ Toolbars) (continued) Secondary Filter A secondary filter is located on the tongue near the toolbar electric valves. This filter, similar in construction to the primary filter, is used to eliminate the need for strainers at the tips. To clean this filter, first drain the filter housing.
— Maintenance 1800 & 2600 NutriMax Liquid Applicator Filters (60’, 66’, 80’, 88’, 90’ Toolbars) This applicator uses two filters to help ensure proper operation. These filters will need to be cleaned periodically during use and prior to applicator storage. •...
— Maintenance 1800 & 2600 NutriMax Liquid Applicator Filters (60’, 66’, 80’, 88’, 90’ Toolbars) (continued) Secondary Filter A secondary filter is located on the toolbar center section, just in front of the toolbar electric valves (FIG. 4-34). This filter, similar in construction to the primary filter, is used to eliminate the need for strainers at the tips.
— Maintenance 1800 & 2600 NutriMax Liquid Applicator Winterizing • ALWAYS WEAR PERSONAL PROTECTIVE EQUIPMENT WHEN WORKING WITH OR NEAR CHEMICALS. THIS EQUIPMENT INCLUDES, BUT IS NOT LIMITED TO: PROTECTIVE EYE WEAR, GLOVES, SHOES, SOCKS, LONG-SLEEVED SHIRT, AND LONG PANTS. AD- DITIONAL PROTECTION MAY BE REQUIRED FOR MANY TYPES OF CHEMICALS.
— Maintenance 1800 & 2600 NutriMax Liquid Applicator Troubleshooting Problem Possible Cause Corrective Action Check tractor SCV flow setting. Check hydraulic oil level in Inadequate oil flow tractor. Remove the valves from the block. Lubricate the valve and re-check for No toolbar functions Valve sticking easy movement.
— Maintenance 1800 & 2600 NutriMax Liquid Applicator Wheel, Hub and Spindle Disassembly and Assembly • TIPPING OR MOVEMENT OF THE MACHINE CAN CAUSE SERIOUS INJURY OR DEATH. BE SURE MACHINE IS SECURELY BLOCKED. • FALLING OBJECTS CAN CAUSE SERIOUS INJURY OR DEATH. DO NOT WORK UNDER THE MACHINE AT ANY TIME WHILE BEING HOISTED.
Page 138
— Maintenance 1800 & 2600 NutriMax Liquid Applicator Wheel, Hub and Spindle Disassembly and Assembly (continued) 5. Inspect the spindle and replace if necessary. If spindle does not need to be replaced, skip to Step 6; otherwise continue with Step 5. Remove the bolt and lock nut that retain the spindle to the axle.
— Maintenance 1800 & 2600 NutriMax Liquid Applicator Wheels and Tires Wheel Nut Torque Requirements • IMPROPERLY TORQUED WHEEL NUTS/BOLTS CAN CAUSE A LOSS OF IMPLEMENT CONTROL AND MACHINE DAMAGE. TORQUE WHEEL NUTS/BOLTS TO VALUES IN TABLE. CHECK TORQUE BEFORE USE, AFTER ONE HOUR OF UNLOADED USE OR AFTER FIRST LOAD, AND EACH LOAD UNTIL WHEEL NUTS/BOLTS MAINTAIN TORQUE VALUE.
Do not exceed maximum recommended tire pressure. Tire Pressure for Top Air Sprayers Load Index / Ply Tire Make Tire Size Rating Unverferth Tire Part # Max PSI Firestone 99061 480/80R42 R-1 151 A8 Goodyear 99495...
— Maintenance 1800 & 2600 NutriMax Liquid Applicator Wheels and Tires (continued) Tire Warranty For questions regarding new tire warranty, please contact your local original equipment tire dealer. Used tires carry no warranty. Following are phone numbers and Websites for your convenience: Firestone www.firestoneag.com...
— Maintenance 1800 & 2600 NutriMax Liquid Applicator Complete Torque Chart Capscrews - Grade 5 NOTE: • Grade 5 capscrews can be identified by three radial dashes on the head. • For wheel torque requirements, refer to Wheels and Tires. •...
— Maintenance 1800 & 2600 NutriMax Liquid Applicator Hydraulic Fittings – Torque and Installation SAE Flare Connection (J. I. C.) 1. Tighten nut with finger until it bottoms the seat. 2. Using a wrench, rotate nut to tighten. Turn nut 1/3 turn to apply proper torque. SAE Straight Thread O-Ring Seal 1.
Need help?
Do you have a question about the NutriMax 1800 and is the answer not in the manual?
Questions and answers
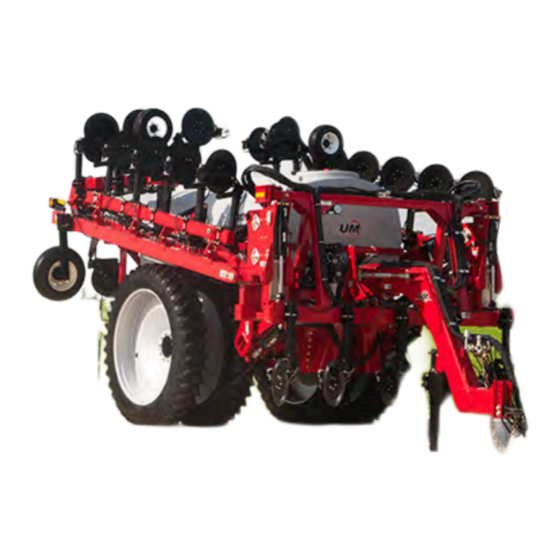
Parts breakdown of steerable hitch valve block
The parts breakdown for the steerable hitch valve block for Unverferth part number 1800 includes:
- 1 Plate-Bracket, Valve (Part 410419)
- 1 Rod-Handle, Dump Valve (Part 411907)
- 1 3" STU1B3BY Valve
- 2 HCS 3/8 x 5 1/2 UNC GR5 FPT bolts (Part 9390-070)
- 2 Flat Washer 3/8 SAE (Part 9405-074)
- 4 Hex Nut/Large Flange 1/4-20 UNC (Part 97189)
- 4 Flange Screw 1/4-20 x 3/4 (Part 97420)
- 1 Locknut 1/4-20 (Part 9936)
These components are associated with the valve block in the steerable hitch system.
This answer is automatically generated