
Subscribe to Our Youtube Channel
Related Manuals for Tapo RV30


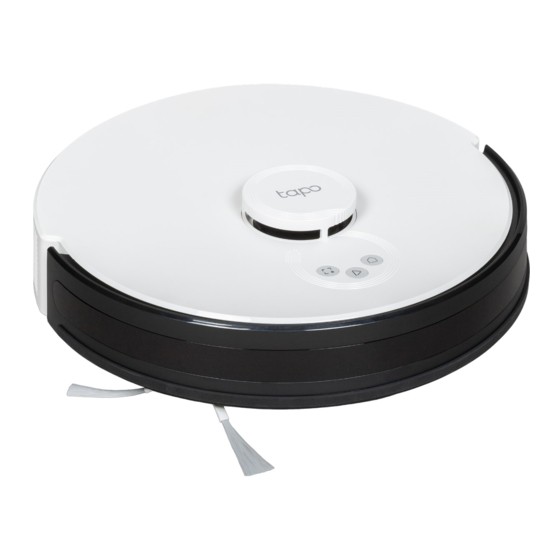
Summary of Contents for Tapo RV30
- Page 1 User Manual LiDAR Navigation Robot Vacuum & Mop *Images may differ from actual products. ©2023 TP-Link 7106510062 REV1.2.0...
- Page 3 IMPORTANT SAFETY INSTRUCTIONS READ ALL INSTRUCTIONS BEFORE USING THIS APPLIANCE WARNING – To reduce the risk of fire, electric shock, or injury: • Do not leave appliance when plugged in. Unplug from outlet when not in use and before servicing. •...
- Page 4 2014/53/EU, 2009/125/EC, 2011 /65/EU and (EU) 2015/863. T he original EU declaration of conformity may be found at https://www.tapo.com/en/support/ce/ TP-Link hereby declares that the device is in compliance with the essential requirements and other relevant provisions of the Radio Equipment Regulations 2017. The original UK declaration of conformity may be found at https://www.tapo.com/support/ukca/...
- Page 5 Safety Information Keep the device away from water, fire, humidity or hot environments. This appliance contains batteries that are only replaceable by skilled persons. Do not attempt to disassemble, repair, or modify the device. If you need service, please contact us. Warning Avoid replacement of a battery with an incorrect type that can defeat a safeguard.
-
Page 6: Package Contents
Package Contents Robot Vacuum* Charging Dock ×1 + Power Adapter x1 HEPA Filter ×1 *One side brush and HEPA Filter installed User Manual Side Brush ×1 Mop Cloth Mount* + User Manual ×1 Cleaning Brush ×1 Washable Mop Cloth ×1 *One mop cloth installed... - Page 7 Overview Power/Clean Robot Vacuum • Press once: Start/pause cleaning. • Press and hold for 5 seconds: Turn on/off the robot vacuum. *For the first use, slide the power switch from OFF to ON to turn on. Dock • Return to the dock to charge. Spot Cleaning/Child Lock •...
- Page 8 LiDAR Dustbin Latch Buttons & LEDs Rubber Plug Cover Water Tank Latch Recharge Sensor Bumper Filter Power Switch Dustbin & Water Tank Dustbin Water Tank Cliff Sensors Open Dustbin Caster Wheel Side Brush Charging Contacts LED Indicator Main Brush Wheel Main Brush Cover Latch Charging Contacts Charging Dock...
-
Page 9: Remove Protective Film
Position the Dock Remove Protective Strip 1. Remove the bottom cover of the dock, connect the Before use, remove the protective strips on power cord to the dock, and then replace the cover. both sides of the front bumper. 2. Place the dock on a level surface, flat against a wall, without obstacles within 1.5m (4.9ft) in front and 0.5m (1.6ft) on left and right. - Page 10 Power On and Charge Slide the power switch from OFF to ON to turn on Place the robot vacuum on the charging dock your robot vacuum. or tap to send it back to the dock to charge. It will return to the dock at the end of a cleaning Notes job and whenever it needs to recharge.
- Page 11 • Cleaning Modes & Preferences Customize vacuum power, water level, cleaning times, and cleaning areas. 2. Open the Tapo app, tap + icon, and select your model. Follow the step-by-step • Scheduled Cleaning instructions to easily set up your robot Set an automatic cleaning schedule, then the robot vacuum.
- Page 12 Cleaning The robot vacuum will automatically explore and clean your home in neat rows. It will return to the charging station at the end of a cleaning job and whenever it needs to recharge. Press Once Press Once In Spot Cleaning mode, it will clean a rectangular area of 1.5m ×...
- Page 13 • Vacuum floors at least 3 times before the first mopping cycle. • To prevent wetting the carpet, add a virtual wall to the carpeted area in the Tapo app. • The ability to cross obstacles is reduced when mopping.
-
Page 14: Care And Maintenance
Care and Maintenance To maintain optimal performance, maintain the robot vacuum according to the following guidelines. Part Maintenance Frequency Replacement Frequency* Dustbin Clean/wash as needed Once a week 3-6 months Filter 6-12 months Main Brush Every 2 weeks 3-6 months Side Brush Once a month Mop Cloth... -
Page 15: Clean The Filter
Empty the Bin Clean the Filter 1. Remove the dustbin and water tank. 1. Remove the dustbin and open the lid. 2. Remove the filter. 2. Open the dustbin to empty the dustbin. 3. Clean the filter with a cleaning brush. 4. -
Page 16: Clean The Main Brush
Clean the Main Brush Clean the Side Brush 1. Turn the robot 1. Pull firmly to remove the side brush and remove any entangled vacuum over, then debris. Wipe with a damp cloth if needed. unlatch and remove 2. Re-install the side brush and press it tightly to ensure it is the main brush cover. - Page 17 Clean the Caster Wheel Clean Main Wheels 1. Pull firmly to remove the caster wheel and remove hair or dirt. Wipe main wheels with a clean, dry cloth. 2. Re-install the caster wheel and press it firmly in place. Main Wheels...
- Page 18 Clean the LiDAR and Sensors Clean the Charging Contacts Wipe the LiDAR and sensors with a clean, dry cloth. Wipe the charging contacts with a clean, dry cloth. LiDAR Recharge Sensor Charging Contacts Cliff Sensors Charging Contacts...
-
Page 19: Troubleshooting
Troubleshooting Issues Solution 1. Check if the power switch on the left side of the robot vacuum is toggled to “ON”. 2. The battery level is low. Please place the robot vacuum on the dock to charge and it will start automatically when it is Setup failure ready. - Page 20 Issues Solution 1. The Wi-Fi signal is poor. Please make sure the robot vacuum is in an area with good Wi-Fi signals. 2. Wi-Fi connection is abnormal. Please reset the Wi-Fi and download the latest app and try again. Failure to connect to Wi-Fi 3.
- Page 21 Voice Prompts for Issues Voice Prompt Solution Error 1: Battery Error. The battery temperature is too high or too low. Please wait until the battery temperature changes to 0℃- 40℃ (32℉- 104℉) . Please refer to the manual or app. Error 2: Wheel Module Error.
-
Page 22: Energy Saving Mode
Energy Saving Mode Energy Saving Mode When the robot vacuum is docked, press and hold the Power button and the Dock button for more than 15 seconds until the LED turns off. And it will enter the Energy Saving mode. In this mode, only the charging feature will work. -
Page 24: Need Some Help
Need some help? Visit www.tapo.com/support/ for technical support, user guides, FAQs, warranty & more...
Need help?
Do you have a question about the RV30 and is the answer not in the manual?
Questions and answers