Table of Contents
Advertisement
Advertisement
Chapters
Table of Contents

Related Manuals for BMW Motorrad C 400 X


Summary of Contents for BMW Motorrad C 400 X
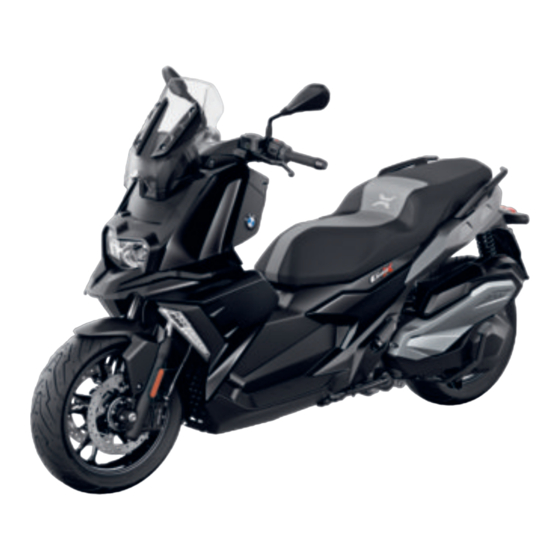
- Page 1 MOTORRAD RIDER'S MANUAL C 400 X MAKE LIFE A RIDE...
- Page 2 Vehicle data Model Vehicle identification number Color number First registration License plate Retailer data Contact in Service Ms./Mr Phone number Retailer's address/Phone (company stamp)
- Page 3 YOUR BMW. We are pleased that you have chosen a BMW Motorrad vehicle and welcome you to the family of BMW riders. Familiarize your- self with your new vehicle so that you can ride safely and confi- dently in all traffic situations.
- Page 4 GENERAL DISPLAYS INSTRUCTIONS Indicator and warning Overview lights Abbreviations and sym- Multifunction display Indicator lights bols Service display Equipment Oil level indicator Technical data Ambient temperature Notice concerning cur- Indicator and warning rent status lights with connectivity Additional sources of TFT display in Pure information view...
- Page 5 TFT DISPLAY Breaking in Brakes General notes Parking the Scooter Principle Refueling Pure and Urban views Refueling General settings Version 1 Onboard computer Version 2 Bluetooth Open fuel filler cap My Vehicle emergency release Navigation Close fuel filler cap Media emergency release Phone Securing the vehicle...
- Page 6 Care products BMW Motorrad Washing your motor- Service cycle BMW Motorrad Cleaning sensitive Service Manual vehicle parts BMW Motorrad Mo- Paint care bility Services Protective wax coat- Maintenance proce- dures Storing the Scooter Maintenance sched- Putting the scooter into operation...
- Page 7 APPENDIX Certificate for elec- tronic immobilizer Certificate for Key- less Ride Declaration of con- formity for anti-theft alarm Certificate for TFT instrument cluster INDEX...
-
Page 8: Version
GENERAL INSTRUCTIONS... -
Page 9: Table Of Contents
OVERVIEW ABBREVIATIONS AND SYMBOLS EQUIPMENT TECHNICAL DATA NOTICE CONCERNING CURRENT STATUS ADDITIONAL SOURCES OF INFORMATION CERTIFICATES AND OPERATING PERMITS DATA MEMORY... -
Page 10: Overview
Failure to sion. avoid this hazard can result in Optional equipment. death or serious injury. BMW Motorrad op- DANGER Hazard with tional equipment is high risk. Failure to avoid already completely in- this hazard results in death or stalled during motor- serious injury. -
Page 11: Equipment
This Rider's Manual describes tion documents or requested optional equipment (OE) from your BMW Motorrad re- offered by BMW and selected tailer or other qualified service optional accessories (OA). This partner or specialist workshop. -
Page 12: Notice Concerning Current Status
Control units are installed in the vehicle. Control units pro- ual. In addition, BMW Motorrad cess data received from vehicle cannot guarantee the total ab- sensors, self-generated data or sence of errors. - Page 13 The vehicle owner can have Vehicle users have the right to a BMW Motorrad retailer or obtain comprehensive informa- other qualified service partner tion without charge from the or specialist workshop read out...
- Page 14 The information can be read out by a BMW Motorrad re-...
- Page 15 Data about the use of Inter- data recorder in the vehicle can net services. This data can be reset by a BMW Motorrad be stored locally in the ve- retailer or other qualified hicle or is on a device con-...
- Page 16 GENERAL INSTRUCTIONS This data is transmitted to third Services parties only upon personal re- General information If the vehicle has a mobile quest as part of the use of on- phone connection, this line services. The data trans- connection makes it possible mitted depends on the selected to exchange data between settings when using the ser-...
- Page 17 tems which are intended for this purpose. Any collection, processing and use of personal data that goes beyond the provision of ser- vices take place only as per- mitted by law, on the basis of a contractual agreement or as a result of consent.
- Page 18 OVERVIEWS...
- Page 19 GENERAL VIEW, LEFT SIDE GENERAL VIEW, RIGHT SIDE UNDERNEATH THE SEAT MULTIFUNCTION SWITCH, LEFT MULTIFUNCTION SWITCH, RIGHT COCKPIT COCKPIT INSTRUMENT CLUSTER INSTRUMENT CLUSTER WITH CONNECTIVITY...
-
Page 20: General View, Left Side
OVERVIEWS GENERAL VIEW, LEFT SIDE 1 Brake fluid expansion tank for the rear wheel brake 149) 2 Under the battery cover: Battery ( 167) Fuses ( 165) Data link connector 175) 3 Spring preload setting 114) 4 Fuel filler opening 126) ( 128) 5 Coolant expansion tank... -
Page 21: General View, Right Side
GENERAL VIEW, RIGHT SIDE 1 Brake fluid expansion tank for the front wheel brake 148) 2 Coolant level indicator 150) 3 Nameplate (on the right frame tube) Vehicle identification num- ber (on the right frame tube) 4 Oil fill location and oil dip- stick ( 144) 5 Emergency release for seat... -
Page 22: Underneath The Seat
OVERVIEWS UNDERNEATH THE SEAT 1 Rider's Manual 2 Onboard vehicle tool kit 142) 3 Payload table Tire pressure table Note about using acces- sory products 4 Unlocking BMW flexcase... -
Page 23: Multifunction Switch, Left
MULTIFUNCTION SWITCH, LEFT 1 High-beam headlight and headlight flasher ( 2 Hazard warning lights 3 Turn indicators ( 4 Horn 5 Rocker button MENU Select displays. ( Call up SETUP. ( Operate the TFT display. 6 Multi-Controller Operating elements... -
Page 24: Multifunction Switch, Right
OVERVIEWS MULTIFUNCTION SWITCH, RIGHT with heated grips Operating heated grips 76). Heated grips with seat heating Operating the rider's seat heating ( 77). Seat heating 3 Emergency-off switch 4 Starter button ( 121) -
Page 25: Cockpit
COCKPIT without Keyless Ride 6 Unlocking the left storage compartment ( 1 Ignition switch/steering lock ( 2 Unlocking the right storage compartment ( 3 Storage compartment, right ( Power socket (in the storage compartment) 180) USB charging port (in the storage compartment) 181) 4 Unlocking the seat... -
Page 26: Cockpit
OVERVIEWS COCKPIT with Keyless Ride 6 Unlocking the left storage compartment ( 1 Control module for Key- less Ride ( 2 Unlocking the right storage compartment ( 3 Storage compartment, right ( Power socket (in the storage compartment) 180) USB charging port (in the storage compartment) 181) 4 Unlocking the seat... -
Page 27: Instrument Cluster
INSTRUMENT CLUSTER without Connectivity 1 Speedometer 2 Indicator and warning lights 3 Multifunction display... -
Page 28: Instrument Cluster With Connectivity
OVERVIEWS INSTRUMENT CLUSTER WITH CONNECTIVITY with Connectivity 4 Photosensor (for adjusting brightness of instrument 1 Indicator and warning lighting) lights with connectivity 2 TFT display ( 3 Anti-theft alarm system with anti-theft alarm sys- tem (DWA) Alarm signal ( 109) with Keyless Ride Indicator light for radio- operated key... - Page 30 DISPLAYS...
- Page 31 INDICATOR AND WARNING LIGHTS MULTIFUNCTION DISPLAY INDICATOR LIGHTS SERVICE DISPLAY OIL LEVEL INDICATOR AMBIENT TEMPERATURE INDICATOR AND WARNING LIGHTS WITH CONNECTIV- TFT DISPLAY IN PURE VIEW TFT DISPLAY IN THE VIEW MENU INDICATOR LIGHTS WITH CONNECTIVITY...
-
Page 32: Indicator And Warning Lights
DISPLAYS INDICATOR AND WARNING LIGHTS 1 Turn indicator, left ( 2 Fuel reserve ( 3 High-beam headlight 4 General warning light 5 Turn signal, right ( 6 Anti-theft alarm system LED ( 109) 7 - with auxiliary head- light Auxiliary headlight 8 ASC ( 9 ABS (... -
Page 33: Multifunction Display
MULTIFUNCTION DISPLAY 1 Clock ( 2 Fuel fill level indicator 3 Warning symbols ( 4 Text field for warnings 5 Set heating stage ( 6 Set heating stage ( 7 Trip odometer ( Service display ( 8 Displays of the onboard computer ( 9 Outside temperature warn- ing (... -
Page 34: Indicator Lights
DISPLAYS INDICATOR LIGHTS Displays Warnings are displayed with appropriate warning lights. Warnings for which no sepa- rate warning light is available are indicated by the 'universal' warning light 1 in conjunction with a warning notice at posi- tion 2 such as or a LAMPF! warning symbol 3 in the multi-... - Page 35 Overview of warning indicators Indicator and Display text Meaning warning lights is displayed. Outside temper- ature warning lights up is displayed. EWS active yellow. lights up is displayed. Radio-operated yellow. key outside re- ception range lights up is displayed. Coolant temper- red.
- Page 36 DISPLAYS Indicator and Display text Meaning warning lights lights up. ABS fault ( flashes ASC intervention rapidly. flashes ASC self-diagno- slowly. sis not completed lights up. ASC error lights up is displayed. BMW flexcase is yellow. open ( is dis- Anti-theft alarm DWALO! played.
- Page 37 Outside temperature warning Have the defective vehicle key replaced, preferably by an au- is displayed. thorized BMW Motorrad re- tailer. Possible cause: The ambient temperature mea- Radio-operated key outside sured at the vehicle is lower reception range than 37 °F (3 °C).
- Page 38 If coolant level is too low: Engine in emergency- Have the cooling system operation mode checked at a specialist lights up yellow. workshop, preferably an authorized BMW Motorrad is displayed. retailer. Possible cause: The coolant or engine oil tem- WARNING perature is too high.
- Page 39 BMW Motorrad retailer. eliminated at a specialist Severe drive malfunction workshop, preferably an au- flashes yellow. thorized BMW Motorrad re- tailer. flashes. Possible cause: The engine control unit has di- Possible cause: agnosed a fault, which can lead The engine control unit has di- to a severe secondary fault.
- Page 40 Light source defect replaced in full; for details lights up yellow. please contact a specialist workshop, preferably an au- is displayed: LAMP! thorized BMW Motorrad re- : low-beam head- LAMPF! tailer. light, high-beam headlight, ABS self-diagnosis not parking lights or front turn completed signal defective.
- Page 41 BMW Motorrad Retailer. min 3 mph (min 5 km/h) ASC intervention Ride off slowly. It must be flashes rapidly. noted that the ASC function is...
- Page 42 Pre- Contact an authorized service Ride-Check. facility, preferably an autho- Possible cause: rized BMW Motorrad retailer. The anti-theft alarm battery Insufficient battery charge no longer has its full capacity. current The operation of the anti-theft lights up red.
-
Page 43: Service Display
Have the malfunction cor- rected as soon as possible at an authorized service facil- ity, preferably an authorized BMW Motorrad Retailer. Fuel down to reserve lights up. If service is due within a month, 1 and the service SERVT! WARNING date 2 are displayed. -
Page 44: Oil Level Indicator
DISPLAYS If service is overdue, the The conditions required for us- service date or the dis- ing the oil level display are as tance covered at which service follows: should have been completed Engine at normal operating is accompanied by the general temperature. - Page 45 temperature drops below this threshold for the first time.
-
Page 46: Indicator And Warning Lights With Connectivity
DISPLAYS INDICATOR AND WARNING LIGHTS WITH CONNECTIVITY with Connectivity 1 Turn indicator, left ( 2 High-beam headlight 3 General warning light 4 Turn signal, right ( 5 ASC ( 6 ABS ( 7 - with auxiliary head- light Auxiliary headlight... -
Page 47: Tft Display In Pure View
TFT DISPLAY IN PURE VIEW with Connectivity Outside temperature 1 Changing operating focus 2 Speedometer 3 Rider info. status line 4 Speed Limit Info ( 5 Clock ( 6 Connection status ( 7 Muting ( 8 Operating assistance 9 Set heating stage, seat heating ( Set heating stage, heated grips (... -
Page 48: Tft Display In The View Menu
DISPLAYS TFT DISPLAY IN THE VIEW MENU with Connectivity Outside temperature warn- ing ( 1 Menu area Outside temperature 2 Speedometer 3 Speed Limit Info ( 4 Rider info. status line 5 Clock Setting the clock ( 92). 6 Connection status Performing Bluetooth pair- ing ( 95). -
Page 49: Indicator Lights With Connectivity
Green CHECK OK 1: no INDICATOR LIGHTS WITH message, values optimal. CONNECTIVITY White circle with small "i" 2: Layout information. Warnings are displayed by the Yellow warning triangle 3: corresponding warning light. warning message, value not Warnings are indicated by the optimal. - Page 50 DISPLAYS White: (---) there is no valid ing the Multi-Controller to the value. Instead of the value, left. Check Control messages are dashes 5 are displayed. dynamically attached as addi- The evaluation of the indi- tional tabs to the pages in the vidual values is possible in 87) menu.
- Page 51 Overview of warning indicators Indicator and Display text Meaning warning lights is displayed. Outside temper- ature warning lights up Radio-operated Remote key not yellow. key outside re- in range. ception range lights up Replacing the bat- Remote key bat- yellow. tery of the key tery at 50%.
- Page 52 DISPLAYS Indicator and Display text Meaning warning lights Anti-theft Anti-theft alarm battery alarm battery discharged discharged. Low engine oil Engine oil level ( level. Check engine oil level. lights up Coolant temper- Coolant tem- red. ature too high perature too high! Drive malfunction Engine!
- Page 53 Indicator and Display text Meaning warning lights lights up. ABS fault ( lights up ABS failure ABS failure! yellow. lights up. flashes ASC intervention rapidly. flashes ASC self-diagno- slowly. sis not completed lights up. ASC fault ( Traction con- trol failure! BMW flexcase is Engine start open (...
- Page 54 DISPLAYS Indicator and Display text Meaning warning lights Service date Service over- missed ( due!
- Page 55 Outside temperature The outside temperature is dis- WARNING played in the status line of the Risk of black ice, even TFT display. above 37 °F (3 °C) Engine heat can lead to spuri- Accident hazard ous readings the outside tem- At a low outside temper- perature when the motorcycle ature, icy conditions must...
- Page 56 Have the defective key fob the battery. transmitter replaced by an Possible cause: authorized BMW Motorrad Consumers with high electri- retailer. cal consumption, e.g. heating Replacing the battery of the vests, are in operation; too...
- Page 57 BMW Motorrad Retailer. Possible cause: Light source defect Alternator or alternator drive lights up yellow. faulty.
- Page 58 Contact a specialist work- Safety risk shop, preferably an authorized Replace defective bulbs as BMW Motorrad retailer. soon as possible; it is best Anti-theft alarm battery always to carry a complete discharged set of spare bulbs on the with anti-theft alarm system motorcycle.
- Page 59 Contact a specialist work- not possible. Dashes ( ) are shop, preferably an authorized indicated in place of the note. BMW Motorrad retailer. Low engine oil level Electronic oil-level check Engine oil level. The electronic oil-level Check engine oil check evaluates the oil level.
- Page 60 Be sure to observe the mea- the fault eliminated at a spe- sures listed below. cialist workshop, preferably an Possible cause: authorized BMW Motorrad re- Coolant level is too low. tailer. Checking the coolant level You may continue to drive 150).
- Page 61 Possible cause: eliminated at a specialist The engine control unit has di- workshop, preferably an au- agnosed a fault. In exceptional thorized BMW Motorrad re- cases, the engine stops and tailer. can no longer be started. Oth- Possible cause: erwise, the engine runs in the The engine control unit has di- emergency operating mode.
- Page 62 The at a specialist workshop, Scooter must reach a speed preferably an authorized of at least 3 mph (5 km/h) BMW Motorrad retailer. before ABS self-diagnosis can You may continue riding, but be completed. it is not recommended.
- Page 63 ASC inter- BMW Motorrad Retailer. vention lasts. This feature continues to furnish the rider ABS failure with visual feedback confirming lights up yellow. that the system has initiated active closed-loop intervention lights up.
- Page 64 Possible cause: at an authorized service facil- At the most, the fuel tank still ity, preferably an authorized contains the reserve fuel quan- BMW Motorrad Retailer. tity. Reserve quantity BMW flexcase is open Engine start not poss. BMW flexcase Approx.
- Page 65 ( 68). ularly by a specialist work- shop, preferably an authorized Service display BMW Motorrad retailer. If service is overdue, the The operating and road safety due date or the odome- of the vehicle remains un- ter reading at which service changed.
- Page 66 OPERATION...
- Page 67 IGNITION SWITCH/STEERING LOCK IGNITION WITH KEYLESS RIDE EMERGENCY ON/OFF SWITCH (KILL SWITCH) LIGHTS HAZARD WARNING LIGHTS TURN INDICATORS MULTIFUNCTION DISPLAY SETUP GENERAL SETTINGS ON THE MULTIFUNCTION DISPLAY HEATED GRIPS SEAT HEATING SEAT STORAGE COMPARTMENTS...
-
Page 68: Ignition Switch/Steering Lock
Please con- tact a specialist workshop for Turn the vehicle key to this purpose, preferably an au- the ON position. thorized BMW Motorrad re- Parking lights and all function tailer. circuits switched on. Locking the steering lock Engine can be started. -
Page 69: Ignition With Keyless Ride
the rear storage compartment If the radio-operated key con- remain illuminated briefly. tinues to be missing, the igni- Steering lock is not locked. tion will be switched off after The vehicle key can now be approx. 1.5 minutes to protect removed. - Page 70 OPERATION ABS self-diagnosis is per- formed. ( 122) ASC self-diagnosis is per- formed. ( 122) Version 2: Steering lock is locked, press and hold button 1. Steering lock is unlocked. Parking lights and all function Press and hold button 1. circuits switched on.
- Page 71 Additional keys can only be radio-operated key through a obtained from an authorized ring antenna in the radio-oper- BMW Motorrad retailer. As the ated lock. The engine control radio-operated keys are part of unit does not enable the engine a safety system, the retailer is...
- Page 72 OPERATION motorcycle can be started by Replace battery. using the spare key. If the battery of the key re- mote is empty, the vehicle can be started by touching the battery cover with the key re- mote. Hold the spare key 1 or the dead radio-operated key 2 against the battery cover at the height of the antenna 3.
-
Page 73: Emergency On/Off Switch (Kill Switch)
The engine can be switched Battery type off easily and quickly using the emergency on/off switch. For Keyless Ride radio-oper- ated key CR 2032 Install battery cover 2. Red LED in instrument panel flashes. The key fob transmitter is working again. EMERGENCY ON/OFF Engine is switched off SWITCH (KILL SWITCH) -
Page 74: Hazard Warning Lights
OPERATION High beam and headlight HAZARD WARNING LIGHTS flasher Operating hazard warning flashers Switch on the ignition. The hazard warning flash- ers place a strain on the battery. Do not use the haz- ard warning flashers for longer than absolutely necessary. If a turn indicator button Press switch 1 toward front is pressed when hazard... -
Page 75: Turn Indicators
switch off the hazard warning Comfort turn signals lights system. TURN INDICATORS Operating turn signals Switch on the ignition. When button 1 is pushed to the right or left, the turn signals automatically turn off under the following conditions: Speed is under 18 mph (30 km/h): After distance of Press button 1 to the left to 165 ft (50 m) is covered. -
Page 76: Multifunction Display
OPERATION MULTIFUNCTION DISPLAY Selecting display at the top Switch on the ignition. Briefly press the bottom of the MENU rocker button 2 repeatedly to select the display of the onboard Briefly press the top of the computer 4. MENU rocker button 1 re- If the fuel reserve has peatedly to select the display been reached,... - Page 77 Resetting the trip meter Switch on the ignition. Select the trip distance recorder. The desired trip distance recorder is displayed. Hold the bottom of the MENU rocker button 2 until the displayed average value 4 is reset. Resetting riding time Switch on the ignition.
-
Page 78: Setup
OPERATION Adjust the backlighting bright- SETUP ness for the instrument cluster Selecting SETUP BRIGHT Requirement Set the units UNIT The Scooter is stationary. Reset the displays RESET Exit SETUP EXIT Exiting SETUP Requirement There are 4 ways to exit SETUP. Briefly press the top of the MENU rocker button 1 repeatedly until... - Page 79 After the hours are set, press Speed for using SETUP and hold the bottom of the MENU rocker button. max 6 mph (max 10 km/h) The minutes 2 flash. When the permissible speed Briefly press the top of the for operation is exceeded, MENU rocker button to in- is exited.
-
Page 80: General Settings On The Multifunction Display
OPERATION Briefly press the bottom of the MENU rocker button to decrease the year setting. After the year is set, press and hold the bottom of the MENU rocker button. Year 3 stops flashing. Setting is completed. Press and hold the top of the MENU rocker button. - Page 81 repeatedly until the desired brightness of the backlighting is adjusted. Press and hold the top of the MENU rocker button 1 to exit SETUP is displayed. SETUP ENTER Setting the units Requirement Briefly press the bottom of The Scooter is stationary. the MENU rocker button 2 Switch on the ignition.
-
Page 82: Heated Grips
OPERATION button 1 repeatedly until func- SETUP RESET tion also resets the date SETUP UNIT RESET displayed. and time to their standard val- Press and hold the bottom of ues. the MENU rocker button 2 The time is displayed. 12:00 until the 3 display RESET... -
Page 83: Seat Heating
grips are warm. The following SEAT HEATING displays are available: with seat heating High heater output Operating the rider's seat heating Medium heater output Start engine. Seat heating can be acti- Low heater output vated only when the en- gine is running. with Connectivity Repeatedly press button 1 Repeatedly press button 1... -
Page 84: Seat
OPERATION with Connectivity Press button 1. The seat is unlocked. Repeatedly press button 1 until the desired heating level without Keyless Ride appears in the display. The rider's seat has three-level heating. The third level is used for heating the seat quickly. It is advisable to switch back to the second or first level as soon as the seat is warm. -
Page 85: Storage Compartments
with Keyless Ride To close, press the seat 5 The seat can also be unlocked into the locking mechanism at without switching on the ig- the rear. nition. To do so, insert the STORAGE COMPARTMENTS key remote 3, which is folded open, into the lock 4 on the Operating the front storage right-hand side trim panel and... - Page 86 OPERATION the storage compartment light- Operating the front storage ing remains lit for a short time. compartments with Keyless Ride Switch on the ignition. Pull the release lever 1 to the front to increase the storage To open a storage compart- compartment, e.g.
- Page 87 The BMW flexcase offers To continue driving, open the space for an integral helmet. seat. Empty the luggage compart- flexcase payload ment. Pull the floor 2 upward into max 11 lbs (max 5 kg) the locking mechanism using the lever 3. When the ignition is switched on, the storage compartment icon is not...
- Page 88 TFT DISPLAY...
- Page 89 GENERAL NOTES PRINCIPLE PURE AND URBAN VIEWS GENERAL SETTINGS ONBOARD COMPUTER BLUETOOTH MY VEHICLE NAVIGATION MEDIA PHONE DISPLAY SOFTWARE VERSION DISPLAY LICENSE INFORMATION...
-
Page 90: General Notes
BMW Motorrad Operate these systems or Connected App devices only if the traffic With the BMW Motorrad Con- situation allows. nected App, you can call up If necessary, stop and oper- information about the vehicle ate the system or devices at and usage. -
Page 91: Principle
On some mobile devices, Functions of the Multi- e.g. with operating sys- Controller tem iOS, the BMW Motorrad Turn the Multi-Controller up: Connected App must be called Move cursor up in lists. Make settings. up before using. Increase volume. Notice concerning current... - Page 92 TFT DISPLAY Rocker button MENU Operating instructions in the functions main menu Navigation instructions are displayed as a dialog if the menu has Navigation not been called up. Operation of the MENU rocker button is temporarily restricted. Briefly press the MENU up: In the menu view: move up one hierarchy level.
- Page 93 Operating instructions in Display Pure view submenus Rocker button MENU long In addition to the operating press up. instructions in the main menu, Switching functions on and there are additional operating instructions in submenus. Some items are preceded by a box.
- Page 94 TFT DISPLAY Calling up the menu Moving the cursor in lists Display Pure view ( 87). Calling up the menu ( 88). Briefly press button 2 down- To move the cursor down ward. in lists, turn the Multi-Con- The following menus can be troller 1 down until the de- called up: sired entry is marked.
- Page 95 Calling up the last menu used Changing the display for rider info. status line In the Pure view: press and hold the bottom of the Requirement MENU rocker button. The vehicle is stationary. The The last used menu is called Pure view is displayed.
- Page 96 Select content of driver info. Vehicle is connected with the status line Navigator or a compatible Call up menu mobile end device. The Settings BMW Motorrad Connected app Display Status line is installed on the mobile end content Turn on desired displays. device.
-
Page 97: Pure And Urban Views
only recalculated when the Switch Speed Limit Info side stand is folded in. on or off. The range is displayed to- PURE AND URBAN VIEWS gether with a warning once the fuel reserve is reached. Pure view After refueling, the range is recalculated if the fuel quan- tity is greater than the fuel reserve. - Page 98 TFT DISPLAY Reduce volume: turn Multi- Switch GPS synchronization Controller down. on or off Mute: turn Multi-Controller all Call up menu Settings the way down. System settings Date and time Set date Switch GPS synchroniza- Switching on the ignition on or off. tion 62).
-
Page 99: Onboard Computer
Polish ONBOARD COMPUTER Portuguese Calling up the onboard Russian computer Thai Go to menu. Turkish My vehicle Scroll to the right until the Ukrainian menu ONBOARD COMPUTER Adjusting brightness panel is displayed. Go to Settings Display Reset on-board computer menu. Brightness with Connectivity Adjust brightness. -
Page 100: Bluetooth
TFT DISPLAY Reset travel on-board nections over short distances, computer faults are possible as with any other wireless technology. with Connectivity Connections can be subject Call up travel on-board com- to interference, can be briefly puter ( 93). interrupted or lost entirely. Press MENU rocker button Especially when several devices down. - Page 101 On some mobile devices, Mobile device e.g. with operating sys- Rider's helmet tem iOS, the BMW Motorrad Passenger helm. The connection status for mo- Connected App must be called bile end devices is displayed. up before using. Connect mobile end device...
- Page 102 TFT DISPLAY data" chapter may provide as- Select helmet and confirm. The connection is established sistance. ( 196) Depending on the mobile and the connection status is end device, telephone data updated. If the connection cannot be is transferred to the vehicle established, the troubleshoot- automatically.
-
Page 103: My Vehicle
MY VEHICLE Start screen 1 Check Control display Layout ( 2 Coolant temperature 3 Range ( 4 Service display ( 5 Vehicle mileage/km 6 Vehicle voltage ( 167) 7 Oil-level check (... - Page 104 TFT DISPLAY Operating instructions CC messages (if available) ONBOARD COMPUTER TRIP COMPUTER SERVICE REQUIREMENTS Further information on the tire pressure and CC messages can be found in the section "Displays". Check-Control messages are dynamically added to the menu screens in the Operating instructions 1: menu as additional Tabs that show how far to...
-
Page 105: Navigation
On some mobile devices, Accident hazard e.g. with operating sys- Observe the relevant road tem iOS, the BMW Motorrad traffic regulations. Do not use while riding (ex- Connected App must be called cept for applications without up before using. - Page 106 FAVORITES Route criteria The following criteria can be shows all destinations that selected: have been saved as a favorite in the BMW Motorrad Con- Route type Avoid nected app. It is not possible Select desired Route type to create new favorites on the...
-
Page 107: Media
Shuffle : Select Repeat Call up menu Media (current track) or BMW Motorrad recom- PHONE mends setting the volume for media and conversations via Prerequisite mobile end devices to the max- The vehicle is connected to a imum before starting a journey. -
Page 108: Display Software Version
TFT DISPLAY Make a phone call Telephone data Depending on the mobile end device, telephone data is trans- ferred to the vehicle automati- cally after the Bluetooth pairing 94). : List of contacts Phone book saved in the mobile end device : List of telephone Call list calls with the mobile end de-... - Page 110 ANTI-THEFT ALARM SYSTEM...
- Page 111 OVERVIEW ACTIVATION ALARM FUNCTION DEACTIVATION PROGRAMMING...
-
Page 112: Overview
ANTI-THEFT ALARM SYSTEM Radio interference OVERVIEW Radio systems or devices with anti-theft alarm system which transmit on the same (DWA) frequency as the remote General information on DWA control of the DWA can Any attempt to move the vehi- interfere with its function. cle, change its position, start it With corresponding problems without authorization, or dis-... - Page 113 again during the activation with Keyless Ride phase. Turn signals are illuminated three times. Confirmation tone sounds three times (if programmed). Movement sensor is deactivated. Activation with Keyless Ride with Keyless Ride Turn off ignition. Press button 1 on the radio- operated key once.
- Page 114 ANTI-THEFT ALARM SYSTEM To deactivate the motion sen- Press the button 1 of the key sor (for example, if the motor- remote again during the acti- cycle is being transported on vation phase. Turn signals are illuminated a train and the train's move- three times.
-
Page 115: Alarm Function
Switch on and Arming tone Switch Arm automati- on and off cally Programming options 111) ALARM FUNCTION with anti-theft alarm system Press MENU rocker but- (DWA) ton down 2 briefly to switch Alarm activation between 3 and DWA ON The DWA alarm can be set off DWA OFF The following settings are avail- Motion sensor... -
Page 116: Deactivation
5 flashes: motion sensor 3 flash. The type of alarm sound DEACTIVATION can be set by an authorized BMW Motorrad retailer. with anti-theft alarm system (DWA) with Keyless Ride Deactivating the alarm function Switch on the ignition with an authorized ignition key. -
Page 117: Programming
The alarm function is Alarm tone: increasing. deactivated. PROGRAMMING with anti-theft alarm system (DWA) Programming options Your BMW Motorrad partner can adapt the anti-theft alarm system in the following areas to meet individual require- ments: Confirmation alarm tone after activating/deactivating the DWA in addition to the turn signals lighting up. - Page 118 SETTING...
- Page 119 MIRRORS HEADLIGHTS SPRING PRELOAD...
- Page 120 If you are in doubt about the correct headlight range adjust- ment, please contact a spe- cialist workshop, preferably an authorized BMW Motorrad re- tailer. Push the rubber cap 1 up. SPRING PRELOAD If necessary, loosen the lock...
- Page 121 Adjusting the spring preload on the rear wheel Park the Scooter, making sure the ground is level and firm. To increase the spring preload, turn the adjustment rings 1 in arrow direction A using a tool from the on- board tool kit. To reduce the spring preload, turn the adjustment rings 1 in the arrow direction B us-...
- Page 122 RIDING...
- Page 123 SAFETY INSTRUCTIONS OBSERVE CHECKLIST STARTING RIDING BREAKING IN BRAKES PARKING THE SCOOTER REFUELING REFUELING VERSION 1 VERSION 2 OPEN FUEL FILLER CAP EMERGENCY RELEASE CLOSE FUEL FILLER CAP EMERGENCY RELEASE SECURING THE VEHICLE FOR TRANSPORT...
-
Page 124: Safety Instructions
This applies even to short loading information. journeys, and to every season of the year. Your authorized Adjust the spring preload BMW Motorrad retailer will be settings to the gross vehicle happy to advise you and has weight. the correct clothing for every Comply with maximum pay- purpose. - Page 125 Burn hazard Spring system setting Unevenly distributed load Loose clothing CAUTION Insufficient tire inflation pres- Intense heating up of en- sure gine and exhaust system Tire tread in poor condition while riding Risk of poisoning Burn hazard Exhaust gas contains carbon After parking the motorcy- monoxide, which is colorless cle, make sure that no per-...
-
Page 126: Observe Checklist
RIDING OBSERVE CHECKLIST ATTENTION Use the following checklist to check your motorcycle at Unburned fuel in the cat- regular intervals. alytic converter Damage to catalytic converter Requirement Note the points listed for Before every journey: protection of the catalytic Check operation of the brake converter. -
Page 127: Starting
Pre-Ride-Check ity, preferably an authorized After the ignition is switched BMW Motorrad Retailer. on, the instrument cluster per- forms a test of the instrument dials and the warning and in- dicator lights – the "Pre-Ride-... - Page 128 ABS self-diagnosis at an authorized service facil- ity, preferably an authorized The self-diagnosis routine BMW Motorrad Retailer. is determining whether BMW Motorrad ABS is ASC self-diagnosis ready for operation. The The self-diagnosis routine self-diagnosis routine runs is determining whether automatically when you switch BMW Motorrad ASC is on the ignition.
-
Page 129: Riding
BMW Motorrad Retailer. Try to do most of your rid- If the ASC intervenes unnec- ing during this initial period essarily, too often or to early,... -
Page 130: Brakes
RIDING Brake pads BRAKES New brake pads must be run in How do you achieve the before they achieve their opti- shortest stopping distances? mum friction force. This initial The dynamic load distribution reduction in braking efficiency between the front and rear can be compensated for by ex- wheel changes during brak- erting greater pressure on the... -
Page 131: Parking The Scooter
Locking up of the front wheel is prevented by BMW Motorrad WARNING ABS. Poorer braking action due Descending mountain passes to moisture and dirt Accident hazard Brake until brakes are dry or WARNING clean; clean if necessary. Braking should be done... -
Page 132: Refueling
RIDING If the slope of the road per- mits, turn the handlebars to WARNING the left. Fuel is highly flammable Center stand Fire and explosion hazard Switch off the engine. Do not smoke. Never bring a naked flame near the fuel ATTENTION tank. - Page 133 Your authorized BMW Motorrad retailer can provide you with more detailed information. If refueling is carried out after running on fuel re- serve, the resulting filling ca- pacity must be greater than the fuel reserve so that the new...
-
Page 134: Refueling
RIDING After the ignition is REFUELING switched off, the fuel filler with Keyless Ride cap can be opened within the Requirement specified run-on time even Steering lock is unlocked. without the radio-operated key being within the reception area. WARNING After-running period for opening the fuel filler Fuel is highly flammable Fire and explosion hazard... - Page 135 fill level is detected and the VERSION 2 fuel reserve indicator light is with Keyless Ride switched off. Requirement The "usable fuel quantity" After run-on time expires specified in the technical data is the fuel quantity, which Bring radio-operated key into can be refueled if the fuel tank reception range.
-
Page 136: Open Fuel Filler Cap Emergency Release
Requirement opened. Fuel filler cap is closed. Have the defect rectified as quickly as possible by a spe- cialist workshop, preferably an authorized BMW Motorrad re- tailer. Position the emergency re- lease 2. Install screws 1. SECURING THE VEHICLE FOR TRANSPORT Remove screws 1. - Page 137 ATTENTION ATTENTION Lateral tipping of the vehi- Pinching of components Component damage Do not pinch components, Component damage cause by e.g. brake lines or wiring tipping over Secure the vehicle from tip- harnesses. ping over laterally, preferably Lay tensioning straps on both with the support of a sec- sides crosswise over the fork ond person.
- Page 138 RIDING Lay tensioning straps around the passenger grab handle at the back and tighten them. Tighten all tensioning straps evenly; the vehicle should be pulled down with the suspension compressed as much as possible.
- Page 140 TECHNOLOGY IN DETAIL...
- Page 141 GENERAL NOTES ANTILOCK BRAKE SYSTEM (ABS) AUTOMATIC STABILITY CONTROL (ASC)
- Page 142 At this road surface is partially depen- point, the BMW Motorrad ABS dent on the friction coefficient assumes extremely low friction of the road surface. Gravel, ice,...
- Page 143 Rear wheel slipping over a smooth roadway over a What are the design features longer period, e.g. when of the BMW Motorrad ABS? decelerating with the braking The BMW Motorrad ABS en- effect of the engine. sures stability on all surfaces,...
- Page 144 BMW Motorrad ABS per- dency for the rear wheel to mits must not be used as an spin or lose traction. If the sys- excuse for careless riding.
- Page 146 MAINTENANCE...
- Page 147 GENERAL NOTES STANDARD TOOL KIT FRONT-WHEEL STAND ENGINE OIL BRAKE SYSTEM COOLANT TIRES RIMS AND TIRES WHEELS FUSES LIGHT SOURCES BATTERY TRIM PANEL COMPONENTS DIAGNOSTIC SOCKET...
-
Page 148: General Notes
"Technical data". ist workshop, preferably your Information on additional main- authorized BMW Motorrad re- tenance and repair procedures tailer. is provided in the repair man- STANDARD TOOL KIT... -
Page 149: Front-Wheel Stand
The basic stand and its acces- fits between them. sories are available through Use the retaining pins 4 on your authorized BMW Motorrad the left and right to set the retailer. front-wheel stand to the de- Make sure the ground is level sired height. -
Page 150: Engine Oil
MAINTENANCE Tighten the mounting bolt 2 ENGINE OIL on the left and right. Checking the engine oil level ATTENTION Misinterpretation of the oil filling quantity, as the oil level is temperature-depen- dent (the higher the tem- perature, the higher the oil level) Engine damage Only check the oil level after... - Page 151 Position the oil dipstick on the oil filler opening, but do not screw it in. Remove the oil dipstick and read the oil level. ATTENTION Lateral tipping of the vehi- Component damage cause by tipping over Specified level of engine Secure the vehicle from tip- ping over laterally, preferably Between MIN and MAX...
-
Page 152: Brake System
If the oil level is above the MAX mark: Have the oil level corrected at a specialist workshop, preferably an authorized BMW Motorrad retailer. Install the oil dipstick and tighten it by hand. Conduct a visual inspection of BRAKE SYSTEM the brake pad thickness. - Page 153 Have brake pads replaced at an authorized service facil- ity, preferably an authorized BMW Motorrad retailer. BMW Motorrad recommends only installing original brake pads from BMW Motorrad. Rear brake-pad wear Checking the rear brake pad limit thickness min 0.04 in (min 1 mm)
- Page 154 BMW Motorrad recommends Make sure that brake fluid only installing original brake is used from a sealed con- pads from BMW Motorrad. tainer only. Make sure the ground is level and firm and put the Scooter on its center stand.
- Page 155 If the brake fluid level falls be- low the approved level: Have the defect rectified as quickly as possible by a spe- cialist workshop, preferably an authorized BMW Motorrad re- tailer. Checking the rear wheel brake fluid level Read off the brake fluid level...
-
Page 156: Coolant
If the brake fluid level falls be- low the approved level: Have the defect rectified as quickly as possible by a spe- cialist workshop, preferably an authorized BMW Motorrad re- tailer. COOLANT Read off the brake fluid level Checking the coolant level... -
Page 157: Tires
Close the cap 1 of the coolant expansion tank. Install fairing side panel 175). TIRES Checking the tire pressure WARNING Target coolant level in Incorrect tire inflation pres- the expansion tank sure. Scooter driving characteristics Between MIN and MAX impaired. ASC control char- mark (when the engine is acteristics impaired and tire cold) -
Page 158: Rims And Tires
TI, TWI or by an arrow. Have damaged rims checked When the minimum tread and, if necessary, replaced depth is reached: by a specialist service facil- Replace the worn tires. ity, preferably an authorized BMW Motorrad retailer. -
Page 159: Wheels
Tire recommendation to be replaced. For every size of tire, If you wish to equip your BMW Motorrad has tested and Scooter with different wheels, approved certain makes as please contact a specialist roadworthy. BMW Motorrad... - Page 160 Raise the front of the Release the brake line from Scooter, preferably using a the brackets 1. BMW Motorrad front-wheel stand, until the front wheel ATTENTION rotates freely. Unintentional pressing to- Attaching the front-wheel gether of brake pads stand ( 143).
- Page 161 Damage to the wheel speed Always have the tightening sensor torques checked by a When rolling out the front specialized workshop, wheel, pay attention to the preferably an authorized wheel speed sensor. BMW Motorrad retailer. Roll the front wheel forward to remove it.
- Page 162 MAINTENANCE If applicable, insert the spacer Lubricate the quick-release bushing 5 on the left side in axle 4. the wheel hub. Lubricant ATTENTION Optimoly TA Front wheel installation op- Raise the front wheel and in- posite the running direction stall the quick-release axle 4. Accident hazard Observe running direction arrows on tire or rim.
- Page 163 Tighten the clamping bolts 3 Install the screws 2 on the and 2 to the specified torque. left and right until the screw head is flush, but do not Clamping bolts (quick- tighten. release axle) in tele- Actuate the brake several scopic forks times until the brake pads 14 lb/ft (19 Nm)
- Page 164 If you are not sure whether this work is within your skill range, please contact a specialist workshop, preferably a BMW Motorrad re- tailer. Removing rear wheel Push back and remove the trim for the silencer 2.
- Page 165 Use the handlebar lever to Release the brake hose from apply the rear wheel brake the holder 3. Remove the screw 4 and re- and hold the handlebar lever lease the holder for the brake in place with a rubber band. The rear wheel cannot turn.
- Page 166 MAINTENANCE Release the nut 1 of the top Release the rear wheel swing- spring strut screw connection, ing arm 2, ensuring that the bracing the screw 2 with an cable 3 for the wheel speed L-shaped wrench. sensor is not damaged. Remove screw 3.
- Page 167 Always have the tightening torques checked by a specialized workshop, preferably an authorized BMW Motorrad retailer. Reposition the rear wheel swinging arm 2 with the ca- ble 3 for the wheel speed sensor and the brake hose 4.
- Page 168 MAINTENANCE Position the rear wheel Pivot the spring strut 4 for- swinging arm 2, ensuring ward and position it. Install the screw 3 and that the cable 3 for the tighten to the appropriate wheel speed sensor is torque. properly routed. Spring strut on the swinging arm 28 lb/ft (38 Nm)
- Page 169 Close the luggage compart- Rear brake caliper on ment flap. rear wheel swinging arm Close the seat. 24 lb/ft (32 Nm) Position the holder for the brake hose 5, install the screw 4 and tighten to the appropriate torque. Brake hose holder on swinging arm 6 lb/ft (8 Nm) Fasten the brake hose to the...
- Page 170 MAINTENANCE Use the handlebar lever to Check the seal in the apply the rear wheel brake silencer 6; if necessary, and hold the handlebar lever renew it. Position and install the si- in place with a rubber band. The rear wheel cannot turn. lencer 6 on the exhaust man- Install the washer 3.
-
Page 171: Fuses
FUSES Removing the fuse Requirement The fuses are located under the battery compartment cover by the leg shield. ATTENTION Position the connector 7, as Bypassing defective fuses required. Risk of short circuit and fire Do not bypass defective fuses. Replace defective fuses with new fuses. - Page 172 "Technical Data". The numbers in the graphic match the fuse numbers. If the fuses blow frequently, have the electrical system checked Pull the affected fuse out of by an authorized specialized the fuse box. workshop, preferably an authorized BMW Motorrad retailer.
-
Page 173: Light Sources
1 with a fuse with the hicle. If an LED light source is required current level. faulty, please contact a spe- Main fuse cialist workshop, preferably an authorized BMW Motorrad re- 30 A (Voltage regulator) tailer. Installing battery cover BATTERY 174). - Page 174 MAINTENANCE Compliance with the points Jump-starting below is important in order to maximize battery service life: ATTENTION Keep the surface of the bat- Excessively high current tery clean and dry. during jump-starting of the Be sure to read and com- Scooter ply with the instructions for Cable fire or damage to the...
- Page 175 Remove battery cover and then from the positive 173). terminal. Removing the battery carrier Installing the battery carrier 171). 173). Do not disconnect the battery Installing battery cover from the electrical system for 174). external starting. Charging a connected battery Use the red jumper cable to connect the jump-start termi- ATTENTION...
- Page 176 ATTENTION sis electronics Only uses chargers that Incorrect battery disconnec- have been approved by tion Danger of short circuit BMW Motorrad. Follow the disconnection Comply with operating sequence. instructions of charger. First disconnect the negative Charging a disconnected battery cable 1.
- Page 177 Release the data link connec- tor 2 from the holder 3 and let it hang to one side. without Keyless Ride ATTENTION Incorrect battery connection Danger of short circuit Press the locks 1 on the left Follow the installation se- and right and fold the battery quence.
- Page 178 MAINTENANCE Install battery the low-frequency antenna 3 and set it aside. Removing battery Turn off ignition. Switch off anti-theft alarm system if necessary. Remove battery cover 173). Removing the battery carrier 171). Place the battery 3 into the battery compartment with the positive terminal on the left side.
-
Page 179: Trim Panel Components
the locks 1 and letting it Installing the battery carrier engage. without Keyless Ride Position the battery carrier 2 Plug the data link connec- and hook it into the battery tor 2 into the bracket 3. compartment at the back. The locks 1 engage. - Page 180 MAINTENANCE Lift the battery cover 2 Install screws 1. slightly at the edges. Removing fairing side panel Pull the mounting clips 3 of the battery cover 2 out of the holders. Installing battery cover Remove the screws 1 for the fairing side panel.
-
Page 181: Diagnostic Socket
Lift the fairing side panel 2 Install the screws 1 for the slightly at the edges. fairing side panel. Pull the mounting clips 3 of DIAGNOSTIC SOCKET the fairing side panel 2 as evenly as possible out of the Removing the diagnostic mounts. - Page 182 MAINTENANCE nected to the data link con- nector 2. Installing the data link connector Disconnect the diagnosis and information system interface. Plug the data link connec- tor 2 into the bracket 3. The locks 1 engage. Installing battery cover 174).
- Page 184 ACCESSORIES...
- Page 185 GENERAL NOTES POWER SOCKET USB CHARGING SOCKET TOPCASE NAVIGATION SYSTEM...
-
Page 186: General Notes
Your authorized Safety risk BMW Motorrad retailer BMW Motorrad cannot ex- offers you qualified advice for amine or test each product choosing genuine BMW parts, of outside origin to ensure accessories and other products. -
Page 187: Usb Charging Socket
Automatic deactivation Automatic shutoff The onboard socket is auto- The USB charging sockets are matically switched off during automatically switched off un- starting. der the following conditions: These sockets are switched If the battery voltage is too off approx. 15 minutes af- low to retain the starting ca- ter switching off the ignition pability of the vehicle. -
Page 188: Topcase
ACCESSORIES Cables must not impede the rider. Cables must not restrict the steering angle and handling characteristics. Cables must not become trapped. TOPCASE Pull the release lever behind with topcase Light the cover 3 toward the back. Opening the topcase Topcase lid opens. - Page 189 Removing the topcase Turn the key in the topcase Turn the key in the topcase lock to the RELEASE posi- lock 1 to the OPEN position. tion. Pull the release lever 4 back while lifting the topcase by the carrying handle. Remove the topcase from the topcase carrier toward the rear.
-
Page 190: Navigation System
ACCESSORIES Pull the release lever 4 to- ward the back while inserting the topcase in the topcase carrier from the back. Close the topcase handle 2. If necessary, turn the key in the topcase lock to the CLOSE position and remove Place the navigation device 1 Maximum payload and in the mount 2. - Page 191 Turn Multi-Controller 1 up scription refers to the and down BMW Motorrad Navigator V In the compass and Me- and the BMW Motorrad Navi- diaplayer page: increase gator VI. The BMW Motorrad or decrease the volume Navigator IV does not offer all of Bluetooth-connected options described.
- Page 192 ACCESSORIES Map view Compass page Compass Turning increases or reduces Mediaplayer volume of a BMW Motorrad BMW special menu communication system con- My motorcycle page nected via Bluetooth. Long tilt the Multi- BMW special menu Controller 1 to the left and...
- Page 193 Bluetooth device as per A2DP standard, e.g., a BMW Motorrad communication system. Mediaplayer Long actuation to left: play previous title. Long actuation to right: play next title. Turning increases or reduces volume of a BMW Motorrad communication system con- nected via Bluetooth.
- Page 194 CARE...
- Page 195 CARE PRODUCTS WASHING YOUR MOTORCYCLE CLEANING SENSITIVE VEHICLE PARTS PAINT CARE PROTECTIVE WAX COATING STORING THE SCOOTER PUTTING THE SCOOTER INTO OPERATION...
-
Page 196: Care Products
To remove road salt, clean the products available at your au- Scooter with cold water im- thorized BMW Motorrad re- mediately after completion of tailer. BMW Care Products every trip. have been material-tested, lab-... -
Page 197: Cleaning Sensitive Vehicle Parts
Fairings and panels Clean trim panel components ATTENTION with water and BMW Motorrad Damage caused by high wa- solvent cleaner. ter pressure from high-pres- Windshields and headlight sure cleaners or steam-jet diffuser made of plastic devices Clean off dirt and insects with... -
Page 198: Paint Care
BMW Motorrad recommends ATTENTION using a solvent cleaner and Bending of radiator fins then applying a BMW Motorrad Damage to radiator fins high gloss polish to preserve When cleaning, ensure that the paint. the cooler fins are not bent. -
Page 199: Putting The Scooter Into Operation
nal BMW Fuel Additive to protect the fuel from aging. Removing battery ( 172). Spray the brake lever and the bearings of the center stand and side stand with suitable lubricant. Preserve bare metal and chrome-plated parts with an acid-free grease (Vaseline). Park Scooter in a dry room, raising it to relieve the weight from both wheels. - Page 200 TECHNICAL DATA...
- Page 201 TROUBLESHOOTING CHART SCREW CONNECTIONS FUEL ENGINE OIL ENGINE CLUTCH TRANSMISSION REAR-WHEEL DRIVE FRAME CHASSIS BRAKES WHEELS AND TIRES ELECTRICAL SYSTEM ANTI-THEFT ALARM SYSTEM KEYLESS RIDE DIMENSIONS WEIGHTS PERFORMANCE DATA...
-
Page 202: Troubleshooting Chart
TECHNICAL DATA TROUBLESHOOTING CHART Engine does not start at all or is very difficult to start. Possible cause Remedy Side stand folded out Fold in side stand. Start without applying brake Start with brake applied. BMW flexcase open Close the BMW flexcase. No fuel in tank Refuel. - Page 203 102). Active route guidance is not displayed in the TFT display. Possible cause Remedy Navigation from the Call up the BMW Motorrad BMW Motorrad Con- Connected App on the con- nected App was not nected mobile end device be- transferred.
- Page 204 TECHNICAL DATA ASC intervenes unnecessarily, too often or too early. Possible cause Remedy Insufficient tire pressure in Checking the tire pressure front and rear; tire pressure 151). or payload changed No propulsion on very loose Switch off ASC to overcome surfaces (e.g.
-
Page 205: Screw Connections
SCREW CONNECTIONS Brakes Value Valid Brake caliper on fork M8 x 50 - 10.9 24 lb/ft (32 Nm) Rear brake caliper on rear wheel swinging M8 x 30 - 10.9, Re- 24 lb/ft (32 Nm) place bolt micro-encapsulated Brake hose holder on swinging arm M6 x 12 6 lb/ft (8 Nm) - Page 206 TECHNICAL DATA Rear wheel Value Valid Spring strut on the swinging arm M10 x 50 28 lb/ft (38 Nm) Spring strut on frame M10 x 50 28 lb/ft (38 Nm) Exhaust system Value Valid Silencer on swinging M8 x 50 15 lb/ft (21 Nm) End muffler on ex- haust manifold...
-
Page 207: Fuel
JASO MA2, Additives (for instance, molybdenum- based substances) are prohibited, because they would attack the coatings on engine components, BMW Motorrad recommends BMW Motorrad ADVANTEC Ultimate oil. Engine oil, quantity for topping max 0.4 quarts (max 0.4 l), Difference between... -
Page 208: Engine
TECHNICAL DATA ENGINE Engine number location Crankcase, on left next to oil filter Engine type A81A03B Engine design 1-cylinder, 4-cycle Displacement 350 cc (350 cm Cylinder bore 3.1 in (80 mm) Piston stroke 2.7 in (69.6 mm) Compression ratio 11.5 : 1 Nominal capacity 34 hp (25 kW), at engine speed: 7500 min... -
Page 209: Frame
FRAME Frame design Steel bridge frame Location of the vehicle identifi- Frame at front right on steer- cation number ing head Location of type plate Frame at right, center, top CHASSIS Type of front suspension Telescopic forks Spring travel, front 4.3 in (110 mm), On front wheel Type of rear-wheel guide... -
Page 210: Wheels And Tires
WHEELS AND TIRES Recommended tire combina- An overview of the current tions tire approvals is available from your authorized BMW Motorrad retailer or on the Internet at bmw- motorrad.com. Speed category of front/rear S, minimum requirement: tires 112 mph (180 km/h) -
Page 211: Electrical System
Tire pressure Front tire pressure 31.9 psi (2.2 bar), One-up, with cold tires 34.8 psi (2.4 bar), Two-up mode with load; with cold tires Rear tire pressure 34.8 psi (2.4 bar), One-up, with cold tires 37.7 psi (2.6 bar), Two-up mode with load;... -
Page 212: Anti-Theft Alarm System
TECHNICAL DATA Fuses Main fuse 30 A, Voltage regulator Fuse 1 Not in use Fuse 2 7.5 A, Diagnostic socket, ig- nition lock, Keyless Ride, anti- theft alarm system Fuse 3 7.5 A, Left multifunction switch, tail lamp, helmet compartment lighting, storage compartment lock, function satellite Fuse 4... -
Page 213: Dimensions
Battery type (For Keyless Ride radio-operated key) with Keyless Ride CR 2032 DIMENSIONS Motorcycle length 87 in (2210 mm), over license-plate carrier Motorcycle height min 51.4 in (min 1305 mm), over wind- shield, at DIN unladen weight Motorcycle width 32.9 in (835 mm), with mir- rors Front-seat height 30.5... -
Page 214: Performance Data
TECHNICAL DATA PERFORMANCE DATA Maximum speed 86 mph (139 km/h) with topcase Light 81 mph (130 km/h) - Page 216 SERVICE...
- Page 217 REPORTING SAFETY DEFECTS BMW MOTORRAD SERVICE BMW MOTORRAD SERVICE MANUAL BMW MOTORRAD MOBILITY SERVICES MAINTENANCE PROCEDURES MAINTENANCE SCHEDULE MAINTENANCE CONFIRMATIONS SERVICE CONFIRMATIONS...
-
Page 218: Reporting Safety Defects
However, the NHTSA cannot be- come involved in individual problems between you, your autho- rized BMW Motorrad retailer, or BMW of North America, LLC. You can contact the NHTSA by calling the Vehicle Safety Hot- line on 1–888–327–4236 (Teletypewriter TTY for the hearing impaired: 1–800–424–9153) for free, by visiting the website at... -
Page 219: Bmw Motorrad Service
BMW MOTORRAD SERVICE Scooter consistently re- With its worldwide retailer net- mains in optimal condition, work, BMW Motorrad can at- BMW Motorrad urges you to tend to you and your Scooter in observe the service intervals over 100 countries around the recommended for your globe. -
Page 220: Bmw Motorrad Mobility Services
BMW Motorrad retailer before electronic Service Manual. it turns the motorcycle over to Objection you. At the BMW Motorrad retailer BMW Running-in Check or specialist workshop, the ve- The BMW running-in check hicle owner can object to the must be carried out between... - Page 221 service appointment, service must be performed sooner. The required scope of mainte- nance work for your motorcycle can be found in the following maintenance schedule:...
-
Page 222: Maintenance Schedule
SERVICE MAINTENANCE SCHEDULE 1 BMW Running-in check Oil change in the tele- (including oil change) scopic forks 2 Standard scope of BMW Check clutch (clutch re- Service moved) 3 Engine oil change with fil- Change brake fluid in the entire system 4 Clean/check filter for CVT annually or every 6000 mi 5 Replace the air filter insert... -
Page 223: Maintenance Confirmations
The actual maintenance work applica- ble for your vehicle may differ. Checking charging state of battery Performing the vehicle test using the BMW Motorrad diagnostic system Visual inspection of the brake lines, brake hoses, and connec-... - Page 224 SERVICE BMW pre-delivery check BMW Running-in Check performed performed Odometer reading Next service latest or, if reached earlier Odometer reading Stamp, signature Stamp, signature...
- Page 225 BMW Service performed Odometer reading Next service latest or, if reached earlier Odometer reading Work performed Yes No BMW Service Engine oil change with filter Clean front continuously variable transmis- sion dust filter Replacing air cleaner element Checking steering head bearing Replace CVT belt Replacing all spark plugs Checking valve clearance...
- Page 226 SERVICE BMW Service performed Odometer reading Next service latest or, if reached earlier Odometer reading Work performed Yes No BMW Service Engine oil change with filter Clean front continuously variable transmis- sion dust filter Replacing air cleaner element Checking steering head bearing Replace CVT belt Replacing all spark plugs Checking valve clearance...
- Page 227 BMW Service performed Odometer reading Next service latest or, if reached earlier Odometer reading Work performed Yes No BMW Service Engine oil change with filter Clean front continuously variable transmis- sion dust filter Replacing air cleaner element Checking steering head bearing Replace CVT belt Replacing all spark plugs Checking valve clearance...
- Page 228 SERVICE BMW Service performed Odometer reading Next service latest or, if reached earlier Odometer reading Work performed Yes No BMW Service Engine oil change with filter Clean front continuously variable transmis- sion dust filter Replacing air cleaner element Checking steering head bearing Replace CVT belt Replacing all spark plugs Checking valve clearance...
- Page 229 BMW Service performed Odometer reading Next service latest or, if reached earlier Odometer reading Work performed Yes No BMW Service Engine oil change with filter Clean front continuously variable transmis- sion dust filter Replacing air cleaner element Checking steering head bearing Replace CVT belt Replacing all spark plugs Checking valve clearance...
- Page 230 SERVICE BMW Service performed Odometer reading Next service latest or, if reached earlier Odometer reading Work performed Yes No BMW Service Engine oil change with filter Clean front continuously variable transmis- sion dust filter Replacing air cleaner element Checking steering head bearing Replace CVT belt Replacing all spark plugs Checking valve clearance...
- Page 231 BMW Service performed Odometer reading Next service latest or, if reached earlier Odometer reading Work performed Yes No BMW Service Engine oil change with filter Clean front continuously variable transmis- sion dust filter Replacing air cleaner element Checking steering head bearing Replace CVT belt Replacing all spark plugs Checking valve clearance...
- Page 232 SERVICE BMW Service performed Odometer reading Next service latest or, if reached earlier Odometer reading Work performed Yes No BMW Service Engine oil change with filter Clean front continuously variable transmis- sion dust filter Replacing air cleaner element Checking steering head bearing Replace CVT belt Replacing all spark plugs Checking valve clearance...
- Page 233 BMW Service performed Odometer reading Next service latest or, if reached earlier Odometer reading Work performed Yes No BMW Service Engine oil change with filter Clean front continuously variable transmis- sion dust filter Replacing air cleaner element Checking steering head bearing Replace CVT belt Replacing all spark plugs Checking valve clearance...
- Page 234 SERVICE BMW Service performed Odometer reading Next service latest or, if reached earlier Odometer reading Work performed Yes No BMW Service Engine oil change with filter Clean front continuously variable transmis- sion dust filter Replacing air cleaner element Checking steering head bearing Replace CVT belt Replacing all spark plugs Checking valve clearance...
- Page 235 BMW Service performed Odometer reading Next service latest or, if reached earlier Odometer reading Work performed Yes No BMW Service Engine oil change with filter Clean front continuously variable transmis- sion dust filter Replacing air cleaner element Checking steering head bearing Replace CVT belt Replacing all spark plugs Checking valve clearance...
- Page 236 SERVICE BMW Service performed Odometer reading Next service latest or, if reached earlier Odometer reading Work performed Yes No BMW Service Engine oil change with filter Clean front continuously variable transmis- sion dust filter Replacing air cleaner element Checking steering head bearing Replace CVT belt Replacing all spark plugs Checking valve clearance...
- Page 237 BMW Service performed Odometer reading Next service latest or, if reached earlier Odometer reading Work performed Yes No BMW Service Engine oil change with filter Clean front continuously variable transmis- sion dust filter Replacing air cleaner element Checking steering head bearing Replace CVT belt Replacing all spark plugs Checking valve clearance...
- Page 238 SERVICE BMW Service performed Odometer reading Next service latest or, if reached earlier Odometer reading Work performed Yes No BMW Service Engine oil change with filter Clean front continuously variable transmis- sion dust filter Replacing air cleaner element Checking steering head bearing Replace CVT belt Replacing all spark plugs Checking valve clearance...
- Page 239 BMW Service performed Odometer reading Next service latest or, if reached earlier Odometer reading Work performed Yes No BMW Service Engine oil change with filter Clean front continuously variable transmis- sion dust filter Replacing air cleaner element Checking steering head bearing Replace CVT belt Replacing all spark plugs Checking valve clearance...
-
Page 240: Service Confirmations
SERVICE SERVICE CONFIRMATIONS The table serves to provide evidence of maintenance and repair work, as well as installed optional accessories and special cam- paigns performed. Work performed Odometer Date reading... - Page 241 Work performed Odometer Date reading...
- Page 242 CERTIFICATE FOR ELECTRONIC IMMOBILIZER CERTIFICATE FOR KEYLESS RIDE DECLARATION OF CONFORMITY FOR ANTI-THEFT ALARM CERTIFICATE FOR TFT INSTRUMENT CLUSTER...
- Page 243 FCC Approval Approbation de la FCC Ring aerial in the ignition Antenne annulaire présente dans le commutateur switch d'allumage To verify the authorization of Pour vérifier l'autorisation de the ignition key, the electronic la clé de contact, le système immobilizer exchanges d'immobilisation électronique information with the ignition échange des informations...
- Page 244 Toute modification qui n'aurait qui n'aurait pas été approuvée expressément par l'organisme responsable de l'homologation peut annuler l'autorisation accordée à l'utilisateur pour utiliser le dispositif.
- Page 245 Certifications BMW Keyless Ride ID Device USA, Canada: Product name: BMW Keyless Ride ID Device FCC ID: YGOHUF5750 IC: 4008C-HUF5750 Any changes or modifications not expressly approved by the party responsible for compliance could void the user’s authority to operate the equipment. Canada: Operation is subject to the following two conditions: (1) This device may not cause harmful interference, and...
- Page 246 USA: This device complies with Part 15 of the FCC rules. Operation is subject to the following two conditions: (1) This device may not cause harmful interference, and (2) this device must accept any interference received, including interference that may cause undesired operation. Argentina: H-17115...
- Page 247 Declaration Of Conformity We declare under our responsibility that the product BMW Keyless Ride ID Device (Model: HUF5750) camplies with the appropriate essential requirements of the article 3 of the R&TIE and the other relevant provisions, when used for its intended purpose.
- Page 248 The product is Iabeted with the CE marking: Velbert, October 15 th , 2013 Benjamin A. Müller Product Development Systems Car Access and Immobilization - Electronics Huf Hülsbeck & Fürst GmbH & Co. KG Steeger Straße 17, D-42551 Velbert...
- Page 249 Declaration of Conformity Radio equipment anti-theft alarm Belgium (DWA) Le soussigné, Meta System S.p.A., déclare que l'équipement Simplified EU Declaration of radioélectrique du type Conformity acc. Radio Equip- TXBMWMR est conforme à la ment Directive 2014/53/EU directive 2014/53/UE. after 12.06.2016 and during Le texte complet de la déclaration transition period UE de conformité...
- Page 250 Czech Republic Estonia Tímto Meta System S.p.A. Käesolevaga deklareerib Meta prohlašuje, že typ rádiového System S.p.A., et käesolev zařízení TXBMWMR je v souladu raadioseadme tüüp TXBMWMR se směrnicí 2014/53/EU. vastab direktiivi 2014/53/EL Úplné znění EU prohlášení o nõuetele. shodě je k dispozici na této ELi vastavusdeklaratsiooni täielik internetové...
- Page 251 Hungary France Le soussigné, Meta System S.p.A., Meta System S.p.A. igazolja, hogy a TXBMWMR típusú déclare que l'équipement radioélectrique du type rádióberendezés megfelel a 2014/53/EU irányelvnek. TXBMWMR est conforme à la directive 2014/53/EU. Az EU-megfelelőségi nyilatkozat teljes szövege elérhető a Le texte complet de la déclaration UE de conformité...
- Page 252 Netherlands Lithuania Hierbij verklaar ik, Meta System Aš, Meta System S.p.A., patvirtinu, S.p.A., dat het type kad radijo įrenginių tipas radioapparatuur TXBMWMR TXBMWMR atitinka Direktyvą conform is met Richtlijn 2014/53/ES. 2014/53/EU. Visas ES atitikties deklaracijos De volledige tekst van de EU- tekstas prieinamas šiuo interneto conformiteitsverklaring kan adresu: https://...
- Page 253 Romania Prin prezenta, Meta System S.p.A. declară că tipul de echipamente radio TXBMWMR este în conformitate cu Directiva 2014/53/UE. Textul integral al declarației UE de conformitate este disponibil la următoarea adresă internet: https:// docs.metasystem.it/ Sweden Härmed försäkrar Meta System S.p.A. att denna typ av radioutrustning TXBMWMR överensstämmer med direktiv 2014/53/EU.
- Page 254 Declaration of Conformity Radio equipment TFT instrument Brazil cluster Este equipamento opera em caráter secundário, isto é, não For all Countries without EU tem direito a proteção contra interferência prejudicial, mesmo de estações do mesmo tipo, e Technical information não pode causar interferência a BT operating frq.
- Page 255 Mexico Le présent appareil est conforme La operación de este equipo está aux CNR d'Industrie Canada sujeta a las siguientes dos applicables aux appareils radio condiciones: exempts de licence. L'exploitation (1) es posible que este equipo o est autorisée aux deux conditions dispositivo no cause interferencia suivantes : (1) l'appareil ne doit perjudicial y...
- Page 256 Thailand เครื ่ อ งโทรคมนาคมและอุ ป กรณ์ น้ ี มี ค วามสอดคล้ อ งตามข้ อ กํ า หนดของ กทช. (This telecommunication equipments is in compliance with NTC requirements) United States (USA) This device complies with Industry Canada’s licence-exempt RSSs and part 15 of the FCC Rules.
- Page 258 INDEX Abbreviations and symbols, 4 Battery Charging a disconnected Indicator and warning battery, 170 light, 34, 56 Charging connected Self-diagnosis, 122 battery, 169 Technology in detail, 136 Indicator light for battery Accessories charge current, 36 Additional onboard Indicator light for vehicle socket, 169 voltage, 50, 51 General notes, 180...
- Page 259 Technical data, 203 Date Break-in, 123 Setting, 73 Deactivating Care Alarm function, 110 Care products, 190 motion sensor, 108 Chrome, 191 Diagnostic socket Fairings and panels, 191 Installing, 176 Paint preservation, 192 Loosen, 175 Plastics, 191 Dimensions Radiator, 191 Technical data, 207 Rubber, 192 Distance recorder Displaying the odometer, 70...
- Page 260 INDEX Indicator light for engine oil Hazard warning flasher level, 32, 53 Operating, 68 Oil dipstick, 15 Operating element, 17 Oil fill location, 15 Headlight Oil level indicator, 38 Adjusting, 114 Technical data, 201 Adjustment for right-hand/ Topping up, 144 left-hand traffic, 114 Equipment, 5 Headlight range adjust-...
- Page 261 Engine management Light sources system, 33, 55 Indicator light for light source Engine oil level, 32, 53 defect, 34 EWS, 31 Technical data, 205 Fuel reserve, 37, 58 Warning indicator for Layout, 43 defective bulb, 51 Light source defect, 34, 51 Lights My Vehicle, 97 Adjusting headlights, 114...
- Page 262 INDEX Multifunction display Overviews, 19, 20 Cockpit, 19, 20 Adjusting the display, 74 Indicator and warning Operating, 70 Overview, 27 lights, 26, 40 Selecting the display, 70 Instrument cluster, 21 SETUP, 72 Instrument cluster with SETUP, exiting, 72 connectivity, 22 Multifunction switch Left side of vehicle, 14 Overview, left, 17...
- Page 263 Spring preload Safety information Adjusting, 114 For riding, 118 Adjusting element, 14 for the brake, 124 Start, 121 On braking, 124 Operating element, 18 Scooter Status bar, top Care, 188 Adjusting, 90 Cleaning, 188 Setting, 89 Lashing down, 130 Status indicators Parking, 125 Selecting, 70 Putting into operation, 193...
- Page 264 INDEX Rear-wheel drive, 202 Values Screw connections, 199 Display, 43 Spark plugs, 205 Vehicle identification number Standards, 5 Position on motorcycle, 15 Transmission, 202 Vehicle voltage Weights, 207 Indicator light, 50, 51 Wheels and tires, 204 TFT display, 22 Warning lights, 21, 22 Operating, 88, 89 Overview, 26, 40 Overview, 41, 42...
- Page 265 Werke Aktiengesellschaft servicing your vehicle. 80788 Munich, Germany For more information visit: Reprinting, in whole or in www.P65Warnings.ca.gov/ part, is only permitted with passenger-vehicle the written permission of BMW Motorrad, Aftersales. Original Rider's Manual, printed in Germany.
- Page 266 Important data for refueling: Fuel Recommended fuel quality Regular unleaded (max. 15% ethanol, E15) 87 AKI (91 ROZ/RON) min 87 AKI Usable fuel quantity Approx. 3.4 gal (Approx. 12.8 l) Reserve quantity Approx. 3.2 quarts (Approx. 3 l) Tire pressure Front tire pressure 31.9 psi (2.2 bar), One-up, with cold tires...
- Page 267 Huomioi seuraavat seikat käyttöohjeen lisäksi. MERKNAD Feil batterier i bilnøkkelen kan skade bilnøkkelen. Det er VAROITUS fare for materielle skader. Bytt ut utladet batteri kun med Auton avaimessa on nappiparisto. Paristot tai nappiparistot et batteri med samme spenning, størrelse og voivat joutua nieluun ja johtaa kahden tunnin sisällä...
- Page 268 Suplimentar faţă de manualul de utilizare, respectaţi UPOZORNĚNÍ următoarele. Nevhodné baterie v klíči vozidla mohou klíč vozidla poškodit. Hrozí nebezpečí hmotných škod. Vybitou baterii AVERTIZARE vyměňte pouze za baterii se stejným napětím, stejnými Cheia autovehiculului conţine o baterie sub forma unui rozměry a stejnou specifikací.
- Page 269 A kezelési útmutató mellett vegye figyelembe a Poleg navodil za uporabo upoštevajte še naslednje. következőket. OPOZORILO FIGYELMEZTETÉS Avtomobilski ključ ima gumbasto celico kot baterijo. V A járműkulcs egy gombelemmel működik. Az elemek, primeru, če pride do zaužitja baterije ali gumbaste celice, illetve a gombelemek lenyelhetők, és két órán belül súlyos lahko to v dveh urah povzroči resne telesne poškodbe ali vagy halálos sérüléseket okozhatnak, például belső...
- Page 270 Please note the following in addition to the information Zusätzlich zur Betriebsanleitung folgendes beachten. provided in the Owner's Handbook. WARNING WARNUNG Der Fahrzeugschlüssel enthält als Batterie eine Knopfzelle. he battery inside the vehicle key is a button cell. Batteries Batterien oder Knopfzellen können verschluckt werden und or button cells can be swallowed, causing serious or even innerhalb von zwei Stunden zu schweren oder tödlichen fatal injuries within two hours, e.g.
Need help?
Do you have a question about the C 400 X and is the answer not in the manual?
Questions and answers