Table of Contents
Advertisement
Quick Links
Advertisement
Table of Contents

Related Manuals for BMW Motorrad R 1200 RT 2005


Summary of Contents for BMW Motorrad R 1200 RT 2005
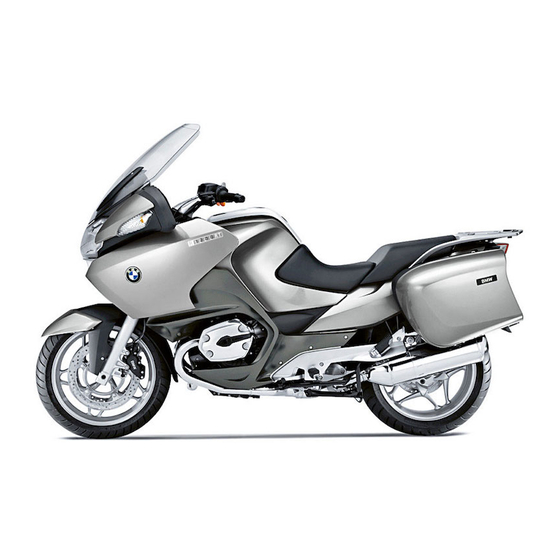
- Page 1 Rider's Manual (US Model) R 1200 RT BMW Motorrad Freude am Fahren...
- Page 2 Motorcycle/Retailer Data Motorcycle data Retailer Data Model Contact in Service Vehicle identification number Ms./Mr. Color number Phone number First registration Retailer's address/phone number Registration number (company stamp)
- Page 3 We wish you many miles of community of BMW riders. safe and enjoyable riding Familiarize yourself with your new motorcycle so that you BMW Motorrad. can ride it safely and confi- dently in all traffic situations. Please read this Rider's Man- ual carefully before starting to use your new BMW motor- cycle.
-
Page 4: Table Of Contents
Table of Contents 3 Status indicators ..21 Heated hand grips ..49 Multifunction display ..22 Seat heating ..49 You can also use the index at Clutch . - Page 5 7 Maintenance ..97 Paint care ....130 BMW Motorrad service General instructions ..98 Protective wax quality .
- Page 6 Confirmation of service ....156...
-
Page 7: General Instructions
General instructions Overview......6 Abbreviations and symbols ..6 Equipment ..... . 7 Technical data . -
Page 8: Overview
Optional equipment Overview Abbreviations and BMW equipment avail- symbols Chapter 2 of this Rider's Man- able only as a factory ual will provide you with an Indicates warnings that installed option. initial overview of your motor- you must comply with for cycle. -
Page 9: Equipment
on the basis of the data, illus- Equipment Technical data trations or descriptions in this When you ordered your BMW All dimensions, weights and manual. motorcycle, you chose vari- performance specifications ous items of custom equip- in the Rider's Manual refer ment. -
Page 11: Overviews
Overviews General view, left side ..11 General view, right side ..13 Underneath seat ....15 Left handlebar fitting . -
Page 13: General View, Left Side
General view, left side Headlight adjustment (vertical) beneath instru- ment panel ( Brake-fluid reservoir 103) Radio operating unit (OE) Onboard socket ( Onboard socket (OE) Adjuster, rear shock ab- sorber ( Oil sight glass ( Filler neck, engine oil 100) -
Page 15: General View, Right
General view, right side Seat lock ( Switch for passenger seat heating (OE) under passenger seat ( Mounting for tank ruck- sack (OA) Filler neck, fuel tank Front clutch fluid reser- voir Electrically adjustable windshield ( Storage or radio com- partment (... -
Page 17: Underneath Seat
Underneath seat Height adjuster, front seat ( Battery ( 122) Brake-fluid reservoir, rear 104) Adjuster, spring preload, rear ( Toolkit ( Type plate Helmet holder ( Table of tire pressures Label, payload... -
Page 18: Left Handlebar Fitting
Left handlebar fitting Switch for cruise control (OE) ( Radio operating unit (OE) ESA button (OE) ( Button for windshield ad- justment ( Horn button Button for left turn indi- cator and hazard warning flashers ( 55) ( Switch, high-beam head- light and headlight flash- er (... -
Page 19: Handlebar Fitting, Right
Handlebar fitting, right Onboard computer but- ton (OE) ( Emergency ON/OFF switch ( Starter button with OE Heated handle- bar grips: Heated hand grips Button for right turn indi- cator and hazard warning flashers ( 55) ( Turn indicators off button Switch for driver's seat heating (... -
Page 20: Instrument Cluster
Instrument cluster Speedometer Warning and indicator lights ( Multifunction display Rev. counter Anti-theft alarm indicator light Setting for clock and display dimming ( Control, odometer ( Sensor for lighting of in- strument panel The instrument-cluster lighting has automatic day and night switchover. -
Page 21: Headlight
Headlight High-beam headlight Low-beam headlight Side lights... -
Page 23: Status Indicators
Status indicators Multifunction display ... 22 Warning and indicator lights..23 ABS warning light ... . . 23 Function indicators . -
Page 24: Multifunction Display
Multifunction display Fuel gauge ( Area for radio display (see radio operating manual) Area for warning symbols Gear indicator ( Engine temperature indi- cator ( Tripmeter or area for dis- plays of onboard com- puter (OE) ( 41) ( Display area for clock, seat heating (OE), display dimming and ESA (OE) 42) (... -
Page 25: Warning And Indicator
Engine temperature Warning and indicator ABS warning light lights The lateral bars under In some countries a different the temperature symbol display of the ABS warning show the engine temperature light is possible. level. Alternative display of General warning indi- ABS warning light. - Page 26 Overview of warning indicators Display Meaning lights up yellow The warning Electronic immobilizer is active EWS! indicated lights up yellow is indicated Fuel down to reserve ( lights up yellow is indicated Engine electronics ( lights up red is indicated Engine oil pressure insufficient lights up red is indicated...
- Page 27 Display Meaning is dis- Anti-theft alarm battery weak ( played with note lights up yellow is dis- Anti-theft alarm battery drained played with note...
- Page 28 Electronic immobilizer is A fuel shortage can lead The engine is running active to misfiring and to the in emergency operating engine dying unexpectedly. mode. Engine power may be General warning light Misfiring can damage the cat- reduced, and this can cause lights up yellow.
- Page 29 Engine oil pressure insuffi- Battery charge current in- If the warning on insufficient cient sufficient engine oil pressure appears General warning light despite a correct engine oil General warning light level: lights up red. lights up red. In addition to an insuf- Engine oil pressure sym- Battery charge current ficient engine oil level,...
- Page 30 gine can die suddenly and Replacing left low-beam Tail light or brake light bulb the battery can be exhaus- bulb ( 115) defective. tively discharged and there- Replacing right low-beam Replacing rear brake, tail fore destroyed. bulb ( 116) light or rear turn indicator Have the fault rectified as Replacing side light bulb bulbs (...
-
Page 31: Abs Warning
Anti-theft alarm battery A combination of several bulb The anti-theft alarm battery weak defects is present. has no capacity. The opera- Battery symbol with note tion of the anti-theft alarm is See the fault descriptions no longer ensured with the above. - Page 32 Display 1. Display 2. The warning indicators in this chapter are described using display 1.
- Page 33 Overview of warning indicators Display Meaning lights up red Brake switch defective ( flashes 1x per Pull-away test not completed ( second flashes 4x per Self-diagnosis not completed ( second lights up red lights up ABS warning lights defective ( lights up red flashes 1x per ABS function not available (...
- Page 34 Brake switch defective Have the fault rectified as Do not use emergency soon as possible by a spe- braking if possible until the General warning light cialized workshop, prefer- starting-off test has been lights up red. ably an authorized BMW completed.
- Page 35 self-diagnosis has not been ior, and therefore accidents ABS warning light flash- completed. may result. es once per second. You can continue to ride. Brake early and avoid hard Without the ABS func- However, bear in mind that braking whenever possible, tion, the wheels may neither the ABS function as functions of the BMW Inte-...
- Page 36 Residual braking function the brake booster is avail- Checking front brake pad active able. thickness ( 101) Have the fault rectified as Checking brake pad thick- General warning light soon as possible by a spe- ness at rear ( 102) lights up red.
- Page 37 Switch off Ignition, then op- Have the fault rectified as ABS warning light flash- erate handbrake lever and soon as possible by a spe- es four times per sec- footbrake lever consecutive- cialized workshop, prefer- ond. ably an authorized BMW At least two faults have oc- motorcycle retailer.
-
Page 39: Operation
Operation Headlight ..... 54 Turn indicators ....55 Ignition switch and steering lock . -
Page 40: Ignition Switch And Steering Lock
Switching on ignition Switching off ignition Ignition switch and steering lock Keys You receive one master key and one spare key. If a key is lost, please note the informa- tion on the electronic immobi- lizer (EWS) ( 39). Ignition switch and steer- ing lock, tank filler cap Turn the key to position 1. -
Page 41: Electronic Immobilizer Ews
The battery can be On level ground, always turn lizer can be started only with recharged via the onboard the handlebars to the left to the keys that belong to the socket. set the steering lock. vehicle. You can also have your authorized BMW motor- Turn the handlebars to the Locking handlebars... -
Page 42: Hazard Warning Flashers
A spare key attached keys that belong to the mo- The hazard warning to the same ring as the torcycle. A key that has been flashers place a strain ignition key used to start the barred can subsequently be on the battery. Do not use engine could "irritate"... -
Page 43: Odometer And Tripmeters
Switching off hazard Odometer and tripme- warning flashers ters Odometer Press tripmeter button 1 once briefly each time. Press turn-indicator cancel button 3. The odometer reading ap- Hazard warning flashers are pears in display field 1. switched off. Alternative: Press button for Selecting tripmeter left turn indicator 1 and right Switch on the ignition. -
Page 44: Clock
Tripmeter and onboard The hour increments by one Clock each time you press the computer Setting clock button. On motorcycles with an on- Attempting to set the Press button 1 for longer board computer, the tripmeter clock while riding the than 2 seconds. -
Page 45: Onboard Computer Oe
Adjusting dimming reached, brightness is reduced by one level. Onboard computer Selecting readings The following sequence is shown in the display field of Adjusting the dimming the onboard computer: while driving can lead to Residual range accidents. Average speed Only adjust the dimming when Average consumption the motorcycle is stationary. - Page 46 The determined residu- al range is an approxi- mate reading. BMW Motorrad Repeatedly press BC therefore recommends that button 1 until the average you do not try to use the full...
-
Page 47: Ambient Temperature
Display shows "--.- mpg". Oil level is correct Ambient temperature The current ambient tempera- Oil level ture is displayed. Check oil level. An ice warning Oil level cannot be mea- appears if the ambient- sured (conditions as temperature reading drops stated above not satisfied). -
Page 48: Cruise Control Oe
Setting road speed Step-by-step accelera- Cruise control tion Switching on cruise con- trol Briefly push button 3 in SET direction Briefly push button 3 in SET Cruise-control indicator direction Move switch 1 to ON. light lights up. Speed is increased by 1 Indicator light 2 in switch mph (2 km/h) each time lights up red. - Page 49 Stepless acceleration Step-by-step decelera- Stepless deceleration tion Briefly press button 3 in Briefly press button 3 in SET direction and hold. RES direction and hold. Briefly push button 3 in RES The motorcycle accelerates The motorcycle decelerates direction. steplessly. steplessly. Speed is decreased by ap- Release button 3.
-
Page 50: Emergency On/Off Switch
Cruise control is deactivat- only to the cruising speed Emergency ON/OFF saved in memory, even switch though you might have Cruise-control indicator light intended slowing to a lower goes out. speed. Indicator light in switch re- mains on. Cruise-control indicator light lights up. -
Page 51: Heated Hand Grips Oe
The engine can be easily and grips are switched off to en- Heated hand grips quickly switched off using the sure starting capability. emergency ON/OFF switch. Heated hand grips switch Heating function off. A Operating position. 50% heat output (one dot The handlebar grips can be B Engine switched off. - Page 52 switched off to ensure the Seat heating of passen- battery's starting capability. ger seat Seat heating, front seat Heating function off. 50% heating power 100% heating power Switch for seat heating, rear seat Switch for seat heating, front seat The passenger seat can be heated at two levels.
-
Page 53: Clutch
Shown in multifunction Driver's seat 50% heat- ing capacity display Driver's seat 100% heat- ing capacity Passenger seat 50% heating capacity Passenger seat 100% heating capacity Switch in middle posi- tion: Heating off. Clutch Switch pressed toward Switch on driver's or pas- Adjusting clutch lever rear: 50% heating ca- senger heating. -
Page 54: Brakes
bars or the handlebars in their Brakes mounts. Adjusting handbrake Attempting to adjust the lever clutch lever while riding The distance between han- the motorcycle can lead to dlebar grip and handbrake accidents. lever can be adjusted to any Adjust the clutch lever only of four positions. - Page 55 switched on longer than Switching on high-beam switch is pressed (headlight absolutely necessary. flasher). headlight Switching on side lights Switching on low-beam headlight Switch off the ignition. The low-beam headlight You can switch on the switches on automatically parking lights only imme- when you start the engine.
-
Page 56: Headlight
Headlight range and Headlight range adjust- Headlight spring preload ment Adjusting headlight for The headlight range gener- RHD/LHD traffic ally remains constant due to When riding in countries the adjustment of the spring where traffic drives on the op- preload to the loading state. posite side of the road to that Spring preload adjustment in which the motorcycle was... -
Page 57: Turn Indicators
A Position with heavy pay- Press left-hand turn indica- Press right-hand turn indi- load tor button 1. cator button 2. B Normal position After driving for approx. After driving for approx. ten seconds or after cov- ten seconds or after cov- Turn indicators ering a distance of approx. -
Page 58: Storage Compartment
Switching off turn indica- Opening storage com- Closing storage com- tors partment partment Press turn-indicator cancel Turn lock barrel 1 perpen- Snap lid of compartment button 3. dicular to driving direction closed and push it down. with ignition key. Turn indicator switched off. The lock engages with an Lock of storage compart- audible click. -
Page 59: Front And Rear Seats
Front and rear seats Removing passenger seat Make sure the ground is level and firm and park the motorcycle. When doing so, press the Pull the seat to the rear to rear seat down. release it from its holders. Lift the seat at the rear and Removing driver's seat release the key. - Page 60 Adjusting driver's seat Installing driver's seat The front seat can be raised Installing passenger seat or lowered to either of two positions. Installing driver's seat Adjusting driver's seat If too much pressure is Make sure the ground is applied in the forward level and firm and park the direction, there is a danger motorcycle.
- Page 61 gage in the lower mount on with OE Seat heating: the frame. Slide front seat forward on- to seat supporting rod 1. Close connector 1. Check that the seat is cor- Firmly push the front seat rectly seated. into the mount. Installing passenger seat If too much pressure is applied in the forward...
-
Page 62: Helmet Holder
Firmly press down on the Removing passenger seat Mirrors seat at the rear. Adjusting mirrors The seat engages with an audible click. Helmet holder Helmet holders under passenger seat Move the mirrors into the The helmet catch can desired position by pressing scratch the paneling. -
Page 63: Windshield
Press button 1 at top. acteristic to suit the spring Windshield preload. Windshield is raised. Adjustable windshield Press button 1 at bottom. Adjusting the spring Windshield is lowered. preload while the motorcycle is being ridden Spring preload can lead to accidents. Adjust the spring preload only Adjusting spring preload when the motorcycle is sta-... -
Page 64: Shock Absorbers
To decrease spring preload, Shock absorbers turn handwheel 1 in direc- Adjusting damping tion of arrow LOW. The damping must be adapt- ed to the spring preload. An increase in spring preload re- quires firmer damping, a re- duction in spring preload re- quires softer damping. -
Page 65: Electronic Suspension
Adjust the rear shock ab- Turn adjusting screw in di- motorcycle to the load and sorber, using a screwdriver rection of arrow H up to the road surface. The damp- to turn adjusting screw 1. stop, then a three-quarter ing setting is displayed in the turn in direction of arrow S multifunction display in the area 1, and the spring preload... - Page 66 Display goes out again au- normal damping tomatically after a few sec- onds. sporty damping Adjusting damping If button 1 is not pressed Switch on the ignition. for a longer time, shock ab- sorbers are set as indicat- ed. During the setting pro- cedure, the display flashes.
-
Page 67: Tires
Two-up (with luggage) pressure, use a metal valve Tire pressure for rear wheel cap with rubber sealing ring - passenger and luggage on the rear wheel and tighten 42.1 psi (with tire cold) If button 1 is not pressed it securely. In case of insufficient tire for longer than one second, pressure:... -
Page 69: Riding
Riding Safety instructions ... . . 68 Checklist ..... . 70 Starting . -
Page 70: Safety Instructions
settings of the spring-strut Do not ride your motorcy- Safety instructions and shock absorber system cle after consuming alcohol, Rider's equipment drugs and/or medication. imbalanced load Do not ride without the cor- loose clothing rect clothing. Always wear: Risk of poisoning insufficient tire pressure helmet Exhaust fumes contain car-... -
Page 71: Catalytic Converter
tion system when the engine Risk of fire Tampering with the con- is running. trol unit of the electronic Temperatures at the exhaust are high. engine-management sys- Catalytic converter Flammable materials If misfiring causes unburned (e.g. hay, leaves, grass, Tampering with con- fuel to enter the catalytic con- clothing and luggage, etc.) trol unit of electronic... -
Page 72: Checklist
engine-management Starting engine Starting system. Side stand You cannot start the Checklist motorcycle with the side Use the following checklist stand extended and a gear to check important functions, engaged. The engine will settings and wear limits be- switch itself off if you start fore you ride off. - Page 73 self-diagnosis has been At ambient temperatures be- a "Pre-ride check", is indicat- performed. low 32 °F (0 °C), actuate the ed by the lettering CHECK! clutch after switching on the in the display. With the OE Emergency ON/OFF ignition. cruise control, the light switch 1 in operating is also displayed.
-
Page 74: Starting Off
If the general warning Phase 1 The ABS warning light light cannot be dis- does not go out until af- Self-diagnosis is performed. played, several malfunctions ter completion of the starting- General warning light cannot be indicated. off test. lights up red. Watch the display of the gen- ABS warning light flash- Starting off... -
Page 75: Running In
The ABS warning light goes Exceeding the specified exerting greater pressure on out after completion of the engine speeds while run- the levers. starting-off test. ning in will lead to increased New brake pads can ex- engine wear. If an error message is shown tend stopping distance after the starting-off test is Adhere to the specified en-... -
Page 77: Parking Your Motorcycle
Slowly lean the motorcycle On a grade, the motor- Parking your motorcy- to the side until its weight cycle should always face is taken by the stand and uphill; select 1st gear. Placing on side stand dismount to the left. When you prop the If the ground is soft or motorcycle on the... - Page 79 An extended side stand Remove from side can catch on the ground stand when the motorcycle is mov- ing and lead to a fall. Brake servo assistance Retract the side stand before is not available when the moving the vehicle. ignition is off;...
- Page 81 Excessive movements Placing on center could result in the cen- stand ter stand retracting, and the motorcycle would topple as a If the ground is soft or result. uneven, there is no guar- Do not sit on the motorcycle antee that the motorcycle will while it is resting on the cen- rest firmly on the stand.
- Page 83 Pushing off center stand Brake servo assistance is not available when the ignition is off; the motorcycle can start to roll. Especially on inclines, switch on the ignition and wait for the ABS self-diagnosis. Switch on the ignition. Wait for ABS self-diagnosis to complete.
-
Page 84: Refueling
Make sure the ground is Premium grade unleaded Refueling level and firm and park the fuel Fuel is highly flammable. motorcycle. 98 ROZ Fire at the fuel tank can Fuel types can be used with result in fire and explosion. poorer performance and Do not smoke. -
Page 85: General Brake System
Salt on brakes Dirt or mud on brakes General brake system The full braking effect When the motorcycle Descending mountain can be delayed if the is ridden on loose sur- passes motorcycle is ridden on salt- faces or muddy roads, the There is a danger of the covered roads and the brakes brakes may fail to take effect... -
Page 86: Brake System With Bmw Integral Abs
minimize braking distances Partially integral brake Brake system with noticeably, even when road BMW Integral ABS Your motorcycle is equipped conditions are poor. When with a partially integral brake Sensitive electronic con- driving straight ahead, BMW configuration. Both front and trol Integral ABS enables safe, re- rear brakes are applied simul-... - Page 87 higher braking efficiency than Bear in mind that ABS can- the ABS function is unavail- standard brake systems. not be relied on in all circum- able in the brake system in stances to prevent the rear question. When the residu- ABS anti-lock braking wheel from lifting clear of the al braking function is active,...
- Page 88 As the residual braking function means that the lever path before the brake pressure is built up can be longer, BMW Motorrad rec- ommends that a larger lever path be set at the handbrake lever. In the case of residual...
-
Page 89: Accessories
Accessories General instructions ... 88 Onboard socket ....88 Luggage ..... . 91 Case . -
Page 90: General Instructions
BMW cannot evaluate General instructions Onboard socket whether every product of BMW Motorrad recommends Ratings other manufacturers is suit- the use of parts and acces- The supply to the socket is able for use on BMW motor- sories for your motorcycle... - Page 91 Cable routing The cables from the onboard socket to the auxiliary device must be routed in such a way that they: do not impede the rider do not restrict or obstruct the steering angle and han- dling characteristics Onboard socket, rear left cannot be trapped Operating electrical ac- Improperly routed cables...
-
Page 93: Luggage
Make sure that the weight Luggage is uniformly distributed be- Correct loading tween right and left. Pack heavy items at bottom Overloading and uneven and toward inboard side. loading can diminish the Max. load in each case (left riding stability of the motorcy- and right): 22 lbs (10 kg). -
Page 94: Case
Closing case Case Opening case Press lock barrel 1. Unlocking lever 2 pops up. Pull lever 2 back as far as it Fold lever 2 toward rear. will go. Turn key in case lock per- Open case lid. Close case lid 3 and press pendicular to direction of down. - Page 95 Removing case Push lever down. Turn the key clockwise (left case) or counterclockwise The lever engages. Turn key in case lock per- (right case). Turn key in case lock paral- pendicular to direction of Handle 4 pops out. lel to direction of travel. travel.
-
Page 96: Topcase Oa
The case is released and Topcase can be removed. Opening Topcase Mounting case Unlatch the handle and pull it up as far as it will go. Push the handle of the case down until it engages (the colored indicator on the Position lock barrel vertically handle must disappear). - Page 97 Closing Topcase Removing Topcase Lift the Topcase at the rear and pull it off the carrier. Fully open locking lever 8. Position lock barrel horizon- Unlock lid and press down. tally in Topcase. Mounting Topcase Check that nothing is Topcase is locked. Position lock barrel horizon- trapped between the lid and Turn the key clockwise.
- Page 98 dicator on the handle must disappear). Topcase is locked. Turn the key clockwise. Hook the Topcase into position on the carrier. Handle 6 pops out. Make sure that hooks 7 are securely seated in corresponding mounts 8. Pull handle 6 up as far as it will go.
-
Page 99: Maintenance
Maintenance Lamps ..... . . 113 Jump starting ....121 General instructions . -
Page 100: General Instructions
General instructions Toolkit Overview of toolkit The 'Maintenance' chapter Removing toolkit describes work involving the Make sure the ground is checking and replacement of level and firm and park the wear parts that can be per- motorcycle. formed with a minimum of ef- Removing passenger seat fort. -
Page 101: Overview Of Supplemental
can only be checked at the oil Overview of supple- Engine oil sight glass. mental set Checking engine oil level Make sure ground is level The engine can seize if and firm and place motorcy- the oil level is low, and cle at operating temperature this can lead to accidents. -
Page 102: General Brake System
Topping up engine oil General brake system Functioning brakes A properly functioning brake system is a basic require- ment for the road safety of your motorcycle. Do not ride the motorcycle if you have any doubts about the dependability of the brake Specified level of engine oil system. -
Page 103: Brake Pads
Checking brake opera- preferably an authorized BMW motorcycle retailer. tion Switch on the ignition. Brake pads Wait for ABS self-diagnosis Checking front brake pad to complete. Pull the handbrake lever. thickness The pressure point must be Continuing to use brake clearly perceptible. - Page 104 The wear markings must be Make sure the ground is clearly visible on the brake level and firm and park the pads must. motorcycle. If the wear indicating marks are no longer clearly visible: Have the brake pads re- placed by a specialized workshop, preferably an au- thorized BMW motorcycle The brake disk must not be...
-
Page 105: Brake Fluid
preferably an authorized Residual brake pad thick- Brake fluid BMW motorcycle retailer. ness Checking front brake flu- at least 75% (3 rings visible) id level at least 50% (2 rings visible) A low fluid level in the 50-25% (1 ring visible) brake reservoir can al- Replace brake pad (No low air to penetrate the brake... - Page 106 system. This significantly re- duces braking efficiency. Brake early. Have the fault remedied as quickly as possible by a certified workshop, preferably an authorized BMW motorcycle retailer. Checking rear brake fluid Read off the brake fluid level Read off the brake fluid level level at the reservoir 1.
-
Page 107: Clutch
Brake fluid DOT4 Tires have wear indica- If no clear pressure point can tors integrated into the The brake fluid level must be felt: main tread grooves. If the tire not drop. Have the clutch checked tread has worn down to the by a specialized workshop, If the brake fluid level drops level of the marks, the tire is... -
Page 108: Wheels
If a risk of the brake pads be- BMW Motorrad has not ap- ing pressed together to the proved the wheels and tires, it extent that they cannot be... - Page 109 Installing front wheel Carefully pull brake calipers BMW Motorrad offers an Threaded fasteners not back and out until clear of adapter piece for remov- tightened to the speci- brake disks.
- Page 110 ably an authorized BMW mo- torcycle retailer. During the following work, parts of the front brake, in particular of the BMW Integral ABS, can be damaged. Take care not to damage the brake system, in particular the ABS sensor with cable and Roll the front wheel into the Install quick-release axle 6 the ABS sensor ring.
- Page 111 Install mounting screws 2 Install screws 1 on left and The cable of the ABS with torque. right. sensor could chafe Brake caliper on slider tube Switch on the ignition. through if it comes into contact with the brake disk. 22 lb/ft Wait for self-diagnosis to complete.
- Page 112 Make sure ground is level and firm and park motorcy- cle on its center stand. Remove screw 2 for bracket Remove screws 3 from rear of end muffler from passen- wheel while supporting ger footrest. wheel. Roll the rear wheel out to- Unscrew clamping screw 1 ward the rear.
- Page 113 Insert rear wheel in hole for wheel and the end muffler wheel centering device. must be at least 0,79 in. Install screw 2 for bracket of end muffler on rear footrest, but do not tighten it. Turn the end silencer to its initial position.
-
Page 114: Front Wheel Stand
14 lb/ft the front wheel stand to the stand before lifting it with the desired height. BMW Motorrad front wheel Front wheel stand Center the front wheel stand stand. relative to the front wheel Front wheel stand... -
Page 115: Lamps
Lamps General instructions A bulb failure is signaled to you in the multifunction dis- play by a warning indicator. If the brake or rear light fails, the general warning light al- so lights up in yellow. If the rear light fails, the brake light Align two mounts 2 so that If the motorcycle is rest- is used as a substitute in that... - Page 116 The bulb is pressurized topple in the course of the and can cause injury if operations described below. damaged. Make sure that the motorcy- Wear eye and hand protection cle is steady on its stand. when replacing bulbs. Make sure the ground is An overview of the bulb level and firm and park the types installed in your...
- Page 117 Check that the bulb is cor- rected seated (by looking in through the headlight lens). Replacing left low-beam bulb If it is not standing firm- ly, the motorcycle could topple in the course of the operations described below. Remove bulb 4. Turn cover 1 counterclock- Make sure that the motorcy- wise and remove it.
- Page 118 Install bulbs in reverse or- Make sure that the motorcy- der. cle is steady on its stand. Make sure the ground is level and firm and park the motorcycle. Switch off the ignition. To achieve better acces- sibility, turn the handle- bars to the left.
- Page 119 Check that the bulb is cor- rected seated (by looking in through the headlight lens). Left and right side-light bulb The procedure for replacing the left side-light bulb is de- scribed below. The proce- dure for replacing the right Disconnect plug 2. Remove bulb 4.
- Page 120 Apply firm forward pressure Remove screw 1 while Side-light bulb is accessible with the flat of your hand to holding fairing side panel in through opening. push the mirror back out of place. the anchorage. Remove bulb holder 3 from Take off fairing side panel 2.
- Page 121 of motorcycle: swivel lever upward). When installing fairing pan- If rubber mounts or re- el 2, make sure that lug of taining pins of the mir- panel is correctly seated in rors are greased, the mirrors Pull bulb 5 out of bulb hold- corresponding recess.
- Page 122 Replacing rear brake, tail Press the bulb into its sock- et and turn it counterclock- light or rear turn indica- wise to remove. tor bulbs Install new bulb in reverse If it is not standing firm- order. ly, the motorcycle could topple in the course of the Replacing front turn indi- operations described below.
-
Page 123: Jump Starting
Press bulb 2 into its socket ly in their corresponding and turn it counterclockwise mounts. to remove. Jump starting Install new bulb in reverse order. Jump starting The wires leading to the onboard socket do not have a load-capacity rating adequate for jump-starting Apply firm forward pressure the engine. -
Page 124: Battery
A short-circuit can result battery from the onboard protect starter and donor if the crocodile clips of electrical system. battery. the jump leads are acciden- Remove the protective cap Allow both engines to idle tally brought into contact with from the positive battery ter- for a few minutes before the motorcycle. - Page 125 BMW Motorrad has de- Charging the battery via Keep the surface of the bat- veloped a trickle-charger the onboard socket is...
- Page 126 Always charge a completely Charging disconnected Removing passenger seat drained battery directly at the battery terminals of the disconnected Removing driver's seat Charge the battery using a battery. suitable charger. Switch off the ignition. Charge the disconnect- Comply with the operating ed battery via the onboard instructions of the charger.
- Page 127 Then pull off protective cap Then install negative cable 2 and remove battery positive and hand-tighten screw. cable 3. Switch on the ignition. Lift out battery upward; if it Without starting engine, is difficult to move, moving it hold throttle twistgrip in ful- back and forth will help.
-
Page 129: Care
Care Care products ....128 Washing your motorcycle ..128 Cleaning sensitive motorcycle parts ......129 Paint care . -
Page 130: Care Products
Care products Washing your motor- brakes might not take effect cycle BMW Motorrad recommends immediately. that you use the cleaning BMW Motorrad recommends Brake early until the brakes and care products you can that you use BMW insect re- are dry or braked until dry. -
Page 131: Cleaning Sensitive Motorcycle Parts
Soften stubborn dirt and Radiator Cleaning sensitive mo- dead insects by covering torcycle parts Clean the radiator regular- the affected areas with a wet ly to prevent overheating of Plastics cloth. the engine due to inadequate Clean plastic parts with water cooling. -
Page 132: Paint Care
For the protective wax coat- sponding auxiliary stands. However, remove particularly ing of paint, BMW Motorrad Before storing the aggressive materials imme- recommends using only BMW vehicle, have the engine diately; otherwise changes in... -
Page 133: Returning Motorcycle To
Returning motorcycle to use Remove protective wax coating. Clean motorcycle. Install a charged battery. Before starting: Observe checklist. -
Page 135: Technical Data
Technical data Troubleshooting chart ..134 Threaded fasteners ... 135 Engine ..... . . 136 Riding specifications . -
Page 136: Chart
Troubleshooting chart Engine does not start at all or is very difficult to start Possible cause Remedy Emergency ON/OFF switch activated. Emergency ON/OFF switch in operating posi- tion. Side stand extended and gear engaged. Retract side stand ( 70). Gear engaged and clutch not operated. Place transmission in neutral or disengage clutch( 70). -
Page 137: Threaded Fasteners
Threaded fasteners Activity Type of threaded fastener Tightening torques Front wheel Clamping screw for quick-release M8 x 35 14 lb/ft axle Quick-release axle in axle mount M24 x 1.5 37 lb/ft Brake caliper on slider tube M8 x 32 - 10.9 22 lb/ft Rear wheel Rear wheel on wheel carrier... -
Page 138: Engine
Engine Engine design longitudinally mounted twelve-cylinder, four- cycle opposed-twin engine with one overhead cam each, air cooling, oil-cooled exhaust sys- tem and electronic fuel injection Effective displacement 1170 cc Cylinder bore 4 in Piston stroke 2.9 in Compression ratio 12.0:1 Rated output 110 hp, - at engine speed: 7500 min with OE Power reduction:... - Page 139 Oil grades Engine oils of the API classification SF or bet- ter. Engine oils of the ACEA classification A2 or better. BMW Motorrad recommends not using synthetic oils for the first 6,000 miles (10,000 km). Ask your BMW motorcycle retail-...
-
Page 140: Riding Specifications
Permissible viscosity classes SAE 5 W-30 -4...68 °F, Operation at low temperatures SAE 10 W-40 14...86 °F, Operation at moderate tempera- tures SAE 15 W-40 or SAE 20 W-40 >32 °F, Operation at high temperatures SAE 5 W-50 or SAE 10 W-50 >-4 °F, Use high-quality and synthetic oils. -
Page 141: Clutch
Clutch Clutch design single dry plate with high-leverage pressure plate Transmission Transmission design fully helical 6-speed transmission with inte- grated torsional vibration damper, claw shift- ing via sliding sleeves Gear ratios Transmission primary gear ratio 1.824 (31:17 teeth) Gear ratio in 1st gear 2.277 (41:18 teeth) Gear ratio in 2nd gear 1.583 (38:24 teeth) -
Page 142: Rear-Wheel Drive
Rear-wheel drive Rear-wheel drive design shaft drive with bevel gears Gear ratio of rear-wheel drive 2.62:1 Running gear Front-suspension design BMW Telelever, tilt decoupled, leading link centrally mounted in main frame/on engine, with externally seated suspension strut Total suspension travel of front suspension 4.7 in, on wheel Rear suspension strut design Central spring strut with single-tube gas-filled... -
Page 143: Brakes
Brakes Front brake design Hydraulic two-disk brake with 4-piston fixed calipers and floating brake disks Front brake pad Sintered metal Front brake pads - wear marking The wear markings must be clearly visible on the brake pads must. Rear brake design Hydraulic disk brake with 2-piston floating caliper and fixed brake disk Rear brake pad... -
Page 144: Wheels And Tires
Wheels and tires Front wheel design Cast wheel with 5 double spokes, MT H2 Front-wheel rim size 3.50" x 17" Front-wheel tire designation 120/70 ZR 17 Rear wheel design Cast wheel with 5 double spokes, MT H2 Rear-wheel rim size 5.50"... -
Page 145: Electrical System
Electrical system Current limit values for onboard sockets 10 A Fuses All circuits are electronically protected, so plug-in fuses are no longer necessary. If an electronic fuse trips and de-energizes a cir- cuit, the circuit is active as soon as the ig- nition is switched on after the fault has been rectified. - Page 146 Bulbs High-beam headlight bulb - standard designa- Halogen bulb H7 tion High-beam headlight bulb - voltage 12 V High-beam headlight bulb - wattage 55 W Low-beam headlight bulb- standard designa- Halogen bulb H7 tion Low-beam headlight bulb - voltage 12 V Low-beam headlight bulb - wattage 55 W Side-light bulb standard designation...
-
Page 147: Frame
Frame Frame design Steel-tube front frame with steel-tube rear frame and carrying drive unit Location of type plate Rear frame lug on right under passenger seat Location of vehicle identification number (VIN) Front frame, upper center Dimensions Overall length 87.8 in Maximum height 56.3 in, in DIN normal-load position;... -
Page 148: Weights
Weights Unladen weight 571 lbs, DIN unladen weight, ready for road, 90% full tank of gas, without OE Permitted total weight 1091 lbs Max. payload 520 lbs... -
Page 149: Service
Service BMW Motorrad service ..148 BMW Motorrad service quality ..... . . 148... -
Page 150: Service
By dance with BMW specifica- BMW Motorrad stands not having the necessary repairs tions. only for good handling and a done properly and in good You can contact your BMW... -
Page 151: Bmw Motorrad Service Card - On-The-Spot Breakdown
BMW Motorrad service certain time, others depend network With all new BMW motorcy- on the distance covered by cles, the BMW Motorrad Ser- With its worldwide service the motorcycle. vice Card protects you in the network BMW Motorrad sup- event of a breakdown with... -
Page 152: Schedules
BMW Service Maintenance sched- ules After the first 6,000 miles (10,000 km) and every The maintenance schedule for additional 12,000 miles your motorcycle depends on (20,000 km) (18,000 miles, the equipment installed, and 30,000 miles, 40,000 miles on the motorcycle's age and etc. -
Page 153: Confirmation Of Maintenance Work
Confirmation of maintenance work BMW Pre-delivery BMW Running-in Check Check Carried out properly in Carried out properly in accordance with work- accordance with work- shop specifications. shop specifications. at miles: Brake fluid changed Without BMW Inte- gral ABS With BMW Integral Wheel circuit Control circuit Date, stamp, signature... - Page 154 BMW Service BMW Service BMW Service BMW Annual In- BMW Annual In- BMW Annual In- spection spection spection BMW Service BMW Service BMW Service BMW Inspection BMW Inspection BMW Inspection Carried out properly in Carried out properly in Carried out properly in accordance with work- accordance with work- accordance with work-...
- Page 155 BMW Service BMW Service BMW Service BMW Annual In- BMW Annual In- BMW Annual In- spection spection spection BMW Service BMW Service BMW Service BMW Inspection BMW Inspection BMW Inspection Carried out properly in Carried out properly in Carried out properly in accordance with work- accordance with work- accordance with work-...
- Page 156 BMW Service BMW Service BMW Service BMW Annual In- BMW Annual In- BMW Annual In- spection spection spection BMW Service BMW Service BMW Service BMW Inspection BMW Inspection BMW Inspection Carried out properly in Carried out properly in Carried out properly in accordance with work- accordance with work- accordance with work-...
- Page 157 BMW Service BMW Service BMW Service BMW Annual In- BMW Annual In- BMW Annual In- spection spection spection BMW Service BMW Service BMW Service BMW Inspection BMW Inspection BMW Inspection Carried out properly in Carried out properly in Carried out properly in accordance with work- accordance with work- accordance with work-...
-
Page 158: Confirmation Of Service
Confirmation of service The table is intended as proof of maintenance, warranty and repair work, the installed optional accessories and any special campaign (recall) work carried out. Work carried out at miles: Date... - Page 159 Work carried out at miles: Date...
- Page 160 Brake lever Clock Abbreviations and symbols, 6 adjusting handbrake adjusting, 18 lever, 52 setting, 42 warning light, 23 Brake pads Clutch Accessories check front, 101 adjusting clutch lever, 51 general instructions, 88 check rear, 102 checking operation, 105 Anti-theft alarm, 18 running in, 73 fluid reservoir, 13 Brakes, 101...
- Page 161 Hazard warning flashers, 16, Electrical system functional description, 39 technical data, 143 switching off, 41 warning indicator, 26 Emergency ON/OFF switching on, 40 switch, 17, 48 Headlight Frame Engine adjusting for RHD/LHD technical data, 145 engine-electronics warning traffic, 54 Front wheel stand, 112 indicator, 26 adjusting headlight Fuel...
- Page 162 Immobilizer replacing rear turn indicator Motorcycle functional description, 39 bulb, 120 general view of left side, 11 warning indicator, 26 replacing right low-beam general view of right bulb, 116 Indicator lights, 18 side, 13 overview, 23 replacing side light returning to use, 131 bulb, 117 Instrument cluster storing, 130...
- Page 163 electrical system, 143 Passenger seat Safety instructions, 68 engine, 136 heating, 13, 50 brakes, 83 engine oil, 137 Service, 148 installing, 59 frame, 145 Service Card, 149 removing, 57 fuel, 4, 137 Side stand Pre-ride check, 71 rear-wheel drive, 140 during starting, 70 running gear, 140 placing on side stand, 75...
- Page 164 Topcase Wheels installing front wheel, 107 closing, 95 installing rear wheel, 110 mounting, 95 removing front wheel, 106 opening, 94 removing rear wheel, 109 removing, 95 technical data, 142 Torques, 135 Windshield Transmission adjusting, 13, 16, 61 during starting, 70 technical data, 139 Troubleshooting chart, 134 Turn indicators...
- Page 165 The right to modify designs, equipment and accessories is reserved. Errors and omissions except- © 2005 BMW Motorrad Not to be reproduced either wholly or in part without writ- ten permission from BMW Motorrad, After Sales.
- Page 166 Tire pressure for front wheel - passenger and luggage 36.3 psi, with tire cold Tire pressure for rear wheel - passenger and luggage 42.1 psi, with tire cold BMW Motorrad Order No.: 01 47 7 698 857 BMW recommends 08.2005 2.
- Page 167 However, NHTSA cannot become involved in BMW Motorrad Order No: 01 47 7 706 697 08.2006...
- Page 168 Information on BMW Motorrad Integral ABS How does ABS work? resulting in a danger of falling. ensure driving stability when The maximum braking force Before this situation occurs, contact with the road surface which can be transferred to the ABS intervenes and is restored.
- Page 169 BMW Motorrad and extremely quickly, in com- accessories connected to retailer should be connected bination with a decreasing...
- Page 170 This optimally utilizes the rider to brake the motor- A fault in the BMW Motorrad the dynamic load increase on cycle. Integral ABS is indicated by a the front wheel. At the same...
- Page 171 • Always brake with the front How important is regular How is the BMW Motorrad maintenance? Integral ABS designed? and rear brakes Any technical system is The BMW Motorrad Integral • In clear situations, carry out always only as good as...
Need help?
Do you have a question about the R 1200 RT 2005 and is the answer not in the manual?
Questions and answers