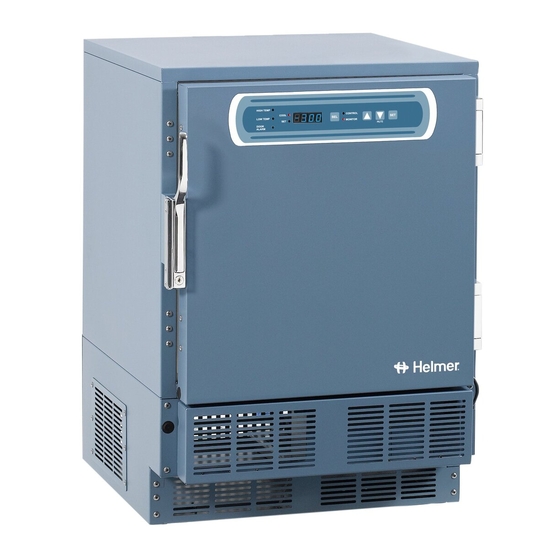
Helmer i.Series Operation Manual
Undercounter refrigerator
Hide thumbs
Also See for i.Series:
- Service manual (126 pages) ,
- Service and maintenance manual (76 pages) ,
- Operation manual (35 pages)
Table of Contents
Advertisement
Quick Links
Undercounter Refrigerator Operation Manual
i.Series
and Horizon Series™
®
HELMER SCIENTIFIC
14400 Bergen Boulevard
Noblesville, IN 46060 USA
PH +1.317.773.9073
FAX +1.317.773.9082
USA and Canada 800.743.5637
360116-1/D
Model Group
Blood Bank
iB105 (Version A)
Laboratory/Pharmacy
iLR105 (Version A)
i.Series
Horizon Series
HB105 (Version A)
HLR105 (Version A)
0086
ISO 13485:2003 CERTIFIED
Advertisement
Table of Contents

Subscribe to Our Youtube Channel
Related Manuals for Helmer i.Series


Summary of Contents for Helmer i.Series
- Page 1 Undercounter Refrigerator Operation Manual i.Series and Horizon Series™ ® Model Group i.Series Horizon Series Blood Bank iB105 (Version A) HB105 (Version A) Laboratory/Pharmacy iLR105 (Version A) HLR105 (Version A) HELMER SCIENTIFIC 14400 Bergen Boulevard Noblesville, IN 46060 USA PH +1.317.773.9073 0086 FAX +1.317.773.9082...
- Page 2 Document History Revision Date Supersession Revision Description Supersedes A, 16 JAN 2014* 8580 Revised layout for ease of navigation and locating information. B, C * Date submitted for Change Order review. Actual release date may vary. 360116-1/D...
-
Page 3: Table Of Contents
7 Maintenance Schedule ........... . . 11 Section II: i.Series ®... - Page 4 Section III: Horizon Series™ Models ........20 11 Operation .
-
Page 5: Section I: General Information
, i.Center ® , Horizon Series™, and Rel.i™ are registered trademarks or trademarks of Helmer, Inc. in the United States of America. Copyright © 2014 Helmer, Inc. All other trademarks and registered trademarks are the property of their respective owners. Helmer, Inc., doing business as (DBA) Helmer Scientific and Helmer. -
Page 6: Avoiding Injury
► Proceed with caution when adding and removing samples from the refrigerator. ► Use supplied power cord only. ► Using the equipment in a manner not specified by Helmer Scientific may impair the protection provided by the equipment. ► Decontaminate parts prior to sending for service or repair. Contact Helmer Scientific or your distributor for decontamination instructions and a Return Authorization Number. -
Page 7: Specifications
General Information Specifications iB105 iLR105 HB105 HLR105 Exterior Dimensions Height 33.5” (851 mm) (2,3) Width 24” (610 mm) Depth 28.5” (724 mm) Physical Weight 200 lbs (91 kg) 188 lbs (86 kg) 200 lbs (91 kg) 188 lbs (86 kg) Interior Volume 5 ft³... -
Page 8: Stacked Undercounter Units
► When stacking a refrigerator and freezer (104 and/or 105 models), place the heavier unit on the bottom. ► Do not open multiple, loaded drawers or baskets at the same time. Call Helmer or your distributor for more information on the stacking kit, and for methods to secure both units to the wall and/or the floor. 360116-1/D... -
Page 9: Compliance
General Information Compliance Regulatory Compliance This device complies with the requirements of directive 93/42/EEC concerning Medical Devices, as amended by 2007/47/EC. 0086 Sound level is less than 70 dB(A). Emergo Europe Molenstraat 15 2513 BH The Hague, Netherlands WEEE Compliance The WEEE (waste electrical and electronic equipment) symbol (right) indicates compliance with European Union Directive WEEE 2002/96/EC and applicable provisions. -
Page 10: Placement
Move refrigerator into place. Lock casters if installed. Ensure refrigerator is level. NOTE Helmer recommends the use of leveling feet (unless casters are installed). Temperature Probes For each probe bottle, use: ► Approximately 4 oz. (120 mL) of product simulation solution (10:1 ratio of water to glycerin). -
Page 11: Install And Change Chart Paper
General Information 6.5.1 Install and Change Chart Paper Press and hold C button. When stylus begins to move left, release button. The LED flashes to indicate current temperature range. When stylus stops moving, remove chart knob then move knob up and away from chart paper. Place new chart paper on chart recorder. Gently lift stylus and rotate paper so current time line corresponds to time line groove. Hold chart paper and reinstall chart knob. -
Page 12: Maintenance Schedule
Temperature Chart Recorder Operation and Service Manual. ► Inspect electrical components and wiring terminals in the electrical box for discoloration. Contact Helmer Technical Service if any discoloration is found. ► Inspect all wiring for terminals for secure connection. Tighten wiring terminal connections as necessary. -
Page 13: Section Ii: I.series ® Models
Models Section II: i.Series Models ® Operation Initial Start Up Plug the power cord into a grounded outlet that meets the electrical requirements on the product specification label. Switch AC ON/OFF switch ON. Insert the D-cell backup battery in the monitoring system backup battery pack. -
Page 14: Change Temperature Setpoint
Models Change Temperature Setpoint Independent temperature controller. NOTICE Parameter values are factory-preset and should not be changed unless directed by Helmer Technical Service. NOTE ► Default setpoint is 4.0 °C. ► When there is no interaction for 25 seconds, the temperature controller exits program mode and returns to normal mode. -
Page 15: Set Alarm Parameters
Models Set Alarm Parameters i.Center Home screen. Press the MAIN button. Press the DOWN button to highlight Edit Configuration. Press the SELECT button. Press the DOWN button to highlight Alarm Setpoints. Press the SELECT button. Press the DOWN button to highlight the desired alarm setting. Press the INC or DEC buttons to set the alarm setpoint. -
Page 16: I.center Screen Reference
Models i.Center Screen Reference HOME screen MAIN button MAIN screen MUTE button (changes mute timer) LIGHT button (turns light on or off, if option installed) MAIN screen Event Log option (Press the SELECT button) EVENT LOG screen System Alarm Test & Status option SYSTEM ALARM TEST &... - Page 17 Models SYSTEM OPTIONS screen Language option Date Format option Alarm Volume option Alarm Pulse option Temperature Units option Chart Paper Timer option SET ALARM SETPOINT screen High Alarm Setpoint option Low Alarm Setpoint option Cond. Alarm Setpoint option Door Ajar Timeout option...
-
Page 18: Components
Models Components 10.1 Front and Base Front and base features (iB105 model shown). Label Description Chart recorder (standard on blood bank models, optional on laboratory/pharmacy models) i.Center monitoring system Door handle with lock Leveling foot (standard; casters are optional) -
Page 19: Chamber
Models 10.2 Chamber Chamber features (multiple models shown). Label Description Probe bottle Shelf (laboratory/pharmacy models) Roll out basket (optional) Drawer (blood bank models) Unit cooler with fan guard Chamber label Standard for adjusting storage components Slide for drawer or basket NOTE Blood bank models (iB) feature drawers as the standard storage configuration. -
Page 20: Rear
Models 10.3 Rear Rear features (iB105 model shown). Label Description Insert for stacking bracket Drain line Compressor Product specification label Power connector Access port Rear panel Remote alarm interface i.Center monitoring system data port RS-232 COM port (optional) Power cord Condensate evaporator... -
Page 21: Section Iii: Horizon Series™ Models
Horizon Series™ Models Section III: Horizon Series™ Models Operation 11.1 Initial Start Up Plug the power cord into a grounded outlet that meets the electrical requirements on the product specification label. Switch AC ON/OFF switch ON. Remove the 9 V battery from the literature box and install it. NOTE If an alarm condition other than High Temperature occurs, refer to the service manual for troubleshooting. -
Page 22: Monitor Offset
► Factory-set to match an independent thermometer. ► Varies for each refrigerator. NOTICE Control Sensor Offset is factory-preset and should not be changed unless directed by Helmer Technical Service. 11.2.4 Hysteresis ► Allowable temperature variance on each side of the refrigerator setpoint. -
Page 23: Active Alarms
Horizon Series™ Models Hold Up Arrow and Down Arrow for three seconds. MONITOR lamp stops flashing to indicate exit from program mode. New settings are saved. 11.3 Active Alarms The controller displays temperature and alarm information. DOOR ALARM lamp lights Door is open (less than 3 minutes) DOOR ALARM lamp flashes Door has been open 3 minutes or longer * HIGH TEMP lamp flashes Temperature reaches high temperature set point LOW TEMP lamp flashes... -
Page 24: Components
Horizon Series™ Models Components 12.1 Front and Base E F G H I Front and base features (HLR105 model shown). Label Description Horizon Series temperature monitor and control Door handle with lock Leveling foot (casters are optional) Condenser grill Monitoring system battery backup Alarm disable key switch Light switch (optional) Circuit breakers (230 V models only) -
Page 25: Chamber
Horizon Series™ Models 12.2 Chamber Chamber features (multiple models shown). Label Description Probe bottle Shelf (laboratory/pharmacy models) Roll out basket (optional) Drawer (blood bank models) Unit cooler with fan guard Chamber label Standard for adjusting storage components Slide for drawer or basket NOTE Blood bank models (HB) feature drawers as the standard storage configuration. -
Page 26: Rear
Horizon Series™ Models 12.3 Rear Rear features (HB105 model shown). Label Description Insert for stacking bracket Drain line Compressor Product specification label Power connector Access port Rear panel Remote alarm interface Power cord Condensate evaporator END OF MANUAL 360116-1/D... - Page 28 HELMER SCIENTIFIC 14400 Bergen Boulevard Noblesville, IN 46060 USA PH +1.317.773.9073 FAX +1.317.773.9082 www.helmerinc.com...
Need help?
Do you have a question about the i.Series and is the answer not in the manual?
Questions and answers