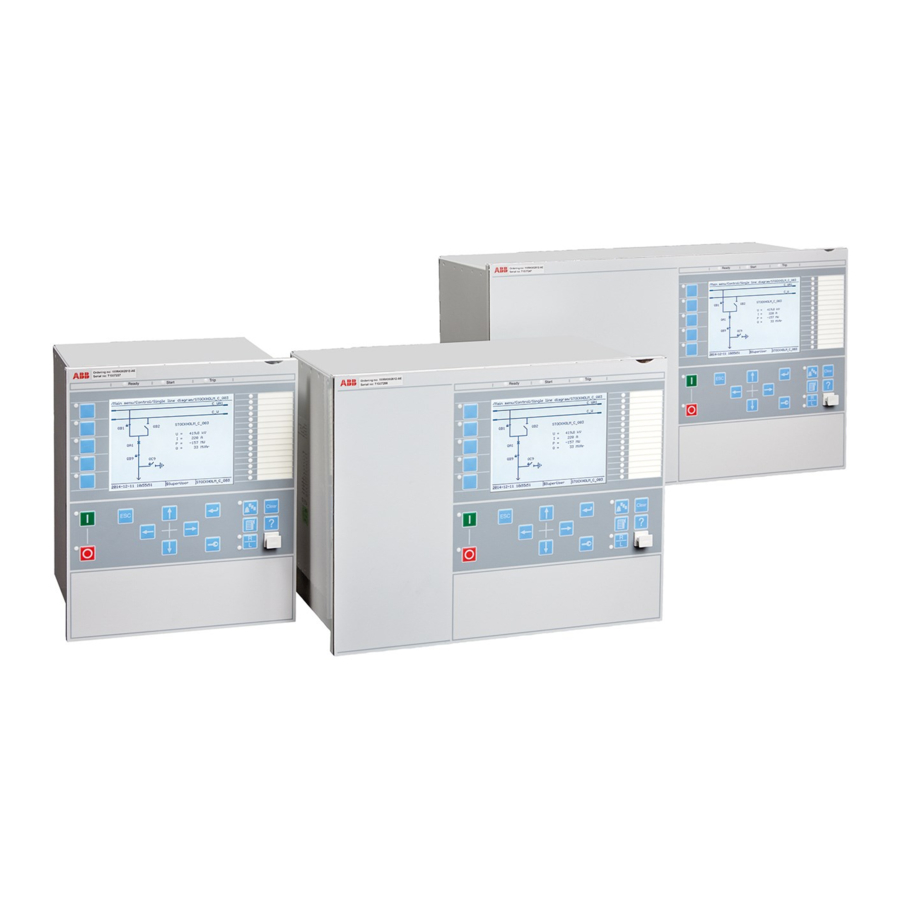
ABB Relion 670 Series Commissioning Manual

ABB Relion 670 Series Commissioning Manual

Busbar protection
Hide thumbs Also See for Relion 670 Series:
Table of Contents

Advertisement

Quick Links

®
Relion
670 series
Busbar protection REB670 2.0 ANSI
Commissioning Manual

Advertisement

Table of Contents
loading

Summary of Contents for ABB Relion 670 Series

  • Page 1 ® Relion 670 series Busbar protection REB670 2.0 ANSI Commissioning Manual...
  • Page 3 Document ID: 1MRK 505 304-UUS Issued: May 2014 Revision: - Product version: 2.0 © Copyright 2014 ABB. All rights reserved...
  • Page 4 Copyright This document and parts thereof must not be reproduced or copied without written permission from ABB, and the contents thereof must not be imparted to a third party, nor used for any unauthorized purpose. The software and hardware described in this document is furnished under a license and may be used or disclosed only in accordance with the terms of such license.
  • Page 5 In case any errors are detected, the reader is kindly requested to notify the manufacturer. Other than under explicit contractual commitments, in no event shall ABB be responsible or liable for any loss or damage resulting from the use of this manual or the application of the equipment.
  • Page 6 (EMC Directive 2004/108/EC) and concerning electrical equipment for use within specified voltage limits (Low-voltage directive 2006/95/EC). This conformity is the result of tests conducted by ABB in accordance with the product standard EN 60255-26 for the EMC directive, and with the product standards EN 60255-1 and EN 60255-27 for the low voltage directive.
  • Page 7: Table Of Contents

    Table of contents Table of contents Section 1 Introduction................9 This manual....................9 Intended audience..................9 Product documentation................10 Product documentation set..............10 Document revision history..............11 Related documents................12 Document symbols and conventions............12 Symbols.....................12 Document conventions..............13 IEC61850 edition 1 / edition 2 mapping..........14 Section 2 Safety information...............23 Symbols on the product................23 Warnings....................23 Note signs....................25...
  • Page 8 Table of contents Binary input circuits................47 Binary output circuits.................47 Section 5 Configuring the IED and changing settings......49 Overview....................49 Configuring analog CT inputs..............50 Reconfiguring the IED................51 Section 6 Establishing connection and verifying the SPA/IEC communication..............53 Entering settings..................53 Entering SPA settings................53 Entering IEC settings.................53 Verifying the communication..............54 Verifying SPA communication............54 Verifying IEC communication............55...
  • Page 9 Table of contents Section 10 Testing functionality by secondary injection......71 Testing disturbance report..............71 Disturbance recorder (DR)..............71 Event recorder (ER) and Event list (EL)..........72 Differential protection................72 Busbar differential protection.............72 General..................72 Operation of the differential protection from CTx input....73 Stability of the busbar differential protection.........75 Operation of fast open CT detection algorithm......76 Operation of slow open CT detection algorithm......77 Completing the test...............79...
  • Page 10 Table of contents Verifying instantaneous back-up trip at CB faulty condition..89 RetripMode = Contact ........89 Verifying the case Current&Contact ......89 Verifying the function mode Completing the test...............90 Breaker failure protection, single phase version CCSRBRF (50BF)....................90 Checking the phase current operate value Pickup_PH ....91 Checking the re-trip and back-up times........91 Verifying the re-trip mode.............92 Verifying the back-up trip mode............93...
  • Page 11 Table of contents Completing the test..............111 Loss of voltage check LOVPTUV (27)..........112 Measuring the operate limit of set values........112 Completing the test..............112 Frequency protection................113 Underfrequency protection SAPTUF (81)........113 Verifying the settings..............113 Completing the test..............114 Overfrequency protection SAPTOF (81).........114 Verifying the settings..............114 Completing the test..............115 Rate-of-change frequency protection SAPFRC (81).......115 Verifying the settings..............115...
  • Page 12 Table of contents Testing the synchrocheck check..........127 Testing the energizing check............130 Testing the voltage selection............131 Completing the test..............134 Autorecloser for 1/2/3-phase operation SMBRREC (79)....134 Preparation of the verification ............137 Switching the autorecloser for 1/2/3-phase operation Enabled and Disabled ..........138 function to Verifying the autorecloser function SMBRREC (79)....138 Checking the reclosing conditions ..........139 Completing the test..............141...
  • Page 13 Table of contents Parameter setting group handling SETGRPS.........151 Verifying the settings..............152 Completing the test..............152 Exit test mode..................152 Section 11 Primary injection testing............153 Operation of the busbar differential protection........153 Stability of the busbar differential protection.........154 Section 12 Commissioning and maintenance of the fault clearing system..............157 Commissioning tests................157 Periodic maintenance tests..............157...
  • Page 15: Section 1 Introduction

    Section 1 1MRK 505 304-UUS - Introduction Section 1 Introduction This manual The commissioning manual contains instructions on how to commission the IED. The manual can also be used by system engineers and maintenance personnel for assistance during the testing phase. The manual provides procedures for the checking of external circuitry and energizing the IED, parameter setting and configuration as well as verifying settings by secondary injection.
  • Page 16: Product Documentation

    Section 1 1MRK 505 304-UUS - Introduction Product documentation 1.3.1 Product documentation set Engineering manual Installation manual Commissioning manual Operation manual Application manual Technical manual Communication protocol manual Cyber security deployment guideline IEC07000220-4-en.vsd IEC07000220 V4 EN Figure 1: The intended use of manuals throughout the product lifecycle The engineering manual contains instructions on how to engineer the IEDs using the various tools available within the PCM600 software.
  • Page 17: Document Revision History

    Section 1 1MRK 505 304-UUS - Introduction The commissioning manual contains instructions on how to commission the IED. The manual can also be used by system engineers and maintenance personnel for assistance during the testing phase. The manual provides procedures for the checking of external circuitry and energizing the IED, parameter setting and configuration as well as verifying settings by secondary injection.
  • Page 18: Related Documents

    Section 1 1MRK 505 304-UUS - Introduction 1.3.3 Related documents Documents related to REB670 Identify number Application manual 1MRK 505 302-UUS Commissioning manual 1MRK 505 304-UUS Product guide 1MRK 505 305-BUS Technical manual 1MRK 505 303-UUS Type test certificate 1MRK 505 305-TUS 670 series manuals Identify number Operation manual...
  • Page 19: Document Conventions

    Section 1 1MRK 505 304-UUS - Introduction The caution icon indicates important information or warning related to the concept discussed in the text. It might indicate the presence of a hazard which could result in corruption of software or damage to equipment or property.
  • Page 20: Iec61850 Edition 1 / Edition 2 Mapping

    Section 1 1MRK 505 304-UUS - Introduction • Signals in frames with a shaded area on their right hand side represent setting parameter signals that are only settable via the PST or LHMI. • If an internal signal path cannot be drawn with a continuous line, the suffix - int is added to the signal name to indicate where the signal starts and continues.
  • Page 21 Section 1 1MRK 505 304-UUS - Introduction Function block name Edition 1 logical nodes Edition 2 logical nodes BUSPTRC_B13 BUSPTRC BUSPTRC BUSPTRC_B14 BUSPTRC BUSPTRC BUSPTRC_B15 BUSPTRC BUSPTRC BUSPTRC_B16 BUSPTRC BUSPTRC BUSPTRC_B17 BUSPTRC BUSPTRC BUSPTRC_B18 BUSPTRC BUSPTRC BUSPTRC_B19 BUSPTRC BUSPTRC BUSPTRC_B20 BUSPTRC BUSPTRC BUSPTRC_B21...
  • Page 22 Section 1 1MRK 505 304-UUS - Introduction Function block name Edition 1 logical nodes Edition 2 logical nodes CMMXU CMMXU CMMXU CMSQI CMSQI CMSQI COUVGAPC COUVLLN0 LLN0 COUVPTOV COUVPTOV COUVPTUV COUVPTUV CVGAPC GF2LLN0 LLN0 GF2MMXN GF2MMXN GF2PHAR GF2PHAR GF2PTOV GF2PTOV GF2PTUC GF2PTUC GF2PTUV...
  • Page 23 Section 1 1MRK 505 304-UUS - Introduction Function block name Edition 1 logical nodes Edition 2 logical nodes HZPDIF HZPDIF HZPDIF INDCALCH INDCALH ITBGAPC IB16FCVB ITBGAPC L3CPDIF L3CPDIF LLN0 L3CGAPC L3CPDIF L3CPHAR L3CPTRC L4UFCNT L4UFCNT L4UFCNT L6CPDIF L6CPDIF LLN0 L6CGAPC L6CPDIF L6CPHAR L6CPTRC...
  • Page 24 Section 1 1MRK 505 304-UUS - Introduction Function block name Edition 1 logical nodes Edition 2 logical nodes LT6CPDIF LT6CPDIF LLN0 LT6CGAPC LT6CPDIF LT6CPHAR LT6CPTRC MVGAPC MVGGIO MVGAPC NS2PTOC NS2LLN0 LLN0 NS2PTOC NS2PTOC NS2PTRC NS2PTRC NS4PTOC EF4LLN0 LLN0 EF4PTRC EF4PTRC EF4RDIR EF4RDIR GEN4PHAR...
  • Page 25 Section 1 1MRK 505 304-UUS - Introduction Function block name Edition 1 logical nodes Edition 2 logical nodes SAPFRC SAPFRC SAPFRC SAPTOF SAPTOF SAPTOF SAPTUF SAPTUF SAPTUF SCCVPTOC SCCVPTOC SCCVPTOC SCILO SCILO SCILO SCSWI SCSWI SCSWI SDEPSDE SDEPSDE LLN0 SDEPSDE SDEPTOC SDEPTOV SDEPTRC...
  • Page 26 Section 1 1MRK 505 304-UUS - Introduction Function block name Edition 1 logical nodes Edition 2 logical nodes TEIGAPC TEIGGIO TEIGAPC TMAGAPC TMAGGIO TMAGAPC TR1ATCC TR1ATCC TR1ATCC TR8ATCC TR8ATCC TR8ATCC TRPTTR TRPTTR TRPTTR UV2PTUV GEN2LLN0 LLN0 PH1PTRC PH1PTRC UV2PTUV UV2PTUV VDCPTOV VDCPTOV VDCPTOV...
  • Page 27 Section 1 1MRK 505 304-UUS - Introduction Function block name Edition 1 logical nodes Edition 2 logical nodes ZMQAPDIS ZMQAPDIS ZMQAPDIS ZMQPDIS ZMQPDIS ZMQPDIS ZMRAPDIS ZMRAPDIS ZMRAPDIS ZMRPDIS ZMRPDIS ZMRPDIS ZMRPSB ZMRPSB ZMRPSB ZSMGAPC ZSMGAPC ZSMGAPC Busbar protection REB670 2.0 ANSI Commissioning Manual...
  • Page 29: Section 2 Safety Information

    Section 2 1MRK 505 304-UUS - Safety information Section 2 Safety information Symbols on the product All warnings must be observed. Read the entire manual before doing installation or any maintenance work on the product. All warnings must be observed. Do not touch the unit in operation.
  • Page 30 Section 2 1MRK 505 304-UUS - Safety information Always use suitable isolated test pins when measuring signals in open circuitry. Potentially lethal voltages and currents are present. Never connect or disconnect a wire and/or a connector to or from a IED during normal operation.
  • Page 31: Note Signs

    Section 2 1MRK 505 304-UUS - Safety information Whenever changes are made in the IED, measures should be taken to avoid inadvertent tripping. The IED contains components which are sensitive to electrostatic discharge. ESD precautions shall always be observed prior to touching components.
  • Page 33: Section 3 Available Functions

    Section 3 1MRK 505 304-UUS - Available functions Section 3 Available functions Main protection functions = number of basic instances = option quantities = optional function included in packages A03 (refer to ordering details) IEC 61850 ANSI Function description Busbar Busbar REB670 Differential protection...
  • Page 34: Back-Up Protection Functions

    Section 3 1MRK 505 304-UUS - Available functions Back-up protection functions IEC 61850 ANSI Function description Busbar Busbar REB670 Current protection OC4PTOC Four step phase overcurrent protection 8-C07 51_67 PH4SPTOC Four step single phase overcurrent protection 0-24 EF4PTOC Four step residual overcurrent protection NS4PTOC 46I2 Four step directional negative phase sequence...
  • Page 35: Control And Monitoring Functions

    Section 3 1MRK 505 304-UUS - Available functions Control and monitoring functions IEC 61850 ANSI Function description Busbar Busbar REB670 Control SESRSYN Synchrocheck, energizing check and synchronizing SMBRREC Autorecloser 2-H05 APC30 Apparatus control for up to 6 bays, max 30 apparatuses (6CBs) incl.
  • Page 36 Section 3 1MRK 505 304-UUS - Available functions IEC 61850 ANSI Function description Busbar Busbar REB670 AND, OR, INV, Configurable logic blocks 40-420 40-28 PULSETIMER, GATE, TIMERSET, XOR, LLD, SRMEMORY, RSMEMORY ANDQT, ORQT, Configurable logic blocks Q/T 0–1 INVERTERQT, XORQT, SRMEMORYQ RSMEMORYQ TIMERSETQT,...
  • Page 37 Section 3 1MRK 505 304-UUS - Available functions IEC 61850 ANSI Function description Busbar Busbar REB670 AISVBAS Function block for service value presentation of secondary analog inputs EVENT Event function DRPRDRE, Disturbance report A1RADR, A2RADR, A3RADR, A4RADR, B1RBDR, B2RBDR, B3RBDR, B4RBDR, B5RBDR, B6RBDR...
  • Page 38: Communication

    Section 3 1MRK 505 304-UUS - Available functions Communication IEC 61850 ANSI Function description Busbar Busbar REB670 Station communication LONSPA, SPA SPA communication protocol LON communication protocol HORZCOMM Network variables via LON PROTOCOL Operation selection between SPA and IEC 60870-5-103 for SLM RS485PROT Operation selection for RS485 RS485GEN...
  • Page 39 Section 3 1MRK 505 304-UUS - Available functions IEC 61850 ANSI Function description Busbar Busbar REB670 GOOSESPRC GOOSE function block to receive a single point value MULTICMDR Multiple command and transmit 60/10 60/10 MULTICMDS FRONT, Ethernet configuration of links LANABI, LANAB, LANCDI, LANCD...
  • Page 40: Basic Ied Functions

    Section 3 1MRK 505 304-UUS - Available functions Basic IED functions Table 2: Basic IED functions IEC 61850 or function Description name INTERRSIG Self supervision with internal event list SELFSUPEVLST Self supervision with internal event list TIMESYNCHGEN Time synchronization module SYNCHBIN, Time synchronization SYNCHCAN,...
  • Page 41 Section 3 1MRK 505 304-UUS - Available functions IEC 61850 or function Description name GBASVAL Global base values for settings PRIMVAL Primary system values ALTMS Time master supervision ALTIM Time management ALTRK Service tracking ACTIVLOG Activity logging parameters FSTACCS Field service tool access via SPA protocol over ethernet communication PCMACCS IED Configuration Protocol SECALARM...
  • Page 43: Section 4 Starting Up

    Section 4 1MRK 505 304-UUS - Starting up Section 4 Starting up Factory and site acceptance testing Testing the proper IED operation is carried out at different occasions, for example: • Acceptance testing • Commissioning testing • Maintenance testing This manual describes the workflow and the steps to carry out the commissioning testing. Factory acceptance testing (FAT) is typically done to verify that the IED and its corresponding configuration meet the requirements of the utility or industry.
  • Page 44: Checking The Power Supply

    Section 4 1MRK 505 304-UUS - Starting up • RJ-45 Ethernet cable (CAT 5) • Three-phase test kit or other test equipment depending on the complexity of the configuration and functions to be tested. • PC with PCM600 installed along with the connectivity packages corresponding to the IEDs to be tested.
  • Page 45: Setting Up Communication Between Pcm600 And The Ied

    Section 4 1MRK 505 304-UUS - Starting up t (s) xx04000310-1-en.vsd IEC04000310 V2 EN Figure 2: Typical IED start-up sequence 1 IED energized. Green LED instantly starts flashing 2 LCD lights up and "IED startup" is displayed 3 The main menu is displayed. A steady green light indicates a successful startup. If the upper row in the window indicates ‘Fail’...
  • Page 46 Section 4 1MRK 505 304-UUS - Starting up If needed, set the IP address for the IEDs. Set up the PC or workstation for a direct link (point-to-point), or Connect the PC or workstation to the LAN/WAN network. Configure the IED IP addresses in the PCM600 project for each IED to match the IP addresses of the physical IEDs.
  • Page 47 Section 4 1MRK 505 304-UUS - Starting up Select Search programs and files in the Start menu in Windows. IEC13000057-1-en.vsd IEC13000057 V1 EN Figure 4: Select: Search programs and files Type View network connections and click on the View network connections icon. Busbar protection REB670 2.0 ANSI Commissioning Manual...
  • Page 48 Section 4 1MRK 505 304-UUS - Starting up IEC13000058-1-en.vsd IEC13000058 V1 EN Figure 5: Click View network connections Right-click and select Properties. IEC13000059-1-en.vsd IEC13000059 V1 EN Figure 6: Right-click Local Area Connection and select Properties Select the TCP/IPv4 protocol from the list of configured components using this connection and click Properties.
  • Page 49 Section 4 1MRK 505 304-UUS - Starting up IEC13000060-1-en.vsd IEC13000060 V1 EN Figure 7: Select the TCP/IPv4 protocol and open Properties Select Use the following IP address and define IP address and Subnet mask if the front port is used and if the IP address is not set to be obtained automatically by the IED, see Figure 8.
  • Page 50: Writing An Application Configuration To The Ied

    Section 4 1MRK 505 304-UUS - Starting up IEC13000062-1-en.vsd IEC13000062 V1 EN Figure 8: Select: Use the following IP address Use the ping command to verify connectivity with the IED. Close all open windows and start PCM600. Setting up the PC to access the IED via a network This task depends on the used LAN/WAN network.
  • Page 51: Checking Ct Circuits

    Section 4 1MRK 505 304-UUS - Starting up Checking CT circuits Check that the wiring is in strict accordance with the supplied connection diagram. The CTs must be connected in accordance with the circuit diagram provided with the IED, both with regards to phases and polarity. The following tests shall be performed on every primary CT connected to the IED: •...
  • Page 52: Checking Vt Circuits

    Section 4 1MRK 505 304-UUS - Starting up Checking VT circuits Check that the wiring is in strict accordance with the supplied connection diagram. Correct possible errors before continuing to test the circuitry. Test the circuitry. • Polarity check when applicable; this test is often omitted for CVTs •...
  • Page 53: Checking The Binary I/O Circuits

    Section 4 1MRK 505 304-UUS - Starting up Verify that the contact sockets have been crimped correctly and that they are fully inserted by tugging on the wires. Never do this with current circuits in service. Current circuit Verify that the contacts are of current circuit type. Verify that the short circuit jumpers are located in the correct slots.
  • Page 55: Section 5 Configuring The Ied And Changing Settings

    Section 5 1MRK 505 304-UUS - Configuring the IED and changing settings Section 5 Configuring the IED and changing settings Overview The customer specific values for each setting parameter and a configuration file have to be available before the IED can be set and configured, if the IED is not delivered with a configuration.
  • Page 56: Configuring Analog Ct Inputs

    Section 5 1MRK 505 304-UUS - Configuring the IED and changing settings FLASH disk. In worst case, the time between saves of this kind of data is around one hour. This means, that to be absolutely sure that all data have been saved to FLASH, it is necessary to leave the IED with auxiliary power connected after all the commissioning is done (including setting the Local/Remote switch to the desired position) for at least one hour after the last commissioning action performed on the IED.
  • Page 57: Reconfiguring The Ied

    Section 5 1MRK 505 304-UUS - Configuring the IED and changing settings Take the rated permissive overload values for the current inputs into consideration. Reconfiguring the IED I/O modules configured as logical I/O modules (BIM, BOM or IOM) are supervised. I/O modules that are not configured are not supervised.
  • Page 59: Section 6 Establishing Connection And Verifying The Spa/Iec Communication

    Section 6 1MRK 505 304-UUS - Establishing connection and verifying the SPA/IEC communication Section 6 Establishing connection and verifying the SPA/IEC communication Entering settings If the IED is connected to a monitoring or control system via the rear SPA/IEC port, the SPA/IEC port has to be set either for SPA or IEC use.
  • Page 60: Verifying The Communication

    Section 6 1MRK 505 304-UUS - Establishing connection and verifying the SPA/IEC communication • for plastic fibres with connector type HFBR • for glass fibres with connectors type ST Procedure Set the operation of the rear SPA/IEC port to “IEC”. The operation of the rear SPA/IEC port can be found on the local HMI under Main menu/Configuration/Communication/SLM configuration/Rear optical SPA-IEC-DNP port/PROTOCOL:1...
  • Page 61: Verifying Iec Communication

    Section 6 1MRK 505 304-UUS - Establishing connection and verifying the SPA/IEC communication 6.2.2 Verifying IEC communication To verify that the IEC communication with the IEC master system is working, there are some different methods. Choose one of the following. Procedure Check that the master system time-out for response from the IED, for example after a setting change, is >...
  • Page 62: Optical Budget Calculation For Serial Communication With Spa/Iec

    Section 6 1MRK 505 304-UUS - Establishing connection and verifying the SPA/IEC communication Optical budget calculation for serial communication with SPA/IEC Table 5: Example Distance 1 km Distance 25 m Glass Plastic Maximum attenuation - 11 dB - 7 dB 4 dB/km multi mode: 820 nm - 62.5/125 um 4 dB 0.16 dB/m plastic: 620 nm - 1mm...
  • Page 63: Section 7 Establishing Connection And Verifying The Lon Communication

    Section 7 1MRK 505 304-UUS - Establishing connection and verifying the LON communication Section 7 Establishing connection and verifying the LON communication Communication via the rear ports 7.1.1 LON communication LON communication is normally used in substation automation systems. Optical fiber is used within the substation as the physical communication link.
  • Page 64: The Lon Protocol

    Section 7 1MRK 505 304-UUS - Establishing connection and verifying the LON communication An optical network can be used within the substation automation system. This enables communication with the IEDs in the 670 series through the LON bus from the operator’s workplace, from the control center and also from other IEDs via bay-to-bay horizontal communication.
  • Page 65 Section 7 1MRK 505 304-UUS - Establishing connection and verifying the LON communication • The node addresses of the other connected IEDs. • The network variable selectors to be used. This is organized by LNT. The node address is transferred to LNT via the local HMI by setting the parameter ServicePinMsg = Yes.
  • Page 66: Optical Budget Calculation For Serial Communication With Lon

    Section 7 1MRK 505 304-UUS - Establishing connection and verifying the LON communication Table 8: LON node information parameters Parameter Range Default Unit Parameter description NeuronID* 0 - 12 Not loaded Neuron hardware identification number in hexadecimal code Location 0 - 6 No value Location of the node *Can be viewed in the local HMI...
  • Page 67 Section 7 1MRK 505 304-UUS - Establishing connection and verifying the LON communication Distance 1 km Distance10 m Glass Plastic Losses in connection box, two contacts (1dB/contact) 2 dB Margin for repair splices (0.5 dB/splice) 0.5 dB Maximum total attenuation 11 dB 7 dB Busbar protection REB670 2.0 ANSI...
  • Page 69: Section 8 Establishing Connection And Verifying The Iec 61850 Communication

    Section 8 1MRK 505 304-UUS - Establishing connection and verifying the IEC 61850 communication Section 8 Establishing connection and verifying the IEC 61850 communication Overview The rear OEM ports are used for substation bus (IEC 61850-8-1) communication. For IEC 61850-8-1 redundant communication, both rear OEM ports are utilized. In this case IEC 61850-9-2LE communication can not be used.
  • Page 70: Verifying The Communication

    Section 8 1MRK 505 304-UUS - Establishing connection and verifying the IEC 61850 communication Navigate to: Main menu/Configuration/Communication/Ethernet configuration/PRP:1 Set values for Operation, IPAddress and IPMask. Operation must be set to Enabled. The IED will restart after confirmation. Menu items LANAB:1 and LANCD: 1 are hidden in local HMI after restart but are visible in PST where the values for parameter Mode is set to Duo.
  • Page 71: Section 9 Testing Ied Operation

    Section 9 1MRK 505 304-UUS - Testing IED operation Section 9 Testing IED operation Preparing for test 9.1.1 Preparing the IED to verify settings If a test switch is included, start preparation by making the necessary connections to the test switch. This means connecting the test equipment according to a specific and designated IED terminal diagram.
  • Page 72: Activating The Test Mode

    FT. The test switch and its associated test plug handles are a part of the COMBITEST or FT system of ABB, which provides secure and convenient testing of the IED. When using the COMBITEST, preparations for testing are automatically carried out in...
  • Page 73: Connecting The Test Equipment To The Ied

    Section 9 1MRK 505 304-UUS - Testing IED operation The RTXH test-plug handle leads may be connected to any type of test equipment or instrument. When a number of protection IEDs of the same type are tested, the test- plug handle only needs to be moved from the test switch of one protection IED to the test switch of the other, without altering the previous connections.
  • Page 74: Releasing The Function To Be Tested

    Section 9 1MRK 505 304-UUS - Testing IED operation IN (I4,I5) VN (U4,U5) TRIP A TRIP B TRIP C IEC 61850 ANSI09000652-1-en.vsd ANSI09000652 V1 EN Figure 10: Connection example of the test equipment to the IED when test equipment is connected to the transformer input module Releasing the function to be tested Release or unblock the function to be tested.
  • Page 75: Verifying Analog Primary And Secondary Measurement

    Section 9 1MRK 505 304-UUS - Testing IED operation Any function is blocked if the corresponding setting in the local HMI under Main menu/Test/Function test modes menu remains Enabled, that is, the parameter Blocked is set to Yes and the parameter TestMode under Main menu/Test/IED test mode remains active.
  • Page 76: Testing The Protection Functionality

    Section 9 1MRK 505 304-UUS - Testing IED operation Testing the protection functionality Each protection function must be tested individually by secondary injection. • Verify operating levels (trip) and timers. • Verify alarm and blocking signals. • Use the disturbance handling tool in PCM600 to evaluate that the protection function has received the correct data and responded correctly (signaling and timing).
  • Page 77: Section 10 Testing Functionality By Secondary Injection

    Section 10 1MRK 505 304-UUS - Testing functionality by secondary injection Section 10 Testing functionality by secondary injection 10.1 Testing disturbance report 10.1.1 Disturbance recorder (DR) A Manual Trig can be started at any time. This results in a recording of the actual values from all recorded channels.
  • Page 78: Event Recorder (Er) And Event List (El)

    Section 10 1MRK 505 304-UUS - Testing functionality by secondary injection All recordings in the IED can be deleted in two ways: in the local HMI under Main menu/Clear/Reset disturbances, or in the Disturbance handling tool in PCM600 by selecting Delete all recordings in the IED...
  • Page 79: Operation Of The Differential Protection From Ctx Input

    Section 10 1MRK 505 304-UUS - Testing functionality by secondary injection circuits, short-circuiting of the current circuits on the transformer side, opening of current transformer circuits and making IED terminals accessible from the terminals on the test plug handle. If the REB670 is not provided with a test switch, the IED has to be tested in the proper way from external circuit terminals.
  • Page 80 Section 10 1MRK 505 304-UUS - Testing functionality by secondary injection Testing will be explained from one general current input CTx (that is x=1, 2,..., Nmax; where Nmax is equal to the maximum number of used CT inputs). Follow the following test instructions for all used current inputs in the REB670 IED.
  • Page 81: Stability Of The Busbar Differential Protection

    Section 10 1MRK 505 304-UUS - Testing functionality by secondary injection 20. Make sure that the dedicated binary output ACTIVE from the Zone Interconnection block has the logical value One. 21. Repeat the steps from to 12. Note that now both zones shall operate during these tests. 22.
  • Page 82: Operation Of Fast Open Ct Detection Algorithm

    Section 10 1MRK 505 304-UUS - Testing functionality by secondary injection Testing will be explained for one general current input CTx (that is x=2, 3,...,Nmax; where Nmax is equal to the maximum number of used CT inputs). Follow the following test instructions to perform this type of test. Procedure Connect the currents I1 and I2 from the three-phase test set to the current terminals of CT1 and CTx inputs of the IED as shown in figure 12.
  • Page 83: Operation Of Slow Open Ct Detection Algorithm

    Section 10 1MRK 505 304-UUS - Testing functionality by secondary injection Procedure Connect the currents I1 and I2 from the three-phase test set test set to the current terminals of CT1 and CT3 inputs of the IED as shown in figure 12. Make sure that current measurement from CT1 and CT3 inputs are included into the same differential zone (see previous test instructions for more details).
  • Page 84 Section 10 1MRK 505 304-UUS - Testing functionality by secondary injection The connections are shown for phase A only. Similar connection shall be used for testing phase B and C also. Follow the following test instructions to perform this type of test. Procedure Connect the currents I1 and I2 from the three-phase test set to the current terminals of CT1 and CT3 inputs of the IED as shown in figure 12.
  • Page 85: Completing The Test

    Section 10 1MRK 505 304-UUS - Testing functionality by secondary injection 10.2.1.6 Completing the test Continue to test another function or end the test by changing the TestMode setting to Disabled. Restore connections and settings to their original values, if they were changed for testing purposes.
  • Page 86: Completing The Test

    Section 10 1MRK 505 304-UUS - Testing functionality by secondary injection If 1 out of 3 currents for operation is chosen: The voltage angle of phase A is the reference. If 2 out of 3 currents for operation is chosen: The voltage angle of phase A – the voltage angle of B is the reference.
  • Page 87: Four Step Single Phase Overcurrent Protection Ph4Sptoc(51)

    Section 10 1MRK 505 304-UUS - Testing functionality by secondary injection 10.3.2 Four step single phase overcurrent protection PH4SPTOC(51) Prepare the IED for verification of settings outlined in section "" and section "Preparing for test" in this chapter. Directional phase overcurrent current function 10.3.2.1 Verifying the settings Procedure...
  • Page 88: Four Step Directional Ground Fault Protection

    Section 10 1MRK 505 304-UUS - Testing functionality by secondary injection 10.3.3.1 Four step directional ground fault protection Connect the test set for single current injection to the appropriate IED terminals. Connect the injection current to terminals A and neutral. Set the injected polarizing voltage slightly larger than the set minimum polarizing voltage (default 5% of Vn) and set the injection current to lag the voltage by an angle equal to the set reference characteristic angle (AngleRCA), if the forward...
  • Page 89: Four Step Negative Sequence Overcurrent Protection Ns4Ptoc (46I2)

    Section 10 1MRK 505 304-UUS - Testing functionality by secondary injection 10.3.4 Four step negative sequence overcurrent protection NS4PTOC (46I2) Prepare the IED for verification of settings as outlined in section "" and section "Preparing for test" in this chapter. When inverse time overcurrent characteristic is selected, the operate time of the stage will be the sum of the inverse time delay and the set definite time delay.
  • Page 90: Completing The Test

    Section 10 1MRK 505 304-UUS - Testing functionality by secondary injection 10.3.4.1 Completing the test Continue to test another function or end the test by changing the TestMode setting to Disabled. Restore connections and settings to their original values, if they were changed for testing purposes.
  • Page 91: Completing The Test

    Section 10 1MRK 505 304-UUS - Testing functionality by secondary injection 12. Check that all trip and alarm contacts operate according to the configuration logic. 13. Switch off the injection current and check from the service menu readings of thermal status and LOCKOUT that the lockout resets at the set percentage of heat content.
  • Page 92: Checking The Residual (Ground Fault) Current Operate Value Pickup_N Set Below Pickup_Ph

    Section 10 1MRK 505 304-UUS - Testing functionality by secondary injection Apply the fault condition, including BFI_3P of CCRBRF (50BF), with a current below set Pickup_PH. Repeat the fault condition and increase the current in steps until a trip occurs. Compare the result with the set Pickup_PH.
  • Page 93: Verifying The Back-Up Trip Mode

    Section 10 1MRK 505 304-UUS - Testing functionality by secondary injection In the cases below it is assumed that FunctionMode = Current is selected. RetripMode = Retrip Off Checking the case without re-trip, Set RetripMode = Retrip Off. Apply the fault condition, including initiation of CCRBRF (50BF), well above the set current value.
  • Page 94 Section 10 1MRK 505 304-UUS - Testing functionality by secondary injection Apply the fault condition, including initiation of CCRBRF (50BF), with phase current well above set value Pickup_PH. Interrupt the current, with a margin before back-up trip time, t2. It may be made at issue of re-trip command.
  • Page 95: Verifying Instantaneous Back-Up Trip At Cb Faulty Condition

    Section 10 1MRK 505 304-UUS - Testing functionality by secondary injection 10.3.6.6 Verifying instantaneous back-up trip at CB faulty condition Applies in a case where a signal from CB supervision function regarding CB being faulty and unable to trip is connected to input 52FAIL. Repeat the check of back-up trip time.
  • Page 96: Completing The Test

    Section 10 1MRK 505 304-UUS - Testing functionality by secondary injection Checking the case with fault current below set value Pickup_BlkCont The case shall simulate a case where the fault current is very low and operation will depend on CB position signal from CB auxiliary contact. It is suggested that re-trip without current check is used, setting RetripMode = No CBPos Check.
  • Page 97: Checking The Phase Current Operate Value Pickup_Ph

    Section 10 1MRK 505 304-UUS - Testing functionality by secondary injection • Calculated settings • Valid configuration diagram for the IED • Valid terminal diagram for the IED • Technical reference manual • Single phase test equipment The technical reference manual contains application and functionality summaries, function blocks, logic diagrams, input and output signals, a list of setting parameters and technical data for the function.
  • Page 98: Verifying The Re-Trip Mode

    Section 10 1MRK 505 304-UUS - Testing functionality by secondary injection Apply the fault condition, including BFI of CCSRBRF (50BF), well above the set current value. Measure time from “Start of CCSRBRF (50BF)”. Check the re-trip t1 and back-up trip times t2 and t3 Disconnect AC and initiate input signals.
  • Page 99: Verifying The Back-Up Trip Mode

    Section 10 1MRK 505 304-UUS - Testing functionality by secondary injection 10.3.7.4 Verifying the back-up trip mode In the cases below it is assumed that FunctionMode = Current is selected. Checking that back-up tripping is not achieved at normal CB tripping Use the actual tripping modes.
  • Page 100: Verifying The Function Mode Curr&Cont Check

    Section 10 1MRK 505 304-UUS - Testing functionality by secondary injection Disconnect the BFI signal(s). Keep the CB closed signal(s). Apply input signal(s), for BFI of CCSRBRF. The value of current could be low. Arrange disconnection of CB closed signal(s) well before set back-up trip time t2. Verify that back-up trip is not achieved.
  • Page 101: Completing The Test

    Section 10 1MRK 505 304-UUS - Testing functionality by secondary injection Disconnect the AC and the BFI signals. Keep the CB closed signal.Disconnect the AC and the BFI signals. Keep the CB closed signals. Apply the fault and the BFI again. The value of current should be below the set value Pickup_BlkCont Arrange disconnection of BC closed signal well before set back-up trip time t2.Arrange disconnection of BC closed signals well before set back-up trip time...
  • Page 102 Section 10 1MRK 505 304-UUS - Testing functionality by secondary injection Table 12: Calculation modes Mode Set value: Formula used for complex power calculation A, B, C × × × (Equation 4) EQUATION2055 V1 EN Arone × × (Equation 5) EQUATION2056-ANSI V1 EN PosSeq = ×...
  • Page 103: Completing The Test

    Section 10 1MRK 505 304-UUS - Testing functionality by secondary injection power protection). Check that the monitored active power is equal to 100% of rated power and that the reactive power is equal to 0% of rated power. Change the angle between the injected current and voltage to Angle1 + 90°. Check that the monitored active power is equal to 0% of rated power and that the reactive power is equal to 100% of rated power.
  • Page 104: Completing The Test

    Section 10 1MRK 505 304-UUS - Testing functionality by secondary injection reverse power protection). Check that the monitored active power is equal to 100% of rated power and that the reactive power is equal to 0% of rated power. Change the angle between the injected current and voltage to Angle1 + 90°. Check that the monitored active power is equal to 0% of rated power and that the reactive power is equal to 100% of rated power.
  • Page 105: Verifying The Settings And Operation Of The Function

    Section 10 1MRK 505 304-UUS - Testing functionality by secondary injection 10.3.10.1 Verifying the settings and operation of the function Reconnection inhibit feature Inject SCB rated current (that is, 0.587A at 50Hz for this SCB) in at least one phase (preferably perform this test with three phase injection). After couple of seconds stop injection of all currents (that is, set all currents back to 0A).
  • Page 106 Section 10 1MRK 505 304-UUS - Testing functionality by secondary injection harmonic by just simply injecting 3 · 50 = 150Hz currents with the same magnitude. Obtain results shall be the same. Undercurrent feature Inject SCB rated current (that is, 0.587A at 50Hz for this SCB) in all three phases. Lower phase A current 10% under the set value for setting parameter PU_37 (that is, 0.9 ·...
  • Page 107 Section 10 1MRK 505 304-UUS - Testing functionality by secondary injection Check that service value from the function for current in phase A, on the local HMI under Main menu/Test is approximately 382A (that is, 0.763A · (500/1) = 382A). Check that service value from the function for reactive power in phase A, on the local HMI under Main menu/Test is approximately 169% (that is, 1.3 ·...
  • Page 108 Section 10 1MRK 505 304-UUS - Testing functionality by secondary injection Note that operation of this feature is based on internally calculated voltage peak RMS value. That means that this feature is also able to operate for current signals with varying frequency. Here will be shown how to test the fourth point from the above table.
  • Page 109: Completing The Test

    Section 10 1MRK 505 304-UUS - Testing functionality by secondary injection Above procedure can also be used to test definite time step. Pay attention that IDMT step can also operate during such injection. Therefore make sure that appropriate settings are entered in order to insure correct test results for definite time step. 10.3.10.2 Completing the test Continue to test another functions or end the test by changing the Test mode setting to...
  • Page 110: Completing The Test

    Section 10 1MRK 505 304-UUS - Testing functionality by secondary injection Increase the measured voltage to rated load conditions. Check that the PICKUP signal resets. Instantaneously decrease the voltage in one phase to a value about 20% lower than the measured operate value. Measure the time delay for the TRIP signal, and compare it with the set value.
  • Page 111: Two Step Overvoltage Protection Ov2Ptov (59)

    Section 10 1MRK 505 304-UUS - Testing functionality by secondary injection 10.4.2 Two step overvoltage protection OV2PTOV (59) Prepare the IED for verification of settings outlined in section "Preparing the IED to verify settings". 10.4.2.1 Verifying the settings Verification of single-phase voltage and time delay to operate for Step 1 Apply single-phase voltage below the set value Pickup1.
  • Page 112: Extended Testing

    Section 10 1MRK 505 304-UUS - Testing functionality by secondary injection where: t(s) Operate time in seconds Settable time multiplier of the function for step 1 Measured voltage Vpickup> Set pickup voltage for step 1 For example, if the measured voltage jumps from 0 to 1.2 times the set pickup voltage level and time multiplier TD1 is set to 0.05 s (default value), then the TRST1 and TRIP signals operate at a time equal to 0.250 s ±...
  • Page 113: Completing The Test

    Section 10 1MRK 505 304-UUS - Testing functionality by secondary injection Measure the time delay for the TRST1 signal and compare it with the set value. Check the inverse time delay by injecting a voltage corresponding to 1.2 × Vpickup>. For example, if the inverse time curve A is selected, the trip signals TRST1 and TRIP operate after a time corresponding to the equation:...
  • Page 114 Section 10 1MRK 505 304-UUS - Testing functionality by secondary injection Check of V1Low Procedure Connect voltages to the IED according to valid connection diagram and figure 16. Apply voltage higher than the highest set value of VDTrip, V1Low and V2Low to the V1 three-phase inputs and to one phase of the V2 inputs according to figure 16.
  • Page 115: Check Of Voltage Differential Trip And Alarm Levels

    Section 10 1MRK 505 304-UUS - Testing functionality by secondary injection Check of V2Low Procedure Connect voltages to the IED according to valid connection diagram and figure 17. ANSI07000107-1-en.vsd ANSI07000107 V2 EN Figure 17: Connection of the test set to the IED for test of V2 block level where: is three-phase voltage group1 (V1) is three-phase voltage group2 (V2)
  • Page 116 Section 10 1MRK 505 304-UUS - Testing functionality by secondary injection Connect voltages to the IED according to valid connection diagram and figure 18. ANSI07000108-1-en.vsd ANSI07000108 V2 EN Figure 18: Connection of the test set to the IED for test of alarm levels, trip levels and trip timer where: is three-phase voltage group1 (V1)
  • Page 117: Check Of Trip And Trip Reset Timers

    Section 10 1MRK 505 304-UUS - Testing functionality by secondary injection 10.4.4.3 Check of trip and trip reset timers Procdure Connect voltages to the IED according to valid connection diagram and figure 18. Set Vn (rated voltage) to the V1 inputs and increase V2 voltage until differential voltage is 1.5 ·...
  • Page 118: Loss Of Voltage Check Lovptuv (27)

    Section 10 1MRK 505 304-UUS - Testing functionality by secondary injection 10.4.5 Loss of voltage check LOVPTUV (27) Prepare the IED for verification of settings outlined in section "Preparing the IED to verify settings". 10.4.5.1 Measuring the operate limit of set values Check that the input logical signals BLOCK, CBOPEN and BLKU are logical zero.
  • Page 119: Frequency Protection

    Section 10 1MRK 505 304-UUS - Testing functionality by secondary injection 10.5 Frequency protection 10.5.1 Underfrequency protection SAPTUF (81) Prepare the IED for verification of settings outlined in section "Preparing the IED to verify settings". 10.5.1.1 Verifying the settings Verification of PICKUP value and time delay to trip Check that the IED settings are appropriate, for example the PICKUP value and the time delay.
  • Page 120: Completing The Test

    Section 10 1MRK 505 304-UUS - Testing functionality by secondary injection Slowly decrease the frequency of the applied voltage, to a value below PUFrequency. Check that the PICKUP signal does not appear. Wait for a time corresponding to tDelay, make sure that the TRIP signal does not appear.
  • Page 121: Completing The Test

    Section 10 1MRK 505 304-UUS - Testing functionality by secondary injection Check that the settings in the IED are appropriate, for example the PUFrequency, VMin, and the tDelay. Supply the IED with three-phase voltages at their rated values. Slowly decrease the magnitude of the applied voltage, until the BLKDMAGN signal appears.
  • Page 122: Completing The Test

    Section 10 1MRK 505 304-UUS - Testing functionality by secondary injection The test above can be repeated to check a positive setting of PickupFreqGrad. The tests above can be repeated to check the time to reset. The tests above can be repeated to test the RESTORE signal, when the frequency recovers from a low value.
  • Page 123: Overcurrent Feature With Current Restraint

    Section 10 1MRK 505 304-UUS - Testing functionality by secondary injection be tested is unblocked and other functions that might disturb the evaluation of the test are blocked. Connect the test set for injection of three-phase currents to the appropriate current terminals of the IED in the 670 series.
  • Page 124: Overcurrent Feature With Directionality

    Section 10 1MRK 505 304-UUS - Testing functionality by secondary injection Connect the test set for injection of three-phase currents and three-phase voltages to the appropriate current and voltage terminals of the IED. Inject current(s) and voltage(s) in a way that relevant measured (according to setting parameter CurrentInput and VoltageInput) currents and voltages are created from the test set.
  • Page 125: Over/Undervoltage Feature

    Section 10 1MRK 505 304-UUS - Testing functionality by secondary injection Overall check in principal as above (non-directional overcurrent feature) Reverse the direction of the injection current and check that the protection does not operate. Check with low polarization voltage that the feature becomes non-directional, blocked or with memory according to the setting.
  • Page 126: Measuring The Operate Value For The Negative Sequence Function

    Section 10 1MRK 505 304-UUS - Testing functionality by secondary injection • The signal BLKV should appear with almost no time delay. • The signals BLKZ and 3PH should not appear on the IED. • Only the distance protection function can operate. •...
  • Page 127: Measuring The Operate Value For The Zero-Sequence Function

    Section 10 1MRK 505 304-UUS - Testing functionality by secondary injection × × + × (Equation 22) EQUATION1818-ANSI V1 EN Where: are the measured phase voltages EQUATION1820-ANSI V1 EN p × = × 0, 5 IECEQUATION00022 V2 EN Compare the result with the set value of the negative-sequence operating voltage (consider that the set value 3V2PU is in percentage of the base voltage VBase).
  • Page 128: Measuring The Operate Value For The Dead Line Detection Function

    Section 10 1MRK 505 304-UUS - Testing functionality by secondary injection × (Equation 28) EQUATION1819-ANSI V1 EN Where: are the measured phase voltages EQUATION1820-ANSI V1 EN Compare the result with the set value of the zero-sequence operating voltage (consider that the set value 3V0Pickup is in percentage of the base voltage.) Repeat steps .
  • Page 129: Checking The Operation Of The Dv/Dt And Di/Dt Based Function

    Section 10 1MRK 505 304-UUS - Testing functionality by secondary injection 10.7.1.5 Checking the operation of the dv/dt and di/dt based function Check the operation of the dv/dt and di/dt based function if included in the IED. Simulate normal operating conditions with the three-phase currents in phase with their corresponding phase voltages and with all of them equal to their rated values.
  • Page 130: Completing The Test

    Section 10 1MRK 505 304-UUS - Testing functionality by secondary injection Checking the operation of binary input and output Simulate normal operation conditions with three-phase voltage on the main fuse group and the pilot fuse group. Ensure the values are equal to their rated values. Disconnect one of the phase voltage from the main fuse group or the pilot fuse group.
  • Page 131: Control

    Section 10 1MRK 505 304-UUS - Testing functionality by secondary injection 10.8 Control 10.8.1 Synchrocheck, energizing check, and synchronizing SESRSYN (25) This section contains instructions on how to test the synchrochecksynchronism check, energizing check, and synchronizing function SESRSYN (25) for single, double and breaker-and-a-half arrangements.
  • Page 132 Section 10 1MRK 505 304-UUS - Testing functionality by secondary injection Test VMeasure equipment V-Bus Ph/N V-Bus Ph/Ph Input Phase A,B,C AB,BC,CA V-Line VMeasure Ph/N Ph/Ph Input Phase A,B,C AB,BC,CA ANSI05000480-3-en.vsd ANSI05000480 V3 EN Figure 19: General test connection with three-phase voltage connected to the line side ANSI05000481-4-en.vsd ANSI05000481 V4 EN...
  • Page 133: Testing The Synchronizing Function

    Section 10 1MRK 505 304-UUS - Testing functionality by secondary injection 10.8.1.1 Testing the synchronizing function The voltage inputs used are: V3PL1 VA, VB or VC line 1 voltage inputs on the IED V3PBB1 Bus1 voltage input on the IED Testing the frequency difference The frequency difference test should verify that operation is achieved when the frequency difference between bus and line is less than set value of FreqDiffMaxand...
  • Page 134 Section 10 1MRK 505 304-UUS - Testing functionality by secondary injection Testing the voltage difference Set the voltage difference to 0.15 p.u. on the local HMI, and the test should check that operation is achieved when the voltage difference VDiffSC is lower than 0.15 p.u. The settings used in the test shall be final settings.
  • Page 135 Section 10 1MRK 505 304-UUS - Testing functionality by secondary injection V-Bus No operation V-Line operation V-Bus en05000551_ansi.vsd ANSI05000551 V1 EN Figure 21: Test of phase difference Change the phase angle between +dφ and -dφ and verify that the two outputs are activated for phase differences between these values but not for phase differences outside, see figure 21.
  • Page 136: Testing The Energizing Check

    Section 10 1MRK 505 304-UUS - Testing functionality by secondary injection The voltage difference between the voltage connected to V-Bus and V-Line should be 0%, so that the AUTOSYOK and MANSYOK outputs are activated first. Change the V-Line voltage connection to V-Line2 without changing the setting on the local HMI.
  • Page 137: Testing The Voltage Selection

    Section 10 1MRK 505 304-UUS - Testing functionality by secondary injection Verify the settings AutoEnerg or ManEnerg to be DBLL. Apply a single-phase voltage of 30% GblBaseSelBus to the V-Bus and a single- phase voltage of 100% GblBaseSelLine to the V-Line. Check that the AUTOENOK and MANENOK outputs are activated after set tAutoEnerg respectively tManEnerg.
  • Page 138 Section 10 1MRK 505 304-UUS - Testing functionality by secondary injection Testing the voltage selection for single CB arrangements This test should verify that the correct voltage is selected for the measurement in the SESRSYN function used in a double-bus arrangement. Apply a single-phase voltage of 100% GblBaseSelLine to the V-Line and a single-phase voltage of 100% GblBaseSelBus to the V-Bus.
  • Page 139 Section 10 1MRK 505 304-UUS - Testing functionality by secondary injection Table 13: Voltage selection logic SESRSYN CBConfig Section to Activated Activated Activated Activated Indication setting B1QCLD B2QCLD LN1QCLD LN2QCLD from synchroniz input on input on input on input on SESRSYN IED from IED from...
  • Page 140: Completing The Test

    Section 10 1MRK 505 304-UUS - Testing functionality by secondary injection Bus 1 Bus 2 CB1 52 CB3 352 (SESRSYN 1) (SESRSYN 3) CB2 252 (SESRSYN 2) LN1 989 LN2 989 Line 1 Line 2 ANSI11000274.en.v1 ANSI11000274 V1 EN Figure 22: Objects used in the voltage selection logic 10.8.1.5 Completing the test...
  • Page 141 (CB) is simulated by an external bi-stable relay (BR), for example a relay type RXMVB2 or RXMD or Breaker Simulator of ABB. The following manual switches are used: • Switch or push-button to close (SC) •...
  • Page 142 Section 10 1MRK 505 304-UUS - Testing functionality by secondary injection • Protection or control unit, IED, configured and with settings entered. • Configuration diagram for the IED • Terminal diagram for the IED, or plant circuit diagram including the IED •...
  • Page 143: Preparation Of The Verification

    Section 10 1MRK 505 304-UUS - Testing functionality by secondary injection To test ANSI04000202-1-en.vsd ANSI04000202 V2 EN Figure 23: Simulating the CB operation by a bi-stable relay/breaker simulator and manual switches 10.8.2.1 Preparation of the verification Check the function settings on the local HMI under Main menu/Settings/Setting group N/Control/Autorecloser79,5(0–>1)/SMBRREC:x Busbar protection REB670 2.0 ANSI Commissioning Manual...
  • Page 144: Switching The Autorecloser For 1/2/3-Phase Operation Function To Enabled And Disabled

    Section 10 1MRK 505 304-UUS - Testing functionality by secondary injection If any timer settings are reduced to speed up or facilitate the testing, they shall be set to normal after testing. A temporary label on the IED can be a reminder to restore normal settings after which a verification test should be performed.
  • Page 145: Checking The Reclosing Conditions

    Section 10 1MRK 505 304-UUS - Testing functionality by secondary injection Set Operation = Enabled. If the synchronizing check SESRSYN (25) is not to be operated, ensure that the signal SYNC input is activated. If SESRSYN (25) is to be included, ensure that it is supplied with the appropriate AC quantities.
  • Page 146 Section 10 1MRK 505 304-UUS - Testing functionality by secondary injection Check that the autorecloser function SMBRREC (79) is operative, for example, by making a reclosing shot without the INHIBIT signal. Apply a fault and thereby a RI signal. At the same time, or during the open time, apply a signal to the input INHIBIT.
  • Page 147: Completing The Test

    Section 10 1MRK 505 304-UUS - Testing functionality by secondary injection The output READY shall be low, and PREP3P shall be high. Apply a single phase fault and thereby a RI signal. Check that a definitive three phase trip and no reclosing takes place. Testing autoreclosing in a multi-breaker arrangement The usual arrangement is to have an autorecloser function SMBRREC (79) per circuit- breaker.
  • Page 148: Apparatus Control Apc

    Section 10 1MRK 505 304-UUS - Testing functionality by secondary injection 10.8.3 Apparatus control APC The apparatus control function consists of four types of function blocks, which are connected in a delivery-specific way between bays and to the station level. For that reason, test the total function in a system, that is, either in a complete delivery system as an acceptance test (FAT/SAT) or as parts of that system.
  • Page 149: Monitoring

    Section 10 1MRK 505 304-UUS - Testing functionality by secondary injection 10.9 Monitoring 10.9.1 Gas medium supervision SSIMG Prepare the IED for verification of settings as outlined in section "Testing the liquid medium supervision for alarm and lock out conditions" and section "Completing the test"...
  • Page 150: Testing The Liquid Medium Supervision For Alarm And Lock Out Conditions

    Section 10 1MRK 505 304-UUS - Testing functionality by secondary injection Check that the input logical signal BLOCK is logical zero and that on the local HMI, the logical signals LVL_ALM, LVL_LO, TEMP_ALM and TEMP_LO are equal to logical zero. 10.9.2.1 Testing the liquid medium supervision for alarm and lock out conditions Connect the binary inputs to consider liquid level to initiate the alarms.
  • Page 151: Verifying The Settings

    Section 10 1MRK 505 304-UUS - Testing functionality by secondary injection 10.9.3.1 Verifying the settings Connect the test set for the injection of a three-phase current to the appropriate current terminals of the IED. If current need to be injected for a particular test, it should be done in the phase selected by the PhSel parameter.
  • Page 152: Completing The Test

    Section 10 1MRK 505 304-UUS - Testing functionality by secondary injection 7.1. Test the actual set values defined by AccSelCal to Aux Contact, ContTrCorr and AlmAccCurrPwr. 7.2. Inject phase current in the selected phase such that its value is greater than set AccStopCurr value.
  • Page 153: Event Function Event

    Section 10 1MRK 505 304-UUS - Testing functionality by secondary injection 10.9.4 Event function EVENT Prepare the IED for verification of settings as outlined in section "" and section "Preparing for test" in this chapter. During testing, the IED can be set when in test mode from PST. The functionality of the event reporting during test mode is set in the Parameter Setting tool in PCM600.
  • Page 154: Function For Energy Calculation And Demand Handling Etpmmtr

    Section 10 1MRK 505 304-UUS - Testing functionality by secondary injection 10.10.2 Function for energy calculation and demand handling ETPMMTR Prepare the IED for verification of settings as outlined in section ”Overview “ and section ”Preparing for test“ in this chapter. 10.10.2.1 Verifying the settings Common test equipment can be used to determine the injection of current and voltage...
  • Page 155: Completing The Test

    Section 10 1MRK 505 304-UUS - Testing functionality by secondary injection Repeat the above test steps 1 to 2. Set tEnergy setting as 1 minute and supply the IED with three phase currents and voltages at their rated value till 1 minute. Check the MAXPAFD and MAXPRFD outputs after 1 minute and compare it with last 1 minute average power values.
  • Page 156: Station Communication

    Section 10 1MRK 505 304-UUS - Testing functionality by secondary injection 10.11 Station communication 10.11.1 Multiple command and transmit MULTICMDRCV / MULTICMDSND The multiple command and transmit function (MULTICMDRCV / MULTICMDSND) is only applicable for horizontal communication. Test of the multiple command function block and multiple transmit is recommended to be performed in a system, that is, either in a complete delivery system as an acceptance test (FAT/SAT) or as parts of that system, because the command function blocks are connected in a delivery-specific way between bays and the station level and transmit.
  • Page 157: Basic Ied Functions

    Section 10 1MRK 505 304-UUS - Testing functionality by secondary injection Test the correct functionality by simulating different kind of faults. Also check that sent and received data is correctly transmitted and read. A test connection is shown in figure 24. A binary input signal (BI) at End1 is configured to be transferred through the communication link to End2.
  • Page 158: Verifying The Settings

    Section 10 1MRK 505 304-UUS - Testing functionality by secondary injection 10.13.1.1 Verifying the settings Check the configuration of binary inputs that control the selection of the active setting group. Browse to the ActiveGroup menu to achieve information about the active setting group.
  • Page 159: Section 11 Primary Injection Testing

    Section 11 1MRK 505 304-UUS - Primary injection testing Section 11 Primary injection testing Whenever it becomes necessary to work on primary equipment, it is essential that all the necessary switching, locking, grounding and safety procedures are observed and obeyed in a rigid and formalized manner. Operating and testing procedures should be strictly followed in order to avoid exposure to live equipment.
  • Page 160: Stability Of The Busbar Differential Protection

    Section 11 1MRK 505 304-UUS - Primary injection testing Testing will be explained from one general current input CTx (that is, x = 1, 2,..., Nmax; where Nmax is equal to the maximum number of used CT inputs). Follow the following test instructions for all used current inputs in an IED. Procedure Connect the test set for injection primary current to the main CT connected to the current terminals of CTx input of the IED as shown in figure 25.
  • Page 161 Section 11 1MRK 505 304-UUS - Primary injection testing REB 670 CT1 Input Input Primary Injection Test Set CT3 Input CT4 Input CT5 Input en05000307_ansi.vsd ANSI05000307 V1 EN Figure 26: Typical test connection for primary injection, which should confirm the stability of the main CT connected to current inputs of the IED For this type of primary injection tests a suitable current source should be applied across the primary windings of two CTs connected in series as shown in figure 26.
  • Page 162 Section 11 1MRK 505 304-UUS - Primary injection testing Check that the current is present only in the phase being tested. Switch the current off. Check the function in phases B and C by injecting current in the same way. In busbar arrangements where a disconnector replica is used, it provides the information to the busbar protection about which of the measured CT currents shall be included within different differential zones.
  • Page 163: Section 12 Commissioning And Maintenance Of The Fault Clearing System

    The periodicity of all tests depends on several factors, for example the importance of the installation, environmental conditions, simple or complex equipment, static or electromechanical IEDs, and so on. The normal maintenance practices of the user should be followed. However, ABB's recommendation is as follows: Every second to third year Busbar protection REB670 2.0 ANSI...
  • Page 164: Visual Inspection

    IED at a time on live circuits where redundant protection is installed and de- energization of the primary circuit is not allowed. ABB protection IEDs are preferably tested by aid of components from the COMBITEST testing system or FT test systems described in information B03-9510 E.
  • Page 165: Preparation

    Section 12 1MRK 505 304-UUS - Commissioning and maintenance of the fault clearing system performed in the right order to allow for simple and safe secondary testing even with the object in service. Important components of FT test system are FT1, FTx, FT19, FT19RS, FR19RX switches and assemblies as well as FT-1 test plug.
  • Page 166: Self Supervision Check

    Section 12 1MRK 505 304-UUS - Commissioning and maintenance of the fault clearing system should be checked that the event and alarm signalling is correct by activating the events and performing some selected tests. 12.2.2.5 Self supervision check Once secondary testing has been completed, it should be checked that no self- supervision signals are activated continuously or sporadically.
  • Page 167: Measurement Of Service Currents

    Section 12 1MRK 505 304-UUS - Commissioning and maintenance of the fault clearing system 12.2.2.7 Measurement of service currents After a maintenance test it is recommended to measure the service currents and service voltages recorded by the protection IED. The service values are checked on the local HMI or in PCM600.
  • Page 169: Section 13 Troubleshooting

    Time synch Ready No problem detected. None. Time synch Fail No time synchronization. Check the synchronization source for problems. If the problem persists, contact your ABB representative for service. Real time clock Ready No problem detected. None. Real time clock Fail The real time clock has Set the clock.
  • Page 170: Fault Tracing

    Ready (I/O module name) Fail I/O modules has failed. Check that the I/O module has been configured and connected to the IOP1- block. If the problem persists, contact your ABB representative for service. 13.2 Fault tracing 13.2.1 Internal fault indications...
  • Page 171: Using Front-Connected Pc

    Section 13 1MRK 505 304-UUS - Troubleshooting HMI Signal Name: Status Description MIMn READY / FAIL mA input module MIM1 failed. Signal activation will reset the IED READY / FAIL This signal will be active when there is a hardware error with the real time clock. Time Sync READY / FAIL This signal will be active when the...
  • Page 172 Section 13 1MRK 505 304-UUS - Troubleshooting The list of internal events provides valuable information, which can be used during commissioning and fault tracing. The internal events are time tagged with a resolution of 1ms and stored in a list. The list can store up to 40 events.
  • Page 173: Repair Instruction

    Operation may be disrupted and IED and measuring circuitry may be damaged. An alternative is to open the IED and send only the faulty circuit board to ABB for repair. When a printed circuit board is sent to ABB, it must always be placed in a metallic, ESD-proof, protection bag.
  • Page 174: Repair Support

    13.4 Repair support If an IED needs to be repaired, the whole IED must be removed and sent to an ABB Logistic Center. Please contact the local ABB representative to get more details. 13.5 Maintenance The IED is self-supervised.
  • Page 175: Section 14 Glossary

    Section 14 1MRK 505 304-UUS - Glossary Section 14 Glossary Alternating current Actual channel Application configuration tool within PCM600 A/D converter Analog-to-digital converter ADBS Amplitude deadband supervision Analog digital conversion module, with time synchronization Analog input ANSI American National Standards Institute Autoreclosing ASCT Auxiliary summation current transformer...
  • Page 176 Section 14 1MRK 505 304-UUS - Glossary Circuit breaker Combined backplane module CCITT Consultative Committee for International Telegraph and Telephony. A United Nations-sponsored standards body within the International Telecommunications Union. CAN carrier module CCVT Capacitive Coupled Voltage Transformer Class C Protection Current Transformer class as per IEEE/ ANSI CMPPS Combined megapulses per second...
  • Page 177 Section 14 1MRK 505 304-UUS - Glossary DBLL Dead bus live line Direct current Data flow control Discrete Fourier transform DHCP Dynamic Host Configuration Protocol DIP-switch Small switch mounted on a printed circuit board Digital input DLLB Dead line live bus Distributed Network Protocol as per IEEE Std 1815-2012 Disturbance recorder DRAM...
  • Page 178 Section 14 1MRK 505 304-UUS - Glossary G.703 Electrical and functional description for digital lines used by local telephone companies. Can be transported over balanced and unbalanced lines Communication interface module with carrier of GPS receiver module Graphical display editor within PCM600 General interrogation command Gas-insulated switchgear GOOSE...
  • Page 179 Section 14 1MRK 505 304-UUS - Glossary IEEE 1686 Standard for Substation Intelligent Electronic Devices (IEDs) Cyber Security Capabilities Intelligent electronic device I-GIS Intelligent gas-insulated switchgear Binary input/output module Instance When several occurrences of the same function are available in the IED, they are referred to as instances of that function. One instance of a function is identical to another of the same kind but has a different number in the IED user interfaces.
  • Page 180 Section 14 1MRK 505 304-UUS - Glossary LON network tool Local operating network Miniature circuit breaker Mezzanine carrier module Milli-ampere module Main processing module MVAL Value of measurement Multifunction vehicle bus. Standardized serial bus originally developed for use in trains. National Control Centre Number of grid faults Numerical module...
  • Page 181 Section 14 1MRK 505 304-UUS - Glossary Power supply module Parameter setting tool within PCM600 PT ratio Potential transformer or voltage transformer ratio PUTT Permissive underreach transfer trip RASC Synchrocheck relay, COMBIFLEX Relay characteristic angle RISC Reduced instruction set computer RMS value Root mean square value RS422...
  • Page 182 Section 14 1MRK 505 304-UUS - Glossary Strömberg Protection Acquisition (SPA), a serial master/slave protocol for point-to-point communication Switch for CB ready condition Switch or push button to trip Starpoint Neutral/Wye point of transformer or generator Static VAr compensation Trip coil Trip circuit supervision Transmission control protocol.
  • Page 183 Section 14 1MRK 505 304-UUS - Glossary (BIPM), which forms the basis of a coordinated dissemination of standard frequencies and time signals. UTC is derived from International Atomic Time (TAI) by the addition of a whole number of "leap seconds" to synchronize it with Universal Time 1 (UT1), thus allowing for the eccentricity of the Earth's orbit, the rotational axis tilt (23.5 degrees), but still showing the Earth's irregular rotation, on which UT1 is based.
  • Page 186 Contact us ABB AB Substation Automation Products SE-721 59 Västerås, Sweden Phone +46 (0) 21 32 50 00 +46 (0) 21 14 69 18 www.abb.com/substationautomation...

This manual is also suitable for:

Reb670 2.0 ansi

Table of Contents