
Subscribe to Our Youtube Channel
Related Manuals for Daheng Imaging MERCURY2 USB3


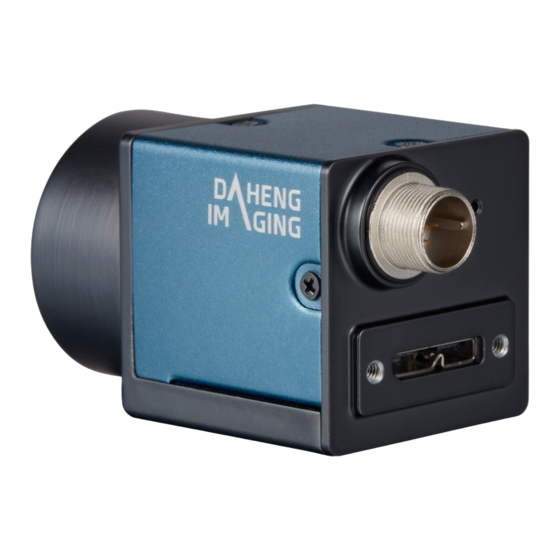
Summary of Contents for Daheng Imaging MERCURY2 USB3
- Page 1 China Daheng Group, Inc. Beijing Image Vision Technology Branch MERCURY2 USB3 Vision Cameras User Manual Version: V1.0.28 Date: 2022-11-11...
- Page 2 All rights reserved. No parts of this manual may be used or reproduced, in any forms or by any means, without prior written permission of China Daheng Group, Inc. Beijing Image Vision Technology Branch. The right is also reserved to modify or change any parts of this manual in the future without prior notification. All other trademarks are the properties of their respective owners.
- Page 3 The MERCURY2 USB3 Vision cameras are especially suitable for machine vision applications such as industrial inspection, medical, scientific research, education, security and so on. This manual describes in detail on how to install and use the MERCURY2 USB3 Vision digital cameras.
-
Page 4: Table Of Contents
Contents 1. Introduction ........................1 1.1. Series Introduction ....................1 1.2. Naming Rules ......................1 1.3. Standards ........................ 2 1.4. Document, CAD/Technical Drawing and Software Downloads ........ 2 2. Precautions ........................3 2.1. Guideline for Avoiding EMI and ESD ............... 3 2.2. - Page 5 4.7. MER2-231-41U3M/C(-L) ..................23 4.7.1. Parameter .......................... 23 4.7.2. Spectral Response ......................25 4.8. MER2-301-125U3M/C(-L) ..................26 4.8.1. Parameter .......................... 26 4.8.2. Spectral Response ......................28 4.9. MER2-302-56U3M/C(-L) ..................29 4.9.1. Parameter .......................... 29 4.9.2. Spectral Response ......................31 4.10. MER2-502-79U3M/C(-L) ..................32 4.10.1.
- Page 6 4.21. ME2P-1840-21U3M/C ..................61 4.21.1. Parameter ........................61 4.21.2. Spectral Response ......................63 4.22. ME2P-2621-15U3M/C \ ME2P-2622-15U3M/C ........... 63 4.22.1. Parameter ........................63 4.22.2. Spectral Response ......................66 4.23. ME2P-2621-15U3M NIR \ ME2P-2622-15U3M NIR ..........67 4.23.1. Parameter ........................67 4.23.2.
- Page 7 7.3.1. MER2/ME2P Series ......................92 7.3.1.1. Line0 (Opto-isolated Input) Circuit ................93 7.3.1.2. Line1 (Opto-isolated Output) Circuit ................95 7.3.1.3. GPIO 2/3 (Bidirectional) Circuit .................. 97 7.3.2. ME2L Series ........................100 7.3.2.1. Line0 (Opto-isolated Input) Circuit ................101 7.3.2.2. Line2 (Bidirectional) Circuit ..................103 8.
- Page 8 8.3.10. Device User ID ......................152 8.3.11. Timestamp ........................153 8.3.12. Binning ........................... 153 8.3.13. Decimation ........................156 8.3.14. Reverse X and Reverse Y ..................... 159 8.3.15. Digital Shift ........................162 8.3.16. Acquisition Status ......................164 8.3.17. Black Level ........................165 8.3.18.
- Page 9 9.1. LUT Create Tool ....................204 9.1.1. GUI........................... 204 9.1.2. User Guide ........................205 9.1.2.1. User Case ......................... 205 9.1.2.2. GroupBox ........................205 9.1.2.3. Auto Create Lut ......................207 9.1.2.4. Save Lut ........................208 9.1.2.5. Read Lut........................208 9.1.3. Precautions ........................209 9.1.3.1.
-
Page 10: Introduction
The MERCURY2 USB3 Vision camera transmits image data through the USB3.0 data interface. Thanks to the locking screw connectors, the MERCURY2 USB3 Vision cameras can secure the reliability of cameras deployed in harsh industrial environments. Featuring high reliability and high price/performance ratio, the MERCURY2 USB3 Vision cameras are especially suitable for machine vision applications such as industrial inspection, medical, scientific research, education, security and so on. -
Page 11: Standards
GEN<i>CAM standard. 1.4. Document, CAD/Technical Drawing and Software Downloads Product related document, CAD/Technical drawing and software can be downloaded from the Downloads of DAHENG IMAGING website. The relevant contents are as follows: Document MERCURY2 USB3 Vision Cameras User Manual CAD/Technical... -
Page 12: Precautions
2.Precautions 2. Precautions 2.1. Guideline for Avoiding EMI and ESD You should consider the EMI (Electro Magnetic Interference) and ESD (Electro-Static discharge) problem in the process of using the camera, to guarantee the camera to work in a relatively good electromagnetic environment. -
Page 13: Certification And Declaration
2.Precautions 2.4. Certification and Declaration 1. CE, RoHS We declare that DAHENG IMAGING MERCURY2 USB3 Vision digital cameras have passed the following EU certifications: 2014/30/EU—Electromagnetic Compatibility Restriction 2011/65/EU—Restriction of Hazardous Substances (RoHS) and its revised directive 2015/863/EU Equipment meeting Class A requirements may not offer adequate protection to broadcast services within a residential environment. -
Page 14: Installation Guideline
3.1. Host Preparation 3.1.1. Software Package The software package of DAHENG IMAGING's MERCURY2 USB3 Vision camera is used to control the MERCURY2 USB3 Vision camera to provide stable, real-time image transmission, and provides multiple samples and easy-to-integrate SDKs for various programming tools. The package is composed of the... -
Page 15: Camera Power
HALCON. USB3 Vision interface The MERCURY2 USB3.0 camera is compatible with the USB3 Vision protocol, which allows the user to control the camera directly through the USB3 Vision protocol. In addition, the user can use some third- party software that supports the USB3 Vision protocol to control the camera, such as HALCON. -
Page 16: Camera Driver Installation
3.Installation Guideline 3.3. Camera Driver Installation 3.3.1. System Requirements GalaxySDK is suitable for all cameras in the MERCURY2. The GalaxySDK contains various operating systems such as Windows, Android and Linux. The requirements for the operating system and version of the installation package are as follows: Operating Systems Applicable Version ... -
Page 17: General Specification
4.General Specification 4. General Specification 4.1. Explanation of Important Parameters 4.1.1. About Spectral Response QE: Quantum efficiency, which is the ratio of the average number of photoelectrons produced per unit time to the number of incident photons at a given wavelength. Sensitivity: The change of the sensor output signal relative to the incident light energy. - Page 18 4.General Specification Operating Humidity 10%~80% Power Consumption < 2.7W@5V Lens Mount Dimensions 29mm×29mm×29mm (without lens adapter or connectors) Weight Operating System Windows XP/Win7/Win8/Win10 32/64bit, Linux, Android, ARMv7, ARMv8 Data Interface USB3.0 Image size, gain, exposure time, Programmable Control Image size, gain, exposure time trigger polarity, flash polarity Conformity CE, RoHS, FCC, USB3 Vision, GenICam...
-
Page 19: Spectral Response
4.General Specification Power Consumption < 2.7W@5V Lens Mount Dimensions 29mm×29mm×29mm (without lens adapter or connectors) Weight Operating System Windows XP/Win7/Win8/Win10 32/64bit, Linux, Android, ARMv7, ARMv8 Data Interface USB3.0 Image size, gain, exposure time, Programmable Control Image size, gain, exposure time trigger polarity, flash polarity Conformity CE, RoHS, FCC, USB3 Vision, GenICam... -
Page 20: Mer2-135-150U3M/C(-L)
4.General Specification 4.3. MER2-135-150U3M/C(-L) 4.3.1. Parameter Specifications MER2-135-150U3C-L MER2-135-150U3C Resolution 1280 × 1024 Sensor Type SmartSens SC130GS global shutter CMOS Max. Image Circle 1/2.7 inch 4.0μm × 4.0μm Pixel Size Frame Rate 150fps@1280 × 1024 ADC Bit Depth 10bit Pixel Bit Depth 8bit, 10bit Shutter Time 8μs~1s... - Page 21 4.General Specification Image size, gain, exposure time, Programmable Control Image size, gain, exposure time trigger polarity, flash polarity Conformity CE, RoHS, FCC, USB3 Vision, GenICam Table 4-3 MER2-135-150U3C(-L) camera specifications Specifications MER2-135-150U3M-L MER2-135-150U3M Resolution 1280 × 1024 Sensor Type SmartSens SC130GS global shutter CMOS Max.
-
Page 22: Spectral Response
4.General Specification Operating System Windows XP/Win7/Win8/Win10 32/64bit, Linux, Android, ARMv7, ARMv8 Data Interface USB3.0 Image size, gain, exposure time, Programmable Control Image size, gain, exposure time trigger polarity, flash polarity Conformity CE, RoHS, FCC, USB3 Vision, GenICam Table 4-4 MER2-135-150U3M(-L) camera specifications 4.3.2. -
Page 23: Mer2-135-208U3M/C(-L)
4.General Specification 4.4. MER2-135-208U3M/C(-L) 4.4.1. Parameter Specifications MER2-135-208U3C-L MER2-135-208U3C Resolution 1280 × 1024 Sensor Type SmartSens SC130GS global shutter CMOS Max. Image Circle 1/2.7 inch 4.0μm × 4.0μm Pixel Size Frame Rate 208.5fps@1280 × 1024 ADC Bit Depth 10bit Pixel Bit Depth 8bit, 10bit Shutter Time 8μs~1s... - Page 24 4.General Specification Image size, gain, exposure time, Programmable Control Image size, gain, exposure time trigger polarity, flash polarity Conformity RoHS, USB3 Vision, GenICam Table 4-5 MER2-135-208U3C(-L) camera specifications Specifications MER2-135-208U3M-L MER2-135-208U3M Resolution 1280 × 1024 Sensor Type SmartSens SC130GS global shutter CMOS Max.
-
Page 25: Spectral Response
4.General Specification Operating System Windows XP/Win7/Win8/Win10 32/64bit, Linux, Android, ARMv7, ARMv8 Data Interface USB3.0 Image size, gain, exposure time, Programmable Control Image size, gain, exposure time trigger polarity, flash polarity Conformity RoHS, USB3 Vision, GenICam Table 4-6 MER2-135-208U3M(-L) camera specifications 4.4.2. -
Page 26: Mer2-160-227U3M/C(-L)
4.General Specification 4.5. MER2-160-227U3M/C(-L) 4.5.1. Parameter Specifications MER2-160-227U3C-L MER2-160-227U3C Resolution 1440 × 1080 Sensor Type Sony IMX273 global shutter CMOS Max. Image Circle 1/2.9 inch 3.45μm × 3.45μm Pixel Size Frame Rate 227fps@1440 × 1080 ADC Bit Depth 10bit Pixel Bit Depth 8bit, 10bit 20μs~1s Shutter Time... - Page 27 4.General Specification Image size, gain, exposure time, Programmable Control Image size, gain, exposure time trigger polarity, flash polarity Conformity CE, RoHS, FCC, USB3 Vision, GenICam Table 4-7 MER2-160-227U3C(-L) camera specifications Specifications MER2-160-227U3M-L MER2-160-227U3M Resolution 1440 × 1080 Sensor Type Sony IMX273 global shutter CMOS Max.
-
Page 28: Spectral Response
4.General Specification Operating System Windows XP/Win7/Win8/Win10 32/64bit, Linux, Android, ARMv7, ARMv8 Data Interface USB3.0 Image size, gain, exposure time, Programmable Control Image size, gain, exposure time trigger polarity, flash polarity Conformity CE, RoHS, FCC, USB3 Vision, GenICam Table 4-8 MER2-160-227U3M(-L) camera specifications 4.5.2. -
Page 29: Mer2-230-168U3M/C(-L)
4.General Specification 4.6. MER2-230-168U3M/C(-L) 4.6.1. Parameter Specifications MER2-230-168U3C-L MER2-230-168U3C Resolution 1920 × 1200 Sensor Type Sony IMX174 global shutter CMOS Max. Image Circle 1/1.2 inch 5.86μm × 5.86μm Pixel Size Frame Rate 168fps@1920 × 1200 ADC Bit Depth 10bit Pixel Bit Depth 8bit, 10bit 20μs~1s Shutter Time... - Page 30 4.General Specification Image size, gain, exposure time, Programmable Control Image size, gain, exposure time trigger polarity, flash polarity Conformity CE, RoHS, FCC, USB3 Vision, GenICam Table 4-9 MER2-230-168U3C(-L) camera specifications Specifications MER2-230-168U3M-L MER2-230-168U3M Resolution 1920 × 1200 Sensor Type Sony IMX174 global shutter CMOS Max.
-
Page 31: Spectral Response
4.General Specification Operating System Windows XP/Win7/Win8/Win10 32/64bit, Linux, Android, ARMv7, ARMv8 Data Interface USB3.0 Image size, gain, exposure time, Programmable Control Image size, gain, exposure time trigger polarity, flash polarity Conformity CE, RoHS, FCC, USB3 Vision, GenICam Table 4-10 MER2-230-168U3M(-L) camera specifications 4.6.2. -
Page 32: Mer2-231-41U3M/C(-L)
4.General Specification 4.7. MER2-231-41U3M/C(-L) 4.7.1. Parameter Specifications MER2-231-41U3C-L MER2-231-41U3C Resolution 1920 × 1200 Sensor Type Sony IMX249 global shutter CMOS Max. Image Circle 1/1.2 inch Pixel Size 5.86μm × 5.86μm Frame Rate 41fps@1920 × 1200 ADC Bit Depth 12bit Pixel Bit Depth 8bit, 10bit, 12bit Shutter Time 20μs~1s... - Page 33 4.General Specification Image size, gain, exposure time, Programmable Control Image size, gain, exposure time trigger polarity, flash polarity Conformity CE, RoHS, FCC, USB3 Vision, GenICam Table 4-11 MER2-231-41U3C(-L) camera specifications Specifications MER2-231-41U3M-L MER2-231-41U3M Resolution 1920 × 1200 Sensor Type Sony IMX249 global shutter CMOS Max.
-
Page 34: Spectral Response
4.General Specification Operating System Windows XP/Win7/Win8/Win10 32/64bit, Linux, Android, ARMv7, ARMv8 Data Interface USB3.0 Image size, gain, exposure time, Programmable Control Image size, gain, exposure time trigger polarity, flash polarity Conformity CE, RoHS, FCC, USB3 Vision, GenICam Table 4-12 MER2-231-41U3M(-L) camera specifications 4.7.2. -
Page 35: Mer2-301-125U3M/C(-L)
4.General Specification 4.8. MER2-301-125U3M/C(-L) 4.8.1. Parameter Specifications MER2-301-125U3C-L MER2-301-125U3C Resolution 2048 × 1536 Sensor Type Sony IMX252 global shutter CMOS Max. Image Circle 1/1.8 inch Pixel Size 3.45μm × 3.45μm Frame Rate 125fps@2048 × 1536 ADC Bit Depth 10bit Pixel Bit Depth 8bit, 10bit 20μs~1s Shutter Time... - Page 36 4.General Specification Image size, gain, exposure time, Programmable Control Image size, gain, exposure time trigger polarity, flash polarity Conformity CE, RoHS, FCC, USB3 Vision, GenICam Table 4-13 MER2-301-125U3C(-L) camera specifications Specifications MER2-301-125U3M-L MER2-301-125U3M Resolution 2048 × 1536 Sensor Type Sony IMX252 global shutter CMOS Max.
-
Page 37: Spectral Response
4.General Specification Operating System Windows XP/Win7/Win8/Win10 32/64bit, Linux, Android, ARMv7, ARMv8 Data Interface USB3.0 Image size, gain, exposure time, Programmable Control Image size, gain, exposure time trigger polarity, flash polarity Conformity CE, RoHS, FCC, USB3 Vision, GenICam Table 4-14 MER2-301-125U3M(-L) camera specifications 4.8.2. -
Page 38: Mer2-302-56U3M/C(-L)
4.General Specification 4.9. MER2-302-56U3M/C(-L) 4.9.1. Parameter Specifications MER2-302-56U3C-L MER2-302-56U3C Resolution 2048 × 1536 Sensor Type Sony IMX265 global shutter CMOS Max. Image Circle 1/1.8 inch 3.45μm × 3.45μm Pixel Size Frame Rate 56fps@2048 × 1536 ADC Bit Depth 12bit Pixel Bit Depth 8bit, 10bit 20μs~1s Shutter Time... - Page 39 4.General Specification Image size, gain, exposure time, Programmable Control Image size, gain, exposure time trigger polarity, flash polarity Conformity CE, RoHS, FCC, USB3 Vision, GenICam Table 4-15 MER2-302-56U3C(-L) camera specifications Specifications MER2-302-56U3M-L MER2-302-56U3M Resolution 2048 × 1536 Sensor Type Sony IMX265 global shutter CMOS Max.
-
Page 40: Spectral Response
4.General Specification Operating System Windows XP/Win7/Win8/Win10 32/64bit, Linux, Android, ARMv7, ARMv8 Data Interface USB3.0 Image size, gain, exposure time, Programmable Control Image size, gain, exposure time trigger polarity, flash polarity Conformity CE, RoHS, FCC, USB3 Vision, GenICam Table 4-16 MER2-302-56U3M(-L) camera specifications 4.9.2. -
Page 41: Mer2-502-79U3M/C(-L)
4.General Specification 4.10. MER2-502-79U3M/C(-L) 4.10.1. Parameter Specifications MER2-502-79U3C-L MER2-502-79U3C Resolution 2448 × 2048 Sensor Type Sony IMX250 global shutter CMOS Max. Image Circle 2/3 inch 3.45μm × 3.45μm Pixel Size Frame Rate 79.1fps@2448 × 2048 ADC Bit Depth 10bit Pixel Bit Depth 8bit, 10bit 20μs~1s Shutter Time... - Page 42 4.General Specification Image size, gain, exposure time, Programmable Control Image size, gain, exposure time trigger polarity, flash polarity Conformity CE, RoHS, FCC, USB3 Vision, GenICam Table 4-17 MER2-502-79U3C(-L) camera specifications Specifications MER2-502-79U3M-L MER2-502-79U3M Resolution 2448 × 2048 Sensor Type Sony IMX250 global shutter CMOS Max.
-
Page 43: Spectral Response
4.General Specification Operating System Windows XP/Win7/Win8/Win10 32/64bit, Linux, Android, ARMv7, ARMv8 Data Interface USB3.0 Image size, gain, exposure time, Programmable Control Image size, gain, exposure time trigger polarity, flash polarity Conformity CE, RoHS, FCC, USB3 Vision, GenICam Table 4-18 MER2-502-79U3M(-L) camera specifications 4.10.2. -
Page 44: Mer2-502-79U3M Pol
4.General Specification 4.11. MER2-502-79U3M POL 4.11.1. Parameter Specifications MER2-502-79U3M POL Resolution 2448 × 2048 Sensor Type Sony IMX250 global shutter CMOS Max. Image Circle 2/3 inch 3.45μm × 3.45μm Pixel Size Frame Rate 79.1fps @ 2448 × 2048 ADC Bit Depth 10bit Pixel Bit Depth 8bit, 10bit... -
Page 45: Spectral Response
4.General Specification Programmable Control Image size, gain, exposure time, trigger polarity, flash polarity Conformity CE, FCC, USB3 Vision, GenICam Table 4-19 MER2-502-79U3M POL camera specifications 4.11.2. Spectral Response Wavelength [nm] Figure 4-19 MER2-502-79U3M POL sensor spectral response 4.12. MER2-503-36U3M/C(-L) 4.12.1. Parameter Specifications MER2-503-36U3C-L MER2-503-36U3C... - Page 46 4.General Specification Signal Noise Ratio 40.5dB Synchronization Software trigger Hardware trigger, software trigger 1 input and 1 output with opto- isolated, 2 programmable GPIOs Operating Temp. 0° C~45° C Storage Temp. -20° C~70° C Operating Humidity 10%~80% Power Consumption < 2.7W@5V Lens Mount Dimensions 29mm×29mm×29mm (without lens adapter or connectors)
-
Page 47: Spectral Response
4.General Specification Signal Noise Ratio 40.4dB Synchronization Software trigger Hardware trigger, software trigger 1 input and 1 output with opto- isolated, 2 programmable GPIOs Operating Temp. 0° C~45° C Storage Temp. -20° C~70° C Operating Humidity 10%~80% Power Consumption < 2.7W@5V Lens Mount Dimensions 29mm×29mm×29mm (without lens adapter or connectors) -
Page 48: Mer2-503-36U3M Pol
4.General Specification Figure 4-21 MER2-503-36U3M(-L) sensor spectral response 4.13. MER2-503-36U3M POL 4.13.1. Parameter Specifications MER2-503-36U3M POL Resolution 2448 × 2048 Sensor Type Sony IMX264 global shutter CMOS Max. Image Circle 2/3 inch 3.45μm × 3.45μm Pixel Size Frame Rate 36fps@2448 × 2048 ADC Bit Depth 12bit Pixel Bit Depth... -
Page 49: Spectral Response
4.General Specification Operating Temp. 0° C~45° C Storage Temp. -20° C~70° C Operating Humidity 10%~80% Power Consumption < 2.7W@5V Lens Mount Dimensions 29mm×29mm×29mm (without lens adapter or connectors) Weight Operating System Windows XP/Win7/Win8/Win10 32/64bit, Linux, Android, ARMv7, ARMv8 Data Interface USB3.0 Programmable Control Image size, gain, exposure time, trigger polarity, flash polarity... -
Page 50: Mer2-630-60U3M/C(-L/-W90)
4.General Specification 4.14. MER2-630-60U3M/C(-L/-W90) 4.14.1. Parameter Specifications MER2-630-60U3C MER2-630-60U3C-W90 MER2-630-60U3C-L Resolution 3088 × 2064 Sensor Type Sony IMX178 rolling shutter CMOS Max. Image Circle 1/1.8 inch 2.4μm × 2.4μm Pixel Size Frame Rate 60fps@3088 × 2064 ADC Bit Depth 10bit Pixel Bit Depth 8bit, 10bit 8μs~1s... - Page 51 4.General Specification Data Interface USB3.0 Programmable Image size, gain, Image size, gain, exposure time, trigger polarity, flash Control polarity exposure time Conformity CE, RoHS, FCC, USB3 Vision, GenICam Table 4-23 MER2-630-60U3C(-L/-W90) camera specifications Specifications MER2-630-60U3M MER2-630-60U3M-W90 MER2-630-60U3M-L Resolution 3088 × 2064 Sensor Type Sony IMX178 rolling shutter CMOS Max.
-
Page 52: Spectral Response
4.General Specification Weight Operating System Windows XP/Win7/Win8/Win10 32/64bit, Linux, Android, ARMv7, ARMv8 Data Interface USB3.0 Programmable Image size, gain, Image size, gain, exposure time, trigger polarity, flash Control polarity exposure time Conformity CE, RoHS, FCC, USB3 Vision, GenICam Table 4-24 MER2-630-60U3M(-L/-W90) camera specifications 4.14.2. -
Page 53: Mer2-1220-32U3M/C(-L/-W90)
4.General Specification 4.15. MER2-1220-32U3M/C(-L/-W90) 4.15.1. Parameter Specifications MER2-1220-32U3C MER2-1220-32U3C-W90 MER2-1220-32U3C-L Resolution 4024 × 3036 Sensor Type Sony IMX226 rolling shutter CMOS Max. Image Circle 1/1.7 inch 1.85μm × 1.85μm Pixel Size Frame Rate 32.3fps@4024 × 3036 ADC Bit Depth 12bit Pixel Bit Depth 8bit, 12bit 10μs~1s... - Page 54 4.General Specification Programmable Image size, gain, Image size, gain, exposure time, trigger polarity, flash Control polarity exposure time Conformity CE, RoHS, FCC, USB3 Vision, GenICam Table 4-25 MER2-1220-32U3C(-L/-W90) camera specifications Specifications MER2-1220-32U3M MER2-1220-32U3M-W90 MER2-1220-32U3M-L Resolution 4024 × 3036 Sensor Type Sony IMX226 rolling shutter CMOS Max.
-
Page 55: Spectral Response
4.General Specification Data Interface USB3.0 Programmable Image size, gain, Image size, gain, exposure time, trigger polarity, Control flash polarity exposure time Conformity CE, RoHS, FCC, USB3 Vision, GenICam Table 4-26 MER2-1220-32U3M(-L/-W90) camera specifications 4.15.2. Spectral Response Figure 4-25 MER2-1220-32U3C(-L/-W90) sensor spectral response Figure 4-26 MER2-1220-32U3M(-L/-W90) sensor spectral response ©... -
Page 56: Mer2-2000-19U3M/C(-L/-W90)
4.General Specification 4.16. MER2-2000-19U3M/C(-L/-W90) 4.16.1. Parameter Specifications MER2-2000-19U3C MER2-2000-19U3C-W90 MER2-2000-19U3C -L Resolution 5496 × 3672 Sensor Type Sony IMX183 rolling shutter CMOS Max. Image Circle 1 inch 2.4μm × 2.4μm Pixel Size Frame Rate 19.6fps@5496 × 3672 ADC Bit Depth 12bit Pixel Bit Depth 8bit, 12bit... - Page 57 4.General Specification Data Interface USB3.0 Programmable Image size, gain, Image size, gain, exposure time, trigger polarity, flash Control polarity exposure time Conformity CE, RoHS, FCC, USB3 Vision, GenICam Table 4-27 MER2-2000-19U3C(-L/-W90) camera specifications Specifications MER2-2000-19U3M MER2-2000-19U3M-W90 MER2-2000-19U3M-L Resolution 5496 × 3672 Sensor Type Sony IMX183 rolling shutter CMOS Max.
-
Page 58: Spectral Response
4.General Specification Weight Operating System Windows XP/Win7/Win8/Win10 32/64bit, Linux, Android, ARMv7, ARMv8 Data Interface USB3.0 Programmable Image size, gain, Image size, gain, exposure time, trigger polarity, flash Control polarity exposure time Conformity CE, RoHS, FCC, USB3 Vision, GenICam Table 4-28 MER2-2000-19U3M(-L/-W90) camera specifications 4.16.2. -
Page 59: Me2P-560-36U3M/C
4.General Specification 4.17. ME2P-560-36U3M/C 4.17.1. Parameter Specifications ME2P-560-36U3C Resolution 2600 × 2160 Sensor Type Gpixel GMAX2505 global shutter CMOS Max. Image Circle 1/2inch 2.5μm × 2.5μm Pixel Size Frame Rate 36.1fps@2600 × 2160 ADC Bit Depth 12bit Pixel Bit Depth 8bit, 12bit Shutter Time 11μs~1s... - Page 60 4.General Specification Programmable Control Image size, gain, exposure time, trigger polarity, flash polarity Conformity CE, RoHS, FCC, USB3 Vision, GenICam Table 4-29 ME2P-560-36U3C camera specifications Specifications ME2P-560-36U3M Resolution 2600 × 2160 Sensor Type Gpixel GMAX2505 global shutter CMOS Max. Image Circle 1/2inch 2.5μm ×...
-
Page 61: Spectral Response
4.General Specification Data Interface USB3.0 Programmable Control Image size, gain, exposure time, trigger polarity, flash polarity Conformity CE, RoHS, FCC, USB3 Vision, GenICam Table 4-30 ME2P-560-36U3M camera specifications 4.17.2. Spectral Response Figure 4-29 ME2P-560-36U3M/C sensor spectral response 4.18. ME2P-900-43U3M/C 4.18.1. Parameter Specifications ME2P-900-43U3C Resolution... - Page 62 4.General Specification Pixel Formats Bayer GB8/Bayer GB12 Signal Noise Ratio 37.15dB Synchronization Hardware trigger, software trigger 1 input and 1 output with opto-isolated, 2 programmable GPIOs Operating Temp. 0° C~45° C Storage Temp. -20° C~70° C Operating Humidity 10%~80% Power Consumption <...
-
Page 63: Spectral Response
4.General Specification Gain 0dB~16dB Pixel Formats Mono8/Mono12 Signal Noise Ratio 36.94dB Synchronization Hardware trigger, software trigger 1 input and 1 output with opto-isolated, 2 programmable GPIOs Operating Temp. 0° C~45° C Storage Temp. -20° C~70° C Operating Humidity 10%~80% Power Consumption <... -
Page 64: Me2P-1230-23U3M/C
4.General Specification 4.19. ME2P-1230-23U3M/C 4.19.1. Parameter Specifications ME2P-1230-23U3C Resolution 4096 × 3000 Sensor Type Sony IMX304 LQR global shutter CMOS Max. Image Circle 1.1inch 3.45μm × 3.45μm Pixel Size Frame Rate 23.5fps@4096 × 3000 ADC Bit Depth 12bit Pixel Bit Depth 8bit, 12bit 28μs~1s Shutter Time... - Page 65 4.General Specification Programmable Control Image size, gain, exposure time, trigger polarity, flash polarity Conformity CE, RoHS, FCC, USB3 Vision, GenICam Table 4-33 ME2P-1230-23U3C camera specifications Specifications ME2P-1230-23U3M Resolution 4096 × 3000 Sensor Type Sony IMX304 LLR global shutter CMOS Max. Image Circle 1.1inch 3.45μm ×...
-
Page 66: Spectral Response
4.General Specification Data Interface USB3.0 Programmable Control Image size, gain, exposure time, trigger polarity, flash polarity Conformity CE, RoHS, FCC, USB3 Vision, GenICam Table 4-34 ME2P-1230-23U3M camera specifications 4.19.2. Spectral Response Figure 4-31 ME2P-1230-23U3C sensor spectral response Figure 4-32 ME2P-1230-23U3M sensor spectral response ©... -
Page 67: Me2P-1231-32U3M/C
4.General Specification 4.20. ME2P-1231-32U3M/C 4.20.1. Parameter Specifications ME2P-1231-32U3C Resolution 4096 × 3000 Sensor Type Sony IMX253 LQR global shutter CMOS Max. Image Circle 1.1inch 3.45μm × 3.45μm Pixel Size Frame Rate 32.1fps@4096 × 3000 ADC Bit Depth 10bit Pixel Bit Depth 8bit, 10bit Shutter Time 24μs~1s... - Page 68 4.General Specification Programmable Control Image size, gain, exposure time, trigger polarity, flash polarity Conformity CE, RoHS, FCC, USB3 Vision, GenICam Table 4-35 ME2P-1231-32U3C camera specifications Specifications ME2P-1231-32U3M Resolution 4096 × 3000 Sensor Type Sony IMX253 LLR global shutter CMOS Max. Image Circle 1.1inch 3.45μm ×...
-
Page 69: Spectral Response
4.General Specification Data Interface USB3.0 Programmable Control Image size, gain, exposure time, trigger polarity, flash polarity Conformity CE, RoHS, FCC, USB3 Vision, GenICam Table 4-36 ME2P-1231-32U3M camera specifications 4.20.2. Spectral Response Figure 4-33 ME2P-1231-32U3C sensor spectral response Figure 4-34 ME2P-1231-32U3M sensor spectral response ©... -
Page 70: Me2P-1840-21U3M/C
4.General Specification 4.21. ME2P-1840-21U3M/C 4.21.1. Parameter Specifications ME2P-1840-21U3C Resolution 4504 × 4096 Sensor Type Gpixel GMAX2518 global shutter CMOS Max. Image Circle 1inch 2.5μm × 2.5μm Pixel Size Frame Rate 21.4fps@4504 × 4096 ADC Bit Depth 12bit Pixel Bit Depth 8bit, 12bit Shutter Time 11μs~1s... - Page 71 4.General Specification Programmable Control Image size, gain, exposure time, trigger polarity, flash polarity Conformity CE, RoHS, FCC, USB3 Vision, GenICam Table 4-37 ME2P-1840-21U3C camera specifications Specifications ME2P-1840-21U3M Resolution 4504 × 4096 Sensor Type Gpixel GMAX2518 global shutter CMOS Max. Image Circle 1inch 2.5μm ×...
-
Page 72: Spectral Response
4.General Specification Data Interface USB3.0 Programmable Control Image size, gain, exposure time, trigger polarity, flash polarity Conformity CE, RoHS, FCC, USB3 Vision, GenICam Table 4-38 ME2P-1840-21U3M camera specifications 4.21.2. Spectral Response Figure 4-35 ME2P-1840-21U3M/C sensor spectral response 4.22. ME2P-2621-15U3M/C \ ME2P-2622-15U3M/C 4.22.1. - Page 73 4.General Specification Pixel Formats Bayer GB8/Bayer GB12 Signal Noise Ratio 36.18dB Synchronization Hardware trigger, software trigger 1 input and 1 output with opto-isolated, 2 programmable GPIOs Operating Temp. 0° C~45° C Storage Temp. -20° C~70° C Operating Humidity 10%~80% Power Consumption <...
- Page 74 4.General Specification Pixel Formats Mono8/Mono12 Signal Noise Ratio 36.15dB Synchronization Hardware trigger, software trigger 1 input and 1 output with opto-isolated, 2 programmable GPIOs Operating Temp. 0° C~45° C Storage Temp. -20° C~70° C Operating Humidity 10%~80% Power Consumption < 3.5W@5V Lens Mount Dimensions 36mm×31mm×38.8mm...
-
Page 75: Spectral Response
4.General Specification Color camera Examples 1: Cluster with 4 consecutive defect pixels within the same Bayer color plane in a row is not allowed. Figure 4-37 ME2P-2622-15U3C clusters within same Bayer color plane distribution diagram Examples 2: When different Bayer color plane combined, maximum cluster size is 8 in any given 5x5 pixel array. -
Page 76: Me2P-2621-15U3M Nir \ Me2P-2622-15U3M Nir
4.General Specification 4.23. ME2P-2621-15U3M NIR \ ME2P-2622-15U3M NIR 4.23.1. Parameter Specifications ME2P-2622-15U3M NIR ME2P-2621-15U3M NIR Resolution 5120 × 5120 Sensor Type GMAX0505 global shutter CMOS Max. Image Circle 1.1inch 2.5μm × 2.5μm Pixel Size Frame Rate 15.1ps@5120 × 5120 ADC Bit Depth 12bit Pixel Bit Depth 8bit, 12bit... -
Page 77: Spectral Response
4.General Specification Data Interface USB3.0 Programmable Control Image size, gain, exposure time, trigger polarity, flash polarity Conformity CE, RoHS, FCC, USB3 Vision, GenICam Table 4-41 ME2P-2621-15U3M NIR \ ME2P-2622-15U3M NIR camera specifications Note: ME2P-2622-15U3M NIR is the Grade2 sensor, and ME2P-2621-15U3M NIR is the Grade1 sensor. The only difference between the two cameras is the grade of the sensor. -
Page 78: Me2L-161-61U3M/C(-L)
4.General Specification 4.24. ME2L-161-61U3M/C(-L) 4.24.1. Parameter Specifications ME2L-161-61U3C-L ME2L-161-61U3C Resolution 1440 × 1080 Sensor Type Sony IMX296 global shutter CMOS Max. Image Circle 1/2.9 inch 3.45μm × 3.45μm Pixel Size Frame Rate 61.2fps@1440 × 1080 ADC Bit Depth 10bit Pixel Bit Depth 8bit, 10bit 20μs~1s Shutter Time... - Page 79 4.General Specification Image size, gain, exposure time, Programmable Control Image size, gain, exposure time trigger polarity, flash polarity Conformity CE, RoHS, FCC, USB3 Vision, GenICam Table 4-42 ME2L-161-61U3C(-L) camera specifications Specifications ME2L-161-61U3M-L ME2L-161-61U3M Resolution 1440 × 1080 Sensor Type Sony IMX296 global shutter CMOS Max.
-
Page 80: Spectral Response
4.General Specification Operating System Windows XP/Win7/Win8/Win10 32/64bit, Linux, Android, ARMv7, ARMv8 Data Interface USB3.0 Image size, gain, exposure time, Programmable Control Image size, gain, exposure time trigger polarity, flash polarity Conformity CE, RoHS, FCC, USB3 Vision, GenICam Table 4-43 ME2L-161-61U3M(-L) camera specifications 4.24.2. -
Page 81: Me2L-203-76U3M/C(-L)
4.General Specification 4.25. ME2L-203-76U3M/C(-L) 4.25.1. Parameter Specifications ME2L-203-76U3C-L ME2L-203-76U3C Resolution 1920 × 1080 Sensor Type rolling shutter CMOS Max. Image Circle 1/2.8 inch 2.9μm × 2.9μm Pixel Size Frame Rate 76fps@1920 × 1080 ADC Bit Depth 10bit Pixel Bit Depth 8bit、10bit Shutter Time 20μs~1s... - Page 82 4.General Specification Specifications ME2L-203-76U3M-L ME2L-203-76U3M Resolution 1920 × 1080 Sensor Type rolling shutter CMOS Max. Image Circle 1/2.8 inch 2.9μm × 2.9μm Pixel Size Frame Rate 76fps@1920 × 1080 ADC Bit Depth 10bit Pixel Bit Depth 8bit、10bit Shutter Time 20μs~1s Gain 0dB~24dB Pixel Formats...
-
Page 83: Me2L-204-76U3C(-L)-F02
4.General Specification 4.26. ME2L-204-76U3C(-L)-F02 4.26.1. Parameter Specifications ME2L-204-76U3C-L-F02 ME2L-204-76U3C-F02 Resolution 1920 × 1080 Sensor Type rolling shutter CMOS Max. Image Circle 1/2.8 inch 2.9μm × 2.9μm Pixel Size Frame Rate 76fps@1920 × 1080 ADC Bit Depth 10bit Pixel Bit Depth 8bit、10bit Shutter Time 20μs~1s... -
Page 84: Me2L-505-36U3M/C(-L)
4.General Specification 4.27. ME2L-505-36U3M/C(-L) 4.27.1. Parameter Specifications ME2L-505-36U3C-L ME2L-505-36U3C Resolution 2592 × 1944 Sensor Type Sony IMX335 rolling shutter CMOS Max. Image Circle 1/2.8 inch 2.0μm × 2.0μm Pixel Size Frame Rate 36.9fps@2592 × 1944 ADC Bit Depth 10bit Pixel Bit Depth 8bit、10bit Shutter Time 20μs~1s... - Page 85 4.General Specification Specifications ME2L-505-36U3M-L ME2L-505-36U3M Resolution 2592 × 1944 Sensor Type Sony IMX335 rolling shutter CMOS Max. Image Circle 1/2.8 inch 2.0μm × 2.0μm Pixel Size Frame Rate 36.9fps@2592 × 1944 ADC Bit Depth 10bit Pixel Bit Depth 8bit、10bit Shutter Time 20μs~1s Gain 0dB~24dB...
-
Page 86: Spectral Response
4.General Specification 4.27.2. Spectral Response Figure 4-44 ME2L-505-36U3C(-L) sensor spectral response 400 450 500 550 600 650 700 750 800 850 900 950 1000 Wave Length [nm] Figure 4-45 ME2L-505-36U3M(-L) sensor spectral response © China Daheng Group, Inc. Beijing Image Vision Technology Branch... -
Page 87: Me2L-830-22U3M/C(-L)
4.General Specification 4.28. ME2L-830-22U3M/C(-L) 4.28.1. Parameter Specifications ME2L-830-22U3C-L ME2L-830-22U3C Resolution 3840 × 2160 Sensor Type Sony IMX334 rolling shutter CMOS Max. Image Circle 1/1.8 inch 2.0μm × 2.0μm Pixel Size Frame Rate 22.1fps@3840 × 2160 ADC Bit Depth 12bit Pixel Bit Depth 8bit、10bit Shutter Time 20μs~1s... - Page 88 4.General Specification Image size, gain, exposure time, Programmable Control Image size, gain, exposure time trigger polarity, flash polarity Conformity CE, RoHS, FCC, USB3 Vision, GenICam Table 4-49 ME2L-830-22U3C(-L) camera specifications Specifications ME2L-830-22U3M-L ME2L-830-22U3M Resolution 3840 × 2160 Sensor Type Sony IMX334 rolling shutter CMOS Max.
-
Page 89: Spectral Response
4.General Specification Data Interface USB3.0 Image size, gain, exposure time, Programmable Control Image size, gain, exposure time trigger polarity, flash polarity Conformity CE, RoHS, FCC, USB3 Vision, GenICam Table 4-50 ME2L-830-22U3M(-L) camera specifications 4.28.2. Spectral Response Figure 4-46 ME2L-830-22U3C(-L) sensor spectral response 400 450 500 550 600 650 700 750 800 850 900 950 1000 Wave Length [nm] Figure 4-47 ME2L-830-22U3M(-L) sensor spectral response... -
Page 90: Dimensions
5.Dimensions 5. Dimensions 5.1. Camera Dimensions Figure 5-1 MER2-U3 mechanical dimensions Figure 5-2 MER2-U3-L mechanical dimensions © China Daheng Group, Inc. Beijing Image Vision Technology Branch... - Page 91 5.Dimensions Figure 5-3 MER2-U3-W90 mechanical dimensions Figure 5-4 ME2P-U3 mechanical dimensions © China Daheng Group, Inc. Beijing Image Vision Technology Branch...
- Page 92 5.Dimensions Figure 5-5 ME2L-U3 mechanical dimensions Figure 5-6 ME2L-U3-L mechanical dimensions © China Daheng Group, Inc. Beijing Image Vision Technology Branch...
-
Page 93: Optical Interface
5.Dimensions 5.2. Optical Interface The cameras are equipped with C-mount lens adapters. The back-flange distance is 17.526 mm (in the air). The maximum lens allowed thread length of ME2P and MER2 cameras should be less than 11.3mm, as shown in Figure 5-7. And the maximum lens allowed thread length of ME2L cameras should be less than 9.4mm, as shown in Figure 5-8. - Page 94 5.Dimensions Figure 5-9 Schematic diagram of screw specification, tripod adapter step thickness and spring washer thickness It is recommended that you select the screw specifications and the tripod adapter step thickness from the table below: Tripod adapter step Spring washer Screwing length of camera Screw specification thickness (mm)
-
Page 95: Filters And Lenses
6.Filters and Lenses 6. Filters and Lenses 6.1. Filters The MERCURY2 color models are equipped with IR filters. The monochrome models are equipped with transparent glasses. Contact our technical support when the glass needed to be removed. Figure 6-1 Infrared cut-off filter transmittance curve for MERCURY2 color camera Figure 6-2 Transparent glass reflectance curve for MERCURY2 mono camera ©... -
Page 96: Lens Selection Reference
6.Filters and Lenses 6.2. Lens Selection Reference DAHENG IMAGING is a professional supplier for images and machine vision devices in China. In addition to industrial cameras, it also provides high-resolution, high-optical machine vision lenses for a wide range of industrial cameras on the market. -
Page 97: Hn-2M Series
6.Filters and Lenses f = sensor size (horizontal or vertical) * Working distance / Field of View (corresponding to the horizontal or vertical direction of the sensor size) The corresponding lens is selected by the calculated focal length. 6.2.1. HN-2M Series The HN-2M series lenses are 2 megapixels lenses for industrial, suitable for sensors with max. -
Page 98: Hn-6M Series
6.Filters and Lenses Models: HN-0619-5M-C2/3X HN-0816-5M-C2/3X HN-1216-5M-C2/3X HN-1616-5M-C2/3X HN-2516-5M-C2/3X HN-3519-5M-C2/3X HN-5024-5M-C2/3X 6.2.3. HN-6M Series The HN-6M series lenses are 6 megapixels lenses for industrial, suitable for sensors with max. image circle of 2/3". This series of lenses has the following features: ... -
Page 99: Hn-P-6M Series
6.Filters and Lenses The housing is small and compact, up to 5G of anti-vibration performance The definition is consistent from the center to the periphery, greatly improving the distance between iris and photography Models: HN-0826-20M-C1/1X HN-1226-20M-C1/1X ... -
Page 100: Hn-P-25M Series
6.Filters and Lenses The housing is small and compact, the minimum outer diameter is only φ32.0mm, and it can be installed in various limited spaces Ultra-low optical distortion Models: HN-P-0824-10M-C2/3 HN-P-1220-10M-C2/3 HN-P-1618-10M-C2/3 HN-P-2518-10M-C2/3 HN-P-3520-10M-C2/3 ... -
Page 101: Electrical Interface
7.Electrical Interface 7. Electrical Interface 7.1. LED Light An LED light is set on the back cover of camera which indicates camera's status, as shown in Table 7-1. LED light can display 3 colors: red, yellow and green. LED status Camera status The camera is powered off Solid red... -
Page 102: Line0 (Opto-Isolated Input) Circuit
7.Electrical Interface The polarity of GPIO pins cannot be reversed, otherwise, camera or other peripherals could burn out. 7.3.1.1. Line0 (Opto-isolated Input) Circuit Hardware schematics of opto-isolated input circuit is shown as Figure 7-1. External Circuit 5V-24V 3.3V Line0+ INPUT0 Line0- Figure 7-1 Opto-isolated input circuit ... - Page 103 7.Electrical Interface The connection method of the opto-isolated input circuit and the NPN and PNP photosensor is shown in Figure 7-2 and Figure 7-3. The relationship between the pull-up resistor and the external power supply voltage is shown in Table 7-3. External circuit Power + Camera internal circuit...
-
Page 104: Line1 (Opto-Isolated Output) Circuit
7.Electrical Interface LINE0+ INPUT0 0.8V TRIGIN_R_DELAY TRIGIN_F_DELAY Figure 7-4 Parameter of opto-isolated input circuit Rising time delay (TRIGIN_R_DELAY): the time required for the response to the decrease to 0.8V of INPUT0 from 50% rising of LINE0+ Falling time delay (TRIGIN_F_DELAY): the time required for the response to the rise to 2V of INPUT0 from 50% falling of LINE0+ 7.3.1.2. - Page 105 7.Electrical Interface Rising time delay = tr+td: <50μs (0°C~45°C) (parameter description is shown in Figure 7-6) Falling time delay = ts+tf: <50μs (0°C~45°C) (parameter description is shown in Figure 7-6) Delay time in typical application conditions (environment temperature is 25° C) are shown in Table 7-6 Parameter Test Condition Value (μs)
-
Page 106: Gpio 2/3 (Bidirectional) Circuit
7.Electrical Interface 7.3.1.3. GPIO 2/3 (Bidirectional) Circuit 3.3V INPUT2 Line2 INPUT3 Line3 OUTPUT2 OUTPUT3 Figure 7-7 GPIO 2/3 (bidirectional) circuit 7.3.1.3.1. Line2/3 is Configured as Input When Line2/3 is configured as input, the internal equivalent circuit of camera is shown in Figure 7-8, taking Line2 as an example 3.3V External... - Page 107 7.Electrical Interface Logic 0 input voltage: 0V~+0.6V(Line2/3 voltage) Logic 1 input voltage: +1.9V~+24V(Line2/3 voltage) The status is unstable when input voltage is between 0.6V and 1.9V, which should be avoided When input of Line2/3 is high, input current is lower than 100μA. When input of Line2/3 is low, input current is lower than -1mA ...
- Page 108 7.Electrical Interface Input rising time delay: <2μs (0°C~45°C), parameter description as shown in Figure 7-4 Input falling time delay: <2μs (0°C~45°C), parameter description as shown in Figure 7-4 7.3.1.3.2. Line2/3 is Configured as Output Range of external voltage (EXVCC) is 5~24V Maximum output current of Line2/3 is 25mA, output impedance is 40Ω...
-
Page 109: Me2L Series
7.Electrical Interface External Circuit EXVCC(5-24V) Line2 33ΩPTC OUTPUT2 Figure 7-11 Internal equivalent circuit of camera when Line2 is configured as output 7.3.2. ME2L Series I/O port is implemented by 8-pin receptacle. Diagram Definition Description Line0+ Opto-isolated input + GPIO GND Line0- Opto-isolated input - Line2... -
Page 110: Line0 (Opto-Isolated Input) Circuit
7.Electrical Interface 7.3.2.1. Line0 (Opto-isolated Input) Circuit Hardware schematics of opto-isolated input circuit is shown as Figure 7-12. External Camera internal circuit circuit 5V-24V 3.3V Line0+ INPUT0 Line0- Figure 7-12 Opto-isolated input circuit Logic 0 input voltage: 0V~+2.5V (Line0+ voltage) ... - Page 111 7.Electrical Interface External circuit Power + Camera internal circuit Pull-up 3.3V resistor Line0+ Signal output FPGA INPUT0 Line0- Figure 7-13 NPN photosensor connected to opto-isolated input circuit External circuit Power + Camera internal circuit 3.3V Line0+ Signal Current limiting resistor output FPGA INPUT0 Line0-...
-
Page 112: Line2 (Bidirectional) Circuit
7.Electrical Interface LINE0+ INPUT0 0.8V TRIGIN_R_DELAY TRIGIN_F_DELAY Figure 7-15 Parameter of opto-isolated input circuit Rising time delay (TRIGIN_R_DELAY): the time required for the response to the decrease to 0.8V of INPUT0 from 50% rising of LINE0+ Falling time delay (TRIGIN_F_DELAY): the time required for the response to the rise to 2V of INPUT0 from 50% falling of LINE0+ 7.3.2.2. - Page 113 7.Electrical Interface 1.8V Camera internal circuit External circuit FPGA INPUT2 Line2 Input+ Input- Figure 7-17 Internal equivalent circuit of camera when Line2 is configured as input To avoid the damage of GPIO pins, please connect GND pin before supplying power to Line2. ...
- Page 114 7.Electrical Interface 1.8V External circuit Camera internal circuit Power + Signal FPGA INPUT2 Line2 output Pull-down resistor Camera Figure 7-19 PNP photoelectric sensor connected to Line2 input circuit When Line2 is configured as input, pull-down resistor over 1K should not be used, otherwise the input voltage of GPIO will be over 0.6V and logic 0 cannot be recognized stably ...
- Page 115 7.Electrical Interface OUTPUT2 LINE2 Figure 7-20 Parameter of Line2 output circuit Delay time (td): the time required from 50% rising of OUTPUT2 to the decrease to 90% of the maximum value of LINE2 Falling time (tf): the time taken for the amplitude of LINE2 to decrease from 90% to 10% of the maximum value ...
- Page 116 7.Electrical Interface Camera internal circuit External circuit EXVCC(5-24V) Line2 33ΩPTC OUTPUT2 Figure 7-21 Internal equivalent circuit of camera when Line2 is configured as output © China Daheng Group, Inc. Beijing Image Vision Technology Branch...
-
Page 117: Features
8.Features 8. Features 8.1. I/O Control 8.1.1. MER2/ME2P Series 8.1.1.1. Input Mode Operation Configuring Line as input The MER2/ME2P series camera has three input signals: Line0, Line2, and Line3. In which the Line0 is uni-directional opto-isolated input, Line2 and Line3 are bi-directional lines which can be configured as input or output. -
Page 118: Output Mode Operation
8.Features Input Signal Delay Time 1000ms Trigger Delay Valid Signal Figure 8-2 Trigger delay schematic diagram Input Inverter The signal level of input lines is configurable for the MER2/ME2P series camera. The user can select whether the input level is reverse or not by setting "LineInverter". For the MER2/ME2P series camera, the default input line level is false when the camera is powered on, indicating that the input line level is not reversed. - Page 119 8.Features Strobe In this mode the camera sends a trigger signal to activate the strobe. The strobe signal is active low. After receiving the trigger signal, the strobe signal level is pulled low, and the pull-low time is the sum of the exposure delay time and the exposure time.
- Page 120 8.Features Trigger Signal Exposure line by line Readout after exposure Exposure Time ExposureActive Figure 8-6 Electronic rolling shutter "ExposureActive" signal schematic diagram This signal is useful when the camera or target object is moving. For example, suppose the camera is mounted on a robotic arm that can move the camera to different position.
- Page 121 8.Features When the trigger mode is "FrameBurstStart", each time the camera receives a trigger signal, it will acquire the set AcquisitionFrameCount frames of image. After receiving the trigger signal, the "AcquisitionTriggerWait" signal is pulled low and the camera starts the exposure transmission. When the transmission is completed and images are transferred, the "AcquisitionTriggerWait"...
-
Page 122: Read The Linestatus
8.Features 8.1.1.3. Read the LineStatus Read the level of single line The MER2/ME2P series camera can get the line's signal status. When the device is powered on, the default status of Line0 and Line1 is false, and the default status of Line2 and Line3 is true. Read all the lines level The MER2/ME2P series camera can get the current status of all lines. - Page 123 8.Features Input Signal Debouncer Filter Width Filter Width Filter Width Filter Width Valid Signal Figure 8-10 Input debouncer schematic diagram Trigger Delay The ME2L series camera has trigger delay feature. The user can set the trigger delay feature by setting "TriggerDelay".
-
Page 124: Output Mode Operation
8.Features Input Signal Input Line LineInverter= False Input Line LineInverter= True Figure 8-12 Setting input line to reverse 8.1.2.2. Output Mode Operation Configuring Line as output The ME2L series camera has one output signals—Line2. And Line2 is a uni-directional opto-isolated output I/O. -
Page 125: Read The Linestatus
8.Features UserOutput In this mode, the user can set the camera's constant output level for special processing, such as controlling the constant light source or the alarm light (two level types are available: high level or low level). For example: select Line2 as the output line, the output source is selected as UserOutput1, and the output value is defined as true. -
Page 126: Image Acquisition Control
8.Features All the lines level status bit of the ME2L series camera are shown in Table 8-2. The default value is 0x2. Line2 Line0 Table 8-2 Camera line status bit 8.2. Image Acquisition Control 8.2.1. Acquisition Start and Stop 8.2.1.1. Acquisition Start It can send AcquisitionStart command immediately after opening the camera. -
Page 127: Acquisition Stop
8.Features In trigger mode, sending AcquisitionStart command is not enough, a trigger signal is also needed. Each time a frame trigger is applied (including software trigger and hardware trigger), the camera will acquire and transmit a frame of image. 8.2.1.2. Acquisition Stop It can send AcquisitionStop command to camera at any time. -
Page 128: Acquisition Mode
8.Features 8.2.2. Acquisition Mode Two camera acquisition modes are available: single frame acquisition mode and continuous acquisition mode. Single frame acquisition mode: In single frame acquisition mode, the camera will only acquire one frame of image at a time. 1) When the trigger mode is set to On, the trigger type is arbitrary After executing the AcquisitionStart command, the camera waits for a trigger signal, which may be a software trigger or a hardware trigger of the camera. -
Page 129: Trigger Type Selection
8.Features 8.2.3. Trigger Type Selection Two camera trigger types are available: FrameStart and FrameBurstStart. Different trigger types correspond to their respective set of trigger configurations, including trigger mode, trigger delay, trigger source, trigger polarity, and software trigger commands. FrameStart trigger mode The FrameStart trigger is used to acquire one image. -
Page 130: Switching Trigger Mode
8.Features 1 image. When 3 images are acquired, the camera will wait for the next FrameBurstStart trigger signal, and so on. FrameBurstStart trigger signal FrameStart trigger signal Image transmission frame1 frame2 frame3 frame4 frame5 frame6 Figure 8-21 Two trigger modes are selected at the same time 8.2.4. -
Page 131: Continuous Mode And Configuration
8.Features Switch trigger mode during blanking Mode Continuous mode Continuous mode Trigger mode Trigger … … Acquisition frame5 frame2 frame3 frame4 frame6 … … frame1 Camera Continuous Frame Trigger Frame Continuous Frame output Figure 8-23 Switch trigger mode during blanking As shown in Figure 8-23, the camera with trigger mode OFF begins after receiving an AcquisitionStart command. -
Page 132: Hardware Trigger Acquisition And Configuration
8.Features Set the Trigger Source to Software. Send Software Trigger command. All the software trigger commands are sent by the host through the USB3.0 bus, to trigger the camera to acquire and transmit images. Software trigger acquisition features In software trigger acquisition mode, the camera begins to acquire one image after receiving software trigger commands. - Page 133 8.Features The features, like trigger polarity, trigger delay and trigger filter, can be select in the GalaxyView. The camera's trigger source Line0 uses opto-isolated circuit to isolate signal. Its internal circuit delay trigger signal and rising edge's delay time is less than falling edge's. There are a dozen clock cycles delay of rising edge and dozens clock cycles delay of falling edge.
- Page 134 8.Features The exposure delay data for each model is as follows: Model Exposure delay (μs) MER2-041-436U3M/C Mono8/BayerRG8: 13~17 MER2-135-150U3M/C 13.63 Mono8/BayerBG8: 10.08 MER2-135-208U3M/C Mono10/BayerBG10: 13.53 Mono8/BayerRG8: 13~17 MER2-160-227U3M/C Mono10/BayerRG10: 20.6~28.5 Mono8/BayerRG8: 15~20 MER2-230-168U3M/C Mono10/BayerRG10: 24.2~33.8 MER2-231-41U3M/C 44.8~64.7 Mono8/BayerRG8: 15~20 MER2-301-125U3M/C Mono10/BayerRG10: 29.2~36.3 MER2-302-56U3M/C 33.8~45.1...
-
Page 135: Set Exposure
8.Features ME2L-161-61U3M BayerRG8/Mono8: 368 ME2L-203-76U3M/C BayerRG10/Mono10: 737 BayerRG8/Mono8: 368 ME2L-204-76U3C(-L)-F02 BayerRG10/Mono10: 737 BayerRG8/Mono8: 27254 ME2L-505-36U3M/C BayerRG10/Mono10: 27567 BayerRG8/Mono8: 32483 ME2L-830-22U3M/C BayerRG10/Mono10: 32729 Table 8-3 Camera exposure delay range 8.2.8. Set Exposure 8.2.8.1. Set Exposure Mode Two Exposure Mode are available: Timed exposure mode and TriggerWidth exposure mode. Among them, the TriggerWidth exposure mode determines the exposure time when the camera is configured for hardware triggering. - Page 136 8.Features Hardware trigger signal Exposure = Exposure Time Figure 8-26 The sequence diagram in falling edge trigger of Timed exposure mode Avoid overtriggering in Timed exposure mode. If the Timed exposure mode is enabled, do not attempt to send a new trigger signal while the previous exposure is still in progress. Otherwise, the trigger signal will be ignored, and a FrameStartOvertrigger event will be generated.
-
Page 137: Set Exposure Value
ME2P-1230-23U3M/C ME2P-1231-32U3M/C 8.2.8.2. Set Exposure Value Global Shutter The MERCURY2 USB3 Vision camera (MER2-041-436U3M/C(-L), MER2-135-150U3M/C(-L), MER2-135- 208U3M/C(-L), MER2-160-227U3M/C(-L), MER2-230-168U3M/C(-L), MER2-231-41U3M/C(-L), MER2- 301-125U3M/C(-L), MER2-302-56U3M/C(-L), MER2-502-79U3M/C(-L), MER2-503-36U3M/C(-L), MER2- 503-36U3M POL, ME2P-560-36U3M/C, ME2P-900-43U3M/C, ME2P-1230-23U3M/C, ME2P-1231- 32U3M/C, ME2P-1840-21U3M/C, ME2P-2621-15U3M/C, ME2P-2621-15U3M NIR, ME2P-2622- 15U3M/C, ME2P-2622-15U3M NIR, ME2L-161-61U3M/C(-L)) uses global shutter sensors. The implementation process of global shutter is as shown in Figure 8-29, all the lines of the sensor are exposed at the same time, and then the sensor will read out the image date one by one. - Page 138 8.Features All lines transfer electrons from All lines are exposing at the same time exposure area to storage area Reading electrons from storage area line by line Exposure time Readout time Time Figure 8-29 Global shutter Electronic Rolling Shutter MER2-630-60U3M/C(-L), MER2-1220-32U3M/C(-L), MER2-2000-19U3M/C(-L), ME2L-203-76U3M/C(-L), ME2L-204-76U3C(-L)-F02, ME2L-505-36U3M/C(-L) and ME2L-830-22U3M/C(-L) cameras use electronic rolling shutter sensors.
- Page 139 8.Features Global Reset Release Shutter As the sensor starts exposure line by line, all of the pixels in the sensor start exposing at the same time. However, the end time of upper lines and lower lines of the same frame of image is different when capturing fast moving objects, so the distortion will occur.
- Page 140 8.Features Setting the exposure time The MERCURY2 USB3 Vision camera supports setting the exposure time, step: 1μs. The exposure time is shown as follows: Adjustment Range Steps Model Exposure Mode Actual Steps (μs) (μs) MER2-041-436U3M/C(-L) Global Shutter 20-1000000 1 row period*...
-
Page 141: Overlapping Exposure And Non-Overlapping Exposure
8.2.9. Overlapping Exposure and Non-overlapping Exposure There are two stages in image acquisition of the MERCURY2 USB3 Vision camera: exposure and readout. Once the camera is triggered, it begins to integrate and when the integration is over, the image data will be read out immediately. - Page 142 8.Features Non-overlapping Non-overlapping Frame N Frame N+1 Frame N+2 Sensor Exposure Frame N Blank Blank Frame N+1 Sensor Readout Time Figure 8-32 The exposure sequence diagram in non-overlapping exposure mode Trigger acquisition mode If the interval between two triggers is greater than the sum of the exposure time and readout time, overlapping exposure will not occur, as shown in Figure 8-33.
-
Page 143: Basic Features
Compared with non-overlapping exposure mode, in overlapping exposure mode, the camera can obtain higher frame rate. 8.3. Basic Features 8.3.1. Gain The MERCURY2 USB3 Vision camera can adjust the analog gain, and the range of analog gain is as follows: Model Adjustment Range... - Page 144 0-24dB 0dB, 0.1dB Table 8-5 MERCURY2 USB3 Vision camera analog gain adjustment range When the analog gain changes, the response curve of the camera changes, as shown in Figure 8-36. The horizontal axis represents the output signal of the sensor in the camera, and the vertical axis represents the gray value of the output image.
-
Page 145: Pixel Format
8.Features Note that increasing the analog gain or digital gain will amplify the image noise. Figure 8-36 The cameras response curve 8.3.2. Pixel Format By setting the pixel format, the user can select the format of output image. The available pixel formats depend on the camera model and whether the camera is monochrome or color. - Page 146 ME2L-830-22U3M/C(-L) Mono8, Mono10, BayerRG8, BayerRG10 Table 8-6 Pixel format that the MERCURY2 USB3 Vision camera supported The image data starts from the upper left corner, and each pixel is output brightness value of each pixel line from left to right and from top to bottom.
- Page 147 8.Features When the pixel format is set to Mono8, the brightness value of each pixel is 8 bits. The format in the memory is as follows: …… …… …… Among them Y00, Y01, Y02 … are the gray value of each pixel that starts from the first row of the image. Then the gray value of the second row pixels of the images is Y10, Y11, and Y12…...
-
Page 148: Roi
8.Features …… …… …… Where R00 is the first pixel value of the first row (for the red component), G01 represents the second pixel value (for the green component), and so on, so that the first row pixel values are arranged. G10 is the first pixel value of the second row (for the green component), the B11 is the second pixel value (for the blue component), and so on, and the second row of pixel values are arranged. -
Page 149: Auto Exposure/Auto Gain
8.Features Column 12 13 14 15 16 17 19 20 21 OffsetY Height Width OffsetX Figure 8-39 ROI When reducing the height of the ROI, the maximum frame rate of the camera will be raised. Please refer to section 8.5.1 for specific effects on the acquisition frame rate. 8.3.4. - Page 150 8.Features The default value of ROI is the entire image, you can set the ROI according to your need. Where the minimum value of AAROIWidth can be set to 16, and the maximum value is equal to the current image width.
-
Page 151: Auto White Balance
8.Features The auto gain feature can be used with the auto exposure at the same time, when target grey is changed from dark to bright, the auto exposure adjust is prior to auto gain adjust. Vice versa, when target grey is changed from bright to dark, the auto gain adjust is prior to auto exposure adjust. - Page 152 8.Features If condition 2 is not met, the user cannot set the ROI. The default value of ROI is the entire image, you can set the "white dot" area (ROI) according to your need. Where the minimum value of AWBROIWidth can be set is 16, the maximum value is equal to the current image width.
-
Page 153: Auto White Balance (Me2L-U3(-L))
8.Features 8.3.6. Auto White Balance (ME2L-U3(-L)) Auto white balance of ME2L-U3(-L) series cameras is performed by software, so it has a certain impact on the acquisition performance. It only supports “Once” mode and “Manual” mode (auto white balance off mode). ... -
Page 154: Light Source Preset
8.Features 1000 1024 Figure 8-42 An example for the relative position between the ROI and the current image Auto White Balance Adjustment Auto White Balance function calculates the white balance coefficient based on the data in ROI, and then use the coefficient to adjust the components of the image, in order to make the R/G/B component the same in the ROI. - Page 155 8.Features Figure 8-43 Color template The user can use a color template containing 24 colors as a benchmark and shoot this color template with a camera, the RGB value of each color may be different from the standard RGB value of the standard color template, the vendor can use the software or hardware to convert the RGB value that is read to the standard RGB value.
-
Page 156: Light Source Preset (Mer2 \ Me2P)
ME2L-830-22U3C(-L) 8.3.7.2. Light Source Preset (MER2 \ ME2P) Some MERCURY2 USB3 cameras support light source preset function, and provides Off mode, Custom mode, and four specified common color temperature light source modes. The camera provides the corresponding white balance coefficient and color transformation coefficient in the four specified color temperature light source modes. - Page 157 8.Features Off Mode The camera does not perform white balance and color conversion processing on the image by default. Custom Mode The camera does not perform white balance and color conversion processing on the image by default. Users can perform automatic white balance, or manually input white balance coefficients, and it supports color conversion enable control and manually input color conversion coefficients.
-
Page 158: Test Pattern
8.Features 8.3.8. Test Pattern The MERCURY2 USB3 Vision camera supports three test images: gray gradient test image, static diagonal gray gradient test image, and moving diagonal gray gradient test image (ME2L cameras only support gray gradient test image). When the camera captures in RAW10 mode, the gray value of test image is: the pixel gray value in RAW8 mode multiplies by 4, as the output of pixel gray value in RAW10 mode. -
Page 159: User Set Control
In order to save the specific parameters of the users, avoiding to set the parameters every time when you open the camera, the MERCURY2 USB3 Vision camera provides a function to save the parameter set, which can easily save the parameters that the user use, including the control parameters that the camera needed. - Page 160 The MERCURY2 USB3 Vision camera can store a set of user configuration parameters.
-
Page 161: Device User Id
UserSetDefault will be loaded into the effective configuration parameters. 8.3.10. Device User ID The MERCURY2 USB3 Vision camera provides programmable device user ID function, the user can set a unique identification for the camera, and can open and control the camera by the unique identification. -
Page 162: Timestamp
8.Features Set by calling the software interface, for details please see the Programmer's Guide. When using multi-cameras at the same time, it is necessary to ensure the uniqueness of the user-defined name of each camera, otherwise, an exception will occur when the camera is opened. - Page 163 8.Features On monochrome cameras, the camera combines (sums or averages) the pixel values of directly adjacent pixels: Figure 8-53 Horizontal mono Binning by 4 Binning Factors Two types of Binning are available: horizontal Binning and vertical Binning. You can set the Binning factor in one or two directions.
- Page 164 8.Features 3) Possible image distortion Objects will only appear undistorted in the image if the numbers of binned rows and columns are equal. With all other combinations, objects will appear distorted. For example, if you combine vertical Binning by 2 with horizontal Binning by 4, the target objects will appear squashed. 4) Mutually exclusive with Decimation Binning and Decimation cannot be used simultaneously in the same direction.
-
Page 165: Decimation
As a result, the image height is reduced. For example, enabling vertical Decimation by 2 halves the image height. The camera automatically adjusts the image ROI settings. Vertical Decimation significantly increases the camera's frame rate. For details, please refer to the section 9.3 MERCURY2 USB3 Vision Frame Rate Calculation Tool. How Horizontal Decimation Works On mono cameras, if you specify a horizontal Decimation factor of n, the camera transmits only every n column. - Page 166 8.Features Figure 8-56 Mono camera horizontal Decimation Figure 8-57 Color camera horizontal Decimation As a result, the image width is reduced. For example, enabling horizontal Decimation by 2 halves the image width. The camera automatically adjusts the image ROI settings. Horizontal Decimation does not (or only to a very small extent) increase the camera's frame rate.
- Page 167 8.Features The displayed image will not be distorted if the vertical and horizontal Decimation factors are equal. When only horizontal Decimation or vertical Decimation is used, the displayed image will be reduced in width or height. 4) Mutually exclusive with Binning Decimation and Binning cannot be used simultaneously in the same direction.
-
Page 168: Reverse X And Reverse Y
8.Features 8.3.14. Reverse X and Reverse Y The Reverse X and Reverse Y features can mirror acquired images horizontally, vertically, or both. Enabling Reverse X To enable Reverse X, set the ReverseX parameter to true. The camera mirrors the image horizontally. Figure 8-59 Reverse X enabled Figure 8-58 The original image ... - Page 169 8.Features Using Image ROI with Reverse X or Reverse Y If you have specified an image ROI while using Reverse X or Reverse Y, you must bear in mind that the position of the ROI relative to the sensor remains the same. Therefore, the camera acquires different portions of the image depending on whether the Reverse X or the Reverse Y feature are enabled: Figure 8-64 The original image Figure 8-65 Reverse X enabled...
- Page 170 8.Features MER2-503-36U3M POL MER2-630-60U3M/C(-L/-W90) MER2-1220-32U3M/C(-L/-W90) MER2-2000-19U3M/C(-L/-W90) ME2P-560-36U3M/C ME2P-900-43U3M/C ME2P-1230-23U3M/C ME2P-1231-32U3M/C ME2P-1840-21U3M/C ME2P-2621-15U3M/C ME2P-2621-15U3M NIR ME2P-2622-15U3M/C ME2P-2622-15U3M NIR ME2L-161-61U3M(-L) ME2L-203-76U3M(-L) ME2L-505-36U3M/C(-L) ME2L-830-22U3M/C(-L) Camera models and changes in the alignment of the Bayer format after using the reverse feature are as follows: Model Reverse X and Reverse Y Bayer format...
-
Page 171: Digital Shift
8.Features 8.3.15. Digital Shift The Digital Shift can multiply the pixel values by 2 of the images. This increases the brightness of the image. If your camera doesn't support the digital shift feature, you can use the Gain feature to achieve a similar effect. ... - Page 172 8.Features Raw pi xel value(8bit): 45 Raw pi xel value(12bit): 726 Shift pi xel value(8bit): 181 Example 3: Digital Shift by 1, 12-bit Image Data, High Value Assume that your camera is using a 12-bit pixel format. Also assume that one of your original pixel values is 2839.
-
Page 173: Acquisition Status
8.Features MER2-2000-19U3M/C(-L/-W90) ME2P-560-36U3M/C ME2P-900-43U3M/C ME2P-1230-23U3M/C ME2P-1231-32U3M/C ME2P-1840-21U3M/C ME2P-2621-15U3M/C ME2P-2621-15U3M NIR ME2P-2622-15U3M/C ME2P-2622-15U3M NIR 8.3.16. Acquisition Status The Acquisition Status feature can determine whether the camera is waiting for trigger signals. This is useful if you want to optimize triggered image acquisition and avoid over triggering. To determine if the camera is currently waiting for trigger signals. -
Page 174: Black Level
8.Features ME2P-1840-21U3M/C ME2P-2621-15U3M/C ME2P-2621-15U3M NIR ME2P-2622-15U3M/C ME2P-2622-15U3M NIR 8.3.17. Black Level The Black Level can change the overall brightness of an image by changing the gray values of the pixels by a specified amount. Currently, the application range of the black level value can only be selected as all pixels, and pixel selection is not supported. -
Page 175: Remove Parameter Limits
ME2P-2622-15U3M NIR 0-1023 4, 1 Table 8-7 MERCURY2 USB3 Vision camera black level adjustment range 8.3.18. Remove Parameter Limits The range of camera parameters is usually limited, and these factory limits are designed to ensure the best camera performance and high image quality. However, for certain use cases, you may want to specify parameter values outside of the factory limits. - Page 176 8.Features Exposure 20~1000000 20~15000000 Auto Exposure 20~1000000 20~15000000 Gain 0~24 0~48 MER2-160-227U3M/C(-L) Auto Gain 0~24 0~48 Black Level 0~255 0~255 White Balance component 0~15.996 0~63.996 Auto White Balance 0~15.996 0~63.996 Exposure 20~1000000 20~15000000 Auto Exposure 20~1000000 20~15000000 Gain 0~24 0~48 MER2-230-168U3M/C(-L) Auto Gain 0~24...
- Page 177 8.Features Exposure 20~1000000 20~15000000 Auto Exposure 20~1000000 20~15000000 Gain 0~24 0~48 MER2-502-79U3M POL Auto Gain 0~24 0~48 Black Level 0~1023 0~1023 Sharpness 0~63 Exposure 20~1000000 20~15000000 Auto Exposure 20~1000000 20~15000000 Gain 0~24 0~48 Auto Gain 0~24 0~48 MER2-503-36U3M/C(-L) Black Level 0~4095 0~4095 Sharpness...
- Page 178 8.Features Exposure 10~1000000 10~15000000 Auto Exposure 10~1000000 10~15000000 Gain 0~24 0~27 Auto Gain 0~24 0~27 MER2-1220-32U3M/C(-L/- W90) Black Level 0~255 0~255 Sharpness 0~63 White Balance component 0~15.996 0~63.996 Auto White Balance 0~15.996 0~63.996 Exposure 12~1000000 12~15000000 Auto Exposure 12~1000000 12~15000000 Gain 0~24 0~27...
- Page 179 8.Features Exposure 11~1000000 11~15000000 Auto Exposure 11~1000000 11~15000000 Gain 0~16 0~24 Auto Gain 0~16 0~24 ME2P-560-36U3M/C Black Level -256~2047 -256~2047 Sharpness 0~63 White Balance component 0~15.996 0~63.996 Auto White Balance 0~15.996 0~63.996 Exposure 11~1000000 11~15000000 Auto Exposure 11~1000000 11~15000000 Gain 0~16 0~24 Auto Gain...
- Page 180 8.Features Exposure 11~1000000 11~15000000 Auto Exposure 11~1000000 11~15000000 Gain 0~16 0~24 Auto Gain 0~16 0~24 ME2P-1840-21U3M/C Black Level 0~2047 0~2047 Sharpness 0~63 White Balance component 0~15.996 0~63.996 Auto White Balance 0~15.996 0~63.996 Exposure 11~1000000 11~15000000 Auto Exposure 11~1000000 11~15000000 Gain 0~16 0~24 Auto Gain...
-
Page 181: User Data Area
8.Features Exposure 11~1000000 11~15000000 Auto Exposure 11~1000000 11~15000000 Gain 0~16 0~24 Auto Gain 0~16 0~24 ME2P-2622-15U3M/C Black Level 0~1023 0~1023 Sharpness 0~63 White Balance component 0~15.996 0~31.996 Auto White Balance 0~15.996 0~31.996 Exposure 11~1000000 11~15000000 Auto Exposure 11~1000000 11~15000000 Gain 0~16 0~24 ME2P-2622-15U3M NIR... -
Page 182: Timer
8.Features MER2-302-56U3M/C(-L) MER2-502-79U3M/C(-L) MER2-502-79U3M POL MER2-503-36U3M/C(-L) MER2-503-36U3M POL MER2-630-60U3M/C(-L/-W90) MER2-1220-32U3M/C(-L/-W90) MER2-2000-19U3M/C(-L/-W90) ME2P-560-36U3M/C ME2P-900-43U3M/C ME2P-1230-23U3M/C ME2P-1231-32U3M/C ME2P-1840-21U3M/C ME2P-2621-15U3M/C ME2P-2621-15U3M NIR ME2P-2622-15U3M/C ME2P-2622-15U3M NIR ME2L-161-61U3M/C(-L) ME2L-203-76U3M/C(-L) ME2L-204-76U3C(-L)-F02 ME2L-505-36U3M/C(-L) ME2L-830-22U3M/C(-L) 8.3.20. Timer The camera only supports one timer (Timer1), which can be started by a specified event or signal (only ExposureStart signal is supported). - Page 183 8.Features The timer configuration process is as follows: Set TimerSelector, currently only Timer1 supported. Set LineSelector. Set the LineSource to Timer1Active. Set TimerTriggerSource, currently only ExposureStart supported. Set TimerDelay, the range of TimerDelay is [0, 16777215], the unit is μs. Set TimerDuration, the range of TimerDuration is [0, 16777215], the unit is μs.
-
Page 184: Counter
8.Features ME2P-900-43U3M/C ME2P-1230-23U3M/C ME2P-1231-32U3M/C ME2P-1840-21U3M/C ME2P-2621-15U3M/C ME2P-2621-15U3M NIR ME2P-2622-15U3M/C ME2P-2622-15U3M NIR 8.3.21. Counter The camera only supports one counter (Counter1), which can count the number of FrameTrigger, AcquisitionTrigger and FrameStart signals received by the camera. The counter starts counting from 0. You can select one of the above three signals to count by CounterEventSource. -
Page 185: Exposure Overlap Time Max
8.Features MER2-302-56U3M/C(-L) MER2-502-79U3M/C(-L) MER2-502-79U3M POL MER2-503-36U3M/C(-L) MER2-503-36U3M POL MER2-630-60U3M/C(-L/-W90) MER2-1220-32U3M/C(-L/-W90) MER2-2000-19U3M/C(-L/-W90) ME2P-560-36U3M/C ME2P-900-43U3M/C ME2P-1230-23U3M/C ME2P-1231-32U3M/C ME2P-1840-21U3M/C ME2P-2621-15U3M/C ME2P-2621-15U3M NIR ME2P-2622-15U3M/C ME2P-2622-15U3M NIR 8.3.22. Exposure Overlap Time Max The Exposure Overlap Time Max feature can optimize the acquisition of overlapping images. This parameter is especially useful if the user wants to maximize the camera's frame rate, i.e., if the user wants to trigger at the highest rate possible. -
Page 186: Multi Gray Control
8.Features The trigger signal width of the hardware triggering should not be shorter than the value of the entered ExposureOverlapTimeMax parameter. Set ExposureOverlapTimeMax To optimize the frame rate of the camera, the exposure mode should be set to TriggerWidth: Set the ExposureMode parameter to TriggerWidth. Enter a value for the ExposureOverlapTimeMax parameter, which represents the shortest exposure time the user intends to use (in µs). - Page 187 8.Features 1 to (5000μs, 1.0); the parameters of frame 2 to (10000μs, 2.0); the parameters of frame 3 to (150000μs, 3.0); acquire 16 frames of images, and the effect is as follows: Note for trigger mode: Multi frames acquisition in one trigger command In 2Frame mode, 2 images will be acquired after send one trigger command.
-
Page 188: Exposure Time Mode
8.Features 8.3.24. Exposure Time Mode According to the length of the exposure time, two exposure time modes of the MERCURY2 USB3 Vision camera are available: Standard exposure time mode and UltraShort exposure time mode. 8.3.24.1. Standard Exposure Time Mode In Standard exposure time mode, three exposure time adjustment modes are available: manual adjustment, one-time automatic adjustment and continuous automatic adjustment. -
Page 189: Image Processing
8.Features 8.4. Image Processing 8.4.1. Color Transformation Control The Color Transformation is used to correct the color information delivered by the sensor, improve the color reproduction of the camera, and make the image closer to the human visual perception. Figure 8-71 Color template The user can use a color template containing 24 colors and shoot this color template with a camera, the RGB value of each color may be different from the standard RGB value of the standard color template, the vendor can use the software or hardware to convert the RGB value that is read to the standard RGB value. -
Page 190: Gamma
8.Features The transformation is performed by premultiplying a 3 x 1 matrix containing R, G, and B pixel values by a 3 x 3 matrix containing the color transformation values: Effect images Figure 8-72 Before color transformation Figure 8-73 After color transformation 8.4.2. - Page 191 8.Features The maximum pixel value (R ) equals, e.g., 255 for 8-bit pixel formats, 1023 for 10-bit pixel formats or 4095 for 12-bit pixel formats. 3) Enabling Gamma correction After enabling Gamma correction, set GammaValue to change the image brightness. The range of GammaValue is 0 to 4.00.
-
Page 192: Lookup Table
8.Features ME2P-900-43U3M/C ME2P-1230-23U3M/C ME2P-1231-32U3M/C ME2P-1840-21U3M/C ME2P-2621-15U3M/C ME2P-2621-15U3M NIR ME2P-2622-15U3M/C ME2P-2622-15U3M NIR 8.4.3. Lookup Table When the analog signal that is read out by the sensor has been converted via ADC, generally, the raw data bit depth is larger than 8 bits, there are 12 bits, 10 bits, etc. The feature of lookup table is to replace some pixel values in the 8 bits, 10 bits, and 12 bits images by values defined by the user. -
Page 193: Sharpness
8.Features 2) Set the LUTIndex parameter to the pixel value that you want to replace with a new value. 3) Set the LUTValue parameter to the new pixel value. 4) Repeat steps 1 and 2 for all pixel values that need to be changed to set the parameters to the target pixel values in turn. - Page 194 8.Features Enable sharpness ON means that the sharpness feature is enabled. Figure 8-74 Before sharpness adjustment Figure 8-75 After sharpness adjustment Sharpness adjustment Adjust the sharpness value can adjust the camera's sharpness to the image. The adjustment range is 0- 3.0.
-
Page 195: Flat Field Correction
8.Features ME2P-2622-15U3M ME2P-2622-15U3M NIR 8.4.5. Flat Field Correction During the use of the camera, there may be various inconsistencies in the image, which are mainly reflected in the following aspects: Inconsistent response of individual pixels. The difference in gray value between the image center and the edge. Non-uniform illumination. -
Page 196: Ffc Factor Calculation And Preview
8.Features It is demanded to acquire bright field images again for executing FFC after changing ROI, Binning, Decimation, Mirror of the cameras that support FFC. The previous factor will no longer apply. There are three ways to obtain the FFC factor: ... -
Page 197: Read/Save Factor
8.Features 2. Acquisition of Bright 1. Acquisition Frame Count Field Images 4. Preview 3. Execute FFC Figure 8-79 The process of obtaining FFC factor Acquisition frame count: acquisition frame count for the bright field image to obtain the average image. ... -
Page 198: Noise Reduction
8.Features 8.4.6. Noise Reduction During the digitization and transmission of an image, it is often disturbed by the noise of the imaging device and the external environment, which will cause the image with noise. The process of reducing or suppressing the noise in the image is called image noise reduction. Adjust the noise reduction value can adjust the noise reduction intensity of the camera on the image. -
Page 199: Saturation
ME2P-2622-15U3M ME2P-2622-15U3M NIR 8.4.7. Saturation Some MERCURY2 USB3 cameras support saturation function. Saturation function can changes the colorfulness (intensity) of the colors to achieve the goal image effect. 1) Prerequisites If the SaturationEnable parameter is available, it must be set to On. -
Page 200: Image Transmission
ME2P-1840-21U3C ME2P-1231-32U3C ME2P-2621-15U3C ME2P-2622-15U3C 8.5. Image Transmission 8.5.1. Calculate Frame Rate Frame Period You can calculate the frame period of the MERCURY2 USB3 Vision series camera by the following formula: © China Daheng Group, Inc. Beijing Image Vision Technology Branch... -
Page 201: Usb Interface Bandwidth
CPU utilization> document. 8.5.3. DeviceLinkThroughputLimit The MERCURY2 USB3 Vision camera provides bandwidth limit function, in order to control the upper limit bandwidth of single device. When the DeviceLinkThroughputLimit is greater than the current device acquisition bandwidth, the current device acquisition bandwidth will not change, when the... - Page 202 8.Features The MER2-502-79U3M/C(-L) is working in continuous mode, the DeviceLinkCurrentThroughput is 35000000Bps, the DeviceLinkThroughputLimit is 40000000Bps, and then the DeviceLinkCurrentThroughput is still 35000000Bps. If the DeviceLinkCurrentThroughput is 70000000Bps, the DeviceLinkThroughputLimit is 40000000Bps, and then the DeviceLinkCurrentThroughput will be 40000000Bps. Example 2: The MER2-502-79U3M/C(-L) is working in trigger mode, the DeviceLinkCurrentThroughput is 300000000Bps, the maximum trigger frequency is 59.8Hz @ full resolution (8bit), when the DeviceLinkCurrentThroughput is 35000000Bps, the maximum trigger frequency is 6.9Hz @ full resolution (8bit).
- Page 203 8.Features 35000000Bps (8bit) MER2-503- 400000000Bps 1000000Bps 36U3M/C(-L) 70000000Bps (10bit) 35000000Bps (8bit) MER2-503-36U3M 400000000Bps 1000000Bps 70000000Bps (10bit) MER2-630- 35000000Bps (8bit) 60U3M/C(-L/- 400000000Bps 1000000Bps W90) 70000000Bps (10bit) 35000000Bps (8bit) MER2-1220- 32U3M/C(-L/- 400000000Bps 1000000Bps W90) 70000000Bps (12bit) MER2-2000- 35000000Bps (8bit) 19U3M/C(-L/- 400000000Bps 1000000Bps W90) 70000000Bps (12bit) 35000000Bps (8bit)
-
Page 204: Camera Acquisition Time
1000000Bps 22U3M/C(-L) 700000000Bps (10bit) Table 8-9 MERCURY2 USB3 Vision camera bandwidth control 8.5.4. Camera Acquisition Time The acquisition time of the camera is related to the OffsetY and height of the image ROI. When the OffsetY and height change in the ROI setting, it will affect the frame period captured by the camera front end, which will affect the acquisition frame rate. - Page 205 8.Features The camera acquisition time (unit: μs): = ( ��������ℎ�� + 30 ) ∗ T MER2-160-227U3M/C(-L) When the pixel format is Mono8 or BayerRG8, the row period (unit: μs): = 3.92 37.5 When the pixel format is Mono10 or BayerRG10, the row period (unit: μs): 147x2 = 7.84 37.5...
- Page 206 8.Features MER2-302-56U3M/C(-L) The row period (unit: μs): = 11.28 37.5 The camera acquisition time (unit: μs): = ( ��������ℎ�� + 32 ) ∗ T MER2-502-79U3M/C(-L) / MER2-502-79U3M POL When the pixel format is Mono8 or BayerRG8, the row period (unit: μs): = 6.053 37.5 When the pixel format is Mono10 or BayerRG10, the row period (unit: μs):...
- Page 207 8.Features The camera acquisition time (unit: μs): = ( ��������ℎ�� + 38 ) ∗ T MER2-2000-19U3M/C(-L/-W90) When the pixel format is BayerRG8, the row period (unit: μs): = 12.5 When the pixel format is BayerRG12, the row period (unit: μs): 900 ∗...
- Page 208 8.Features = (��������ℎ�� + 34) ∗ T ME2P-1231-32U3M/C When the pixel format is Mono8 or BayerRG8, the row period (unit: μs): = 9.36 37.5 When the pixel format is Mono10 or BayerRG10, the row period (unit: μs): = 18.72 37.5 The camera acquisition time (unit: μs): = (��������ℎ��...
-
Page 209: Events
When event notification is set to "on", the camera can generate an "event" and transmit a related event message to the host whenever a specific situation has occurred. For MERCURY2 USB3 Vision camera, the camera can generate and transmit events for the following situations: ... - Page 210 8.Features The image frame block is not empty (BlockNotEmpty) The burst trigger signal overflow (FrameBurstStartOvertrigger) The trigger signal wait (FrameStartWait) The burst trigger signal wait (FrameBurstStartWait) Every event has a corresponding enable status, and in default all the events' enable status are disable. When using the event feature, you need to enable the corresponding event.
-
Page 211: Exposureend Event
8.Features Event ID FrameBurstStartWait Event Frame ID Timestamp Table 8-10 The effective information of each event Among them: the timestamp is the time when the event occurs, and the timer starts when the camera is powered on or reset. The bit width of the timestamp is 64 bits, and the unit is ns. 8.6.1. -
Page 212: Framestartwait Event
8.Features 8.6.6. FrameStartWait Event When the camera is in FrameTrigger mode, the camera starts acquiring images, and if it does not receive the FrameTrigger signal, the camera will send a FrameStartWait event to the host. 8.6.7. FrameBurstStartWait Event When the camera is in the AcquisitionTrigger mode, the camera starts acquiring images. If the camera does not receive the AcquisitionTrigger signal, the camera sends a FrameBurstStartWait event to the host. -
Page 213: Software Tool
9.1. LUT Create Tool 9.1.1. GUI LUT Create Tool, which supports all series of DAHENG IMAGING cameras. This plugin is integrated into GalaxyView.exe. After opening the device that you want to operate through this software, you can open LUT Create Tool from the menu bar plugin list. With the plugin you can achieve the following functions: Adjust the image Gamma, brightness, and contrast. -
Page 214: User Guide
9.Software Tool [Save Lut] Write the currently generated Lut to device or save to Lut/CSV file. [Polyline Drawing Area] Represent the currently generated Lut in a curve form. 9.1.2. User Guide 9.1.2.1. User Case After you select GroupBox and adjust the Lut parameter to a satisfactory effect, if you want to save the currently set parameters and you want to restore the parameters after the camera is powered on again, you need to select "Write To Device". - Page 215 9.Software Tool Read From device When you select read from device, the tool will automatically load UserSet0, and then load the Lut saved by the device. If the device supports LUTEnable, it will automatically set LUTEnable to true to display the image effect in real time, the GUI is as shown in Figure 9-3.
-
Page 216: Auto Create Lut
9.Software Tool CSV file After selecting CSV file, a dialog box for selecting the file will pop up. You can select the file in the format of .csv, and update the polyline diagram and image acquisition effect of the device. After selecting CSV file, all widgets of Auto Create Lut are disabled and unadjustable, as shown in Figure 9-5. -
Page 217: Save Lut
9.Software Tool After selecting the GroupBox, when the above parameters are modified, the generated Lut will be written to the device Flash in real time. At this time, the "Write To Device" is not selected. After the device is powered off and restarted, the modified parameters will be lost. The generated Lut cannot be restored by "Read From Device". -
Page 218: Precautions
9.2. Flat Field Correction Plugin ShadingCorrectionTool.plx is the companion software for DAHENG IMAGING digital camera. The plugin is integrated into GalaxyView.exe. After opening the device through this software, open the FFC plugin from the menu bar plugin list. -
Page 219: Gui
9.Software Tool Load the saved FFC factor from the file. Save the prepared FFC factor to the file. 9.2.1. GUI Figure 9-7 Flat field plugin GUI After opening the device through GalaxyView.exe and opening the FFC plugin, the initial state of the GUI is shown in Figure 9-7. -
Page 220: User Guide
9.Software Tool Write the calculated FFC factor to the device to prevent factors loss Write to Device when the device is powered off Load File Load the FFC factor from the file and make it immediate effect Save the calculated FFC factor to a file. When the factor is Save File subsequent used, it can be loaded directly from the file Prompt the execution status and error message when executing... -
Page 221: Execute Ffc
9.Software Tool Figure 9-8 The bright field image is too dark Figure 9-9 The bright field image is too bright If the brightness of the acquired bright field image is greater than 250, it will prompt in the prompt box that the acquired bright field image will affect the effect of FFC, as shown in Figure 9-9. -
Page 222: Load Ffc Data From File / Save Ffc Data To File
9.Software Tool 9.2.2.5. Load FFC Data from File / Save FFC Data to File When loading FFC data from file or saving FFC data to file, the FFC is enabled by default. After the read from the device is successful, the FFC takes effect in real time. When loading FFC data from file or saving FFC data to file, the default file path is: under the installation path (*\GalaxySDK\Demo\Win64\resource\gxplugins\FlatFieldCorrection). -
Page 223: Preview
9.Software Tool Figure 9-12 PC-side GUI 9.2.3.2. Preview The preview widget is grayed out when acquiring bright field images and cannot be previewed. 9.3. Frame Rate Calculation Tool Figure 9-13 Frame rate calculation tool © China Daheng Group, Inc. Beijing Image Vision Technology Branch... -
Page 224: Static Defect Correction Plugin
1%. 9.4. Static Defect Correction Plugin Static Defect Correction Plugin support all series of DAHENG IMAGING digital camera. The plugin is integrated into GalaxyView.exe. After opening the device through GalaxyView, open the Static Defect Correction plugin from the menu bar plugin list. -
Page 225: Gui
9.Software Tool Save the defect pixel information to the device.(The camera which support Static Defect Correction) Save the defect pixel information to the file 9.4.1. GUI Figure 9-14 Static Defect Correction GUI After opening the device through GalaxyView.exe and opening the Static Defect Correction plugin, the initial state of the GUI is shown in Figure 9-14. -
Page 226: User Guide
9.Software Tool Choose whether to perform Static Defect Correction. When the Static StaticDefectCorrection Defect Correction is enabled, the label becomes StaticDefectCorrection (software) (hardware) Save to Device Save the defect pixel information to the device Save to File Save the defect pixel information to a file Display the image. -
Page 227: Acquisition Images
The format of the defect pixel data file is “.dp” and the default save path is under the installation package directory: *\Daheng Imaging\GalaxySDK\Demo\Win64\resource\gxplugins\DefectPixelCorrection; When you need to use the SDK to implement the Static Defect Correction function, you can read the saved defect pixel data file and call the function of the image processing library: DxStaticDefectPixelCorrection to realize the Static Defect Correction of the image. -
Page 228: Faq
10.FAQ 10. FAQ General Question Answer On the unactivated Windows7 64bit Activate Windows7 64bit system, uninstall the system, the installation of Galaxy SDK package, restart the system, reinstall the package has been successfully, but open the and reopen the demo program. demo program failed. - Page 229 10.FAQ General Question Answer Camera crashes on Advantech AIIS- Be sure the driver version of AMD USB controller 1440 IPC. is later than 2.20. Be sure one USB3.0 controller can only be Brightness changes (flicker) or received connected to one ME2L-U3 series camera, and incomplete frames in ME2L-U3 series no other USB devices can be connected cameras’...
-
Page 230: Revision History
11.Revision History 11. Revision History Version Changes Date Initial release V1.0.0 2019-09-27 Add MER2-041-436U3x, MER2-160-227U3x, MER2-230- 168U3x, MER2-302-56U3x, MER2-630-60U3x, ME2P- V1.0.1 2019-12-17 1230-23U3x Modify Figure 1-1, Figure 5-1, Figure 5-2, Figure 5-4, Figure 7-6 and Figure 8-9 Rename camera models, for example, rename MER2- 041-436U3x to MER2-041-436U3M/C(-L) V1.0.2 2020-03-09... - Page 231 11.Revision History Version Changes Date Add the description in FAQ V1.0.13 2021-03-16 Modify the frame rate of ME2L-505-36U3M/C V1.0.14 2021-03-22 Add MER2-503-36U3M POL Add HN-20M, HN-P-6M, HN-P-10M series of industrial V1.0.15 2021-04-16 lenses Modify some description in section 6.2 Modify some description Add the description in section 2.4 and section 8.3.23 Add MER2-630-60U3M/C-W90, MER2-1220-32U3M/C- V1.0.16...
- Page 232 11.Revision History Version Changes Date Update the information of MER2-1220-32U3M/C, MER2- V1.0.27 2022-07-04 2000-19U3M/C MER2-135-150U3M/C(-L), ME2P-560-36U3M/C, ME2P-900-43U3M/C, ME2P-1840-21U3M/C Update the information of MER2-160-227U3M/C(-L), MER2-230-168U3M/C(-L) Update the spectral response of ME2P-2621-15U3M/C, ME2P-2622-15U3M/C, ME2P-2621-15U3M NIR, ME2P- 2622-15U3M NIR V1.0.28 Add the description of FCC in section 2.4 2022-11-11 Update the description of operation system in section 4 Update the mechanical dimensions in section 5.1...
-
Page 233: Contact Us
If you need to order products or inquire product information, please contact our sales: Tel: +86 10 8282 8878 Email: isales@deheng-imaging.com 12.2. Contact Support If you have any questions in using DAHENG IMAGING products, please contact the experts on our support team: Tel: +86 10 8282 8878 Email: isupport@daheng-imaging.com...
Need help?
Do you have a question about the MERCURY2 USB3 and is the answer not in the manual?
Questions and answers