Sony CDX-4000X Operating Instructions Manual
Hide thumbs
Also See for CDX-4000X:
- Service manual (48 pages) ,
- Operating instructions manual (24 pages) ,
- Installation/connections manual (15 pages)
Table of Contents
Advertisement
Quick Links
3-043-292-11 (1)
FM /AM
Compact Disc
Player
US
Operat ing Inst ruct ions
Ow ner's Record
The model and serial numbers are located on the bottom of the unit.
Record these numbers in the space provided below.
Refer to these numbers whenever you call upon your Sony dealer regarding this
product.
Model No.
Serial No.
For installation and connections, see the supplied installation/connections manual.
CDX-4000X
CDX-4005
© 2000 Sony Corporation
Downloaded from:
https://www.usersmanualguide.com/
Advertisement
Table of Contents

Related Manuals for Sony CDX-4000X


Summary of Contents for Sony CDX-4000X
- Page 1 Ow ner’s Record The model and serial numbers are located on the bottom of the unit. Record these numbers in the space provided below. Refer to these numbers whenever you call upon your Sony dealer regarding this product. Model No.
- Page 2 If this equipment does this manual, please consult your nearest Sony cause harmful interference to radio or dealer. television reception, which can be determined...
- Page 3 • You cannot play CD-RWs (rewritable CDs) on this player. When you play 8 cm (3 in.) CDs Use the optional Sony compact disc single adaptor (CSA-8) to protect the CD player from damage. Do not use solvents such as benzine, thinner, commercially available cleaners, or antistatic spray intended for analog discs.
-
Page 4: Table Of Contents
Table of Cont ent s Location of controls ..........5 Get t ing St art ed Resetting the unit ..........6 Detaching the front panel ........6 Turning the unit on/off ........7 How to use the menu .......... 7 Setting the clock ........... -
Page 5: Location Of Controls
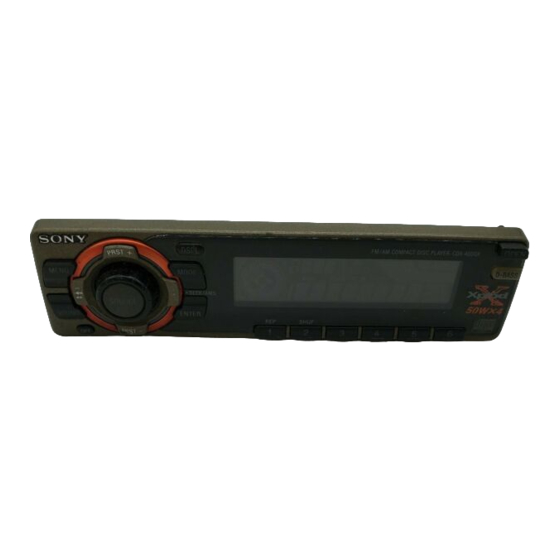
MODE SOURCE -SEEK/AMS SOUND ENTER SHUF CDX-4000X/4005 Refer to the pages listed for details. 1 Volume control dial qd OFF button * 6, 7, 8 2 M ENU button 7, 9, 10, 11, 12, 13, 16 qf SEEK/ AM S –/ + (cursor left/ right) buttons... -
Page 6: Get T Ing St Art Ed
At t aching t he f ront panel Place the hole A in the front panel onto the Get t ing St art ed spindle B on the unit as illustrated, then push the left side in. Reset t ing t he unit Before operating the unit for the first time or after replacing the car battery, you must reset the unit. -
Page 7: Turning The Unit On/Off
Turning t he unit on/off Set t ing t he clock The clock uses a 12-hour digital indication. Turning on t he unit Press (SOURCE) or insert a CD in the unit. For Example: To set the clock to 10:08 details on operation, refer to page 8 (CD player) and page 10 (radio). -
Page 8: Cd Player
Changing t he display it em Each time you press (DSPL) during CD TEXT CD Player disc playback, the item changes as follows: Track number/ Elapsed playback time List ening t o a CD Disc name/ Artist name * Press (OPEN) and insert the CD. Labeled side up Track name * If you play a CD TEXT disc, t he art ist name... -
Page 9: Automatic Music Sensor
Aut om at ically scrolling a disc nam e Locat ing a specif ic t rack — Auto Scroll — Automatic M usic Sensor (AM S) If the disc name, artist name, or track name on During playback, press either side of a CD TEXT disc exceeds eight characters and (SEEK/AMS) momentarily for each track the Auto Scroll function is on, information... -
Page 10: Playing A Cd In Various Modes
Playing a CD in various Radio m odes You can play CDs in various modes: •REP (Repeat Play) repeats the current track. •SHUF (Shuffle Play) plays all the tracks in M em orizing st at ions random order. aut om at ically Playing t racks repeat edly —... -
Page 11: Memorizing Only The Desired Stations
M em orizing only t he Receiving t he m em orized desired st at ions st at ions You can preset up to 18 FM stations (6 each for Press (SOURCE) repeatedly to select the FM1, FM2, and FM3), up to 12 AM stations tuner. -
Page 12: Storing The Station Names
If FM st ereo recept ion is poor St oring t he st at ion nam es — M onaural M ode — Station M emo During radio reception, press (MENU) , then press either side of (PRST) You can assign a name to each radio station repeatedly until “M ONO-OFF”... -
Page 13: Ot Her Funct Ions
To return to the normal radio reception, press (ENTER) . Ot her Funct ions To erase or correct a name, ent er “ _” (under-bar) f or each charact er. You can also control the unit with a rotary commander. Displaying t he st at ion nam e Press (DSPL) during radio reception. -
Page 14: Using The Rotary Commander
By pushing in and rot at ing t he Using t he rot ary cont rol (t he PRESET/DISC cont rol) com m ander The rotary commander works by pressing buttons and/or rotating controls. By pressing but t ons (t he SOURCE and M ODE but t ons) Push in and rotate the control to: (SOURCE) •Receive the stations memorized on the... -
Page 15: Adjusting The Sound Characteristics
Changing t he operat ive direct ion Adjust ing t he sound The operative direction of controls is factory- set as shown below. charact erist ics To increase You can adjust the bass, treble, balance, and fader. You can store the bass and treble levels independently for each source. -
Page 16: Changing The Sound And Display Settings
Changing t he sound and Boost ing t he bass sound display set t ings — D-bass The following items can be set: You can enjoy a clear and powerful bass sound. SET (set t ing) The D-bass function boosts the low and high •CLOCK (page 8) frequency signal with a sharper curve than •BEEP —... -
Page 17: Addit Ional Inform At Ion
If the fuse blows, check the power connection and replace the fuse. If the fuse blows again after replacement, there may be an internal malfunction. In such a case, consult your nearest Sony dealer. M ain unit Back of the front panel Fuse (10 A) Notes •... -
Page 18: Dismounting The Unit
Dism ount ing t he unit Press the clip inside the front cover w ith a thin screw driver, and gently pry the front cover free. Repeat step 1 on the left side. The front cover is removed. Use a thin screw driver to push in the clip on the left side of the unit, then pull out the left side of the unit until the catch clears the mounting. -
Page 19: Specifications
Bass ±9 dB at 100 Hz Tuner sect ion Treble ±9 dB at 10 kHz Power requirements 12 V DC car battery (negative ground) Tuning range CDX-4000X Approx. 178 × 50 × 183 mm Dimensions 87.5 – 107.9 kHz × 2 × 7 in.) CDX-4005... -
Page 20: Troubleshooting Guide
Troubleshoot ing guide The following checklist will help you remedy the problems you may encounter with your unit. Before going through the checklist below, check the connection and operating procedures. General Cause/Solut ion Problem •Cancel the ATT function. No sound. •Set the fader control to the center position for two-speaker system. - Page 21 The “ST” indication flashes. •Tune in the frequency accurately. •The broadcast signal is too weak. t Set to the MONO mode (page 12). If the above-mentioned solutions do not help improve the situation, consult your nearest Sony dealer. Downloaded from: https://www.usersmanualguide.com/...
- Page 22 Downloaded from: https://www.usersmanualguide.com/...
- Page 23 Downloaded from: https://www.usersmanualguide.com/...
- Page 24 Sony Corporation Printed in Korea Downloaded from: https://www.usersmanualguide.com/...
- Page 25 This file has been downloaded from: www.UsersManualGuide.com User Manual and User Guide for many equipments like mobile phones, photo cameras, monther board, monitors, software, tv, dvd, and othes.. Manual users, user manuals, user guide manual, owners manual, instruction manual, manual owner, manual owner's, manual guide, manual operation, operating manual, user's manual, operating instructions, manual operators, manual operator, manual product, documentation manual, user maintenance, brochure, user reference, pdf manual Downloaded from:...
Need help?
Do you have a question about the CDX-4000X and is the answer not in the manual?
Questions and answers