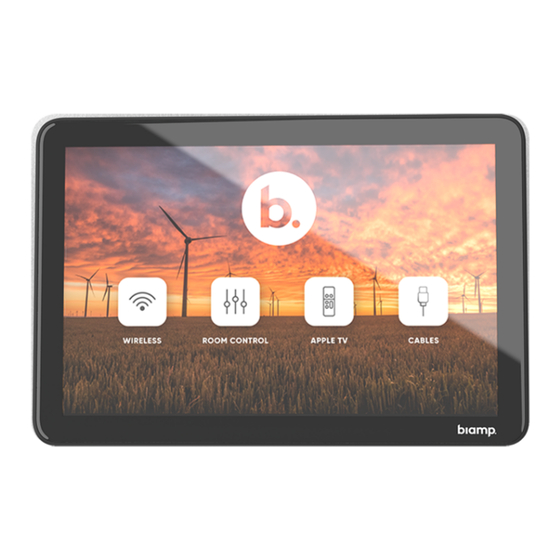
Biamp Apprimo Touch 8i Installation And Operation Manual
Hide thumbs
Also See for Apprimo Touch 8i:
- Installation and operation manual (6 pages) ,
- Quick start manual (6 pages)
Advertisement
Apprimo
Touch 8i Control Panel
Installation and Operation Guide
PRODUCT DESCRIPTION
The Apprimo Touch 8i is an 8" control panel for any room
that requires a more complex level of control, while still
being a stylish and discreet interface that fits in any type of
interior design.
CONTENTS
Apprimo Touch 8i
(with table mount attached)
Reset Pin
3 m (10 ft) Cat5 cable
Reset Pin
A:
Touch 8 control panel with attached Table Mount
9300 S.W. Gemini Drive Beaverton, OR 97008 USA
shown on the attached Table Mount
FEATURES
• 8" capacitive touch LCD interface
• Scratch-resistant glass
• Display brightness can adjust automatically to the
ambient light level
• Customizable user interface to fit customers' control
requirements and corporate identity
• PoE powered (IEEE 802.3at Class 3, 15W) for simple,
single CAT5e/CAT6 cable installation
Cat5 Cable
W:
www.biamp.com
Advertisement
Table of Contents

Subscribe to Our Youtube Channel
Summary of Contents for Biamp Apprimo Touch 8i
- Page 1 Table Mount PRODUCT DESCRIPTION FEATURES The Apprimo Touch 8i is an 8" control panel for any room • 8" capacitive touch LCD interface that requires a more complex level of control, while still • Scratch-resistant glass being a stylish and discreet interface that fits in any type of •...
-
Page 2: Product Installation
PRODUCT INSTALLATION Table Installation 1. Remove cover from the bottom of the table mount. 2. Insert network cable into port on the back of the control panel. 3. Reattach the cover routing the cable through the notch in the latch and stand. 4. -
Page 3: Operation
OPERATION A simple touch will wake up the control panel. It provides a method of interacting with or controlling the room system. The initial interface and on-screen prompts make use of the control panel default setup. Note: More options can be enabled upon setup, including user proximity to "wake up"... -
Page 4: Accessories (Optional)
ACCESSORIES (OPTIONAL) It is necessary to remove the Table Mount from the control panel in order to mount the panel to any of the accessory wall mounting options. The instructions to remove the table mount are on the next page. Do this before proceeding with the accessory mount instructions. - Page 5 ACCESSORIES (OPTIONAL) Determine placement on the wall 1. The center of the control panel would typically be located between 102 – 165 cm (40" – 65") above the finished floor. Route Cat 5e/6 cable to the location. There are channels and/or knockouts on the base 165 cm plates for cable routing if installing on a solid wall.
- Page 6 ACCESSORIES (OPTIONAL) Installation - Flat or Angled Wall Mount The control panel can be mounted to a wall with or without a gang box. Most gang box styles are supported. 70 mm 1. Attach wall plate directly to the wall with screw anchors or screw it to a (2.75") gang box (most gang box styles are supported).
- Page 7 ACCESSORIES (OPTIONAL) Installation - Flat or Angled Wall Mount (continued) 4. Insert network cable into port on the back of the control panel. 5. Mount the panel on the wall plate by hanging it on the top tabs then rotating in and clipping into the bottom tab.
- Page 8 ACCESSORIES (OPTIONAL) Installation - Concrete Wall Mount (Apprimo Touch 8-WMC) 1. Securely attach wall plate directly to the wall with concrete anchors (or construction adhesive). Orient the plate with the arrows pointing up. 2. Attach wall mount base to control panel - fit clips in control panel back (a), and slide up (b).
- Page 9 ACCESSORIES (OPTIONAL) Installation - Low Profile Mount Bracket (Apprimo Touch 8-WML) Network cabling must be routed to the desired panel location. 1. Cut a rectangular hole in the wall (drywall or sheet rock). Dimensions H x W: 90 x 122 mm (3.5 x 4.8") Note:The hole must have clearance of 25mm (1") on either side of the hole to accommodate the full clamp rotation.
- Page 10 6. Position the panel's backplate aligned with, and against all four magnets in the low profile bracket. The panel will be held securely on the wall. CONTACT US Email: support@biamp.com Warranty: biamp.com/legal/warranty-information Web: support.biamp.com Safety & Compliance: biamp.com/compliance...


Need help?
Do you have a question about the Apprimo Touch 8i and is the answer not in the manual?
Questions and answers