Table of Contents
Advertisement
Quick Links
Advertisement
Table of Contents

Subscribe to Our Youtube Channel
Related Manuals for Mitchell & Brown JB-55QLED1811


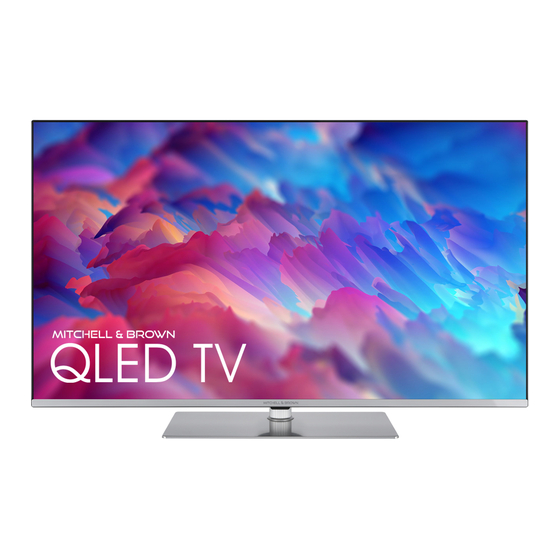
Summary of Contents for Mitchell & Brown JB-55QLED1811
-
Page 2: Table Of Contents
HBBT� System............25 Table of Contents Freeview Play Platform..........25 Quick Standby Search ...........26 Safety Information ..........2 Software Update ............26 Mains Supply ............2 Markings on the Product........3 Troubleshooting & Tips ..........26 HDMI Signal Compatibility ........27 WARNING .............3 Supported File Formats for USB Mode ....28 WALL MOUNTING WARNINGS ......3 �ideo Decoder ............28 Introduction ............4... -
Page 3: Safety Information
� Do not expose the T� to direct sunlight or do Safety Information not place open �ames such as lit candles on the top of or near the T�. � Do not place any heat sources such as electric CAUTION heaters�... -
Page 4: Markings On The Product
� N���R place items that might tempt children to Markings on the Product climb� such as toys and remote controls� on the top The following symbols are used on the product as of the television or furniture on which the television a marker for restrictions and precautions and safety is placed. -
Page 5: Introduction
High Dynamic Range (HDR) / Hybrid Log- Introduction Gamma (HLG) Using this feature the T� can reproduce greater Thank you for choosing our product. You’ll soon be dynamic range of luminosity by capturing and then enjoying your new T�. Please read these instructions combining several di�erent exposures. -
Page 6: Stand Installation & Wall Mounting
Stand Installation & Antenna Connection Wall Mounting Connect the aerial �� plug to the AE�IAL IN��� �AN�� socket located on the left side of the ��. Assembling / Removing the pedestal Left side of the TV Preparations �ake out the pedestal�s� and the �� from the packing case and put the ��... -
Page 7: Other Connections
Other Connections If you want to connect a device to the ��� make sure that both the �� and the device are turned o� before making any connection. After the connection is done� you can turn on the units and use them. When using the wall mounting kit Connector Type... -
Page 8: Turning On/O� The T
Press the control button again to go back to operating Turning On/Off the TV mode. Your T� continues to operate in the quick standby Connect power mode state� as it regularly checks for updates. This is IMPORTANT: The TV set is designed to operate on not a malfunction�... -
Page 9: Remote Control
Remote Control Standby: Quick Standby / Standby / On Numeric buttons: Switches the channel in Live T� mode� enters a number or a letter in the text box on the screen Language: Displays and changes audio language �digital T�� where available� Volume +/- Microphone: Activates the microphone on the remote Home: Opens the Home Screen... -
Page 10: Initial Setup Wizard
connection or change the network. Highlight Change Initial Setup Wizard network and press OK if you want to use wireless connection instead of wired connection. Note: Follow the on-screen instructions to complete the initial 6. Network Connection setup process. Use the directional buttons and the OK button You will be directed to the next step automatically�... -
Page 11: Home Screen
9. Google Services your T� up to respond to �ast commands� even when on standby mode and the screen is o�. Select each to learn more about each service� such as how to turn it on or o� later. Data will be used accord- 13. -
Page 12: Live T� Mode Menu Content
Source option in the TV options menu� and press selection in the initial setup� the tabs on the Home OK. Depending on your T� setup and your country Screen may contain di�erent items. selection in the initial setup� the Home menu may Live TV Mode Menu Content contain di�erent items. -
Page 13: Settings
Audio Channel: Set your Audio Channel on the side of the screen. Refer to Freeview Play preference. Platform section for more information. Audio Language: Set your language preference for Subtitle audio. This item may not be available depending on Digital Subtitle: Set this option as O� or On. the input source setting. -
Page 14: Ethernet
Scanning always available: You can let the location on the remote. Highlight the desired channel/s on the service and other apps scan for networks� even when list and press OK to select/unselect. �LAN function is turned o�. Press OK to turn it on Channel Swap: Replace the positions of the two and o�. -
Page 15: Auto Channel Update
Channel Skip: Set channels to be skipped when during the initial setup. The content of this menu may not be displayed if the channel installation is not completed and no switching the channels via Programme +/- buttons channels are installed. on the remote. -
Page 16: Permissions
your T�� you can move the app to that device. For Date & Time: Set the date and time options of your T�. You can set your T� to automatically update more information refer to the Storage section in the the time and date data over the network or over the Settings>Device Preferences menu. - Page 17 Local Contrast Control: Local contrast control Dolby Vision Modes: If Dolby Vision content is detected Dolby Vision Bright� Dolby Vision Dark and Dolby Vi- divides each frame to de�ned small regions and sion Vivid picture mode options will be available instead provides ability to apply independent contrast set- of other picture modes.
- Page 18 tions� one displaying the MJC activity� the other Sound Surround: Turn the surround sound feature displaying the normal settings for the T� screen. on or o�. If the Demo Partition option is set to All� both Equalizer Detail: Adjust the equalizer values ac- sides will display the MJC activity.
- Page 19 Dolby Atmos: Your T� supports Dolby Atmos use it with other devices. Before proceeding with technology. By means of this technology the sound the formatting� you may consider backing up the moves around you in three-dimensional space� so data on your device to your T�’s internal storage you feel like you’re inside the action.
-
Page 20: Remote & Accessories
open source licences and view version number and Captions: Con�gure the settings for the captions. serial number under the About section. You can set the language� text si�e and style using the options of this menu. Highlight Display Screen Saver: Set the screensaver options for your and press OK to turn on or o�... -
Page 21: Programme Guide
All channels option to see all installed channels in be displayed on the screen. Press Info button to see the channel list. additional information on the highlighted event. Press Back/Return button to go back to guide screen. Note: All channels is selected in the channel list, you can only switch to the channels that are Press Blue button to search events. -
Page 22: Multimedia Player
Broadband ISP connection A network with hidden a SSID can not be detected by other devices. If you want to connect to a network with a hidden SSID� highlight the Add new network option under the Settings>Network and Internet menu on the Home Screen and press OK. - Page 23 Select the media type on the main media player screen. Stop: Stop the playback. On the next screen� you can press the Menu button to Programme +: Switch to next �le. access a list of menu options while the focus is on a Programme -: Switch to previous �le.
-
Page 24: From Usb Connection
stop after the last listed �le is displayed and media back as a slide show when photo frame feature is player screen will be displayed. activated. Info: Display the info bar. Press twice to display the Hide/Show Spectrum: Hide or show the spectrum extended information and the next �le. -
Page 25: Usb Autoplay Feature
To operate the connected CEC device� select the USB AutoPlay feature related HDMI input source from the Inputs menu on the Home Screen. Or press the Source button if the T� This feature is used to start playing the media content is in Live T�... -
Page 26: Google Cast
Google Cast HBBTV System With the built-in Google Cast technology you can cast HbbT� �Hybrid �roadcast �roadband T�� is a standard the content from your mobile device straight to your that seamlessly combines T� services delivered via T�. If your mobile device has Google Cast feature� you broadcast with services delivered via broadband and can mirror your device’s screen to your T�... -
Page 27: Quick Standby Search
Catch-up content can also be accessed and played Note: Do not unplug the power cord during the reboot process. If the TV fails to come on after the upgrade, unplug, wait for back directly from the T� Guide. Refer to the section two minutes then plug it back in. -
Page 28: Hdmi Signal Compatibility
� Change to a di�erent picture format� if the picture does not �t the screen � Make sure that your PC uses the supported resolution and refresh rate. No sound / poor sound � Make sure that the sound settings are correctly set. �... -
Page 29: Supported File Formats For Usb Mode
Supported File Formats for USB Mode Video Decoder Video Codec Resolution Bit Rate �ro�le Container Pro�le 0 �420 8-bit� �P9 4096x2176@60fps 100Mbps M�� �.mkv�� �ebM �.webm� Pro�le 2� �420� 10-bit� Main �8-bit�/Main10 MP4 �.mp4� .mov�� 3GPP �.3gpp� .3gp�� �10-bit� MPEG transport stream �.ts� .trp� .tp�� HE�C/H.265 4096x2176@60fps 100Mbps... -
Page 30: Ideo Encoder
Video Encoder Max Bit Video Codec Max Resolution �ro�le Note Rate H.264 1920x1080@30fps 12Mbps Main pro�le� level 4.1 Hardware video encoder Audio Audio Codec Sample rate Channel Bit Rate Container Note MP3 �.mp3�� A�I �.avi�� ASF �.asf�� WM� �.wmv�� MK� �.m�v� .m�a�� 3GPP �.3gpp�... - Page 31 Audio Codec Sample rate Channel Bit Rate Container Note ASF �.asf�� WM� �.wma� .wmv�� WMA 10 Pro M1 8KHz ~ 48KHz Up to 5.1 < 384Kbps A�I �.avi�� 3GPP �.3gpp� .3gp�� MP4 �.mp4� .mov� ASF �.asf�� WM� �.wma� .wmv�� WMA 10 Pro M2 8KHz ~ 96KHz Up to 5.1 <...
-
Page 32: Picture
Picture Resolution Image Photo (width x height) Base-line 15360 x 8640 JPEG Progressive 1024 x 768 9600 x 6400 9600 x 6400 6400 x 4800 WebP 3840 x 2160 HEIF 4000 x 3000 Subtitle Internal File Extension Container Subtitle Codec D�B Subtitle Teletext ts�... -
Page 33: Supported D�I Resolutions
Supported DVI Resolutions When connecting devices to your T��s connectors by using a D�I converter cable �D�I to HDMI cable - not supplied�� you can re�er to the �ollo�ing resolution in�ormation. 56Hz 60Hz 66Hz 70Hz 72Hz 75Hz 640x480 800x600 1024x768 1280x768 1280x960 1360x768... -
Page 34: Licences
�ireless L�� �ransmitter �peci�cations Google� Android� Android T�� Chromecast� Google Play and YouTube are trademarks of Google LLC. Max Output Frequency Ranges For DTS patents� see http�//patents.dts.com. Power Manufactured under licence from DTS Licensing 2400 - 2483.5 MHz �CH1 - CH13� <... -
Page 35: Disposal Information
Disposal Information [European Union] These symbols indicate that the electrical and electronic equipment and the battery with this symbol should not be disposed of as general household waste at its end-of-life. Instead� the products should be handed over to the applicable collection points for the recycling of electrical and electronic equipment as well as batteries for proper treatment�... - Page 36 �ereby� ���T�� �lektronik �anayi ve Ticaret �.�.� declares that the radio e�uipment type TFT ��T� is in compliance with �irective �����53���. The full te�t of the �� declaration of conformity is available at the following internet address: doc.vosshub.com Mitchell & Brown Product Registration Thank you for purchasing a Mitchell &...
Need help?
Do you have a question about the JB-55QLED1811 and is the answer not in the manual?
Questions and answers