
Related Manuals for Sony CMT-C5


Summary of Contents for Sony CMT-C5
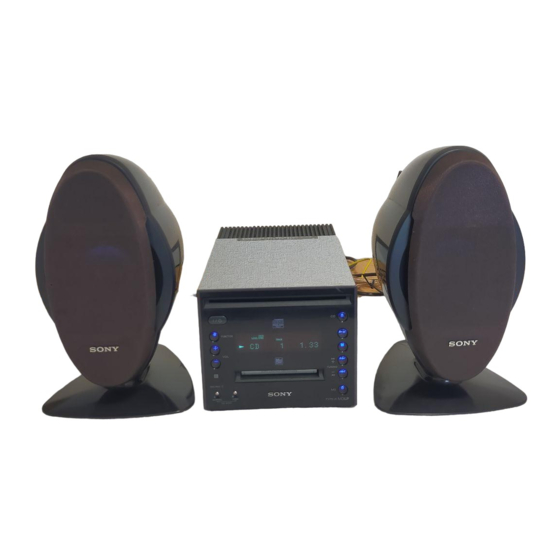
- Page 1 4-233-942-11 (1) Micro Hi-Fi Component System Operating Instructions CMT-C5 © 2001 Sony Corporation Downloaded from: https://www.usersmanualguide.com/...
- Page 2 WARNING To prevent fire or shock hazard, do not expose the unit to rain or moisture. To avoid electrical shock, do not open the cabinet. Refer servicing to qualified personnel only. Do not install the appliance in a confined space, such as a bookcase or built-in cabinet.
-
Page 3: Table Of Contents
Table of Contents Parts Identification MD — Editing Before you start editing ....... 26 Main unit ............4 Labeling an MD Remote control ..........5 — Name Function ........ 27 Erasing recordings Getting Started — Erase Function ......... 29 Hooking up the system ........6 Moving recorded tracks Preparing the remote ........ -
Page 4: Parts Identification
Parts Identification The items are arranged in alphabetical order. Refer to the pages indicated in parentheses () for details. M ain unit CD SYNC HIGH 7 (19, 51) BUTTON DESCRIPTIONS CD SYNC NORMAL 8 (19) @/1 (power) 1 (7, 18, 26, 27, 37, CD Z 2 (10, 51) 40, 42) FUNCTION qa (9, 11, 13, 14, 16,... -
Page 5: Remote Control
Remote control 1 2 3 4 CD x qh (10) MD x qs (15) BUTTON DESCRIPTIONS CD X ws (10) MD X wf (15) @/1 (power) 4 (7, 18, 26, 27, 37, CD N wd (9, 11, 20) MD N wg (14, 16, 19, 20, 25) 40, 42) CLEAR 9 (11, 16, 28, 38) MENU/NO q;... -
Page 6: Getting Started
Hooking up the system Follow steps 1 through 3 of the procedure below to hook up your system using the supplied cords and accessories. AM loop antenna FM antenna CMT-C5 rear panel Right speaker Left speaker 1 Connect the speakers. -
Page 7: Preparing The Remote
Battery life You can expect the remote to operate for about Pull out the insulating sheet to allow 6 months (using a Sony CR2025 lithium power to flow from the battery. battery) before the battery runs down. When The remote already contains a battery. -
Page 8: Setting The Time
Setting the time Conserving power in standby mode Turn on the system. Even if the system is off, the unit consumes Press CLOCK/TIMER SET on the power to power the clock and to stay remote. responsive to commands from the remote. If you are setting the clock for the first time, Power saving mode was introduced to reduce go to step 5. -
Page 9: Loading The Cd
Playing the CD Loading the CD — Normal Play/Shuffle Play/Repeat Play Load a CD. The CD is drawn in automatically. This system lets you play CDs in different play modes. Track number Playing time Press FUNCTION repeatedly until “CD” appears in the display. Load with the label side up. - Page 10 Playing the CD (continued) You can start playing from the desired track in Normal Play. Press . or > repeatedly until the desired track Other operations appears before step 3. Or, press the number buttons on the remote. The play Do this automatically starts.
-
Page 11: Programming The Cd Tracks
To program additional tracks, repeat Programing the CD tracks steps 3 and 4. Press u (or CD N on the remote). — Program Play You can make a program of up to 25 tracks on Do this a CD in any order that you want. Check the program Press . -
Page 12: Using The Cd Display
To scroll a long name Using the CD display Press SCROLL on the remote. The title appears scrolling in the display. Checking the remaining time Tips • If you press TIME on the remote in stop mode for a Press TIME on the remote repeatedly CD with CD text containing the artist name, the during play. -
Page 13: Labeling A Cd - Disc Memo
If you have selected numbers Labeling a CD Press the corresponding number button on the remote. — Disc Memo The number is entered and the cursor shifts to the right. You can label up to 100 CDs with titles of up to 20 symbols and characters. -
Page 14: Md - Play
MD — Play Labeling a CD (continued) Loading the MD Checking the disc titles Load an MD. Press FUNCTION repeatedly until “CD” With the label side up, and the appears in the display. shutter on the righthand side Press MENU/NO on the remote in stop mode. - Page 15 Other operations You can start playing from the desired track in Normal Play. Do this Press . or > repeatedly until the desired track Stop play Press x. appears before step 3. Pause Press u (or MD X on the Or, press the number buttons on the remote.
-
Page 16: Programing The Md Tracks
To program additional tracks, repeat Programing the MD tracks steps 3 and 4. Press u (or MD N on the remote). — Program Play You can make a program of up to 25 tracks on Do this an MD in any order that you want. Check the program Press . -
Page 17: Using The Md Display
Checking the track title or a Using the MD display disc title Press DISPLAY on the remote during play Checking the remaining time or in stop mode. The display changes as follows: Press TIME on the remote repeatedly Clock* t Preset Equalizer name* during play. -
Page 18: Md - Recording
MD — Recording When you use a partially recorded Before you start recording Recording starts after the recorded tracks. MDs (Mini Disc) let you digitally record and Note on MD track numbers play music with high quality sound. Another On an MD, the track numbers (track sequence), track feature of MDs is track marking. -
Page 19: Recording A Cd On An Md
To stop recording Recording a CD on an MD Press x. — CD-MD Synchro Recording/CD-MD Tips High-Speed Synchro Recording • You can record only your favorite CD tracks with CD Program Play. After step 3, follow the same procedures as from step 2 to 5 in CD Program Play In addition to normal-speed recording, you can (see page 11). -
Page 20: Recording On An Md Manually
Recording on an MD Recording the current manually track — Manual Recording — Rec It With manual recording, you can record a radio You can record a track quickly while listening program. to a CD. Manual recording cannot be done from the CD Load a recordable MD. -
Page 21: Audio Data
To stop Time Machine Recording Starting recording with 6 Press x. seconds of prestored Note audio data The MD deck starts storing audio data when the deck stands by for recording in step 3 and you start playing the source. If less than 6 seconds have passed when —... -
Page 22: Recording Tips
Press . or > repeatedly to select Recording tips the recording mode you want, and then press ENTER/YES on the remote. — Recording for long times/Marking The display changes as follows: track numbers/Smart space/ STEREO REC t LP2 REC t LP4 REC Adjusting the recording level t MONO (Monaural) REC t STEREO REC t …... - Page 23 Marking track numbers To add “LP:” at the beginning of a track name during MDLP recording • Automatically during recording “LP:” appears when you try to play the track on Track numbers are automatically marked as on a system that does not support MDLP mode. the original source during recording from this This convenient function lets you know at a system’s CD player or components connected...
- Page 24 Recording tips (continued) To change the trigger level for automatic track marking Do the procedure below to change the signal Note level that triggers automatic track marking. You cannot mark track numbers automatically if the (The factory setting is –50 dB.) sound source to be recorded is noisy (e.g., tapes or radio programs).
- Page 25 Making a space between Press FUNCTION repeatedly until “MD” appears in the display. tracks 3 seconds long — Smart Space Press MENU/NO on the remote. Press . or > repeatedly until Smart Space: Lets you make the blank “Setup?” appears in the display, and spaces between tracks 3 seconds long then press ENTER/YES on the remote.
-
Page 26: Md - Editing
MD — Editing Recording tips (continued) Before you start editing Adjusting the recording level Before editing You can adjust the recording level when recording to an MD from the tuner or from an You can edit an MD only when: optional component connected to the TAPE IN •... -
Page 27: Labeling An Md
Before pulling out the power cord After recording MD editing is completed when the MD Table Use Name Function on this page. You can of Contents (TOC) is updated. The TOC is input a total of approximately 1700 characters updated when you eject the MD or press ?/1 for the disc title and track titles on a single MD. - Page 28 Labeling an MD (continued) Checking the titles To check the disc titles, press SCROLL on the Enter a character. remote in stop mode. To check the track title, press SCROLL on the remote during play. The If you have selected uppercase or title appears scrolling in the display.
-
Page 29: Erasing Recordings
Press . or > repeatedly until the Erasing recordings desired track number appears. Press ENTER/YES on the remote. — Erase Function “Complete!” appears. The MD deck lets you erase unwanted tracks Note quickly and easily. “Erase???” appears when the track was recorded or edited on another deck and then protected. - Page 30 While monitoring the sound, press . Erasing recordings (continued) or > repeatedly to find the starting point of the portion to be erased (point Erasing a portion of a track — A-B Erase Function You can shift the starting point by 1/86 second (1 frame) intervals*.
-
Page 31: Moving Recorded Tracks
Moving recorded tracks Dividing recorded tracks — Move Function — Divide Function You can use this function to change the order You can use this function to mark track of any track on the disc. When you move numbers after recording. The total number of tracks, the tracks are automatically tracks increases by one and all the tracks renumbered. -
Page 32: Combining Recorded Tracks
Dividing recorded tracks (continued) Combining recorded tracks While monitoring the sound, press . or > repeatedly to adjust the point to — Combine Function be divided. You can shift the point by 1/86 second You can use this function to combine 2 tracks (1 frame) intervals*. -
Page 33: Undoing The Last Edit
Press . or > repeatedly until the Undoing the last edit first track number of the two to be combined appears, and then press — Undo Function ENTER/YES on the remote. For example, to combine track 1 to 4, select You can use this function to cancel the last edit and restore the contents of the MD to the Press . -
Page 34: Changing The Recording Level After Recording
Press . or > repeatedly to select Changing the recording the track number you want to change level after recording the recording level of, and then press ENTER/YES on the remote. “Level 0dB” appears. — S.F Edit While monitoring the sound, press . You can change the volume of the recorded or >... - Page 35 Fade-in and Fade-out To cancel the operation Recording Press MENU/NO on the remote during step 4 through 8. After recording starts in step 9, you cannot interrupt the operation. Press FUNCTION on the remote repeatedly until “MD” appears in the Notes display.
-
Page 36: Tuner
Tuner To cancel presetting Presetting radio stations Press MENU/NO on the remote during step 5 through 6. The system can store a total of 30 preset To tune in a weak station stations (20 for FM and 10 for AM). In step 2, press TUNING MODE on the remote repeatedly until “MANUAL”... -
Page 37: Listening To The Radio
To tune in a non-preset radio station Listening to the radio • In step 2, press TUNING MODE on the remote repeatedly until “MANUAL” appears — Preset Tuning in the display, and then press TUNING + or – repeatedly to tune in the desired station Presetting radio stations in the system’s (Manual Tuning). -
Page 38: Labeling The Preset Stations
Labeling the preset Using the Radio Data stations System (RDS) (European model only) — Station Name What is the Radio Data System? You can label each preset station with up to 10 characters (Station Name). Radio Data System (RDS)* is a broadcasting service that allows radio stations to send Tune the desired station you want to additional information along with the regular... -
Page 39: Sound Adjustment
Sound Adjustment Timer Reinforcing the bass Falling asleep to music sound — Sleep Timer — DBFB The Sleep Timer Function lets you specify a sleep time, after which the system stops playing and turns off automatically. You can thus fall Press DBFB* on the remote. -
Page 40: Waking Up To Music
Press . or > on the remote Waking up to music repeatedly until the music source you want appears. — Daily Timer The display changes as follows: By setting the Daily Timer, you can make the t TUNER y MD PLAY T system automatically turn on and off at t CD PLAY T specified times. -
Page 41: Timer Recording Radio Programs
Do this Timer recording radio Check the settings/ Press CLOCK/TIMER programs activate the timer SELECT on the remote and press . or > on the remote repeatedly until Before recording with the timer, make sure that “DAILY SELECT?” appears in you have set the system clock correctly (see the display, and then press “Setting the time”... - Page 42 Timer recording radio programs Do this (continued) Check the settings Select the timer number (REC 1 to 3) in step 2 of “Activate/ Press – or + (. or >) on the Cancel the timer”, then press remote repeatedly to select the desired ENTER/YES on the remote.
-
Page 43: Optional Components
Optional Components When you record from the radio, the station name Hooking up the optional (see page 38, or frequency when the station is not labeled), the start time and the stop time are components automatically recorded on the MD. Notes You can connect a variety of components to •... - Page 44 To stop recording, press x. Operate the system Connect the personal from a personal computer to the PC LINK computer connector using a Sony PC connection kit (option) that supports this system. Listen with Connect headphones headphones. (optional) to the PHONES jack.
-
Page 45: Additional Information
If you have any questions or problems concerning system, unplug the system and have it checked by your system, please consult your nearest Sony dealer. qualified personnel before operating it any further. • AC power cord must be changed only at the On the speaker system qualified service shop. - Page 46 Precautions (continued) Notes on CDs • Before playing a CD, clean the CD surface with a cleaning cloth. Wipe the CD from the center out. Notes on MDs • Do not play a CD with tape, stickers, or adhesives on any of its surfaces as this may damage the •...
-
Page 47: System Limitations Of Mds
The total recorded time and the System limitations of MDs remaining time on the MD do not add up to the maximum recording time The recording system in your MD deck has the Recording is done in minimum units of 2 seconds* limitations described below. -
Page 48: Troubleshooting
Should any problem persist, consult your system uses the Serial Copy Management System that allows you to make only a single copy of a digitally nearest Sony dealer. When bringing the system recorded source through digital-to-digital in for servicing, be sure to bring the speaker connections. - Page 49 The controls do not work. • Press and hold CD Z. • Replace the MD with a new one. • Consult your nearest Sony dealer. • Retry the operations after “TOC” turns off. Play does not start. Play does not start.
- Page 50 • Locate the antennas as far away from the speaker cords as possible. Play does not start from the first track. • Consult your nearest Sony dealer if the supplied • Press PLAY MODE on the remote repeatedly AM antenna wire has come off the plastic stand.
-
Page 51: Self-Diagnosis Display
– if the cords are connected properly. refer to the following list. If any problem – if the cord plugs are firmly inserted all the way. persists, consult your nearest Sony dealer. • Turn on the connected component. • Refer to the operating instructions included with the connected component and start playing. - Page 52 There is an error in the internal data that the system Impossible needs in order to operate. • You tried to make an impossible editing cConsult your nearest Sony dealer. operation. • You cannot combine or erase the tracks due to the system limitations of MDs.
- Page 53 Incomplete! S.F Edit NOW You pressed `/1 during S.F Edit (adjusting the Adjustment of the recording level after recording or Fade-in and Fade-out procedures have failed recording level after recording, Fade-in and Fade- since the unit was either subject to vibration or out).
-
Page 54: Specifications
Self-diagnosis display (continued) Specifications Main unit (HCD-C5) Check and CD Position appear alternately The disc could not be read properly. Amplifier section Complete! European model: DIN power output (rated): 15 + 15 W CD editing (Disc Memo) finished normally. (6 ohms at 1 kHz, DIN) Eject Continuous RMS power output (reference): 20 + 20 W... - Page 55 Remote commander (1) AM loop antenna (1) Tuner section FM wire antenna (1) FM stereo, FM/AM superheterodyne tuner Optional accessories PCLK-MN10A Sony PC connection kit FM tuner section The optional accessories Tuning range 87.5 – 108.0 MHz for this system are subject (50-kHz step) to change without notice.
- Page 56 Sony Corporation Printed in China Downloaded from: https://www.usersmanualguide.com/...
- Page 57 This file has been downloaded from: www.UsersManualGuide.com User Manual and User Guide for many equipments like mobile phones, photo cameras, monther board, monitors, software, tv, dvd, and othes.. Manual users, user manuals, user guide manual, owners manual, instruction manual, manual owner, manual owner's, manual guide, manual operation, operating manual, user's manual, operating instructions, manual operators, manual operator, manual product, documentation manual, user maintenance, brochure, user reference, pdf manual Downloaded from:...
Need help?
Do you have a question about the CMT-C5 and is the answer not in the manual?
Questions and answers