
Subscribe to Our Youtube Channel
Related Manuals for Polygroup Funsicle Oasis Pool


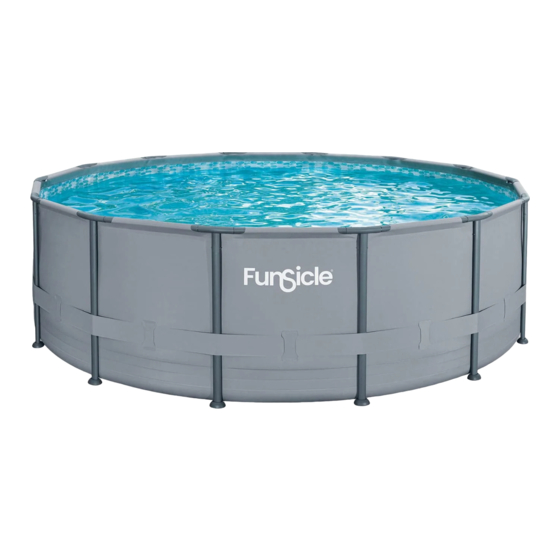
Summary of Contents for Polygroup Funsicle Oasis Pool
- Page 1 Oasis Pool Most spacious & luxurious all-in-one experience User Guide Simple steps to setting up and enjoying your pool Sign up for future 09C3A4USAA09 offers and discounts. Scan the QR Code. ©2022...
-
Page 2: Table Of Contents
Contents Welcome! ..........................3 Warranty Information . -
Page 3: Welcome
Welcome! Congratulations on your new Funsicle Oasis Pool – the most spacious and luxurious all-in-one experience. This guide will walk you through everything from setting up to maintaining and enjoying your pool. As always, we’re here to help. For any issues, questions, or extra support, visit funsicle.com/support, or contact Customer Service at 888-670-4FUN (888-670-4386) or HelloFun@Funsicle.com. -
Page 4: Safety Guidelines
Customers should contact their local building code enforcement office for further details. Polygroup is not responsible for any additional expenses that you may incur. Warnings... - Page 5 • Pool presents a drowning hazard even during filling and draining of the pool. Maintain constant supervision of children and do not remove any safety barriers until the pool is completely empty and stowed away. • Children, especially children younger than five years, are at high risk of drowning. Drowning occurs silently and quickly and can occur in as little as 2 in (5 cm) of water.
- Page 6 • The floor of the pool shall be visible at all times from the outside perimeter of the pool. • Keep your pool clean and clear. The deepest part of the pool must be visible at all times from outside of the pool. •...
- Page 7 CHEMICALS For safety's sake, ensure the deepest part of the pool is always visible. The user must properly maintain pool water clarity at all times. Check the pH and chlorine levels periodically, and make sure they are within the recommended limits. Additional water treatment chemicals might be needed from time to time.
- Page 8 • DO NOT attempt to assemble this pool in adverse weather conditions, windy conditions, or when the temperature is below 60°F. • This is a storable pool, which should be disassembled and stored when temperatures are expected to fall below 32°F. •...
- Page 9 SAFETY EDUCATION PROGRAMS AND MATERIALS Educational programs and materials (i.e. seminars, workshops, brochures, videos, instructional guides) are available from the APSP, other aquatic safety groups, and by private firms. As a means of communicating useful safety information to pool owners/operators and users, industry members are permitted to provide such information to owners/operators and to request or require owners/operators to sign a statement that they have received, read, and will follow the guidelines.
-
Page 10: Pool Safety Sign
INSTALLER RESPONSIBILITIES All of these components shall be positioned so as to prevent their being used as a means of access to the pool by young children. All safety signs shall be affixed above the water line according to manufacturer's instructions. -
Page 11: Pool Cover Safety
Pool Cover Safety If you are going to use a pool cover, solar cover, or solar blanket, please read this information. POOL COVER WARNING / SOLAR COVER WARNING / SOLAR BLANKET WARNING WARNING: AVOID DROWNING RISK • Pool cover (if included) is not a safety cover. •... -
Page 12: Building Your Pool
Building Your Pool Inside Your Product Box The following illustration outlines the contents in your product box. Items 3 – 6 are optional depending on the pool model you purchased. For exact quantity of parts, refer to the Parts List (on Page 23). NOTE: The Parts of Maintenance Kit / Deluxe Maintenance Kit (if included) are placed in Boxes 3 and/or 4. -
Page 13: Step 1: Prepare The Site
STEP 1: Prepare the site Before assembling your pool, check the contents and become familiar with all the parts. Review all the following warnings, guidelines and tips before proceeding with setup: WARNINGS • Do not overfill the pool and / or allow people to lay over or sit on pool wall - doing so can cause permanent injury! •... -
Page 14: Step 2: Assemble The Pool Frame And Connect It To Liner
STEP 2: Assemble the pool frame and connect it to liner 1. Lay all parts (located in Boxes 1, 2a & 2b) on the ground around the pool liner as shown below: NOTE: Ensure the pool is between 10 to 21 feet away from any electrical outlets. Pool Liner Vertical Leg Leg Cap... - Page 15 3. Carefully slide the horizontal beam set into the sleeves of the pool liner. NOTE: Make sure the vertical part of the T-Fitting faces down and away from the liner to avoid puncturing the liner. 4. Repeat Step 2 to connect the rest of the horizontal beams and the T-Fittings. 5.
- Page 16 7. Slide this set into the sleeve to complete the top frame. 8. Insert the Vertical Legs into the Leg Caps. Vertical Leg Leg Cap 9. Carefully slide the Vertical Legs up through the liner’s belt that runs around the middle of the pool, and then lock each one into the hold of the T-Fitting (see following figure on the left).
- Page 17 10. Look through the hole at the bottom of the T-Fitting, as you insert the Vertical Leg with Leg Cap, rotate it until the buttons align with the holes and pop out, locking the Vertical Leg in place (see following figure). Do this for all Vertical Legs. NOTE: Each Vertical leg has a V-Shaped Spring Pin pre-installed.
-
Page 18: Step 3: Add 1 Inch Of Water To Pool
STEP 3: Add 1 inch of water to pool 1. After ensuring that the drain fitting is plugged securely and the cap is in place, fill the pool with about an inch of water. Then stop filling, and smooth out all wrinkles in the liner. 1 inch 2. -
Page 19: Filling Your Pool
Do not add chemicals while the pool is occupied. This can cause skin or eye irritation. Concentrated chlorine solutions can damage the pool liner. In no event is Polygroup, our buyer/retailers, or any other party liable for costs associated with the loss of pool water, chemicals, or water damage. Keep spare filter cartridges on hand. -
Page 20: Draining & Dismantling Your Pool
Draining & Dismantling Your Pool 1. Check local regulations for specific directions regarding disposal of swimming pool water. 2. Remove the protective foam ring on the drainage cap. 3. Follow the steps below for water drainage: a) Turn the drain cap b) Return the drain c) Flip the drain cap counterclockwise... -
Page 21: Maintaining Your Pool
Maintaining Your Pool Storage 1. Remove all connecting parts. 2. Be sure that the pool and all parts are completely dry before storage. Air dry the liner in the sun until it is completely dry before folding (see drawing 1). Sprinkle some talcum powder to prevent the vinyl from sticking together and to absorb any residual moisture. -
Page 22: Winterizing
Winterizing This above-ground pool cannot be winterized and must be drained, disassembled, and properly stored if you live in an area where the temperature drops below 32°F (0°C). If you are in a warmer environment, follow the instructions below. After usage, you can easily empty and store away your pool in a safe place (see long term storage above). Some pool owners, in warmer climates however, may choose to leave their pool up all year round. -
Page 23: Parts List
Parts List Easy Link Horizontal Vertical Leg T-Fitting Leg Cap Pool Liner T-Fitting Beam Pool Size Qty. Qty. Qty. Qty. Qty. Qty. 14' x 42" (427 x 107 cm) 14' x 48" (427 x 122 cm) 15' x 42" (457 x 107 cm) 15' x 48"... - Page 24 WARRANTY For warranty information, visit funsicle.com/warranty. NEED PARTS? To order parts and accessories, visit funsicle.com. REGISTER YOUR PRODUCT Scan the QR code Distributed by: Polygroup Pacific Limited Unit 606, 6th Floor, Fairmont House, 8 Cotton Tree Drive, Central, Hong Kong.
Need help?
Do you have a question about the Funsicle Oasis Pool and is the answer not in the manual?
Questions and answers
WHAT SIZE ADAPTER DO I NEED TO ADD A FOUNTAIN TO THE OUTLET FUNSICLE 15 FT OASIS
How do you let the water out
How far under do the side brackets on 13x7 Funsicle Oasis pool go??