Table of Contents
Advertisement
Available languages
Available languages
Quick Links
Installations- und Bedienungsanleitung
Installation and operating manual
Notice d'installation et d'emploi
Manual de instalación y uso
Istruzioni per l'installazione e l'uso
Installatie- en bedieningshandleiding
DE
Wired Glasdisplay
EN
Wired Glass Display
FR
Écran en verre câblé « Wired Glasdisplay »
ES
Wired Pantalla de cristal
IT
Wired Display in vetro
NL
Wired Glasdisplay
HmIP-WGD
S. 2
p. 23
p. 37
p. 52
pag. 67
pag. 83
Advertisement
Chapters
Table of Contents

Related Manuals for HomeMatic HmIP-WGD


Summary of Contents for HomeMatic HmIP-WGD
- Page 1 Istruzioni per l‘installazione e l‘uso Installatie- en bedieningshandleiding Wired Glasdisplay S. 2 Wired Glass Display p. 23 p. 37 Écran en verre câblé « Wired Glasdisplay » Wired Pantalla de cristal p. 52 Wired Display in vetro pag. 67 Wired Glasdisplay pag. 83 HmIP-WGD...
- Page 2 Lieferumfang Anzahl Bezeichnung Homematic IP Wired Glasdisplay Montageplatte Schrauben 3,2 x 15 mm Schrauben 3,2 x 25 mm Bedienungsanleitungen Beiblatt mit Sicherheitshinweisen Dokumentation © 2022 eQ-3 AG, Deutschland Alle Rechte vorbehalten. Ohne schriftliche Zustimmung des Herausgebers darf diese Anleitung auch nicht auszugsweise in irgendeiner Form reproduziert werden oder unter Verwendung elektronischer, mechanischer oder chemischer Verfahren vervielfältigt oder...
- Page 6 click...
- Page 7 Homematic IP...
-
Page 9: Table Of Contents
Installation ....................15 Anlernen ....................16 5.3.1 Anlernen an die Zentrale CCU3 ..........17 5.3.2 Anlernen an die Homematic IP Cloud per Wired Access Point ................18 Updates über SD-Karte einspielen ..........19 Bedienung ....................20 Fehlercodes und Blinkfolgen ..............20 Wiederherstellung der Werkseinstellungen ........21 Wartung und Reinigung ................21... -
Page 10: Hinweise Zur Anleitung
Hinweise zur Anleitung Hinweise zur Anleitung Lesen Sie diese Anleitung sorgfältig, bevor Sie Ihre Homematic IP Geräte in Betrieb nehmen. Bewahren Sie die Anleitung zum späteren Nachschla- gen auf! Wenn Sie das Gerät anderen Personen zur Nutzung überlassen, überge- ben Sie auch diese Anleitung. - Page 11 Normen und Richtlinien des Landes zu beachten. Das Gerät ist ausschließlich für den Betrieb am Home- matic IP Wired Bus vorgesehen. Der Homematic IP Wired Bus ist ein SELV-Stromkreis. Eine gemeinsame Führung der Netzspannung und des Homematic IP Wired Bus in Installations- oder Verteilerdosen ist nicht zulässig.
-
Page 12: Funktion Und Geräteübersicht
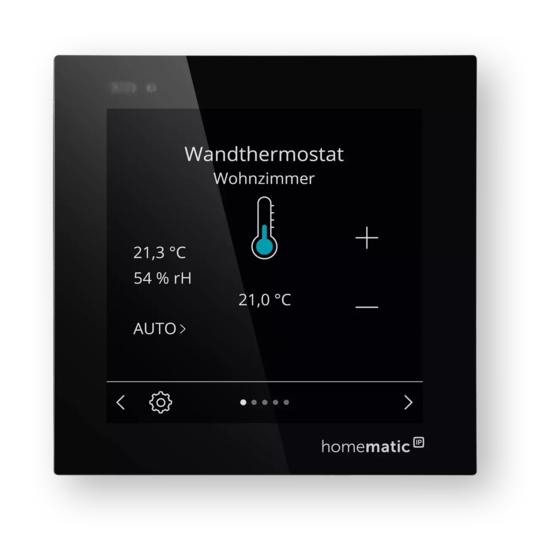
Das Gerät ist nur für den Einsatz in Wohnbereichen, Geschäfts- und Gewerbebereichen sowie in Kleinbetrieben bestimmt. Funktion und Geräteübersicht Das Homematic IP Wired Glasdisplay ermöglicht eine intuitive Bedienung und einen aktuellen Überblick über vielseitige Funktionen im Homema- tic IP Smart-Home-System. Per Touch-Gestik können z. B. Leuchten ein- bzw. -
Page 13: Allgemeine Systeminformationen
Allgemeine Systeminformationen Dieses Gerät ist Teil des Homematic IP Smart-Home-Systems und kommu- niziert über das Homematic IP Protokoll. Sie haben die Möglichkeit, alle Ge- räte des Systems komfortabel und individuell über die Bedienoberfläche der Zentrale CCU3 oder flexibel per Smartphone über die Homematic IP App in Verbindung mit der Homematic IP Cloud zu konfigurieren. - Page 14 Inbetriebnahme Beachten Sie die auf dem Gerät angegebene Abisolierlänge der anzu- schließenden Leiter. Beachten Sie bei der Installation die Gefahrenhinweise gemäß „2 Ge- fahrenhinweise“ auf Seite 10. Hinweis! Installation nur durch Personen mit einschlägigen elekt- rotechnischen Kenntnissen und Erfahrungen!* Durch eine unsachgemäße Installation gefährden Sie •...
-
Page 15: Installation
Points (HmIPW-DRAP) auf “–“ (= Masse) aufgelegt werden. Am Glas- display darf der Schirm nicht aufgelegt werden. Installation Der Bus wird vom Homematic IP Wired Access Point (HmIPW-DRAP) gespeist. Weitere Informationen dazu können Sie der Bedienungs- anleitung des Wired Access Points entnehmen. -
Page 16: Anlernen
Anlernen an die Homematic IP Cloud Für eine flexible Steuerung per kostenloser Smartphone-App können Sie das Gerät an die Homematic IP Cloud anlernen (s. „5.3.2 Anlernen an die Homematic IP Cloud per Wired Access Point“ auf Seite 18). Dabei ist es möglich, die Wired Geräte •... -
Page 17: Anlernen An Die Zentrale Ccu3
Access Point (HmIP-HAP) zu kombinieren. 5.3.1 Anlernen an die Zentrale CCU3 Um das Homematic IP Wired Gerät softwarebasiert und komfortabel steuern und konfigurieren sowie in Zentralenprogrammen nutzen zu können, müssen Sie es an die WebUI anlernen. Um das Gerät an die Zen- trale CCU3 anzulernen, gehen Sie wie folgt vor: •... -
Page 18: Anlernen An Die Homematic Ip Cloud Per Wired Access Point
Anlernen an die Homematic IP Cloud per Wired Access Point Wenn Sie Ihre Homematic IP Wired Geräte flexibel per Smartphone-App steuern möchten, können Sie die Homematic IP Wired Geräte einfach an die Homematic IP Cloud anlernen. Gehen Sie dazu wie folgt vor: •... -
Page 19: Updates Über Sd-Karte Einspielen
IP kombinieren möchten, können Sie die Homematic IP Wired Gerä- te auch einfach an einen (bestehenden) Homematic IP Access Point anlernen. Lernen Sie dazu den Homematic IP Wired Access Point ge- mäß der zugehörigen Bedienungsanleitung an den (bestehenden) Homematic IP Access Point an. Anschließend gehen Sie wie oben beschrieben vor, um das Glasdisplay anzulernen. -
Page 20: Bedienung
Bedienung Bedienung Nach erfolgreicher Inbetriebnahme des Glasdisplays kann es ganz be- quem über die WebUI Benutzeroberfläche oder per Homematic IP App eingerichtet werden. Dank des zuverlässigen Näherungssensors wird das Display automatisch beleuchtet, sobald sich eine Person nähert. Das Display kann ganz intu- itiv per Touch-Gestik bedient werden. -
Page 21: Wiederherstellung Der Werkseinstellungen
Lassen Sie die Systemtaste wieder los, um das Wiederherstellen der Werkseinstellungen abzuschließen. Das Gerät führt einen Neustart durch. Nach dem Neustart können Sie das Gerät wieder in Ihr Homematic IP System integrieren. Wartung und Reinigung Das Gerät ist wartungsfrei. Überlassen Sie eine Reparatur einer Fach- kraft. -
Page 22: Technische Daten
Technische Daten Technische Daten Geräte-Kurzbezeichnung: HmIPW-WGD Versorgungsspannung: 24 V , +/-5 %, SELV Stromaufnahme: 110 mA max. Leistungsaufnahme im Ruhebetrieb: 0,6 W Leitungsart u. -querschnitt: Starre Leitung 0,12-0,50 mm² Installation: nur in Schalterdosen (Gerätedosen) gemäß DIN 49073-1 Schutzart: IP20 Schutzklasse: Umgebungstemperatur: -5 bis +40 °C Abmessungen (B x H x T):... - Page 23 Package contents Quantity Description Homematic IP Wired Glass Display Mounting plate Screws, 3.2 x 15 mm Screws, 3.2 x 25 mm Operating manuals Supplement with safety instructions ocumentation © 2022 eQ-3 AG, Germany All rights reserved. Translation from the original version in German. This manual may...
- Page 24 5.3.1 Connecting to Homematic IP Central Control Unit CCU3 ..................31 5.3.2 Connecting to the Homematic IP cloud via Wired access point ..............33 Import updates via SD card ............. 34 Operation ....................34 Error codes and flashing sequences ........... 34 Restore factory settings ................35...
-
Page 25: Information About This Manual
Information about this manual Information about this manual Please read this manual carefully before operating your Homematic IP components. Keep the manual so you can refer to it at a later date if you need to. If you hand over the device to other persons for use, please hand over this manual as well. - Page 26 The device is intended for operation within the Homematic IP Wired bus only. The Homematic IP Wired bus is a SELV power circuit. Common cable routing of power supply and the Homematic IP Wired bus in installation or junction boxes is not permitted.
-
Page 27: Function And Device Overview
(E) SD card slot General system information This device is part of the Homematic IP smart home system and works with the Homematic IP protocol. All devices in the Homematic IP system can be configured easily and individually with the CCU3 user interface or flexibly... -
Page 28: Start-Up
Start-up functions provided by the system in combination with other components are described in the Homematic IP Wired User Guide, available for down- load. All current technical documents and updates are provided at www. homematic-ip.com. Start-up Installation instructions Since the bus is powered by the Homematic IP Wired Access Point (HmIPW-DRAP), you must first set-up a Homematic IP Wired Access Point (HmIPW-DRAP) to enable power supply for the device. - Page 29 Rigid cable: 0.12-0.50 mm For reasons of electrical safety, only the following cables may be used for connecting to the Homematic IP Wired bus: • Telephone cable J-Y(ST)Y with 2 x 2 x 0.8 (= 0.5 mm²) or 4 x 2 x 0.8 (= 0.5 mm²), shielded, TP •...
-
Page 30: Installation
Start-up Installation The bus is powered by the Homematic IP Wired Access Point (HmI- PW-DRAP). For further information, please refer to the operating manual of the corresponding Wired Access Points. To facilitate connection to the terminals, the green push-in terminal can be removed from the device. -
Page 31: Connecting To Homematic Ip Central Control Unit Ccu3
Connecting to the Homematic IP cloud For flexible use via the free smartphone app, you can connect the device to the Homematic IP cloud (see „5.3.2 Anlernen an die Homematic IP Cloud per Wired Access Point“ auf Seite 33). You can •... - Page 32 Newly connected devices and the corresponding channels are ready for operation and configuration only after they have been configured in the inbox. You will find further information in the Homematic IP Wired Instal- lation Guide at www.homematic-ip.com. For operating without an Internet connection, please select the op- tion “Adding Homematic IP device without Internet connection”.
-
Page 33: Connecting To The Homematic Ip Cloud Via Wired Access Point
5.3.2 Connecting to the Homematic IP cloud via Wired access point If you want to control your Homematic IP Wired devices flexibly via the smartphone app, they can be connected to the Homematic IP cloud. To do this, proceed as follows: •... -
Page 34: Import Updates Via Sd Card
Operation Once your glass display has been connected successfully, it can be easily set up via the WebUI user interface or the Homematic IP app. Thanks to the proximity sensor, the display is automatically illuminated as soon as a person approaches. The display can be operated intuitively by touch. -
Page 35: Restore Factory Settings
Release the system button again to conclude the procedure. The device will perform a restart. After the restart, you can again integrate your device into your Homematic IP system. Maintenance and cleaning The product does not require any maintenance. Enlist the help of an expert to carry out any repairs. -
Page 36: Technical Specifications
Technical specifications Technical specifications Device short description: HmIPW-WGD Supply voltage: 24 V , +/-5 %, SELV Current consumption: 110 mA max. Power consumption in Standby: 0.6 W Cable type and cross section: Rigid cable 0.12-0.50 mm² Installation: only in normal commercial switch boxes (device boxes) in accordance with DIN 49073-1 Protection rating:... - Page 37 Contenu de la livraison Nombre Désignation Écran en verre câblé Homematic IP Wired Glasdisplay Plaque de montage Vis 3,2 x 15 mm Vis 3,2 x 25 mm Modes d’emploi Fiche de consignes de sécurité Documentation © 2022 eQ-3 AG, Allemagne Tous droits réservés.
- Page 38 Apprentissage ..................45 5.3.1 Enregistrement dans la centrale CCU3 ......46 5.3.2 Enregistrement dans Homematic IP Cloud via le point d’accès câblé ................47 Charger les mises à jour via la carte SD ........49 Utilisation ....................49 Codes d’erreur et séquences de clignotement ........ 49 Rétablissement des réglages d’usine ..........
-
Page 39: Remarques Sur La Notice
Remarques sur la notice Remarques sur la notice Lisez attentivement la présente notice avant de mettre les éléments Ho- mematic IP en service. Conservez la notice pour pouvoir vous y référer ultérieurement ! Si vous laissez d’autres personnes utiliser l’appareil, n’oubliez pas de leur remettre également cette notice d’utilisation. - Page 40 L’appareil est prévu exclusive- ment pour une utilisation sur le bus câblé Homematic IP Wired Bus. Le bus câblé Homematic IP Wired Bus est un circuit électrique SELV.
-
Page 41: Fonction Et Aperçu De L'appareil
Fonction et aperçu de l’appareil L’écran en verre câblé Homematic IP Wired Glasdisplay permet la com- mande intuitive et offre une vue d’ensemble actuelle des nombreuses fonctions du système Smart Home Homematic IP. Les luminaires peuvent être allumés ou éteints et leur luminosité... -
Page 42: Informations Générales Sur Le Système
(E) Lecteur de cartes SD Informations générales sur le système Cet appareil fait partie du système Smart Home Homematic IP et com- munique par le biais du protocole Homematic IP. Vous pouvez configu- rer très simplement chaque appareil du système en passant par l’interface utilisateur de la centrale CCU3 ou tout simplement par votre smartphone,... - Page 43 Mise en service Respectez la longueur de dénudage indiquée sur l’appareil pour les conducteurs à raccorder. Lors de l’installation, respectez les mises en garde indiquées à la sec- tion „2 Gefahrenhinweise“ auf Seite 39. Remarque importante ! La pose doit être effectuée uniquement par des personnes possédant les connaissances et l’expérience en électrotechnique suffisantes.* En procédant à...
-
Page 44: Installation
Wired Access Point (HmIPW-DRAP). Le blin- dage ne doit pas être raccordé à l’écran en verre. Installation Le bus est alimenté par le point d’accès câblé Homematic IP Wired Access Point (HmIPW-DRAP). Reportez-vous au mode d’emploi du point d’accès câblé pour en savoir plus. -
Page 45: Apprentissage
Pour une commande flexible au moyen d’une appli gratuite pour smart- phones, vous pouvez enregistrer l’appareil dans Homematic IP Cloud (voir „5.3.2 Anlernen an die Homematic IP Cloud per Wired Access Point“ auf Seite 47). Dans ce cas, les appareils câblés « Wired »... -
Page 46: Enregistrement Dans La Centrale Ccu3
Mise en service • peuvent être commandés au moyen de l’appli pour smartphone via le point d’accès câblé Homematic IP Wired Access Point (HmIPW-DRAP) ou • combinés avec les éléments radio Homematic IP via le point d’accès Homematic IP Access Point (HmIP-HAP). -
Page 47: Enregistrement Dans Homematic Ip Cloud Via Le Point D'accès Câblé
Enregistrement dans Homematic IP Cloud via le point d’accès câblé Si vous souhaitez commander confortablement vos appareils câblés Homematic IP Wired au moyen de l’appli pour smartphone, il vous suf- fit d’enregistrer les appareils Homematic IP Wired dans Homematic IP Cloud. Procédez comme suit : •... - Page 48 Donnez un nom à l’appareil dans l’application et attribuez-le à une pièce. Si vous utilisez déjà des appareils Homematic IP dans le système Smart Home ou souhaitez combiner vos appareils câblés avec des éléments radio de Homematic IP, vous pouvez aussi enregistrer tout simplement vos appareils câblés Homematic ...
-
Page 49: Charger Les Mises À Jour Via La Carte Sd
Utilisation Charger les mises à jour via la carte SD Vous trouverez dans le manuel d’utilisateur des informations détail- lées au sujet des mises à jour du progiciel au moyen de la carte SD dans le lecteur de cartes SD (E). Utilisation Après la mise en service réussie de l’écran en verre, il peut être configuré... -
Page 50: Rétablissement Des Réglages D'usine
Relâchez la touche système pour terminer le rétablissement des réglages d’usine. L’appareil effectue un redémarrage. Après le redémarrage, vous pouvez intégrer à nouveau l’appareil dans votre système Homematic IP. Entretien et nettoyage L’appareil ne requiert aucun entretien. Confiez les réparations à un spécialiste. -
Page 51: Caractéristiques Techniques
Caractéristiques techniques Caractéristiques techniques Désignation abrégée de l’appareil : HmIPW-WGD Tension d’alimentation : 24 V , +/-5 %, SELV Courant absorbé : 110 mA max. Puissance absorbée en Mode repos : 0,6 W Type et section de câble : Câble rigide 0,12-0,50 mm² Installation : uniquement dans des boîtiers de commutateurs (boîtiers d’encastrement) selon la norme DIN 49073-1 Type de protection :... - Page 52 Volumen de suministro Canti- Componente Homematic IP Wired Pantalla de cristal Placa de montaje Tornillos 3,2 x 15 mm Tornillos 3,2 x 25 mm Manuales de instrucciones Hoja adjunta a las indicaciones de seguridad Documentación © 2022 eQ-3 AG, Alemania Todos los derechos reservados.
- Page 53 Instalación ................... 59 Conexión ..................... 59 5.3.1 Conexión a la central CCU3 ..........60 5.3.2 Conexión a Homematic IP Cloud a través de Wired Access Point ..............62 5.3.3 Cargar actualizaciones desde tarjeta SD ......63 Manejo....................... 63 Códigos de errores y secuencias intermitentes ....... 64 Restablecimiento de la configuración de fábrica ......
-
Page 54: Advertencias Sobre Estas Instrucciones
Advertencias sobre estas instrucciones Advertencias sobre estas instrucciones Lea atentamente estas instrucciones antes de poner en servicio sus dis- positivos Homematic IP. ¡Conserve estas instrucciones para consultas posteriores! Si cede este dispositivo para que lo utilicen otras personas, entregue también estas instrucciones junto con el dispositivo. - Page 55 Homematic IP Wired Bus. El Homematic IP Wired Bus es un circuito SELV. No se permite la conducción conjunta de la tensión de red y del Homematic IP Wired Bus en las cajas de instalación o de distribución. Es indispensable disponer siempre del aislamiento re- querido entre una tensión de red de la instalación doméstica y Ho-...
-
Page 56: Funciones Y Esquema Del Dispositivo
Funciones y esquema del dispositivo Homematic IP Wired Pantalla de cristal permite un manejo intuitivo y un control en todo momento de las diferentes funciones del sistema de ho- gar inteligente de Homematic IP. Con gestos táctiles se pueden encender o apagar luces, o subir o bajar su intensidad. -
Page 57: Puesta En Servicio
Puesta en servicio IP Cloud. En el manual del sistema de Homematic IP Wired encontrará las funciones compatibles con otros componentes del sistema. Todos los documentos técnicos y actualizaciones están a su disposición en www. homematic-ip.com. Puesta en servicio Instrucciones de instalación Como el bus de Homematic IP Wired Access Point (HmIPW-DRAP) requiere alimentación, para ello se debe poner en marcha primero... - Page 58 Las secciones de cable permitidas para conectar al dispositivo son: Conducto rígido: 0,12-0,50 mm Por motivos de seguridad eléctrica, para conectar el Homematic IP Wired Bus solo se pueden utilizar los siguientes cables: • Cable de comunicación J-Y(ST)Y con 2 x 2 x 0,8 (= 0,5 mm²) o 4 x 2 x 0,8 (= 0,5 mm²), apantallado, TP...
-
Page 59: Instalación
Puesta en servicio Instalación El Bus se alimenta a través del Homematic IP Wired Access Point (HmIPW-DRAP). En el manual de instrucciones del Wired Access Point encontrará más información al respecto. Para facilitar la conexión a los bornes, extraiga el borne push-in ver- de del dispositivo. -
Page 60: Conexión A La Central Ccu3
IP Cloud per Wired Access Point“ auf Seite 62). Así podrá controlar los dispositivos Wired • a través de la app para móvil mediante el Homematic IP Wired Access Point (HmIPW-DRAP) o • combinarlos con los componentes de radio de Homematic IP a través de Homematic IP Homematic IP Access Point (HmIP-HAP). - Page 61 Wired en www.homematic-ip.com. Si está en servicio sin acceso activo a internet, seleccione la opción „Conectar dispositivo Homematic IP sin acceso a internet“. Para la conexión, introduzca en los campos correspondientes el SGTIN y la clave del dispositivo. Encontrará el SGTIN y la clave en la pegatina...
-
Page 62: Conexión A Homematic Ip Cloud A Través De Wired Access Point
Conexión a Homematic IP Cloud a través de Wired Access Point Si desea controlar sus dispositivos Homematic IP Wired cómodamente a través de la app de su móvil, puede conectar sus dispositivos Homematic IP Wired a Homematic IP Cloud. Modo de proceder: •... -
Page 63: Cargar Actualizaciones Desde Tarjeta Sd
Manejo Una vez encendida la pantalla de cristal, se puede configurar cómoda- mente a través de la interfaz de usuario WebUI o con la app Homematic Gracias a la sensibilidad del sensor de proximidad, la pantalla se enciende automáticamente en cuanto se acerca alguien. La pantalla se puede ma- nejar intuitivamente con gestos táctiles. -
Page 64: Códigos De Errores Y Secuencias Intermitentes
Códigos de errores y secuencias intermitentes Códigos de errores y secuencias intermitentes Secuencia intermi- Significado Solución tente Luz naranja Transmisión de datos Espere hasta que finali- intermitente corta ce la transmisión. 1 luz Proceso Puede continuar con el manejo. verde larga confirmado 1 luz roja larga Proceso... -
Page 65: Mantenimiento Y Limpieza
Suelte de nuevo el botón del sistema para finalizar el restableci- miento de la configuración de fábrica. El dispositivo ejecuta un reinicio. Tras el reinicio ya puede integrar de nuevo el dispositivo en su sistema Homematic IP. Mantenimiento y limpieza El dispositivo no requiere mantenimiento. En caso de fallo, encar- gue su reparación a un técnico. - Page 66 Datos técnicos Salvo modificaciones técnicas. Indicaciones sobre la eliminación ¡No desechar el dispositivo en la basura doméstica! La eliminación de los equipos electrónicos debe efectuarse siguiendo la directiva de equipos eléctricos y electrónicos usados, en los puntos de reco- gida locales para ese tipo de aparatos. Información relativa a la conformidad El distintivo CE es un símbolo de mercado libre dirigido exclusiva- mente a las autoridades y que no implica ninguna garantía de deter-...
- Page 67 Fornitura Quantità Definizione Homematic IP Wired Display in vetro Piastra di montaggio Viti 3,2 x 15 mm Viti 3,2 x 25 mm Istruzioni per l'uso Foglio allegato con le avvertenze di sicurezza Documentazione © 2022 eQ-3 AG, Germania Tutti i diritti riservati. Senza l’approvazione scritta del produttore è vietata la riproduzione di questo manuale o di sue parti in qualsiasi forma o la sua duplicazione o modifica con l’utilizzo di processi elettronici, meccanici o chimici.
- Page 68 Accoppiamento ................. 75 5.3.1 Accoppiamento con la centralina CCU3 ......76 5.3.2 Accoppiamento con il Cloud Homematic IP tramite il Wired Access Point ..............77 Importa aggiornamenti dalla scheda SD ........79 Uso ......................79 Codici di errore e sequenze di spie lampeggianti ......79 Ripristino delle impostazioni di fabbrica ..........
-
Page 69: Indicazioni Su Queste Istruzioni
Indicazioni su queste istruzioni Indicazioni su queste istruzioni Leggere attentamente queste istruzioni prima di mettere in funzione i dispositivi Homematic IP. Conservare questo manuale per poterlo con- sultare anche in futuro! Se si affida l’utilizzo dell’apparecchio ad altre persone consegnare anche queste istruzioni per l’uso. - Page 70 Questo apparecchio è progettato per funzionare esclusivamente sul canale bus della serie Homematic IP Wired. Il siste- ma Homematic IP Wired Bus è un circuito elettrico SELV. I cavi della tensione di rete e del canale bus Homematic IP Wired non devono passare assieme all’interno di scatole di derivazione o di installazione.
-
Page 71: Funzioni E Vista D'insieme Dell'apparecchio
Funzioni e vista d’insieme dell’apparecchio Il dispositivo Homematic IP Wired Display – plus in vetro consente di comandare in maniera intuitiva e di consultare in una panoramica aggior- nata diverse funzioni all’interno del sistema Smart-Home di Homematic IP. -
Page 72: Messa In Funzione
Cloud. Per conoscere la gamma di funzioni che si può utilizzare all’interno del sistema collegato ad altri componenti, consultare il Manuale del siste- ma Homematic IP Wired. Tutta la documentazione tecnica e gli aggiorna- menti sono sempre disponibili su www.homematic-ip.com. - Page 73 Messa in funzione Un’installazione eseguita in modo non appropriato mette a rischio • la propria vita; • la vita delle persone che utilizzano l’impianto elettrico. Con un’installazione eseguita in modo non appropriato si rischiano gravi danni materiali, ad es. dovuti a un incendio. In caso di danni a persone o cose si rischia l’attribuzione di responsabilità...
-
Page 74: Installazione
Disattivare la rispettiva linea del sistema Homematic IP Wired Bus in ingresso (v. figura 3). • Collegare il sistema Homematic IP Wired Bus ai morsetti di col- legamento Bus (v. figura 4). Per collegare e staccare i singoli fili azionare il pulsante di attivazione arancione utilizzando un pic- colo giravite. -
Page 75: Accoppiamento
Per un sistema di controllo versatile che utilizza l’app gratuita per smar- tphone, il dispositivo può essere accoppiato al Cloud di Homematic IP (v. „5.3.2 Anlernen an die Homematic IP Cloud per Wired Access Point“ auf Seite 77). In tal caso, gli apparecchi della serie Wired possono •... -
Page 76: Accoppiamento Con La Centralina Ccu3
Messa in funzione 5.3.1 Accoppiamento con la centralina CCU3 Per comandare e configurare comodamente il dispositivo Homematic IP Wired mediante software e per utilizzarlo all’interno dei programmi della centralina è necessario eseguire l’accoppiamento con l’interfaccia WebUI. Per accoppiare il dispositivo alla centralina CCU3 procedere nel modo seguente: •... -
Page 77: Accoppiamento Con Il Cloud Homematic Ip Tramite Il Wired Access Point
Volendo comandare i dispositivi Homematic IP Wired in modo flessibile tramite l’app per smartphone, è sufficiente accoppiare gli apparecchi del- la serie Wired al Cloud Homematic IP. In tal caso procedere come segue: • Aprire l’app Homematic IP sullo smartphone. - Page 78 Nell’app assegnare un nome all’apparecchio e associarlo a un ambiente. Se nel sistema di domotica si utilizzano già dispositivi Homematic IP o se si desidera abbinare gli apparecchi della serie Wired con com- ponenti a radiofrequenza di Homematic IP, è possibile anche accop- piare semplicemente i dispositivi Homematic IP Wired a un punto di accesso (già...
-
Page 79: Importa Aggiornamenti Dalla Scheda Sd
Importa aggiornamenti dalla scheda SD Informazioni dettagliate sugli aggiornamenti del firmware eseguiti utilizzando la scheda SD nell’apposito slot (E) sono fornite nel Ma- nuale dell’utente. Completata la messa in funzione del display in vetro, per configurarlo si può comodamente utilizzare l’interfaccia utente WebUI o l’app Home- matic IP. -
Page 80: Ripristino Delle Impostazioni Di Fabbrica
Rilasciare di nuovo il tasto di sistema per concludere il ripristino delle impostazioni di fabbrica. L’apparecchio esegue un riavvio. Dopo il riavvio l’apparecchio può essere di nuovo integrato nel sistema Homematic IP. Manutenzione e pulizia Questo apparecchio non richiede manutenzione. Per le riparazioni rivolgersi a un tecnico specializzato. -
Page 81: Dati Tecnici
Dati tecnici Dati tecnici Sigla dell’apparecchio: HmIPW-WGD Tensione di alimentazione: 24 V , +/-5 %, SELV Corrente assorbita: 110 mA max. Potenza assorbita nel funzionamento a riposo: 0,6 W Tipo di cavo e sezione cavo: Cavo rigido 0,12-0,50 mm² Installazione: solo in scatole per interruttori (scatole di supporto apparecchio) secondo DIN 49073-1... - Page 82 Leveringsomvang Aantal Naam Homematic IP Wired glasdisplay Montageplaat Schroeven 3,2 x 15 mm Schroeven 3,2 x 25 mm Handleidingen Bijgesloten blad met veiligheidsinstructies Documentatie © 2022 eQ-3 AG, Duitsland Alle rechten voorbehouden. Zonder schriftelijke toestemming van de uitgever mogen deze handleiding of fragmenten ervan op geen enkele manier worden gereproduceerd of met behulp van elektronische, mechanische of chemische middelen worden verveel- voudigd of verwerkt.
- Page 83 Installatie ....................89 Inleren ....................90 5.3.1 Inleren in de centrale CCU3 ..........90 5.3.2 Onderwijs aan de Homematic IP cloud via Wired Access Point ..............92 Update installeren via SD-kaart ............93 Bediening ....................93 Foutcodes en knipperreeksen .............. 94 Herstellen van de fabrieksinstellingen ..........94 Onderhoud en reiniging ................
-
Page 84: Instructies Bij Deze Handleiding
Instructies bij deze handleiding Instructies bij deze handleiding Lees deze handleiding zorgvuldig door voordat u uw Homematic IP ap- paraten in gebruik neemt. Bewaar de handleiding, om ze ook later nog te kunnen raadplegen! Als u het apparaat door andere personen laat gebruiken, geef dan ook deze handleiding mee. - Page 85 Homematic IP Wired Bus. De Homematic IP Wired Bus is een SELV-stroomkring. Het is niet toege- staan om de netspanning en de Homematic IP Wired Bus samen te leiden in installatie- of aftakdozen. De noodzakelijke isolatie van een netspanning van de gebouwinstallatie naar de Homematic IP Wired Bus moet altijd in acht worden genomen.
-
Page 86: Werking En Overzicht Van Het Apparaat
Werking en overzicht van het apparaat Het Homematic IP Wired glasdisplay maakt een intuïtieve bediening en een actueel overzicht van veelzijdige functies in het Homematic IP Smart Home systeem mogelijk. Zo kunnen bijv. lampen in- of uitgeschakeld en lichter gezet of gedimd worden. Rolluiken en jaloezieën kunnen flexibel omhoog of omlaag worden gebracht of in een bepaalde stand worden gezet. -
Page 87: Algemene Systeeminformatie
Algemene systeeminformatie Algemene systeeminformatie Dit apparaat is een onderdeel van het Homematic IP Smart Home sys- teem en communiceert via het Homematic IP protocol. U hebt de moge- lijkheid alle apparaten van het systeem comfortabel en individueel via de bedieningsinterface van de centrale CCU3 of flexibel per smartphone via de Homematic IP app in combinatie met de Homematic IP cloud te con-... - Page 88 Toegestane kabeldoorsneden voor de aansluiting op het apparaat zijn: starre kabel: 0,12-0,50 mm Vanwege de elektrische veiligheid mogen voor het aansluiten van de Homematic IP Wired Bus uitsluitend de volgende kabels worden ge- bruikt: • signaalkabel J-Y(ST)Y met 2 x 2 x 0,8...
-
Page 89: Installatie
Het glasdisplay mag niet met het scherm worden ver- bonden. Installatie De bus wordt gevoed door het Homematic IP Wired Access Point (HmIPW-DRAP). Meer informatie hierover vindt u in de handleiding van het Wired Access Point. Om de aansluiting op de klemmen te vergemakkelijken, kan de groene push-in-klem uit het apparaat worden gehaald. -
Page 90: Inleren
Inleren in de Homematic IP cloud Voor een flexibele bediening via de gratis smartphone-app kunt u het apparaat inleren in de Homematic IP cloud (zie „5.3.2 Anlernen an die Homematic IP Cloud per Wired Access Point“ auf Seite 92). Hierbij is het mogelijk om de Wired-apparaten •... - Page 91 Na korte tijd verschijnt het nieuw ingeleerde apparaat in de inbox van uw interface. Nieuw ingeleerde apparaten en de bijbehorende kanalen zijn pas be- schikbaar voor bedienings- en configuratietaken nadat ze in de inbox zijn geconfigureerd. Meer informatie vindt u in het Homematic IP Wired sys- teemhandboek op www.homematic-ip.com.
-
Page 92: Onderwijs Aan De Homematic Ip Cloud Via Wired Access Point
Als u uw Homematic IP Wired-apparaten flexibel wilt aansturen via een smartphone-app, kunt u de Homematic IP Wired-apparaten eenvoudig- weg inleren in de Homematic IP cloud. Ga hiervoor als volgt te werk: • Open de Homematic IP app op uw smartphone. -
Page 93: Update Installeren Via Sd-Kaart
Bediening Als u al Homematic IP apparaten gebruikt in uw smart home-sys- teem of als u uw Wired-apparaten wilt combineren met draadloze componenten van Homematic IP, kunt u de Homematic IP Wired-ap- paraten ook gewoon inleren op een (bestaand) Homematic IP Acces Point. -
Page 94: Foutcodes En Knipperreeksen
Foutcodes en knipperreeksen Foutcodes en knipperreeksen Knippercode Betekenis Oplossing Kort Dataoverdracht Wacht tot de overdracht oranje knipperen beëindigd is. 1x lang groen Proces U kunt met de bediening doorgaan. oplichten bevestigd 1x lang rood oplich- Proces Probeer het opnieuw. mislukt Kort oranje knippe- Inleermodus actief Voer de laatste vier cijfers... -
Page 95: Onderhoud En Reiniging
Onderhoud en reiniging Het apparaat voert een herstart uit. Na de hernieuwde start kunt u het apparaat weer in uw Homematic IP systeem integreren. Onderhoud en reiniging Het apparaat is onderhoudsvrij. Laat reparaties over aan een vak- man. Reinig het apparaat met een zachte, schone, droge en pluisvrije doek. - Page 96 Technische gegevens Verwijdering Het apparaat hoort niet in de vuilnisbak! Elektronische apparaten moeten overeenkomstig de richtlijn voor afgedankte elektrische en elektronische apparaten worden ingeleverd bij de inzamelpunten voor afgedankte apparaten. Informatie met betrekking tot de conformiteit De CE-markering is een label voor het vrije verkeer van goederen binnen de Europese Unie en is uitsluitend bedoeld voor de desbe- treffende autoriteiten.
- Page 97 Technische gegevens...
- Page 98 Kostenloser Download der Homematic IP App! Free download of the Homematic IP app! Bevollmächtigter des Herstellers: Manufacturer’s authorised representative: eQ-3 AG Maiburger Straße 29 26789 Leer / GERMANY www.eQ-3.de...
Need help?
Do you have a question about the HmIP-WGD and is the answer not in the manual?
Questions and answers