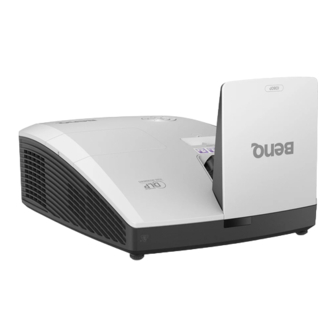
BenQ MH856UST Installation Manual
Rs232 command control
Hide thumbs
Also See for MH856UST:
- User manual (77 pages) ,
- Quick start manual (31 pages) ,
- User manual (77 pages)
Table of Contents
Advertisement
Quick Links
Advertisement
Table of Contents

Summary of Contents for BenQ MH856UST
- Page 1 MH856UST/ MW855UST/ MX854UST Projector RS232 Command Control Installation Guide...
-
Page 2: Table Of Contents
Table of Contents Introduction ............................. 3 Wire arrangement ................................ 3 RS232 pin assignment ..............................3 Connections and communication settings ..................4 RS232 serial port with a crossover cable ....................... 4 Settings .................................. 4 RS232 via LAN ................................6 Settings .................................. 6 RS232 via HDBaseT .............................. -
Page 3: Introduction
Introduction The document describes how to control your BenQ projector via RS232 from a computer. Follow the procedures to complete the connection and settings first, and refer to the command table for RS232 commands. Available functions and commands vary by model. Check the specifications and user manual of the purchased projector for product functions. -
Page 4: Connections And Communication Settings
Connections and communication settings Choose one of the connections and set up properly before RS232 control. RS232 serial port with a crossover cable D-Sub 9 pin (male) on a projector PC or laptop D-Sub 9 pin (female) Communication cable (crossover) Settings On-screen images in this document are for reference only. - Page 5 Choose Serial and the corresponding COM port as the communication port. In this given example, COM6 is selected. Finish Serial port setup. Baud rate 9600 / 14400 / 19200 / 38400 / 57600 / 115200 bps Check the baud rate of the connected projector from its OSD menu. Data length 8 bit Parity check...
-
Page 6: Rs232 Via Lan
RS232 via LAN RJ45 port on a projector PC or laptop LAN cable Settings Find the Wired LAN IP address of the connected projector from the OSD menu and make sure the projector and the computer are within the same network. Input 8000 in the TCP port # field. - Page 7 Finish Serial port setup. Baud rate 9600 / 14400 / 19200 / 38400 / 57600 / 115200 bps Check the baud rate of the connected projector from its OSD menu. Data length 8 bit Parity check None Stop bit 1 bit Flow control None...
-
Page 8: Command Table
Command table • Available features differ by projector specification, input sources, settings, etc.. • Commands are working if the standby power is 0.5W or a supported baud rate of the projector is set. • Uppercase, lowercase, and a mixture of both types of characters are accepted for a command. •... - Page 9 Write Audio-Computer2 <CR>*audiosour=RGB2#<CR> Write Audio-Video/S-Video <CR>*audiosour=vid#<CR> Write Audio-Component <CR>*audiosour=ypbr#<CR> Write Audio-HDMI <CR>*audiosour=hdmi#<CR> Write Audio-HDMI2 <CR>*audiosour=hdmi2#<CR> Read Audio pass Status <CR>*audiosour=?#<CR> Write Dynamic <CR>*appmod=dynamic#<CR> Write Presentation <CR>*appmod=preset#<CR> Write sRGB <CR>*appmod=srgb#<CR> Write Bright <CR>*appmod=bright#<CR> Write Living Room <CR>*appmod=livingroom#<CR> No Write Game <CR>*appmod=game#<CR> Write Cinema <CR>*appmod=cine#<CR>...
- Page 10 Temperature-Normal Write Color <CR>*ct=cool#<CR> Temperature-Cool Color <CR>*ct=cooler#<CR> Write Temperature-Cooler Color <CR>*ct=native#<CR> Write Temperature-lamp native Read Color Temperature <CR>*ct=?#<CR> Status Write Aspect 4:3 <CR>*asp=4:3#<CR> Write Aspect 16:9 <CR>*asp=16:9#<CR> Write Aspect 16:10 <CR>*asp=16:10#<CR> Write Aspect Auto <CR>*asp=AUTO#<CR> Write Aspect Real <CR>*asp=REAL#<CR> Write Aspect Letterbox <CR>*asp=LBOX#<CR>...
- Page 11 Read Quick auto search <CR>*QAS=?#<CR> status Read Projector Position <CR>*pp=?#<CR> Status Write Direct Power On-on <CR>*directpower=on#<CR> Write Direct Power On-off <CR>*directpower=off#<CR> Read Direct Power <CR>*directpower=?#<CR> On-Status Write Signal Power On-on <CR>*autopower=on#<CR> Write Signal Power On-off <CR>*autopower=off#<CR> Read Signal Power On-Status <CR>*autopower=?#<CR> Write Standby <CR>*standbynet=on#<CR>...
- Page 12 Write 19200 <CR>*baud=19200#<CR> Write 38400 <CR>*baud=38400#<CR> Write 57600 <CR>*baud=57600#<CR> Write 115200 <CR>*baud=115200#<CR> Read Current Baud Rate <CR>*baud=?#<CR> Read Lamp Hour <CR>*ltim=?#<CR> Read Lamp2 Hour <CR>*ltim2=?#<CR> Write Normal mode <CR>*lampm=lnor#<CR> Write Eco mode <CR>*lampm=eco#<CR> Write SmartEco mode <CR>*lampm=seco#<CR> Write SmartEco mode 2 <CR>*lampm= seco2#<CR>...
- Page 13 Write 3D Sync Frame <CR>*3d=fs#<CR> Sequential Write 3D Frame packing <CR>*3d=fp#<CR> Write 3D Side by side <CR>*3d=sbs#<CR> Write 3D inverter disable <CR>*3d=da#<CR> Write 3D inverter <CR>*3d=iv#<CR> Write 2D to 3D <CR>*3d=2d3d#<CR> Write 3D nVIDIA <CR>*3d=nvidia#<CR> Read 3D Sync Status <CR>*3d=?#<CR> Write Remote <CR>*rr=fr#<CR>...
- Page 14 Write AMX Device <CR>*amxdd=off#<CR> Discovery-off Read AMX Device Discovery <CR>*amxdd=?#<CR> Status Read Mac Address <CR>*macaddr=?#<CR> Write High Altitude mode on <CR>*Highaltitude=on#<CR> Write High Altitude mode off <CR>*Highaltitude=off#<CR> Read High Altitude mode <CR>*Highaltitude=?#<CR> status...
- Page 15 BenQ.com © 2018 BenQ Corporation All rights reserved. Rights of modification reserved. Version: 1.01-C...


Need help?
Do you have a question about the MH856UST and is the answer not in the manual?
Questions and answers