Table of Contents
Advertisement
Quick Links
Advertisement
Table of Contents

Related Manuals for BenQ MH760


Summary of Contents for BenQ MH760
- Page 1 MH760 Digital Projector User Manual V 1.00...
-
Page 2: Table Of Contents
Table of contents Important safety Fine-tuning the image size and clarity..27 Correcting picture distortion....28 instructions ......3 Using the preset and user modes ..30 Overview........6 Fine-tuning the picture quality .... 32 Advanced picture quality controls ..33 Shipping contents........6 Selecting the aspect ratio ..... -
Page 3: Important Safety Instructions
Thank you for your purchase of this quality BenQ projector! It has been designed to provide you with an enjoyable home theater viewing experience. For the best results, please read this manual through carefully as it is your guide through the control menus and operation. - Page 4 Liquids spilled into the projector will void your images for ceiling mount installation. Use only warranty. If the projector does become wet, BenQ's Ceiling Mount Kit for mounting. disconnect it from the power point and call BenQ to have the projector repaired. Important safety instructions...
- Page 5 Moisture condensation 13. Never attempt to replace the lamp assembly until the projector has cooled down and is unplugged Never operate the projector immediately after from the power supply. moving it from a cold location to a hot location. When the projector is exposed to such a change in temperature, moisture may condense on the crucial internal parts.
-
Page 6: Overview
Overview Shipping contents Carefully unpack and verify that you have the items below. Some of the items may not be available depending on your region of purchase. Please check with your place of purchase. Some of the accessories may vary from region to region. The warranty card is only supplied in some specific regions. -
Page 7: Remote Control Batteries
BenQ projector ceiling mount kit and that you ensure it is securely and safely installed. If you use a non-BenQ brand projector ceiling mount kit, there is a safety risk that the projector may fall from the ceiling due to an improper attachment through the use of the wrong gauge or length screws. -
Page 8: Projector Features
Projector features • FHD resolution The projector is HDTV compatible with FHD resolution, providing 1920 x 1080 pixels at its native resolution. • High picture quality The projector provides excellent picture quality due to its high resolution, excellent home theater brightness, super high contrast ratio, vivid color and rich gray-scale reproduction. -
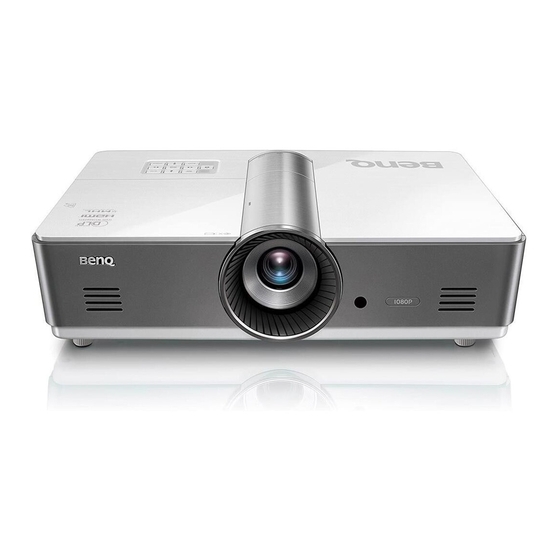
Page 9: Projector Exterior View
Projector exterior view Front and upper side view 1. Control panel (See "Control panel" on page 11 for details.) 2. Lamp cover 3. Speaker Grill 4. Projection lens 5. Front IR sensor 6. LED indicator 7. Lens adjustment panel cover (See "Control panel"... - Page 10 Under view 27. Adjustable feet 28. Ceiling mount holes 29. Filter cover release button (Filter function is available only for models with pre-installed filter) Overview...
-
Page 11: Controls And Functions
Controls and functions Control panel 9. ECO BLANK Used to hide the screen image. 10. MODE/ENTER When On-Screen Display (OSD) is off, sequentially selects a predefined picture setting available for each input. When OSD is on, enacts to selected OSD menu item. -
Page 12: Remote Control
Remote control 8. QUICK INSTALL Displays the quick install page. This key is "TEST" for remote controls in the Japan region. Its function is the same as Quick Install. 9. FREEZE Freezes the projected image. 10. NETWORK SETTING Enters network settings directly. 11. -
Page 13: Positioning Your Projector
Purchase the BenQ Projector Ceiling Mount Kit Note that a special rear projection screen and the from your dealer to mount your projector on the BenQ Projector Ceiling Mount Kit are required for ceiling. this installation location. *Set Front Ceiling after you turn the projector on. -
Page 14: Obtaining A Preferred Projected Image Size
Obtaining a preferred projected image size The distance from the projector lens to the screen, the zoom setting, and the video format each factors in the projected image size. The diagram from page offers recommendations on projection distances and screen sizes. This projector is equipped with a movable lens. -
Page 15: Projection Dimensions
Projection dimensions Installation for a 16:9 ratio screen Ceiling Installation Floor Installation <B> <A> <F> <D> <E> <A> <G> <B> <E> <G> <C> <D> <F> <C> <F>: Screen <G>: Center of lens <F>: Screen <G>: Center of lens The screen aspect ratio is 16:9 and the projected picture is 16:9 Screen dimensions Projection distance <D>... -
Page 16: Shifting The Projection Lens
Shifting the projection lens The lens shift control provides flexibility for installing your projector. It allows the projector to be positioned off the center of the screen. The lens shift is expressed as a percentage of the projected image height or width. It is measured as an offset from the projected image’s vertical or horizontal center. -
Page 17: Connecting To Video Equipment
Connecting to video equipment You can connect the projector to any type of video equipment, such as a DVD or Blu-ray player, digital tuner, cable or satellite decoder, video game console or digital camera. You can also connect it to a desktop PC, a laptop PC, or Apple Macintosh system. -
Page 18: Connecting Mhl Devices
Connecting MHL devices MHL (Mobile High-definition Link) supports uncompressed HD video (1080/30p) and audio (7.1 surround sound) transmission between compatible devices like smartphones, tablets and other mobile devices. It provides pure digital viewing and listening experience. You should use an MHL cable when making connection between the projector and MHL devices. -
Page 19: Connecting Video Devices
Connecting video devices The audio connections are provided for informational purposes only. You can also connect the separate audio cable to a suitable audio amplifier. Audio cable AV equipment Video cable Speakers Audio cable • If you have already made a Component Video connection between the projector and the video source device, you need not connect to this device again using a composite Video connection as this makes an unnecessary second connection of poorer picture quality. -
Page 20: Connecting A Computer
Connecting a computer Connect the projector to a computer with a VGA cable. Audio cable VGA cable Laptop or desktop computer Speakers Audio cable Many laptops do not turn on their external video ports when connected to a projector. Usually a key combination like Fn + F3 or CRT/LCD key turns the external display on/off. -
Page 21: Using The Projector
Using the projector Preparations 1. Plug in and turn all of the connected equipment on. 2. If not already in, plug the supplied power cable into the AC inlet on the rear of the projector. 3. Plug the power cable into a wall power outlet and turn the wall switch on. -
Page 22: Selecting An Input Source
Selecting an input source The projector can be connected to multiple equipment at the same time. When the projector is first turned on, it will attempt to reconnect with the input source which was in use when the projector was last shut down. To select the video source: •... -
Page 23: Using The Menus
Front Remote Receiver Reset Picture Settings Panel Key Lock Blue Background Color Video MENU Exit Splash Screen BenQ Test Pattern 2. Use to highlight the System Setup: Basic menu. MENU Exit Video 4. Press to select a preferred System Setup: Basic language and press MODE/ENTER. -
Page 24: Securing The Projector
Securing the projector Using a security cable lock The projector has to be installed in a safe place to prevent theft. Otherwise, purchase a lock, such as the Kensington lock, to secure the projector. You can locate a Kensington lock slot on the projector. See item 23 on page for details. - Page 25 2. Write down the number and turn off your projector. and contact BenQ Customer Center. 3. Seek help from the local BenQ service center to decode the number. You may be required to provide proof of purchase documentation to Recall code: verify that you are an authorized user of the projector.
- Page 26 Changing the password 1. In the System Setup: Advanced > Security Settings menu, press to highlight Change Password and press MODE/ENTER. The Change Password page is displayed. 2. Enter the old password. • If the password is correct, the message "Input New Password" is displayed. •...
-
Page 27: Adjusting The Projected Image
Adjusting the projected image Adjusting the projection angle There are two adjuster feet on the bottom of the projector. These can be used if necessary to change the projection angle. Screw the feet in or out as appropriate to aim and level the projection angle. -
Page 28: Correcting Picture Distortion
Correcting picture distortion Keystoning occurs when the projector is not perpendicular to the screen and is where the projected picture displays visible as a trapezoid shape like either of the following: • Two parallel sides (left and right, or top and bottom) but is noticeably wider on either side. •... - Page 29 Using Corner Fit function Manually adjust four corners of the image by setting the horizontal and vertical values. Press MENU/EXIT and then press until the DISPLAY menu is highlighted. Press to highlight Corner Fit and press MODE/ENTER. The Corner Corner Fit Fit correction page displays.
-
Page 30: Using The Preset And User Modes
Using the preset and user modes Selecting a preset mode The projector is preset with several pre-defined picture modes so that you can choose one to suit your operating environment and input source picture type. To select a picture mode that suits your need: •... - Page 31 Each time you change the picture mode, the projector also changes the setting to the one which was last set for that particular picture mode on that particular input. If you change the input source, the most recently used picture mode and settings for that input and resolution will be restored. Setting the User 1/User 2 mode There are two user-definable modes if the current available picture modes are not suitable for your need.
-
Page 32: Fine-Tuning The Picture Quality
Fine-tuning the picture quality No matter what picture mode you have selected, you are able to fine-tune those settings to fit every presentation purpose. Those adjustments will be saved to the preset mode you are at when you exit the OSD menu. -
Page 33: Advanced Picture Quality Controls
Advanced picture quality controls There are more advanced functions in the Picture > Advanced... menu to be adjusted to your preference. To save the settings, just press MENU/EXIT to leave the OSD menu. Setting Black Level Highlight Black Level and press on the projector or remote control to select 0 IRE or 7.5 IRE. - Page 34 Gamma refers to the relationship between input source and picture brightness. • Gamma 1.6/1.8/2.0/BenQ Select these values according to your preference. • Gamma 2.2 Increases the average brightness of the picture. Best for a lit environment, meeting room or family room.
- Page 35 The 3D Color Management provides six sets (RGBCMY) of colors to be adjusted to favorite colors. When you select each color, you can independently adjust its color range and saturation according to your preference. To adjust and store the settings: 1.
-
Page 36: Selecting The Aspect Ratio
Selecting the aspect ratio The "aspect ratio" is the ratio of the image width to the image height. The default for this projector is 16:9 while digital TV and Blu-ray discs are usually in 16:9 ratio, and most analog TV signals and DVDs are in 4:3 ratio. - Page 37 About the aspect ratio 1. Auto: S cales a picture proportionally to fit the projector's native resolution in its horizontal or vertical width. This makes the most use of the screen and when projecting maintains the aspect ratio of a picture 15:9 picture images that are neither 4:3 nor 16:9 ratio.
-
Page 38: Setting A Wall Color
Setting a wall color In the situation where you are projecting onto a colored surface such as a painted wall which may not be white, the Wall Color feature can help correct the projected picture’s color to prevent possible color difference between the source and projected pictures. -
Page 39: Adjusting The Sound
Adjusting the sound The sound adjustments made (such as functions shown below) will have an effect on the projector speaker(s). Be sure you have made a correct connection to the projector audio input. See "Connecting to video equipment" on page 17 for how the audio input is connected. -
Page 40: Using The Teaching Templates
Using the teaching templates The projector provides several preset patterns for various teaching purposes. To activate the pattern: 1. Press MENU/EXIT to open the OSD menu and press to highlight the Display menu. 2. Press to highlight Teaching Template and press MODE/ENTER. 3. -
Page 41: Setting The Lamp Mode
Setting the lamp mode This projector provides two lamp modes for different purposes: Lamp mode User benefit Suitable environment • Delivering bright and clear images Normal • Suitable for high-ambient-light environments Large, well lit meeting rooms • Allowing continuous and non-stop operation under or auditoriums (The lamp is used in normal mode) critical situations... -
Page 42: Controlling The Projector Through A Wired Lan Environment
Controlling the projector through a Wired LAN environment Wired LAN allows you to manage the projector from a computer using a web browser when the computer and the projector are properly connected to the same local area network. Configuring the Wired LAN If you are in a DHCP environment: 1. - Page 43 Controlling the projector remotely through a web browser Once you have the correct IP address for the projector and the projector is on or in standby mode, you can use any computer that is on the same local area network to control the projector. 1.
- Page 44 The tools page allows you to manage the projector, configure the LAN control settings and secure access of remote network operation on this projector. i. You can name the projector, keep track of its location and the person in charge of it. ii.
- Page 45 The info page displays the information and status of this projector. Press Exit to go back to the remote network operation page. For more information, visit http://www.crestron.com & www.crestron.com/getroomview. Using the projector...
-
Page 46: Operating In A High Altitude Environment
Operating in a high altitude environment We recommend that you activate High Altitude when your environment is higher than 1500 meters (around 4920 feet) above sea level, or whenever the projector will be used for extended periods of time (>10 hours) without shutdown. To activate High Altitude: 1. -
Page 47: Turning The Projector Off
Turning the projector off To turn the projector off, press POWER ( ) on the projector or on the remote control and a warning message appears. Press POWER/OFF ( ) again. • The Power indicator light flashes orange and the fans run for about two minutes to cool the lamp. -
Page 48: On-Screen Display (Osd) Menus
Red Offset 0–511 Advanced... Green Offset 0–511 Blue Offset 0–511 Primary Color Red/Green/Blue/Cyan/Magenta/Yellow 0–100 3D Color Management Saturation 0–100 Gain 0–100 Gamma Selection 1.6/1.8/2.0/2.2/2.4/2.5/2.6/2.8/BenQ Brilliant Color On/Off Rename User Mode User 1/User 2 Reset Picture Settings Current/All Using the projector... - Page 49 Main menu Sub-menu Options Off/Light Yellow/Pink/Light Green/Blue/ Wall Color Blackboard Aspect Ratio Auto/Real/4:3/16:9/16:10 Overscan Adjustment 0/1/2/3 2D Keystone Top Left/Top Right/Bottom Left/ Corner Fit Bottom Right Auto/Off/Frame Sequential/Frame Display 3D Mode Packing/Top-Bottom/Side-by-Side 3D Sync Invert Disable/Invert 3D Settings 1/3D Settings 2/ Save 3D Settings 3D Settings 3 3D Settings 1/3D Settings 2/...
- Page 50 Operation Settings Disable/5 min/10 min/15 min/20 min/25 Blank Timer min/30 min Disable/30 min/1 hr/2 hr/3 hr/4 hr/8 hr/ Sleep Timer 12 hr Remote Receiver Front/Top/Front+Top/Off Panel Key Lock On/Off Background Color BenQ/Black/Blue/Purple Splash Screen BenQ/Black/Blue Test Pattern On/Off Using the projector...
- Page 51 Main menu Sub-menu Options High Altitude On/Off Lamp Mode Normal/Economic Reset Lamp Timer Reset/Cancel Lamp Usage Time Lamp Settings Normal Mode Lamp Timer Economic Mode Equivalent Lamp Hour Power On Lock On/Off Security Settings Change Password 2400/4800/9600/14400/19200/38400/ Baud Rate 57600/115200 Closed Caption On/Off System...
- Page 52 Picture menu Function Description Pre-defined picture modes are provided so you can optimize your projector Picture Mode picture set-up to suit your program type. See "Selecting a preset mode" on page 30 for details. Selects a preset mode that most suits your need for the picture quality and Reference Mode further fine-tune the picture based on the selections listed below.
- Page 53 (with 3D game discs), 3D Blu-ray players (with 3D Blu-ray discs), 3D TV (with 3D channel), and so on. After you have connected the 3D video devices to the projector, wear the BenQ 3D glasses and make sure the power is on to view 3D contents.
- Page 54 Source menu Function Description Allows the projector to search automatically for input sources. If the source Quick Search scan is On, the projector will scan for input sources until it acquires a signal. If the function is not activated, the projector selects the last used input source. HDMI Format Selects an input source type for the HDMI signal.
- Page 55 Allows you to select which logo screen will be displayed during projector start- Splash Screen up. You can choose BenQ logo screen, Blue screen or Black screen. "Using the test pattern" on page 39 for details.
- Page 56 System Setup: Advanced menu Function Description A mode for operation in areas like high altitude or high temperature. See High Altitude "Operating in a high altitude environment" on page 46 for details. Lamp Mode Selects the projector lamp power among Normal and Economic modes. See "Setting the lamp mode"...
- Page 57 Network Selecting On enables the function. The projector is able to provide the network function when it is in standby mode. Monitor Out Selecting On enables the function. The projector can output a VGA signal when it is in standby mode and the PC jack is correctly connected to devices. "Connecting a monitor"...
-
Page 58: Additional Information
4. Pack the projector in its original packing or equivalent. Transporting the projector It is recommended that you ship the projector with its original packing or equivalent. More information Please visit the below local website to find service contact window: http://www.benq.com/welcome Additional information... -
Page 59: Lamp Information
Lamp information Getting to know the lamp hour When the projector is in operation, the duration (in hours) of lamp usage is automatically calculated by the built-in timer. To obtain the lamp hour information: 1. Press MENU/EXIT and then press until the System Setup: Advanced menu is highlighted. -
Page 60: Timing Of Replacing The Lamp
Replace lamp soon until the next hour lamp warning appears. Lamp hour > XXXX hours Order a new lamp at www.BenQ.com Press MODE/ENTER to dismiss the message. It is strongly recommended that you replace the lamp at this age. Notice The lamp is a consumable item. -
Page 61: Replacing The Lamp
Replacing the lamp • To reduce the risk of electrical shock, always turn the projector off and disconnect the power cable before changing the lamp. • To reduce the risk of severe burns, allow the projector to cool for at least 45 minutes before replacing the lamp. - Page 62 Turn the power off and disconnect the Loosen the screw that hold the lamp to the projector from the power outlet. Turn off all projector. Disconnect the lamp connector connected equipment and disconnect all other from the projector. cables. See "Turning the projector off"...
- Page 63 Insert the replacement lamp. Make sure it is Replace the lamp cover. pushed fully and firmly in place. Ensure the handle is fully locked in place. Tighten the screw securing the lamp box. Tighten the screws on the lamp cover. 10.
-
Page 64: Indicators
Indicators Light Status POWER TEMP LAMP Power events Stand-by mode. Orange Green Powering up. Flashing Normal operation. Green Orange Normal power-down cooling. Flashing Download Flashing Flashing Flashing Scaler shutdown fail (data abort) Flashing Scaler reset fail (video projector only) LAN download fail LAN download OK Green Lamp Life exhausted... -
Page 65: Troubleshooting
Troubleshooting Problem Cause Remedy Plug the power cable into the AC inlet on the rear of the projector, and plug the power There is no power from the power cable into to the power outlet. If the power cable. outlet has a switch, make sure that it is The projector does switched on. -
Page 66: Specifications
Specifications All specifications are subject to change without notice. Optical Projection system Single-chip DLP™ system Native resolution 0.65" DLP (1920 x 1080) Lens F = 2.59 to 2.87, f = 16.88 to 21.88 mm Projection screen size 60" to 180" Lamp 370W Electrical... - Page 67 Dimensions 411.4 mm x 267.5 mm x 118.4 mm (W x D x H) 411.4 267.5 118.4 Unit: mm Ceiling mount installation Ceiling mount screws: M5 65.94 291.20 (Max. L = 25 mm; Min. L = 20 mm) 289.7 75.53 Unit: mm 205.94 411.88...
- Page 68 Timing chart Supported timing for PC input Refresh rate H. Frequency Pixel Frequency Format Resolution (Hz) (KHz) (MHz) VGA_60* 59.94 31.469 25.175 VGA_72 72.809 37.861 31.5 640 x 480 VGA_75 37.5 31.5 VGA_85 85.008 43.269 720 x 400 720 x 400_70 70.087 31.469 28.3221...
- Page 69 640 x 480@67Hz 640 x 480@67Hz 66.667 30.24 (MAC13) 832 x 624@75Hz 832 x 624@75Hz 74.546 49.722 57.28 (MAC16) 1024 x 768@75Hz 1024 x 768@75Hz 74.93 60.241 (MAC19) 1152 x 870@75Hz 1152 x 870@75Hz 75.06 68.68 (MAC21) 1920 x 1080_60 1920 x 1080@60Hz 67.5 148.5...
- Page 70 Supported timing for EDTV and HDTV (via Component inputs) Format Resolution Refresh rate (Hz) H. Freq. (KHz) Pixel Freq. (MHz) 480i 720 x 480* 59.94 15.73 13.5 480p 720 x 480* 59.94 31.47 576i 720 x 576 15.63 13.5 576p 720 x 576 31.25 720/50p...
- Page 71 Supported timing for Video and S-Video input Format Refresh rate (Hz) H. Freq. (KHz) Pixel Freq. (MHz) NTSC* 15.73 3.58 NTSC 4.43 15.73 4.43 PAL-B/D/G/H/I/N 15.63 4.43 PAL M 15.73 3.58 PAL N 15.63 3.58 PAL 60 15.73 4.43 SECAM 15.63 4.25/4.41 Supported timing for 3D signal with Frame Sequential format.
-
Page 72: Warranty And Copyright Information
Further, BenQ Corporation reserves the right to revise this publication and to make changes from time to time in the contents hereof without obligation of BenQ Corporation to notify any person of such revision or changes.
Need help?
Do you have a question about the MH760 and is the answer not in the manual?
Questions and answers