Epson PhotoPC 3000Z User Manual
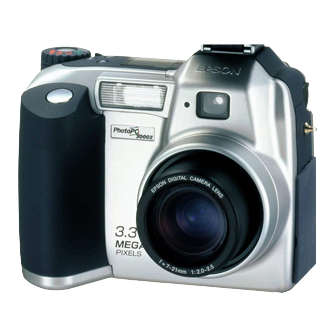
3 megapixel zoom digital camera
Hide thumbs
Also See for PhotoPC 3000Z:
- User manual (140 pages) ,
- Service manual (109 pages) ,
- Quick reference manual (28 pages)
Table of Contents
Advertisement
Quick Links
Advertisement
Table of Contents
Troubleshooting

Related Manuals for Epson PhotoPC 3000Z


Summary of Contents for Epson PhotoPC 3000Z
- Page 1 User’s Guide...
-
Page 2: Top View
camera dial timer light flash shutter button lens front view hot shoe viewfinder diopter dial serial port neck strap holder AC adapter video/audio port out port shutter button image quality button flash button self timer button top view USB port camera dial POWER... -
Page 3: Bottom View
camera status status display photo light panel capture light viewfinder microphone speaker LCD screen MENU button back view camera control buttons tripod socket neck strap holder zoom controls battery cover battery cover lock bottom view... - Page 4 While some countries’ laws permit limited copying in certain circumstances, those circumstances may not be as broad as some people assume. EPSON encourages each user to be responsible and respectful of the copyright laws when using digital cameras and scanners.
-
Page 5: Table Of Contents
Contents Introduction PhotoPC 3000Z Features Software Optional Accessories Using Your Documentation Safety Instructions Section 1: Using Your Camera and Taking Pictures Setting Up Your Camera Unpacking Your PhotoPC 3000Z Using Rechargeable NiMH Batteries Charging Batteries Installing Batteries Battery Options Attaching the Neck Strap Attaching the Lens Cap Using the Camera Case Choosing Your User Mode... - Page 6 Using the Flash Auto Forced Flash Flash Off Red-eye Reduction Slow Synchronized Flash Taking Pictures With the Timer Selecting Color or Black and White Mode Using Programmed Subject Settings Enabling the Confirmation Screen Adding Sound to Pictures Using Quick Playback and Delete Capturing Video Clips and Special Shots Recording Video Clips Continuous Shooting...
- Page 7 Magnifying a Picture Playing Back Video Clips Deleting a Video Clip Viewing Picture Information Playing Your Pictures as a Slide Show Playing Sounds With Your Slide Show Excluding Pictures From a Slide Show Rotating Pictures in a Slide Show Adjusting Camera Settings Setting the Auto Power Off Time Turning the Camera Alert Sounds On or Off Adjusting the LCD Brightness...
- Page 8 Printing Photos 13 Operating the Camera From Your Computer Taking Pictures From Your Computer With Image Expert Using the Self Timer Taking Pictures With EPSON Photo!3 10-14 Adjusting Camera Settings From Your Computer 13-5 10-15 Changing Settings With Image Expert...
-
Page 9: D Regulatory Information And Warranty
Solving Picture Problems Where To Get Help EPSON Accessories Software Support Software Licensing B Optional Accessories Using the Optional AC Adapter Using a Tripod Attaching an Optional Converter Lens or Filter Attaching an Optional Flash Using a PCMCIA Adapter Installing the PCMCIA Adapter... - Page 10 Introduction Introduction our new EPSON PhotoPC 3000Z is an ultra-high resolution, three megapixel, USB and serial digital camera with 3 optical zoom. It includes three different user modes with varied levels of control: a manual mode for expert photographers, a programmed mode for control of your shots and time savings, and a fully automatic point-and-shoot mode for no-fuss photography.
-
Page 11: Introduction
Bright lens (F2.0) for sharper images 24-bit color or monochrome image capture Introduction Resolutions of 2048 1536 pixels, and up to 2544 1904 pixels (interpolated) using EPSON’s HyPict image enhancement technology Produces A3-sized prints (12 17 inches) with HyPict photos... -
Page 12: Software
Also includes QuickTime Player and Adobe Acrobat Reader The EPSON Photo!3 application and TWAIN driver for transferring your pictures EPSON File Converter for converting files (including presentation slides) into a file format that you can... -
Page 13: Optional Accessories
Optional Accessories EPSON offers these accessories for the PhotoPC 3000Z: Universal AC adapter (part number B867081) for use with any standard (100 to 240 V) electrical outlet Additional or replacement NiMH rechargeable batteries (part number B818113) Additional or replacement universal NiMH Power Pak,... -
Page 14: Safety Instructions
Safety Instructions Read all of these instructions before using your camera and battery charger. Also follow all warnings and instructions marked on the camera, battery charger, and batteries. To reduce the risk of electric shock, do not remove the camera’s cover or open any of the compartments except as instructed in this User’s Guide. - Page 15 Do not store the camera near sources of bright light, direct sunlight, high humidity, heat, excessive dirt or dust, or where it will be exposed to strong vibrations or magnetic fields. To prevent possible eye injury, do not take flash pictures of faces at close range.
-
Page 16: Section 1: Using Your Camera And Taking Pictures
Using Your Camera and Taking Pictures This section includes information about using your EPSON PhotoPC 3000Z to take and play back pictures, adjust camera settings, and capture video clips. It also explains how to use the camera to set up DPOF files for printing. The... -
Page 17: Setting Up Your Camera
Setting Up Your Camera efore you can start using your PhotoPC 3000Z, you need to charge the batteries. You must also format your CompactFlash memory card and prepare the camera. This chapter describes the following: Unpacking your PhotoPC 3000Z Using rechargeable NiMH batteries Attaching the neck strap Attaching the lens cap Using the camera case... -
Page 18: Using Rechargeable Nimh Batteries
WARNING Make sure you use the charger only with EPSON rechargeable NiMH batteries (model EU-24). Do not place any other batteries in the charger. Always charge batteries from the same package as a set. - Page 19 When the batteries are charged, after about two and a half hours, the light goes off. NOTE Replace the batteries with new EPSON NiMH batteries if the charger light stays on for more than four hours or the charger light flashes for more than half an hour.
-
Page 20: Installing Batteries
Installing Batteries Before you install (or remove) batteries, make sure the camera is turned off. Hold the camera upside down. Press and hold down the battery cover lock and slide the cover out to open it. battery cover lock Setting Up Your Camera Insert four batteries into the compartment, positioning the + and ends as shown below. -
Page 21: Battery Options
Note the following safety instructions when handling batteries: Use only the EPSON battery charger (Model EU-38) to charge the batteries that came with your camera. Use the batteries that came with your camera only in EPSON digital cameras. Do not use manganese batteries. -
Page 22: Attaching The Neck Strap
Attaching the Neck Strap Your camera includes a neck strap that attaches to the camera to make it easier to carry. WARNING To avoid damaging the camera or other objects, or injuring people, do not swing the camera about. Keep the strap away from children. -
Page 23: Attaching The Lens Cap
After securing the fastener, turn it so that the screw sleeve is covered by the strap, as shown below. Repeat steps 1 through 4 to attach the other end of the strap to the other side of the camera. Setting Up Your Camera Attaching the Lens Cap Follow these steps to secure the lens cap to the camera: Pass the end of the string with the shorter loop through... -
Page 24: Using The Camera Case
Pass the end of the string with the longer loop through the neck strap’s triangular fastener. Gently pull the lens cap through the string’s longer loop until the string is securely attached to the camera. Setting Up Your Camera Push the lens cap onto the camera. It should snap into place. -
Page 25: Choosing Your User Mode
Choosing Your User Mode The PhotoPC 3000Z has three user modes to give you different levels of control over the camera settings. To use more advanced features, such as white balance and exposure adjustment, you must be in Program mode or Manual mode. Program This setting is recommended for photographers who want a moderate amount of control over the camera’s functions. -
Page 26: Setting The Date And Time
Setting the Date and Time Before you use the camera, you need to set its clock. Then the camera will automatically record the date and time for each picture you take. If you remove the batteries for more than one hour (without connecting the camera to an optional AC adapter), you will need to reset the clock. -
Page 27: Formatting Your Compactflash Memory Card
When you’re finished, press the button under BACK . You see the SETUP menu. Now you’re ready to format the memory card. Formatting Your CompactFlash Memory Card You must format CompactFlash memory cards before you use them to store your images. Your camera comes with a 16MB memory card preinstalled in the camera. -
Page 28: Removing A Compactflash Memory Card
Removing a CompactFlash Memory Card CAUTION Never remove a card while the camera is on. Data in the card may be lost or damaged. Follow these steps to remove a CompactFlash memory card from the camera: Make sure the camera is turned off. (Press the POWER button to turn off the camera, if it is on.) Place your finger behind the memory card cover latch and pull the cover open. -
Page 29: Installing A Compactflash Memory Card
Installing a CompactFlash Memory Card You can purchase additional CompactFlash memory cards (Type I, 4MB to 192MB) from leading suppliers like Lexar Media, Delkin Devices, and SanDisk. See page B-2 for more information. Follow these steps to install a memory card: Make sure the camera is turned off. -
Page 30: Adjusting The Viewfinder Focus
Adjusting the Viewfinder Focus You can adjust the viewfinder’s focus using the diopter. This is useful if you wear glasses and want to remove them to take pictures with the viewfinder. To adjust the focus, simply look through the viewfinder and move the diopter dial up or down until you have a clear view. -
Page 31: Taking Pictures
Taking Pictures aking pictures with the PhotoPC 3000Z is similar to using a traditional camera. This chapter gives the following information for taking pictures: Using the camera dial Reading the status display panel Taking pictures with the viewfinder Taking pictures with the LCD screen Setting image quality Using the flash Taking pictures with the timer... -
Page 32: Reading The Status Display Panel
Camera dial settings include the following: Use this setting for video clip capture, continuous shooting, and interval shooting. See Chapter 3 for details. Use this setting to take photos with the LCD screen. See page 2-6 for details. Use this setting to take photos with the optical viewfinder. -
Page 33: Checking The Picture Counter
Although you may be able to use the camera with low batteries, it needs full battery power to operate reliably. NOTE Several factors can affect battery life, including the surrounding temperature and the type of batteries you use. Low temperatures—especially below 50 °F (10 °C)—drain batteries faster. -
Page 34: Taking Pictures With The Viewfinder
While you make an audio recording, rEc appears in this space. While you take photos using the interval shooting feature, Int appears on the display panel. Taking Pictures With the Viewfinder You can capture an image as you would with any point-and-shoot auto-focus camera: look through the optical viewfinder and press the two-step shutter. - Page 35 NOTE To change the programmed subject setting (when the user mode is set to Program), or to make changes to exposure, white balance, or other advanced settings, press the MENU button to see the Viewfinder menu. See the specific setting’s section for more details. Look straight through the viewfinder and center your subject within the cross hairs.
-
Page 36: Taking Pictures With The Lcd Screen
CAUTION If you set the camera down while the light is still flashing, make sure you handle it carefully. The camera may lose your image if you set it down too hard. Saved images remain on the memory card even when you turn off the camera or remove the memory card or batteries. - Page 37 The following screen illustrates what you see if your camera is set to Program user mode, the default setting. The settings look different if you’re using Full Auto or Manual user mode. (See page 1-9 to change your setting.) NOTE If you’re using batteries, the camera shuts off automatically after a designated period of inactivity.
- Page 38 The photo capture light stops flashing and you see a green circle on the screen when the lens locks in focus and the camera locks its exposure settings. While holding the shutter button down, you can reframe your picture if you want. Press the shutter button the rest of the way down to take the picture.
-
Page 39: Setting Image Quality
Press the button next to to instantly play back your images. (Press the button under BACK to return to the View menu.) When the camera’s green photo capture light stops flashing, you’re ready to take another picture. Setting Image Quality The PhotoPC 3000Z has four image quality (resolution) settings. -
Page 40: Fine Jpeg
Fine JPEG Produces color or black and white images at 2048 1536 pixels with moderate compression. Your pictures include ample detail, and the CompactFlash memory card holds approximately 31 pictures without audio recordings. This setting is best for 8 10-inch prints. Super Fine JPEG Produces color or black and white images at 2048... -
Page 41: Using The Flash
Press the button under Image JPEG to change the setting to Image Tiff . (Press the same button to change the setting back.) You see a message warning you to use a card with at least 9.1MB of free space. Press the button under BACK to return to the SETUP menu. -
Page 42: Auto
TIPS When you’re using the Flash Off setting, hold the camera steady or use a tripod to avoid capturing blurry images. If you are taking pictures outdoors in bright light, the camera may reduce the exposure and darken your subject. To brighten your subject without over-exposing the whole picture, you can use the Forced Flash An icon for each setting appears on the status display panel,... -
Page 43: Taking Pictures With The Timer
Selecting a Slow Synchronized Flash Setting Follow these steps to select the setting you want: Turn the camera dial to . You see the SETUP menu. Press the button next to Shot SETUP . You see the Shot SETUP menu: Press the button next to Leading or Press the button under BACK to return to the SETUP... -
Page 44: Selecting Color Or Black And White Mode
Press the timer button on the top of the camera. The timer icon appears in the status display panel. timer button Press the shutter button all the way down. The timer icon and the red timer light on the front of the camera flash slowly for eight seconds. -
Page 45: Using Programmed Subject Settings
Using Programmed Subject Settings The Program user mode (your camera’s default mode) provides four programmed settings that let you choose the type of shot you’re taking. The camera automatically assigns the optimum exposure, metering method, and sensitivity for your subject. Normal Appropriate for most photographs. -
Page 46: Enabling The Confirmation Screen
To take a picture with the viewfinder, turn the camera dial to . Then press the MENU button. You see the Viewfinder menu. Press the button under the Program setting to cycle through the four subject settings. Take your picture. (See page 2-4 or 2-6 for instructions.) Enabling the Confirmation Screen The confirmation screen needs to be on if you want to add recordings when you are taking photos. -
Page 47: Adding Sound To Pictures
Adding Sound to Pictures Your camera has a built-in microphone that lets you add an audio recording of up to 10 seconds to each photo. You can record audio in any user mode. You can make a recording immediately after shooting a photo, or add it later. (For information about adding a recording when playing back photos later, see page 6-6. -
Page 48: Using Quick Playback And Delete
Hold the camera still until the shutter snaps. Then release the shutter button. After a moment, you see the confirmation screen. Press the button next to Rec Sound . You see the message Sound recording... and a countdown of the recording time. - Page 49 Hold the camera still until the shutter snaps. Then release the shutter button. After a moment, you see the confirmation screen. To delete the image, press the button next to Delete . Your image is deleted and the camera returns to the View menu.
-
Page 50: Capturing Video Clips And Special Shots
Capturing Video Clips and Special Shots our PhotoPC 3000Z lets you take shots of moving and changing subjects, including video clips and time lapse photos. You can also take quick sequences of shots, without having to wait for the camera to process each image. This chapter explains how to use these features in the following sections: Recording video clips... -
Page 51: Continuous Shooting
Follow these steps to record a video clip: Turn the camera dial to and press the POWER button to turn on the camera. You see a screen like the following: To turn the sound on or off, press the button next to the Sound setting. - Page 52 You can’t use the flash for continuous shooting, so make sure you have adequate lighting for your pictures. Also, you can’t select the HyPict or Tiff image quality settings. NOTE If you want to adjust any camera settings, such as white balance, sensitivity, or macro mode, turn the camera dial to View menu and adjust the settings, then turn the camera dial back to...
-
Page 53: Continuous Shooting Using The Timer
Continuous Shooting Using the Timer You can also combine continuous shooting with the timer to delay automatic capture of a series of images. This allows you to photograph yourself in motion. NOTE You can capture 37 standard (2 per second), 7 fine (1 per second), or up to 3 super fine (1 per second) images. -
Page 54: Interval Shooting
Interval Shooting You can use this time lapse feature to capture scenes that change over time, such as a sunset or a busy street corner. Your camera lets you set a time interval from 10 seconds to 24 hours. Interval shooting is available for all user modes. NOTE When you’re adding audio recordings or taking pictures with HyPict image quality, the shortest time interval available is... - Page 55 Press the buttons next to the up and down arrows to change the highlighted setting, then press the button under the left arrow to move to the next setting and repeat the process. Continue until you’ve set the correct interval. NOTE You can also choose the maximum interval (24 hours) or the minimum interval (10 seconds) by pressing the button next...
-
Page 56: Framing, Focusing, And Zooming
Framing, Focusing, and Zooming Framing, Focusing, and Zooming our camera has great shot-capturing capabilities that allow you to get the exact image you want. You can use the 2 digital zoom, frame your image as a panorama, or focus in on a close object with macro mode. You can also manually focus the camera to a fixed point. - Page 57 Follow these steps to take digital zoom pictures: Turn the camera dial to . You see the View menu. NOTE This example shows the View menu when the user mode is set to Program. Depending on the user mode setting, your View menu may look different.
-
Page 58: Taking Panoramic Pictures
NOTE Since the digital zoom mode magnifies the image by cropping it, there is less information and the file is smaller. It’s best to print the image in a smaller format, such as 4 Taking Panoramic Pictures Images in the panorama mode are long and narrow, although they are not captured at a wider angle than normal images. -
Page 59: Taking Close-Ups With Macro Mode
For a few seconds, the word PANORAMA the LCD screen, and a black frame appears around the previewed image. Press the shutter button halfway to lock the auto focus and exposure. When the camera locks its settings, the photo capture light stops flashing and you see a green circle on the screen. -
Page 60: Adjusting The Focus
NOTE This View menu illustrates what you see if your user mode is set to Program. Your View menu will look different if the user mode is set to Full Auto or Manual. Press the button next to the frame setting until you see (macro) setting. - Page 61 Press the button under Menu Change following screen appears: Press the buttons next to the up and down arrows to select a manual focus setting. If the camera is set to Normal Frame choose from the following settings: The camera determines the focus automatically. Focal point is about three feet.
-
Page 62: Adjusting Exposure And Color Settings
Adjusting Exposure and Color Settings ight is one of the most important considerations for taking great photographs. Good color composition is also invaluable. Your PhotoPC 3000Z gives you complete control over exposure, color, and other lighting condition settings. See the following sections to change your settings: Adjusting exposure Adjusting the sensitivity setting Adjusting the white balance setting... -
Page 63: Changing The Automatic Exposure Value
Similarly, you may want to decrease it if you want to darken the picture, or if you’re taking pictures against a dark background (where your subject may be overexposed). With the PhotoPC 3000Z, you can select automatic exposure settings, or you can fine-tune the exposure manually by setting the shutter speed and aperture setting. -
Page 64: Setting Shutter Speed And Aperture
In Manual mode, make sure the exposure setting is Auto Exposure . You can choose from 21 settings in increments of 0.2, from 2.0 to 2.0 EV. Viewfinder LCD Screen The setting appears in the status display panel next to the +/- icon and remains in effect while you take pictures. -
Page 65: Using Aperture Priority Settings
Press the button next to Auto Exposure to change the exposure mode to Manual . set aperture Press the button next to the up arrow to increase shutter speed, or the button next to the down arrow to decrease Press the buttons under the left and right arrows to change the aperture setting. -
Page 66: Adjusting The Sensitivity Setting
Press the button next to Auto Exposure to change the exposure mode to Aperture Priority . Viewfinder Press the buttons under the right and left arrows to change the aperture setting. (You can choose F2 , F2.3 , F2.8 , F4 , F5.6 or, F8 .) When you press the shutter button part way down to focus the camera, the camera shows the exposure settings at the top of the LCD screen. -
Page 67: Adjusting The White Balance Setting
Follow these steps to adjust the sensitivity setting: Make sure the camera is set to Program or Manual user mode. (See page 1-9 for instructions.) Turn the camera dial to If you are taking pictures using the viewfinder (with the camera dial set to ), press the MENU button. - Page 68 Locks the white balance setting at 5200 °K. This setting gives your pictures a warmer appearance under fluorescent lighting. It’s also a good choice for retaining the reds in a sunset or sunrise. CUST Lets you customize the white balance setting. See page 5-8 to set the custom white balance.
-
Page 69: Setting The Custom White Balance
The setting, which appears in the status display panel next to the W.B. mark, remains in effect while you take pictures. white balance setting NOTE When nothing appears next to W.B. on the display panel, the camera is in the fixed white balance mode. Setting the Custom White Balance Follow these steps to customize the white balance setting: Remove the camera’s lens cap and press the POWER... -
Page 70: Changing The Metering Method
Press the button under BACK to return to the main SETUP menu. Changing the Metering Method If you’re using Manual mode, your camera lets you choose between matrix metering and spot metering. With matrix metering, the camera automatically samples light from the entire image area and determines the correct exposure. -
Page 71: Fixing Condition Settings
Fixing Condition Settings In manual mode, you can save your automatic exposure, white balance, sensitivity, shutter speed, and aperture settings for one photo, and apply them to other photos. This is useful if you want a consistent appearance in a series of shots. NOTE You can’t use fixed settings when you are using an optional external flash. -
Page 72: Capturing Shots With Fixed Settings
Capturing Shots With Fixed Settings After you have enabled fixed settings as described in the section above, follow these steps: Turn the camera dial to Press the button next to the exposure setting to change the exposure mode to Fixed Settings . Center your subject on the screen, then press the shutter button halfway down to lock the auto focus and... -
Page 73: Exposure And Color Tips
Press the button under FixSet Cancel to delete the settings you have saved. (Repeat steps 1 through 5 to fix new settings.) Take any other pictures you want with the fixed settings. The settings are saved until you delete them. NOTE If your camera is without battery power for over one hour, you will lose the fixed settings (along with the time and date and... - Page 74 If you are taking pictures in low light or at night: Increase the sensitivity setting. Increase the exposure setting. Use a wide aperture or slow shutter speed setting to let in more light. If your subject is in the shade with a sunny background, try using spot metering and focusing the camera on your subject.
-
Page 75: Playing Back Photos
Playing Back Photos NOTE You can play back all your photos, sounds, and video clips on a TV, projector, or VCR using the video cable that came with your camera. See page 14-10 for details. Playing Back Photos he LCD screen lets you play back your pictures one- by-one or in groups of four or nine. -
Page 76: Playing Back Pictures One By One
Playing Back Pictures One by One When you set the camera dial to and press the POWER button, you see the last picture you took on the LCD screen (you’ll notice a delay if the picture was taken in Tiff mode): Press the button next to the right arrow to display the earliest picture taken. -
Page 77: Deleting Pictures
Press the arrow buttons to move the white selection frame through the images on screen, or hold one of these buttons down to move through the images quickly. When the frame passes the first or last image of the current group, the previous or next three images are displayed in the group. -
Page 78: Deleting All Pictures
Deleting All Pictures To delete all the images from your memory card, make sure the camera dial is set to , then follow these steps: Press the button next to Select Image . Press the button next to Delete All to delete all the images in your card. -
Page 79: Locking And Unlocking Pictures
Press the buttons next to the right and left arrows to move the frame to an image you want to delete. Then press the button next to Select to Delete . A Delete icon appears on the image and the word Select to Delete changes to Cancel Delete . -
Page 80: Adding Audio Recordings
Press the buttons next to the right and left arrows to move the frame to an image you want to lock. Then press the button under Lock . A lock icon appears in the top left corner of the screen and the word Lock changes to Unlock . -
Page 81: Playing Back Audio Recordings
You see the Sound menu: Press the button next to Sound Rec . A ten second countdown of the recording time appears on the screen. NOTE If an image is locked, you see a warning message. Press the button next to Yes to record audio. Or, press the button under No to return to the sound menu. -
Page 82: Deleting Audio Recordings
Press the button under Sound . You see the Sound menu, as shown to the right. Press the button next to Sound Play . If you want to stop the playback, press the same button again (next to Sound Stop ). Deleting Audio Recordings You can also delete audio recordings that you’ve added to the pictures on your memory card. -
Page 83: Playing Back Video Clips
Make sure the camera dial is set to , and follow these steps: To enlarge the currently displayed image, press the button next to the magnifying glass. A magnified view of the center section of the picture appears. An icon in the top left corner of the screen indicates which area of the image is currently shown. - Page 84 Press the button under Menu Change . Press the button next to Video Clip . You see the video clip playback screen. Press the buttons next to the left and right arrows to select a video clip. If you want to view the video clip backward, press the button under Fwd (forward).
-
Page 85: Deleting A Video Clip
To pause the video, press the button under Pause . You can do the following while the video is paused: Press the button next to Fwd to move the clip forward one frame. Press the button under Rev to move the clip backward one frame. -
Page 86: Viewing Picture Information
You see a confirmation screen. Press the button next to Yes to delete the video clip. Press the button next to No if you don’t want to delete it. Viewing Picture Information You can use the LCD screen to view detailed information about individual images, including date and time taken, shutter speed, exposure settings, aperture and white balance settings, and flash settings. - Page 87 Press the button under SLIDE SHOW . You see the following: Press the button next to 3 Sec to select the slide show speed. You can have the image change automatically every 3 or 5 seconds. (When sound is turned on, the camera displays an image until its entire recording has played.) If you select Manual , you can move through your...
-
Page 88: Playing Sounds With Your Slide Show
Playing Sounds With Your Slide Show You can turn the audio recordings for your images on or off when you display your slide show. Follow these steps: Turn the camera dial to . Then press the button under Menu Change . Press the button under SLIDE SHOW . -
Page 89: Rotating Pictures In A Slide Show
Do one of the following: Press the button next to Exclude to exclude the selected picture. Press the button next to Exclude All to exclude all pictures. The number that normally appears in the top left corner of each slide show image disappears for excluded photos. NOTE If you change your mind, move the white frame to the picture you want to include again and press the button next... - Page 90 Press the button next to Settings to display the slide show settings screen: Press the buttons next to the right and left arrows to frame the image you want to rotate. NOTE To make it easier to view your picture, press the button under Multi to display multiple images, then use the arrow buttons to select an image.
-
Page 91: Adjusting Camera Settings
Adjusting Camera Settings our camera has many options that you can change to configure the camera to work exactly the way you want. This chapter describes the following: Setting the auto power off time Turning the camera alert sounds on or off Adjusting the LCD brightness Setting the camera volume Setting the time and date... -
Page 92: Turning The Camera Alert Sounds On Or Off
Follow these steps to change the power off interval: Turn the dial to . You see the SETUP menu: Press the button below Camera SETUP to go to the Camera SETUP menu. The current power off setting appears in the upper right corner of the screen. Press the button next to the current setting to select a new setting. -
Page 93: Adjusting The Lcd Brightness
Adjusting the LCD Brightness To adjust the brightness of the LCD screen, follow these steps: Turn the camera dial to to display the SETUP menu. Then press the button under Camera SETUP . You see the Camera SETUP menu. Press the buttons next to the up and down arrows to adjust the screen brightness. -
Page 94: Setting The Time And Date
Setting the Time and Date The camera remembers the time and date settings you made when you formatted your memory card, unless it goes without battery power for more than an hour. If you need to reset the time and date for any reason, follow these steps: Turn the camera dial to to display the SETUP... -
Page 95: Setting The Language
Setting the Language You can choose from eight languages for information displayed on the LCD screen. Follow these steps to change the language setting: Turn the camera dial to to display the SETUP menu. Press the button under the icon to go to the Language/Signal setup menu. -
Page 96: Creating Dpof Files For Processing
Creating DPOF Files for Processing our PhotoPC 3000Z includes an internal program, Print Mark, that lets you set up your images for printing in the DPOF format. You can drop off your CompactFlash memory card at a photo finishing lab or insert your card in a DPOF-compatible printer and get the exact printouts you need. -
Page 97: Making The Dpof File
Making the DPOF File The Print Mark program on your PhotoPC 3000Z lets you make a Digital Print Order Format file and save it on your camera’s CompactFlash memory card in one of two formats: Standard layout prints one photo per sheet Index layout prints several thumbnail photos per sheet When you select Standard layout, you can choose to have an index sheet printed with your standard photo sheets, if you... - Page 98 If you are using the Standard layout, go to step 6 to select images. If you are using the Index layout and you want to print only selected images, press the button next to Index print , then go to step 6. If you want to print all your images in the index, skip to step 12.
- Page 99 You see a screen confirming the number of original photo frames you have selected to print: If you want to change your selections, press the button under Back . To quit Print Mark and keep your previous file settings, press the button next to Cancel . To save your selections, press the button next to Done .
-
Page 100: Confirming And Changing The Dpof File
Confirming and Changing the DPOF File Follow these steps to confirm or change a file: Turn the camera’s dial to Press the button next to PrintMark . The Print Mark program’s main menu appears on the screen: Creating DPOF Files for Processing Press the button next to Confirm . -
Page 101: Deleting The Dpof File
Deleting the DPOF File Follow these steps to delete a DPOF file: Turn the camera’s dial to Press the button next to PrintMark . The main menu appears: Press the button next to Delete . You see a confirmation message. Press the button next to Done to delete the DPOF file. - Page 102 LCD screen messages (Continued) Message Description You will lose the last There is already a DPOF file saved on the print settings. Are you memory card. If you create a new file, you sure? overwrite the saved print settings. Press the button next to Done to create a new file, or press the button next to Cancel to save the settings.
-
Page 103: Section 2: Using Your Camera With Your Computer Or Video Device
Video Device This section includes information about using your EPSON PhotoPC 3000Z camera and software to load your photos onto your computer and work with them. It also explains how to to use your camera with your computer, print out your photos, and connect your camera to a television, VCR, or other device. -
Page 104: Installing Software And Connecting
You can also use it to edit pictures and sounds. EPSON Photo!3 is a standalone application for transferring, exporting, and uploading files. It also includes EPSON Auto Downloader for quick and easy file transfers and the EPSON Photo!3 TWAIN program for importing files directly into TWAIN-compliant... -
Page 105: Installing For Windows
EPSON File Converter lets you convert files (including presentation slides) into a file format that you can upload into your camera. EPSON Photo! Print2 gives you an easy way to print your pictures in the exact layout you want. Installing for Windows You can install the software on your Windows 98, Windows 95, Windows NT 4.0, or Windows 2000 system. - Page 106 Next . After installation is complete, you return to the Setup screen. Click the Install EPSON Photo!3 button. Follow the instructions on the screen to install EPSON Photo!3. Installing Software and Connecting When you return to the Setup screen, click the Install EPSON File Converter button.
-
Page 107: Installing On A Macintosh
Double-click the Photo!3 Installer – Part 1 icon and follow the instructions on the screen. Open the EPSON File Converter folder. Double-click the EPSON File Converter Install icon and follow the instructions on the screen. Open the EPSON Photo! Print2 folder. -
Page 108: Reading Your Image Expert User's Guide
From the PhotoPC 3000Z CD-ROM window, open the EPSON Camera Registration folder. Double-click the PhotoPC 3000Z Registration icon. Click Register and follow the steps on the screen to register your camera. Reading Your Image Expert User’s Guide Image Expert includes an electronic manual, the Image Expert User’s Guide , that you can view on your computer... -
Page 109: Connecting The Camera
Connecting the Camera This section describes how to connect the camera to a Windows PC using the PC serial cable, a Macintosh using the Macintosh serial cable, and to a USB-compatible PC or Macintosh using the USB cable. Note the following before you start: You can conserve battery life by using the optional AC adapter when you connect the camera to your computer. -
Page 110: Connecting To A Macintosh
Open the connector cover on the side of the camera. Carefully insert the connector on the other end of the cable into the camera’s serial interface port. NOTE To disconnect the cable from the camera, squeeze and hold the connector lock button on the side of the connector while you pull the cable out. -
Page 111: Connecting The Camera With The Usb Cable
NOTE If you’re sharing a serial port that you use for another device, make sure AppleTalk is turned off. Your Macintosh may not recognize the camera if AppleTalk is on. If you have problems connecting to the printer port, try connecting to the modem port instead. - Page 112 NOTE If you’re using Windows 98 or Windows 2000 and you see a New Hardware screen, follow the instructions below. If your iMac is running OS 8.1, you’ll need to upgrade your operating system to OS 8.5.1, or later, before connecting to your camera using the USB cable.
- Page 113 You may need your Windows 98 system disk for this installation. Contact your system administrator if you see an error message or you aren’t able to install the EPSON PhotoPC 3000Z drivers on your Windows 2000 system. Follow these steps to install the driver for your camera: Insert the PhotoPC 3000Z CD-ROM in your computer’s CD-ROM or DVD drive.
-
Page 114: Getting Photos Into Your Computer
You can save your files in Image Expert albums for easy viewing and file management. (See page 10-2.) You can use EPSON Auto Downloader to automatically download all your files to a folder on the desktop. (See page 10-6.) You can import photos into programs that support TWAIN with the EPSON Photo!3 TWAIN software. -
Page 115: Saving Files In Albums With Image Expert
You can use EPSON Photo!3 to transfer files to the computer in different formats for programs that don’t recognize JPEG or Tiff files. (See page 10-10.) NOTE If you have USB, you can save time by using the USB camera events to automatically open designated programs. - Page 116 In the top left corner of each image preview, you see an icon that shows the file type. The video clip files (QuickTime Movie format) and the icon appears on photos (JPEG or Tiff format). If you recorded audio for a photo, the icon appears.
- Page 117 Image Expert automatically creates an album (folder) for your photos with the current date as its name. You can type your own name for the album if you want, or choose an existing album. Click Open (or OK on a Macintosh) to begin transferring your photos.
- Page 118 Follow these tips to get your camera connected correctly: Make sure the camera is turned on and has not shut off automatically. If it has, press the POWER button to turn the camera back on. Check the cable and make sure the connections are secure.
-
Page 119: Downloading Files Automatically With Auto Downloader
Make sure the camera is turned on, connected to your computer, and the camera dial is turned to these steps: In Windows, click Start , point to Programs , EPSON Photo!3 , then click EPSON Auto Downloader . On a Macintosh, double-click the EPSON Auto Downloader icon in the EPSON Photo!3 folder on your hard drive. - Page 120 No to keep the files on your card. Setting Up Auto Downloader Follow these steps to change the Auto Downloader settings: In Windows, click Start , point to Programs , EPSON Photo!3 , then click EPSON Auto Downloader Settings .
- Page 121 Click the Advanced tab to change advanced settings. Check Start Downloading When Launched to set the Auto Downloader to start downloading files as soon as it is launched. (With USB, this allows you to perform one-step downloading by simply pressing the shutter button when the camera is connected to your computer.) You can also set delay settings and automatically minimize Auto Downloader during an automatic...
-
Page 122: Getting Images Into Twain-Compliant Applications
Acquire or Select Source. Some applications let you download only one photo at a time. Getting Photos Into Your Computer For your TWAIN source, choose EPSON Photo!3 (Windows), or Photo!3 (Macintosh). For Windows, choose Import , then TWAIN_32 from the File menu. -
Page 123: Getting Images That You Can Import
JPEG or Tiff format, you have to convert the files one by one in an image editing program. Or you can use the export feature of EPSON Photo!3 to automatically convert the files as you transfer them. - Page 124 Follow these steps to export and convert your pictures with EPSON Photo!3: Start your EPSON Photo!3 software: In Windows, click Start , point to Programs , EPSON Photo!3 , then click EPSON Photo!3. On a Macintosh, double-click the EPSON Photo!3 icon in the EPSON Photo!3 folder.
- Page 125 Click Save . Your pictures are transferred one by one. Getting Photos Into Your Computer NOTE You cannot open exported photos in EPSON Photo!3. Use Image Expert to view and edit the exported images. Click Erase Photos if you want to delete the pictures in your camera’s memory card.
-
Page 126: What To Do If The Camera Is Not Responding
What To Do If the Camera Is Not Responding When you try to acquire pictures from the camera or start the EPSON Photo!3 application, you may see a screen like the following: Getting Photos Into Your Computer From EPSON Auto Downloader, you may see a screen like... -
Page 127: Configuring Camera Events
Select another port if necessary. In most cases, it’s best to leave the Port setting at Auto because EPSON Photo!3 and EPSON Auto Downloader can detect the camera connection automatically. If you have a serial device connected to one port and an internal modem on the other, you can try COM3 or COM4. -
Page 128: Configuring Camera Events In Windows
Click Start , point to Settings , then click Control Panel . Double-click the Scanners and Cameras icon. You see the Scanners and Cameras Properties window. Highlight EPSON PhotoPC 3000Z and click Properties . Click the Events tab. You see the Camera Events window, as shown to the right. -
Page 129: Configuring Camera Events In Macintosh
Application . Click Browse to find your application. Select your application and click Open . Click OK to save your settings and close the EPSON Camera Monitor Setup window. Now when you connect your camera or press any of the camera buttons that you have assigned, your selected application opens automatically. -
Page 130: Getting Your Photos Into Documents
Getting Your Photos Into Documents Getting Your Photos Into Documents hotoPC 3000Z provides several methods for getting your pictures into presentations, letters, web pages, and other projects. You can drag and drop a picture from an Image Expert album into a document or presentation. You can also import an image into your application, or copy and paste it. -
Page 131: Importing Images Into Documents
Importing Images Into Documents Once your pictures are transferred and saved on your hard drive, you can import them into your applications. You may need to convert your images if you didn’t export them from the camera (as explained in Chapter 10) and your application can’t import JPEG or Tiff files. - Page 132 Locate and select the image you want to insert. In some applications you can see a preview of your picture. Click OK (or Insert , Import , or whatever command your application uses) to insert your picture. The picture appears in your document. Getting Your Photos Into Documents NOTE Before you import pictures with your Web design and...
-
Page 133: Getting Images With Copy And Paste
Getting Images With Copy and Paste You can use this method to place a picture in just about any type of document or project. You should already have transferred your picture from the camera to your hard disk. Follow these steps: In Windows, click Start , point to Programs , point to Image Expert , and click Image Expert - PhotoPC 3000Z . -
Page 134: Using Drag And Drop From An Album (Windows Only)
Open the document where you want to use the picture. Choose Paste (or Paste Special ) from your application’s Edit menu. A copy of the picture appears in your document. Using Drag and Drop From an Album (Windows Only) Once you have transferred your photos into albums, you can easily drag and drop them into documents or other projects. -
Page 135: Getting Images With The Camio Viewer (Windows)
Click the image you want. While holding down the mouse button, drag the image to the location where you want it in your document. Release the mouse button. The picture appears in your project or document. If you want to edit or modify the picture, just double-click it on the Image Expert window to bring up the Image Expert menus and toolbar. -
Page 136: Dragging And Dropping A Picture Into A Document
Choose one of the following options: View images in the Camera Displays a filmstrip of your pictures. You can then select an image to drag and drop into a document or presentation. (The image is embedded in your document, and is not available as a separate file.) Copy all images from the Camera to the Computer Transfers your pictures to an album (folder) on your... -
Page 137: Transferring Images Before Placing Them
Click the picture you want to use. Without releasing the mouse button, drag the picture to your document. When your pointer is over the location where you want the picture to appear, release the mouse button. The picture is downloaded to your document from the camera. -
Page 138: Printing Your Photos
Printing Your Photos Printing Your Photos hotoPC 3000Z provides Photo! Print2 so you can quickly download and print your images. You can use Photo! Print2 to print an index of all the pictures in your camera. You can also print several copies of your photos with different layouts and print settings. -
Page 139: Opening Photos In The Camera's Memory Card
Opening Photos in the Camera’s Memory Card You can use the EPSON Photo! Print2 Launcher to open the photos from your camera’s memory card for printing without saving them on your computer. CAUTION When you use Photo! Print2 Launcher to open your files in Photo! Print2, your files are not permanently stored on the computer. -
Page 140: Opening Photos Saved On The Computer
In Windows, click Start , point to Programs , EPSON Photo! Print2 , then click EPSON Photo! Print2 . On a Macintosh, double-click the EPSON Photo! Print2 icon in the EPSON Photo! Print2 folder. -
Page 141: Printing Photos
Select your folder and click OK . Your images open in the Photo! Print2 Index window: Follow the steps under “Printing Photos,” below, to print the photos you have just opened in Photo! Print2. Printing Your Photos Printing Photos After opening your photos in the Photo! Print2 Index window, as described in the sections above, follow these steps to print them: To print an index of all your photos, click Yes . - Page 142 You see the Select photos to print window. Click a photo to select the number of prints. The selected photo opens in a window like the following: Click the up arrow to increase or the down arrow to decrease the number of copies for that photo. You see a green circle and the number of copies on each selected image.
- Page 143 You see the print confirmation window: Click Printer Settings to adjust your printer’s settings (including the media type and size). From the Print Setup screen, select your printer from the list and click Properties . Make your changes, then click OK . Click OK to return to the printing menu. Click Print Options to set up trimming, date printing, cutting guides, and other print option settings.
-
Page 144: Operating The Camera From Your Computer
Taking pictures with EPSON Photo!3 Adjusting camera settings from your computer NOTE You can use either Image Expert or EPSON Photo!3 to take pictures from your computer, adjust camera settings, and transfer images. PhotoPC 3000Z allows you to choose the application that best meets your needs and preferences. - Page 145 Follow these steps to take pictures from your computer: Connect the camera to your computer as described in Chapter 9. Position the camera facing the subject. Using a tripod will give you the most control when setting up your shots. See page B-4 for instructions. Turn on your computer, press the POWER button to turn on the camera, then turn the camera dial to In Windows, click Start , point to Programs , point to...
-
Page 146: Using The Self Timer
You can click the Flash and Resolution buttons on the screen to adjust these settings just as you would by using the buttons on the camera. For more information about the flash and resolution (image quality) settings, see Chapter 2. NOTE When the camera is connected to your computer, you can’t use any of the control buttons or the shutter button on the... -
Page 147: Taking Pictures With Epson Photo!3
Turn on both your camera and your computer. Make sure the camera dial is set to Start your EPSON Photo!3 software: In Windows, click Start , point to Programs , EPSON Photo!3 , then click EPSON Photo!3. On a Macintosh, double-click the EPSON Photo!3 icon in the EPSON Photo!3 folder. -
Page 148: Adjusting Camera Settings From Your Computer
B-5. Operating the Camera From Your Computer Adjusting Camera Settings From Your Computer You can use either Image Expert or EPSON Photo!3 to change the following camera settings: Time Date Camera Description (ID) - Page 149 Start Image Expert, then select Properties from the Camera menu. The Camera Properties menu appears: NOTE If you see an error message, check for possible solutions on page A-9. Enter a new Description of the camera to change the default. This might be useful if you have more than one camera and you want to record its description in your picture data.
-
Page 150: Changing Settings With Epson Photo!3
Click OK to save your settings and exit the Connection dialog box. Changing Settings With EPSON Photo!3 You can also change settings in EPSON Photo!3 while you’re viewing pictures in the camera. Follow these steps: Connect the camera to your computer as described in Chapter 9. - Page 151 Select another port if you want to change your connection. In most cases, it’s best to leave the Port setting at Auto because EPSON Photo!3 can detect the camera connection automatically. Select a different communication speed. EPSON Photo!3 automatically chooses the fastest speed that works with your system.
-
Page 152: Presenting Your Photos
Uploading Images to the Camera The EPSON File Converter software allows you to convert any image or presentation slide to the EPSON Photo file format and upload it to your CompactFlash memory card. You can upload images in their actual sizes or convert them to 640 480 pixels. -
Page 153: Converting Files On A Windows Pc
The images in the folder are listed in the File Name box. NOTE If you want to upload images from a network drive, you may need to map the drive before opening the EPSON File Converter software. See your Windows documentation for more information. Presenting Your Photos... - Page 154 To rearrange the uploading (and display) order, select the image you want to reorder, then click the sort arrow. If you want to change your selection, click the <– button to remove selected files or click the << button to remove all the files from the Selected Files List .
-
Page 155: Converting Files On A Macintosh
Presenting Your Photos Converting Files on a Macintosh Follow these steps to convert your files: Double-click the EPSON File Converter icon in the EPSON File Converter folder. The EPSON File Converter dialog box opens, as shown on the next page. - Page 156 The selected images appear in the Selected File List in the order they will be uploaded. This determines the sequence in which you can display the images. check here for helpful information To rearrange the uploading order, select the image you want to reorder, then click Up or Down .
-
Page 157: Uploading Converted Files
. Then follow these steps to upload the files: Start your EPSON Photo!3 software: In Windows, click Start , point to Programs , EPSON Photo!3 , then click EPSON Photo!3. On a Macintosh, double-click the EPSON Photo!3 icon in the EPSON Photo!3 folder. -
Page 158: Converting Presentations
Windows users can make screen captures from within the EPSON File Converter utility; Macintosh users need to use the standard Macintosh screen capture function. Capturing Windows Screens... - Page 159 Click the Screen Capture tab. The Screen Capture dialog box appears: choose the key combination to use for capturing screens set the drive and folder for saving screen captures Use the Drive and Folder lists to select the folder where you want to save the screen capture.
-
Page 160: Capturing Macintosh Screens
14-6 to upload the screens to the camera. Presenting Your Photos Capturing Macintosh Screens EPSON File Converter for the Macintosh does not have a screen capture feature. However, you can make screen captures using your Macintosh system software, then use EPSON File Converter to convert the screen captures so you can upload them to your camera. -
Page 161: Connecting The Camera To A Video Device
NOTE If you’re running OS 8.0 or later, you can capture just the active window. Press the , Shift, and 4 keys at the same time, then click the window you want to capture (if Caps Lock is on), or drag the cursor around that portion of the screen you want to capture. - Page 162 Follow these steps: Make sure your camera and TV (and VCR) or video projector are turned off. Open the camera’s connector cover and connect the black end of the video cable to the AV Out port, as shown below: Presenting Your Photos Connect the yellow end of the video cable to the VIDEO IN port and the white end of the cable to the AUDIO IN port on the TV, VCR, or projector.
-
Page 163: Setting The Broadcast Signal System
You can use the camera’s slide show feature to play your images and sounds automatically, or play them one at a time using the navigation buttons. You can use all of the camera’s other playback features to show your presentation. NOTE If you are powering your camera with batteries, the LCD screen is blank when the camera is connected to a video... -
Page 164: Section 3: Troubleshooting And Reference
Troubleshooting and Reference This section includes troubleshooting and maintenance instructions for your EPSON PhotoPC 3000Z, optional accessories available for the camera, specifications, and warranty information. This section includes the following appendices: Maintenance and Troubleshooting Optional Accessories Specifications Regulatory Information and Warranty... -
Page 165: Maintenance And Troubleshooting
Maintenance and Troubleshooting our PhotoPC 3000Z camera is easy to take care of, and any problems you may have are easy to solve. This chapter includes the following sections: Caring for the camera and battery charger Solving camera problems Solving connection and software problems Solving picture problems Where to get help Caring for the Camera and Battery... -
Page 166: Cleaning The Camera And Battery Charger
Make sure you replace the lens cap on the camera when you are not using it. Remove the lens cap before turning on the camera. Attach the neck strap (see Chapter 1) and use that to carry the camera. Keep the camera in the included case, or in a camera bag to protect it. -
Page 167: Solving Camera Problems
Do not store the camera in the following locations: Where it will be exposed to direct sunlight, for example, on a car dashboard Near sources of bright light or high humidity Near heat sources or in a closed car or trunk In areas of excessive dirt or dust Where it will be exposed to strong vibrations or magnetic fields... - Page 168 transfer the pictures or video clips to your computer and then erase them (see Chapter 10). Or replace your memory card with a new one (see Chapter 1). The batteries may be low. If you see the low battery icon, recharge or replace the batteries (see Chapter 1) or use the optional AC adapter (see Appendix B).
- Page 169 If you are using one of the automatic flash modes (automatic, red-eye reduction, slow synchronized), the flash only fires when there is insufficient light. If you want to force the flash to fire, set it to (See Chapter 2.) You can’t use the flash in continuous shooting mode or video clip capture mode.
- Page 170 The LCD screen turns off automatically when the camera is connected to (and communicating with) a computer or video device. The lens is still out even though the camera is turned off. The camera may have shut off automatically. To retract the lens, press the POWER button to turn the camera back on, then press it again to turn the camera off.
- Page 171 The “pictures remaining” number on the display panel doesn’t decrease after you take a picture. Your camera is operating correctly. The total number of pictures you can store depends on your pictures’ content. The number doesn’t always change, especially when you’re using standard image quality. (To confirm that the camera took the picture, you can turn the camera dial to to display the last picture that was...
-
Page 172: Solving Connection And Software Problems
Check the serial port settings in your Image Expert or EPSON Photo!3 software. You may need to change the Port and Speed serial connection settings to Auto . If you’re using a Windows system and have trouble connecting to the COM port, check the computer’s... - Page 173 If your camera is connected to a USB hub, try connecting the camera directly to your computer. Make sure you don’t have more than one of the following open at the same time: Image Expert, EPSON Photo!3, EPSON Auto Downloader, EPSON Photo! Print2 Launcher, Camio Viewer, EPSON Photo!3 TWAIN.
- Page 174 Make sure you don’t have more than one of the following open at the same time: Image Expert, EPSON Photo!3, EPSON Auto Downloader, EPSON Photo! Print2 Launcher, Camio Viewer, EPSON Photo!3 TWAIN. You are unable to drag and drop photos into a document.
- Page 175 You can’t find your video clips (or photos) in EPSON Photo!3. Your camera stores photos and video clips on different folders on the camera’s memory card. EPSON Photo!3 uses these folders for organizing photos and video clips. From the Select Camera Directory list, choose EPSON to view photos, or select Video Clips to view video clips.
- Page 176 CompactFlash memory card in your PCMCIA drive, the camera can’t access the images. You can’t use this method to upload pictures to the camera. You have to use the EPSON File Converter to convert your images and EPSON Photo!3 to upload your images.
-
Page 177: Solving Picture Problems
Auto Downloader. You can’t find your photos on the hard drive. If you are using the EPSON Photo! Print2 Launcher, your photos aren’t stored on your hard drive, only opened temporarily. Download your photos from the camera, as described in Chapter 10. - Page 178 If you used drag and drop to insert your pictures, they may appear grainy. Try importing them into your documents instead. When you preview images on your computer, they look distorted. ® If you are using an STB Velocity 128 video card and have a screen resolution of 800 600 or 640 480, you may notice this phenomenon.
- Page 179 When you take macro close-ups, make sure you have adequate lighting. Using a tripod will help you capture sharp pictures. Make sure that your subject isn’t moving and that you hold the camera steady after you press the shutter button (until the camera status light or photo capture light starts flashing).
- Page 180 If you’re taking a picture at night and you want to light up the background as well as your subject, use the camera’s slow synchronized flash mode. If you need more light, attach an optional external flash to the camera’s hot shoe (see Appendix B). Your picture is too light (overexposed).
-
Page 181: Where To Get Help
Capture your video clips with the camera turned upright. You can’t rotate video clips. Maintenance and Troubleshooting Where To Get Help EPSON provides technical assistance 24 hours a day through the electronic support services and automated telephone services listed in the following table: NOTE If you need software help, see “Software Support,”... -
Page 182: Epson Accessories
Computer configuration Description of the problem EPSON Accessories You can purchase manuals and accessories from EPSON Accessories at (800) 873-7766 or visit our website at www.epsonsupplies.com (U.S. sales only). In Canada, please call (800) 873-7766 for dealer referral. Maintenance and Troubleshooting... -
Page 183: Optional Accessories
Optional Accessories Optional Accessories ou can use a variety of options with the PhotoPC 3000Z to enhance its capabilities and convenience. This chapter describes how to use your camera with the following options: AC adapter Tripod Optional lenses and filters External flash PCMCIA adapter Image Authentication System software (for verifying... -
Page 184: Using The Optional Ac Adapter
These options should be available where you bought your PhotoPC 3000Z. You can order the following options directly from EPSON Accessories at (800) 873-7766 (U.S. sales only). In Canada, please call (800) 873-7766 for dealer referral. Or visit our website at www.epsonsupplies.com (U.S. - Page 185 WARNING Use only the AC adapter designed for the PhotoPC 3000Z. Using any other adapter could cause fire, electrical shock, or injury. Do not use the AC power cable and the adapter for any purpose other than powering your PhotoPC 3000Z. If the AC plug doesn't fit your outlet, have a proper outlet installed by a qualified electrician.
-
Page 186: Using A Tripod
Using a Tripod Follow these steps to use the camera with any standard tripod: Assemble and set up the tripod according to the manufacturer’s instructions. Make sure the tripod is well-balanced on a flat surface. Find the opening for the tripod screw on the bottom of your camera. -
Page 187: Attaching An Optional Flash
You can attach an optional flash unit to the camera to significantly increase the brightness of your images in dark environments. It also works well for portrait photography. EPSON recommends the following external flash (available through photo specialty shops, mail order catalogs, and on the Internet):... - Page 188 Turn on the camera and turn your camera dial to You see the SETUP menu. Press the button next to Shot SETUP . You see the Shot SETUP menu. Press the button next to Trailing (or the current flash setting) to change the setting to Ext Flash (external).
-
Page 189: Using A Pcmcia Adapter
Using a PCMCIA Adapter If your desktop or notebook computer has a Type II PCMCIA card slot, you can use a PCMCIA adapter to access images stored on CompactFlash cards. NOTE If you don’t have an adapter, you can use Image Expert to transfer photos to your computer. -
Page 190: Transferring Photos With The Adapter
Image Authentication System If you want to verify the authenticity of photos taken with your camera, you can purchase the EPSON Image Authentication System (IAS). This software detects when even a single bit of digital data in a picture has been altered. -
Page 191: Specifications
Specifications Camera Physical Dimensions Width 4.3 in (108 mm) Height 3.5 in (89 mm) Depth 2.6 in (65 mm) Weight 12.9 oz (365 g) without batteries, strap, lens cap, and CompactFlash memory card Specifications Power Sources Includes 4 AA rechargeable NiMH batteries and charger. -
Page 192: Technical
Technical Product type Digital still AF camera with LCD screen 1/1.8 inch color area CCD (3.34 megapixels) Image resolution 2048 1536 pixels (fine and super fine) 480 pixels (standard) 2048 768 pixels (panoramic fine and super fine) 2544 1904 pixels* (HyPict) 2544 952 pixels* (HyPict panorama) * Interpolated... -
Page 193: Environmental
Environmental Temperature Operating: 41 to 95 °F (5 to 35 °C) Non-operating: –4 to 140 °F (–20 to 60 °C) Humidity Operating: 30 to 80% (non-condensing) Non-operating: 10 to 80% (non- condensing) Safety United States FCC Part 15 Subpart B Class B Canada CSA C108.8 Class B Specifications... -
Page 194: Photo Processing Time And File Size (Approximate
Exposure control Programmed auto exposure Exposure value adjustment: –2 to +2 EV, in 9 or 21 steps Manual shutter speed and aperture settings, and shutter-priority and aperture-priority settings Spot metering and matrix metering White balance TTL automatic white balance Fixed white balance (5200 °Kelvin) User-defined white balance Zoom 3 optical zoom... -
Page 195: Nimh Battery Charger
NiMH Battery Charger Physical Dimensions Width 3.0 inches (76 mm) Height 4.5 inches (115 mm) Depth 1.1 inch (28 mm) Weight Approximately 4.6 oz (130 g) Technical Input 100 to 240 V, 50 to 60 Hz Output DC 1.2 V/490 mA Charging time 240 minutes maximum (initial charge) 2 1/2 hours average (subsequent charges) -
Page 196: Compactflash Memory Card
CompactFlash Memory Card Storage Capacity 16MB Physical Dimensions Width 1.7 inches (42.8 mm) Height 1.5 inches (36.8 mm) Depth 0.13 inch (3.3 mm) Minimum System Requirements To transfer images to your computer and edit them, make sure your system meets these minimum requirements: Windows Systems IBM-compatible PC with 486 or higher processor At least 32MB RAM (64MB when using Photo! Print2) -
Page 197: Macintosh Systems
Macintosh Systems At least 32MB RAM (96MB when using Photo! Print2) At least 40MB free hard disk space (150MB when using Photo! Print2) CD-ROM drive VGA monitor with minimum resolution of 640 16-bit sound card and speakers QuickTime 3.0 or later (QuickTime 4.0 is included with Image Expert) Serial Connection Macintosh PowerPC with System Software Version 7.5... -
Page 198: Regulatory Information And Warranty
Regulatory Information and Warranty his appendix includes the following important information: Declaration of Conformity FCC Compliance Statement Warranty Regulatory Information and Warranty... -
Page 199: Declaration Of Conformity
DECLARATION of CONFORMITY According to 47CFR, Part 2 and 15 for Class B Personal Computers and Peripherals; and/or CPU Boards and Power Supplies used with Class B Personal Computers: EPSON AMERICA, INC. Located at: MS 6-43 3840 Kilroy Airport Way... -
Page 200: Fcc Compliance Statement
FCC Compliance Statement FCC COMPLIANCE STATEMENT FOR AMERICAN USERS This equipment has been tested and found to comply with the limits for a class B digital device, pursuant to Part 15 of the FCC Rules. These limits are designed to provide reasonable protection against harmful interference in a residential installation. -
Page 201: Warranty
If repair is required, EPSON will, at its option, repair or replace on an exchange basis the defective unit, without charge for parts or labor. If the product... -
Page 202: Index
Index AC adapter, 4, 2-3, 7-1, B-2 to B-3, C-5 Accessories, 4, B-1 to B-8 Acquiring photos, TWAIN programs, 10-9 to 10-10 Acrobat Reader installing, 9-1 to 9-5 using, 9-5 Action photos, 2-15 Adjusting camera settings, 2-9 to 2-16, 7-1 to 7-5 Albums copying from, 11-4 to 11-5 dragging pictures from, 11-5 to 11-6... - Page 203 Auto Downloader downloading files, 10-6 to 10-7 installing, 9-1 to 9-5 one-step downloading, 10-8 problems, A-13 settings, 10-7 to 10-9 USB camera event, 10-14 Auto flash, 2-12 Automatic exposure value, 5-2 to 5-3 Automatic power off setting, 7-1 to 7-2 waking camera, 2-7 AV Out port, 14-11 Background, lighting, 2-12 to 2-13...
- Page 204 Buttons alert sounds, 7-2 flash, 2-11, 10-14 image quality, 2-9, 10-14 POWER, 2-1 shutter see Shutter timer, 2-14, 10-14 Cable Macintosh serial, 9-7 to 9-8 PC serial, 9-6 to 9-7 USB, 9-8 to 9-9 video, 14-10 to 14-12 Camera alert sounds, 7-2 AV Out port, 14-11 case, 1-8 cleaning, A-2...
- Page 205 Camera mode continuous shooting, 3-2 to 3-4 Full Auto, 1-9 interval shooting, 3-5 to 3-6 macro, 4-4 to 4-5 Manual, 1-9 manual focus, 4-5 to 4-6 monochrome, 2-14 Program, 1-9 sleep, 2-7 Tiff, 2-10 viewfinder, 2-4 to 2-6 Camera status light, 2-3 Camio Viewer, 11-6 to 11-8 Cancelling deletion of pictures, 6-5 Cap, lens, 1-7...
- Page 206 Confirmation screen adding sound, 2-17 to 2-18 enabling, 2-16 options, 2-8 quick delete, 2-18 to 2-19 quick playback, 2-18 to 2-19 Confirming DPOF files, 8-5 Connecting camera, 9-6 to 9-9 optional AC adapter, B-2 to B-3 problems, A-8 to A-13 serial cable, 9-6 to 9-8 USB cable, 9-8 to 9-9 video cable, 14-10 to 14-12...
- Page 207 Driver signing, A-12 Electronic manual, 9-5 E-mail technical support, A-17 English, resetting on camera, 7-5 Environmental specifications, C-3 EPSON automated telephone services, A-17 Electronic support services, A-17 to A-18 help, A-17 to A-18 World Wide Web site, A-17 Index 6...
- Page 208 2-18 to 2-19 video clip, 6-11 to 6-12 Error messages Auto Downloader, 10-13 EPSON Photo!3, 10-13 Image Expert, 10-4 to 10-5 on camera display panel, 8-6 on computer, A-8 to A-10 EV (Exposure Value) see Exposure...
- Page 209 2-5, 2-8 problems, A-14 to A-15 setting, 4-5 to 4-6 viewfinder adjustment, 1-14 Folders, on camera, A-11 Formats EPSON Photo file, 14-1 to 14-7 exported files, 10-12 JPEG, 2-9 to 2-10 Motion JPEG, 3-1 QuickTime Movie, 3-1, A-12 Tiff, 2-10, A-4...
- Page 210 Full Auto mode, description, 1-9 Glare, A-16 Grainy pictures, A-14 Handling batteries, 1-5 camera, A-1 to A-2 Hardware Wizard, 9-9 to 9-10 Help, EPSON, A-17 to A-18 Hi volume setting, 7-3 Hub, USB, 9-9 Human subjects, 5-13 HyPict digital zoom, 4-1 image quality, 2-10...
- Page 211 Installing batteries, 1-4 memory card, 1-13 PCMCIA adapter, B-7 software, 9-1 to 9-5 USB driver, 9-9 to 9-10 Instant playback, 2-18 to 2-19 Internet, A-17 Interval shooting, 3-5 to 3-6 ISO, 5-5 to 5-6, 5-12 JPEG, 2-9 to 2-10, 10-10 to 10-12, 11-2 Landscape digital panoramas, 4-3 to 4-4 subject setting, 2-15...
- Page 212 Lighting conditions bright, 5-12 dim, 5-5, 5-13, A-15 to A-16 direct, 5-13 excessive, A-16 fluorescent, 5-7, 5-13 portraits, 5-13 sunset/sunrise, 5-7 Lights camera status, 2-3 photo capture, 2-5, 2-8 Limited warranty, D-4 Lines on pictures, A-16 Live preview, 13-1 to 13-5 Locked pictures, deleting, 6-4 Locking condition settings, 5-10 to 5-12...
- Page 213 Menus playback, 6-1 to 6-16 problems, A-6 Shot SETUP, 2-10, 2-13, 2-16 View, 2-6 Messages EPSON Photo!3, 10-13 to 10-14 Image Expert, 10-4 to 10-5 Print Mark, 8-6 Metering method, changing, 5-9 Microphone, 2-17 Military time format, 1-10 Minimum system requirements, C-6 to C-7...
- Page 214 Options AC adapter, 4, 2-3, B-2 to B-3 batteries, B-2 battery charger, B-2 converter lenses, B-4 external flash, A-5 filters, 5-12, B-4 flash, B-5 to B-6 Image Authentication System, B-2, B-8 PCMCIA adapter, B-7 to B-8 tripod, using, B-4 Outdoor pictures, 2-15 Overexposed pictures, 5-4, A-16 PAL, 14-12 Panoramic pictures, 4-3 to 4-4...
- Page 215 Pictures (continued) deleting, 2-18 to 2-19, 6-3 to 6-5, 10-4, 10-10, 10-12, 11-7 displaying information, 6-12 distorted on computer, A-14 downloading, 10-2 to 10-4, 10-6 to 10-7, B-8 downloading problems, A-13 drag and drop, 11-5 to 11-6, A-14 exporting, 10-10 to 10-13 importing, 11-2 incorrect captured area, A-17 light, A-16...
- Page 216 Port AUDIO IN on video device, 14-11 AV Out, 14-11 camera serial, 9-7, 9-8 camera USB, 9-9 Macintosh serial, 9-7 PC serial, 9-6 settings, A-8 to A-10 USB, 9-9 VIDEO IN on video device, 14-11 Portrait subject setting, 2-15 Portraits, 5-13 Power AC adapter, 2-3, C-5 battery, see Batteries...
- Page 217 Problems (continued) drag and drop, A-10 EPSON Photo!3, 10-13 to 10-14 external flash, A-5 flash, A-4 to A-5 focus, A-14 to A-15 importing, A-10 LCD screen, A-5 to A-6 lens, A-6 memory card, A-4 missing pictures, A-11 overexposed pictures, A-16...
- Page 218 Red-eye reduction, 2-12, 5-13 Reflected light, A-16 Remaining pictures, 2-3 Removing memory card, 1-12 Resolution, 2-9 to 2-11 Restarting slide show, 6-13 video clip, 6-11 Reversing video clip playback, 6-10 Rewinding video clips, 6-10 Rotating slide show pictures, 6-15 to 6-16 Safety instructions, 5 to 6 specifications, C-3...
- Page 219 Settings (continued) macro mode, 4-4 to 4-5 metering, 5-9 monochrome, 2-14 panoramic pictures, 4-3 to 4-4 problems, A-6 programmed subject settings, 2-15 to 2-16 sensitivity, 5-5 to 5-6 shutter speed and aperture, 5-3 to 5-5 time and date, 7-4 USB, 10-14 to 10-16 USB camera events, 10-14 to 10-16 user mode, 1-9 viewfinder, 2-5...
- Page 220 Slide show excluding pictures, 6-14 manual playback, 6-13 pausing, 6-13 playing pictures, 6-12 to 6-16 playing sounds, 6-14 restarting, 6-13 rotating pictures, 6-15 to 6-16 setting speed, 6-13 shuffling pictures, 6-13 stopping, 6-13 Slow shutter, A-4 Slow synchronized flash, 2-12, 5-13 Slow transfer, A-10 Software File Converter, 14-2 to 14-5...
- Page 221 LCD screen, 2-6 to 2-9 with the timer, 2-13 to 2-14 with the viewfinder, 2-4 to 2-6 Technical specifications, C-2 Technical support, EPSON, A-17 to A-18 Telephoto optional lenses, B-4 setting, 2-5, 2-7, 3-2 Television, 14-10 to 14-12, A-8...
- Page 222 Trailing flash setting, 2-12 to 2-13 Transfer rate, 9-7, 9-8, A-10 Transferring error message, A-8 to A-10 files to computer, 10-2 to 10-4, 10-6 to 10-7, 11-8 problems, A-11, A-13 too slow, A-10 using PCMCIA adapter, B-8 Tripod, attaching, B-4 Troubleshooting, A-3 to A-17 Turning camera on/off, 2-1 TV, 14-10 to 14-12, A-8...
- Page 223 Video clip changing playback speed, 6-10 deleting, 6-11 to 6-12 downloading to computer, 10-2 to 10-4, 10-6 to 10-7 fast forwarding, 6-10 frame-by-frame playback, 6-11 pausing, 6-11 playing back, 6-9 to 6-12 playing backward, 6-10 playing forward, 6-10 problems, A-5, A-7, A-12 to A-13 recording, 3-1 to 3-2 restarting, 6-11 rewinding, 6-10...
- Page 224 Windows capturing screens, 14-7 to 14-9 connecting with serial cable, 9-6 to 9-7 connecting with USB cable, 9-8 to 9-9 converting pictures, 14-2 to 14-4 installing software, 9-2 to 9-3 installing USB driver, 9-9 to 9-10 system requirements, C-6 USB camera events, 10-15 USB problems, A-12 World Wide Web, A-17 Zoom...
Need help?
Do you have a question about the PhotoPC 3000Z and is the answer not in the manual?
Questions and answers