Table of Contents
Advertisement
Quick Links
Advertisement
Chapters
Table of Contents

Subscribe to Our Youtube Channel
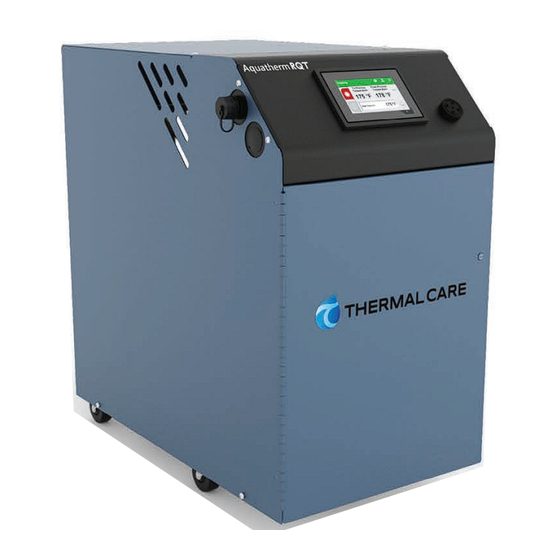
Related Manuals for Thermal Care Aquatherm RQT Premium


Summary of Contents for Thermal Care Aquatherm RQT Premium
- Page 2 Thermal Care makes no warranty of any kind with regard to this information, including, but not limited to, the implied warranties of merchantability and fitness for a particular purpose.
-
Page 3: Table Of Contents
Ta b le of C onte nt s 1 - 1 I n t r o d u c t i o n Purpose of the User Guide .................. 1-2 How the Guide is Organized ................1-2 Your Responsibility as a User ................1-2 Foreword ........................ - Page 4 Setpoint ........................ 3-15 Setting Process Value Source ................3-15 Setting Up Your Controller ................. 3-16 4 - 1 O p e r a t i o n The RQT Premium Control ................... 4-2 Start-up ........................4-4 Starting the RQT Premium ................... 4-5 Stopping the RQT Premium .................
- Page 5 Replacing the Controller Boards ..............5-14 B&R IO Card Replacement/Additions ............. 5-15 6 - 1 T r o u b l e s h o o t i n g Before Beginning ....................6-2 A Few Words of Caution ..................6-3 Identifying the Cause of a Problem ..............
- Page 6 A p p e n d i x External Interfaces ....................D-1 A p p e n d i x Flowmeter Installation Instruction Sheet ............E-1 Ta b l e o f C o n t e n t s...
-
Page 7: I Ntrod Uc T I On
S E C T I O N I ntrod uc t i on P u rpose of th e U s er G u i d e ........1 - 2 Ho w the G u i de i s O r g an i z e d ... -
Page 8: Purpose Of The User Guide
Pu rp ose of th e U se r Guide This User Guide describes the Thermal Care RQT Premium and explains step-by-step how to install and operate this equipment. Before installing this product, please take a few moments to read the User Guide and review the diagrams and safety information in the instruction packet. -
Page 9: Foreword
F ore wo r d The RQT Premium typically consists of a fluid pump, electric immersion heater, and temperature control valve in a compact packaged cabinet for easy location in industrial applications where fluid temperature control is required. This manual is to serve as a guide for installing, operating, and maintaining the equip- ment. - Page 10 ATT ENT ION : Re ad This So N o One Gets Hurt We design equipment with the user’s safety in mind. You can avoid the potential hazards identified on this machine by following the procedures outlined below and elsewhere in the User Guide.
-
Page 11: Zero Energy State (Zes)
Z ero E n e r g y S t at e ( ZE S ) CAUTION: Before performing maintenance or repairs on this product, you should disconnect and lockout electrical power sources to prevent injury from unexpect- ed energizing or start-up. During maintenance, it is essential that the system be put into a state which eliminates the possibility of components making an unexpected and dangerous movement. -
Page 12: How To Use The Lockout Device
Lockout is the preferred method of isolating machines or equipment from energy sources. Your Thermal Care product may be equipped with the lockout device pictured below. To use the lockout device: Stop or turn off the equipment. -
Page 13: Des Crip T Io N
S E C T I O N Des crip t io n Wh a t i s t he RQ T P r e m i um ........2 - 2 Ty pi cal A ppl i ca ti o n s . -
Page 14: What Is The Rqt Premium
What is th e RQ T Prem ium The RQT Premium Series circulates water at a temperature higher than the available water supply. It will add or remove heat as needed to maintain a uniform temperature setpoint in the process. The RQT Premium Series is available in single or multiple-zone configurations for process heating and cooling. - Page 15 Ty pic al Ap p l i c a t i on s (Continue d) The limiting factor regarding the maximum cooling pressure is the presumed 150 PSI Rat- ing of industry-standard hose. The hose must be able to withstand the maximum possible process temperature at maximum possible pressure.
- Page 16 How th e RQT Prem ium S erie s D ir ec t In jec tio n Wo rks Direct Injection models maintain the process temperature by electrically heating and/or injecting cool water supplied to the RQT Premium by a chiller, tower, or other water source. The temperature of the process fluid is measured as it leaves the unit’s primary heater tank.
- Page 17 Ho w the C los ed C i r cu i t C o m mo n S ou rce Works Closed Circuit models maintain the process temperature by electrically heating and in- directly cooling fluid in the process circuit. Cooling water supplied by a chiller, tower or other water source, is mixed with the process fluid only during the initial filling or when water is needed to make up process fluid loss.
-
Page 18: How The Closed Circuit Separate Source Works
How the Cl ose d C irc uit S epa ra te So urc e Wo r ks Closed Circuit Separate Source models maintain the process temperature by electrically heating and indirectly cooling fluid in the process circuit. Cooling water supplied by a chiller, tower or other water source, is never mixed with process fluid. - Page 19 R QT Prem iu m Co nt ro l Fe a tu re s vs RQ T Std & R QT A dva nc ed Touch Screen Control, RQT Premium Multi-level User Security Simple Menu Operation Alarm Lists, History, and Details Identify User and Log-in Status Access to all features Operators can drill down from the Alarm...
-
Page 20: Specifications: Rqt Premium
Sp ecif ications: RQT Pr e m ium Specifications Models RQT Premium (direct injection) RQT Premium(closed circuit) ‡ § Performance characteristics 40 {4} (with 100% water process fluid), optional lower temperatures Minimum setpoint temperature °F {°C} with various glycol mixtures are available - consult factory. Maximum setpoint temperature °F {°C} 250 {121}, (300 {149} optional †... -
Page 21: I Nst A Llati On
S E C T I O N I nst a llati on Un packi ng t he B ox e s ..........3 - 2 P re pari ng f or I n st a l l at i o n . -
Page 22: Unpacking The Boxes
Unpa ck in g the Boxe s RQT Premium models come fully assembled.* If it was specified at the time of the order, the optional mold purge valve is factory-installed. CA U TI O N: Lif t ing To avoid personal injury or damage to the RQT Premium, lift the unit using a fork- lift or hoist with straps that have been positioned at the center of gravity. - Page 23 P rep arin g f o r In s t a l l a t i on The RQT Premium is easy to install, if you plan the location and prepare the area properly. WA R NING : Im pr o pe r in s t a lla t ion , op er at i on, or s e r v i c - in g may re s u lt i n e qu i pm ent d am a ge o r pe r s ona l in- ju r y.
-
Page 24: Preparing For Installation
Pr epar i ng for I nsta l la tio n ( Conti nue d) Pump HP Max Cooling (PSI) U A source of water for cooling. City, tower or chiller water may be used, as long as the supply pressure is at least 30 PSI*. Refer to max cooling water pressure chart shown to the left. - Page 25 Prep ar in g f or I n s t a l l a t i on ( C ont i nue d) Fil l Wat er C he m is t r y To avoid the unwanted side effects associated with water cooling, proper chemical treat- ment and preventive maintenance is required for continuous plant productivity.
-
Page 26: Fluid Distribution Piping
RQT Premium connections. The use of line size isolation valves are recommended. Contact Thermal Care for more information about recommendations for your product. Fl uid Distrib u tio n Pip ing Proper insulation of any cooling fluid system where the supply cooling fluid temperature is below the dew point is crucial to prevent condensation. -
Page 27: Installation - Electrical
I n sta llatio n - E l e c t ri ca l U All wiring must comply with local codes and the National Electric Code (NEC). Full Load Amperes (FLA) and other unit electrical data are on the unit nameplate. U An electrical schematic ships with the unit. -
Page 28: Connecting Process And Water Supply Lines Without Purge
Install pipe to the rear of the RQT Premium. Use male 1 -inch NPT piping for NOTE: Thermal Care recommends process connections and male 1-inch NPT piping for water connections. Pipe and using a second wrench, pipe threads must be clean and new. Clean threads with solvent, removing all oil, sometimes referred to as a “back-... -
Page 29: C Onne Cti Ng P R Oc Es S A Nd Wa Te R S Up Pl Y L In Es Wi T H O Pt I On Al M Ol D P U R Ge Valv E C Onn Ect Ion S
Do not over-tighten! Connect the purge valve to the compressed air supply. The air pressure should not exceed 100 psi. Thermal Care strongly recommends a lockable air valve be installed in order to effectively lockout this energy source when performing equipment maintenance. -
Page 30: Connecting The Main Power Source
Conn ec ti ng th e M a in Pow er S ou rc e Before beginning, note the electrical specifications on the serial tag mounted to the side of Tools Required the unit. The electrical connection must match these specifications with +/- 10% (+/- 15% U Flashlight for 400 V/50 Hz) maximum voltage variance and <2% imbalance. -
Page 31: Program Menu Accessibility
Change Auto Logout Screen Note that some parameters can only be modified and defined by Thermal Care. If there are issues with con- figuration settings please contact Customer Service for assistance. -
Page 32: Testing The Installation
Te st ing th e Ins ta lla ti on WA R N ING : O nly qual if ied pe r sonnel s houl d per f or m t h i s p roced ur e. Part of this test requires opening the unit while it is energized. Only qualified personnel who have been trained in the use of electrical testing devices and in avoiding the safety hazards involved in safely troubleshooting this type of equip- ment should perform this test procedure. - Page 33 “Configuration” menu selec- tion shown. NOTE: Certain machine configuration details/parameters can only be changed by Thermal Care Service or Factory. The “More” menu contains the most commonly accessed machine functions. I n stal l a t i on...
-
Page 34: Altitude, Fluid Type, And Units Of Measure
Alti tud e , Fl ui d Type , a n d Un its o f Me asur e To select the desired altitude, fluid type, and NOTE: You will need to log in as units of measure for your system (°F vs °C), the appropriate level to access these settings/screens. -
Page 35: Setpoint
Set poi n t To select the proper setpoint of the system, follow this procedure: NOTE: Setpoint range can be expanded for your application based on process fluids used The temperature setpoint can be (Glycol). Maximum pressure quickly adjusted by tapping on the setting may be dependent upon “Main Setpoint”... -
Page 36: Setting Up Your Controller
Se tti ng Up Yo ur C o ntro lle r A l a rm Po in t s To select the desired alarm points for your system (low alarm and high alarm), follow this procedure: If running, stop the RQT Premium by going to the Home screen and pressing STOP. Enter the Alarms settings by following the screens below. - Page 37 Settin g U p Your C o nt rol l e r (Continued) NOTE: Pressing the left/right arrows (< & >) on the top of You may select how you want the TCU the screen allows you to move to act if the temperature deviates from between subsections of the menus.
- Page 38 Se tting Up Your C o ntro lle r ( Cont inue d) If estimated flow is enabled without a flowmeter, it can still be alarmed. The screen will look slightly different based on if you have a flowswitch or a flowmeter installed.
- Page 39 S etti ng U p You r C on t ro l l e r (Co ntinued) Limit Switch - Detects if there is flow at a predetermined setpoint followed by a desig- nated action. Be sure to configure what kind of contact state is considered to be an alarm.
- Page 40 If Analog Process Retransmit is set to 0-10V: Some calibrations are factory set and can- not be modified by the user. If you have a need to change these, please contact Thermal Care Customer Service. Pressure Sensors • Modulating Valve Signal •...
- Page 41 Set ting U p You r C on t rol l e r (Continued) D i sp l ay To access Display Settings from the Home screen, tap on the hamburger icon to access the Main Menu. Main Menu→Configuration→Display In the Display section, you can customize the KPIs (Key Performance Indicators) that are shown on the Home screen, as well as the screensaver.
- Page 42 Settin g Up Yo ur C o ntro ller (Co nt inue d) H o t P re ssu re R e lief Determines how the machine will respond to expanding water in the process loop as it heats up. It is recommended not to change these settings unless there is a reason to do so.
- Page 43 S e ttin g U p Your C o nt rol l e r (Co ntinued) If Auto Restart is off: Auto Restart - When enabled, Auto Restart will restart the unit automatically after a loss of power event, but only if the unit was run- ning when power was lost.
- Page 44 Se tti n g Up Your C o ntroller (Co nt in ued ) Ride Through - How long to ignore a low- or no-pressure situation, which can be handy if your facility experiences sudden, intermittent pressure drops which recover quickly.
- Page 45 S ett ing U p You r C ont rol l e r (Continue d) C on t rol L oo p Various PID tuning parameters are shown here and can be customized as desired. “PID Parameters” in Appendix B. Ad apt i ve M a x S e t po i nt Adaptive max setpoint is a dynamic feature that will warn the user if the incoming supply pressure is insufficient to achieve the defined setpoint.
- Page 46 Se tting Up Yo ur C o ntro ller (Co nt inue d) Pan el S et t i ng s To access Panel Settings from the Home screen, tap on the hamburger icon to access the Main Menu. From the Main Menu, tap on the System Icon. Panel Settings allow access to language settings, Default Security level settings, Screen Save/Backlight Timeout, Serial Number, Firmware Version, and Software Version.
- Page 47 Set ting U p You r C on t rol l e r (Continued) R ec i pe s To access Recipes from the Home screen, tap on the (…) icon to access the Additional Settings screen where the Recipes feature is located.
- Page 48 Settin g Up You r C o ntro ller (Co nt inue d) S yst em M ai n t e n ance In the event that a system reset to factory settings is required, there are several options provided to reset the TCU parameters. To access System Maintenance from the Home screen, tap on the hamburger icon to access the Main Menu.
-
Page 49: O Peratio N
S E C T I O N O peratio n T he R Q T P r e m i u m C on t r ol ........4 - 2 S ta rt-u p . - Page 50 Th e RQT Con tro l Help/Information Icon Notification Status Bar Once active, will allow The TCU will indicate the user to click on other running/stopped status Security Level Indicator icons to get additional as well as warnings/errors “Operator” Level shown. help/information.
-
Page 51: The Rqt Premium Control
T he R Q T Pr e mi u m C on tr ol (Continued) Tapping on the Main Menu (Hamburger Menu) Icon will bring up the Main Menu where you can access system settings, configurations, alarms, user, and maintenance menus. Tapping on the …... -
Page 52: Start-Up
Star t- up Every unit is factory set to deliver water in accordance with the standard operating speci- fications for that particular unit. Due to variables involved with different applications and different installations, minor adjustments may be required during the initial start-up to ensure proper operation. -
Page 53: Starting The Rqt Premium
Starti ng the RQT P r em i u m Before starting the RQT Premium, verify that the system has been installed correctly for your application. See the Installation section of this User Guide. NOTE: If minimum 30 psi cooling water supply pressure is not achieved, the TCU Turn on the water supply to the RQT Premium. -
Page 54: Stopping The Rqt Premium
S to pp i n g th e RQT Prem ium WA R NI NG : El e ct r ic a l S ho c k a n d H ot Su r fac e H a z ar d s Before attempting maintenance of any kind on the RQT Premium, you must stop the unit, disconnect and lockout the main power supply, and allow the unit to cool to less than 100°F {38°C}. -
Page 55: Program Menu Accessibility
Security Level to eliminate password entry if security is not a concern. NOTE: Some parameters can only be modified and defined by Thermal Care. If there are issues with configuration settings please contact Thermal Change Auto Logout Screen Care Customer Service for assistance. -
Page 56: Spi Communications (Optional)
SPI Comm uni ca ti ons (Opt ion a l) Several members of SPI: The Plastics Industry Trade Association developed a communica- tions standard for plastic processing equipment to communicate, which coincidently has the same abbreviation as the trade association. This option includes an RS-485 communication port on the unit. - Page 57 M od bu s - TC P/ OPC - UA C om m u nic a tio ns ( O ptio n al) NOTE: This unit is compliant with Euromap 82.1 v1.01. Main Menu→System→Network NOTE: DNS Server #1 IP Address and DNS Server #2 IP Address are all optional.
-
Page 58: Spi Option Parameters
SPI Op tio n Pa ra me ters TIP: If you need advanced communication details, contact Thermal Care Customer Service. No rmal Op era tio n For normal operation of the RQT Premium, set the setpoint on the temperature controller using the Main Setpoint prompt on the Home screen. - Page 59 O pe rat io n o f th e S c r ee n Sa ve r (Co ntinued) The screensaver background color will generally mimic the Home screen status bar color, as described below. This feature allows the general state of the TCU to be recognized at a glance from a distance.
-
Page 60: Auto Cool Stop Sequence Initiation
Se al Saver/Aut o C o o l St op Seq uenc e In iti atio n During this sequence, the cooling valve opens and the pump runs for 600 seconds or until the temperature reaches 100°F {38°C}, whichever occurs first. Pressing the Stop button during an Seal Aaver/Auto Cool Stop cool-down sequence stops the sequence. - Page 61 Usi ng th e M ol d P ur g e Op t i on (C ontinued) Ensure that the unit is Stopped by going to the Home screen and checking the status bar on the top left hand corner. If not, press the red stop button to stop the unit.
-
Page 62: System Maintenance
Syste m Ma in tena nce In the event that a system reset to factory settings is required, there are several options provided to reset the TCU parameters. To access System Maintenance from the Home screen, tap on the hamburger icon to access the Main menu. - Page 63 S ys tem Ma i n te n a nce (Continue d) Sy s te m S t a t s To access System Stats from the Home screen, tap on the hamburger icon to access the Main menu. Main Menu→Maintenance→System Stats. System stats include useful realtime infor- mation regarding power usage, electrical enclosure temperature, alarm operations,...
- Page 64 Page intentionally left blank. 4-16 O p e r a t i o n...
-
Page 65: Ma Inten Anc E
S E C T I O N Ma inten anc e Ma int enanc e o f You r R Q T P r emi um ......5 - 2 P re ve nti ve M a i nt en an c e S c he du le .. -
Page 66: Maintenance Of Your Rqt Premium
Mai nte na n ce o f You r RQT Pre mium Depending on which features, options, and additions you ordered with your unit, your maintenance procedures and necessities may differ from what is shown in this User Guide. Please note that all illustrations, photos, and instructions are based on a typical configura- tion of a RQT Premium. -
Page 67: Accessing The Rqt Premium Enclosure
Ac ce ss in g t h e RQT P re m i u m E nclosu re Depending on which features, options, and additions you ordered with your RQT Premium, your unit may appear different and operate differently from the illustrations and photos shown in this user guide. -
Page 68: Removing The Pump Motor And Seal
Remove the motor and adapter from the pump adapter to volute. Remove the casing O-ring. Inspect for damage or wear. If in good condition, set aside for re-use. If a new part is needed, contact Thermal Care Parts. (Continued) M a i n t e n a n ce... -
Page 69: (3/4-2 Hp, Any Frequency And 3 Hp, 60 Hz Units)
Re mo vi n g t h e P um p Mot or a n d Seal (3 /4 -2 H P, an y fre que ncy and 3 HP, 60 H z units) ( C on t inu ed ) Remove the dust cap from the bell end motor housing to expose the motor shaft. - Page 70 Re mo vin g the Pu mp M o to r a nd S ea l (3/4-2 HP, any frequency and 3 HP, 60 Hz units) (Continued) Slide the rotating half of the shaft seal off of the shaft. Be careful not to contami- nate, chip, or scratch seal surfaces if it is to be re-used.
- Page 71 Re as semb li n g t he Pu m p M ot o r an d Sea l ( 3/ 4-2 H P, an y fre que ncy and 3 HP, 60 H z units) The following procedure can be used on all models with 3/4-2 HP, any frequency and 3 HP, 60 Hz motors for reassembly: Tools Required U 9/16-inch wrench...
-
Page 72: Re Assem Bli Ng T He P Ump Mo To R A Nd S Eal (3/4-2 Hp, Any Frequency And 3 Hp, 60 Hz Units)
Re assem bli ng t he P ump Mo to r a nd S eal (3/4-2 HP, any frequency and 3 HP, 60 Hz units) (Continued) Align the impeller and screw on to shaft. Place a small amount of Blue Loc-Tite #271 on the shaft end thread. Install the impeller jam nut on the shaft, and tighten to 12 ft-lbs {16.27 N·m}. -
Page 73: (3 Hp, 50Hz And 5 To 10 Hp, Any Frequency Units)
Remove motor and adapter from casing. Inspect pump casing to adapter o-ring for damage. If appropriate obtain replace- ment part from the Thermal Care Parts Department. Remove impeller bolt and washer using a 9/16-inch deep socket. The bolt is secured in place with a high performance thread locker. A significant amount of torque will be required to break it free. -
Page 74: (3 Hp, 50Hz And 5 To 10 Hp, Any Frequency Units)
Re mo vin g the Pu mp M o to r a nd S ea l ( 3 HP, 50 Hz a nd 5 t o 1 0 H P, a n y f r eque ncy uni ts) (C o nt i n ue d) This area interfaces with volute Witness line Clamp in this region if needed... -
Page 75: R Ea Ssem B L I Ng P Um P M O To R An D S Ea L (3 H P, 50 H Z A Nd 5 T O 1 0 Hp, An Y Fr E Q Uenc Y Uni T
Re as semb li n g P um p M ot or a nd Seal ( 3 H P, 5 0Hz a nd 5 to 10 HP, an y fre quency units) The following procedure can be used on all models with 3 HP, 50 Hz and 5 to 10 HP, any Tools Required frequency motors for disassembly: U 9/16-inch wrench... -
Page 76: Resetting Pump Overload
Re setting Pump Ove rlo a d Tools Required Phillips Screwdriver The pump motor overload is located inside the unit’s electrical enclosure. Disconnect and lockout the main power. Open the electrical enclosure door. Turn the screw on the front panel counterclockwise to open. Check the overload. -
Page 77: Replacing The Heater Contactor
Re pl aci n g th e He a t e r C ont a c to r WA R NING : E l e c t r i ca l S ho c k H a z a r d Only qualified service personnel who have been trained on electrical testing and the procedures for avoiding the hazards should diagnose or correct problems that require opening the unit with power on. -
Page 78: Replacing The Controller Boards
Re pla ci ng th e C o ntro lle r Bo a rds Tools Required Flathead screwdriver The touchscreen/controller on the RQT Premium can be replaced if necessary. The con- troller consists of the HMI touchscreen and a series of I/O card slots located on the upper left portion of the electrical panel. - Page 79 B& R IO C a r d Rep l a ce m e n t/ Add itio ns Power off the control and disconnect the main power. Cards must be removed from the right end of the DIN rail to the left. To remove each card: To remove each card, lift the orange release tab on the card.
-
Page 80: B&R Io Card Replacement/Additions
B&R IO Ca rd Re pla c eme nt/ Additi ons ( C on t i n ue d ) Reverse the process above to re-install the new card and install the card assem- bly onto the DIN rail. NOTE: Sometimes lining up the grooves to slide the card in can be difficult. -
Page 81: Tro Uble S H Oot I N G
S E C T I O N Tro uble s h oot i n g Be f ore B e gi n ni n g........... 6 - 2 A F ew Wor d s of C au t i on . -
Page 82: Before Beginning
Additional manuals and prints for ment. These are the best reference for correcting a problem. The diagrams will note your Thermal Care equipment may any custom features or options not covered in this User Guide. be ordered through the Customer Service or Parts Department for a U Verify that you have all instructional materials related to the RQT Premium. -
Page 83: A Few Words Of Caution
A Fe w Wo r ds of C au t i o n WA R NING : I mp r o p er i ns t a llat io n, oper at i on o r se r vi c i ng m a y r e s ul t in equ ipm e n t da m age or p er so na l i nj u r y. -
Page 84: Identifying The Cause Of A Problem
Identifying the C a use of a Pro ble m The Troubleshooting section covers problems directly related to the operation and main- NOTE: Additional troubleshooting tenance of the RQT Premium. This section does not provide solutions to problems that help can be found in the originate with other equipment. - Page 85 Con tro ll er Wa r n i ng s Warning Possible Cause Solution PUMP OVERLOAD The pump overload protector has tripped Check the fluid loop for too much TRIPPED from too much pump motor current. This flow or restrict it. is typically caused by excessive flow in the process loop.
-
Page 86: Controller Warnings
Con t r oll er War ni ngs (Co nti nue d) Warning Possible Cause Solution TO PROCESS An OPEN CIRCUIT has occurred in the "To Check "To Process" RTD probe for RTD PROBE OPEN Process" RTD temperature probe or wiring. an OPEN CIRCUIT. - Page 87 C o ntro l ler War n i ng s (Continue d) Warning Possible Cause Solution FLOWMETER A CHANNEL FAULT has occurred on the Check for a malfunctioning analog SIGNAL ERROR FLOWMETER or wiring. The machine input card. can continue to operate, but will be unable to measure flow or take action on low flow Check for extraneous voltages on conditions.
-
Page 88: Controller Alarms
Contr oll er Ala rms NOTE: *corresponding slot number will be identified on the controller screen. Alarm Possible Cause Solution IO CONNECTION The touchscreen controller has lost connec- Verify connections at touchscreen and FAILURE tion with all of the IO modules. The touch- first IO module. -
Page 89: Tro U Bl Eshoo T I
Co ntro l le r Al a rm s (Continue d) NOTE: *corresponding slot number will be identified on the controller screen. Alarm Possible Cause Solution OVER- DISCONNECT POWER TO THE MA- Check for missing jumper or external TEMPERATURE CHINE! A hardware overtemperature equipment. - Page 90 Con tr ol ler Al ar ms (C o nti nue d) NOTE: *corresponding slot number will be identified on the controller screen. Alarm Possible Cause Solution SYSTEM PRESSURE Excessive pressure has been detected in the Reduce cooling water pressure. TOO HIGH process loop.
- Page 91 C ont ro ller Al a r ms (Continue d) NOTE: *corresponding slot number will be identified on the controller screen. Alarm Possible Cause Solution LOW PRESSURE There have been to many low pressure The plumbing to the machine is likely TOO MANY events (NN) within a short amount of time insufficient.
- Page 92 C on tro ller Alar ms (C ont inue d) NOTE: *corresponding slot number will be identified on the controller screen. Alarm Possible Cause Solution FROM PROCESS A SHORT CIRCUIT has occurred in the Check "From Process" RTD probe for RTD PROBE SHORT "From Process"...
- Page 93 C o ntro l ler Al a r ms (Conti nued) NOTE: *corresponding slot number will be identified on the controller screen. Alarm Possible Cause Solution FROM PROCESS A HIGH SIGNAL or OPEN/SHORT CIR- Check the "From Process" pressure PRESS SNSR HIGH CUIT has occurred on the "From Process"...
- Page 94 Con tr oll er Alar ms (C ont inue d) NOTE: *corresponding slot number will be identified on the controller screen. Alarm Possible Cause Solution TEMPERATURE The temperature has deviated too high for Check for a failed/blocked cooling DEVIATION HIGH too long above the setpoint.
-
Page 95: Unit Will Not Power Up
Un it Wi ll N ot Pow e r Up If you apply power to the machine, and switch ON the disconnect switch (if equipped), and the touch- screen controller does not light, you have a problem with the main power circuit or the unit’s temperature controller. -
Page 96: Troubleshooting
Trou blesho otin g Symptom Possible Cause Solution Alternating overheating and Poor water flow. Check connectors and increase overcooling or rapid cycling size if necessary. If there are a from heat to cool. large number of hoses and/or they are long, try to shorten hose runs and use as large of a hose as possible to minimize water-circuit pressure drop. - Page 97 IMPORTANT: Always refer to the wiring Tro ub le s h oot i ng (Continued) diagrams that came with your RQT Premium to locate specific electrical components. Illustrations in the User Guide are intended to be representative only. Symptom Possible Cause Solution Unable to cool properly.
-
Page 98: Checking The Rtd
Ch eck in g the RTD WA R NIN G : Elect r ical Shock Hazar d Only qualified service personnel who have been trained on electrical testing and the procedures for avoiding the hazards should diagnose or correct problems that require opening the unit with power on. -
Page 99: C Hecki Ng T H E R T
Chec kin g th e RTD (C on tin u ed ) Pt1 00 0 Temp Resistance Resistance Resistance Resistance Resistance Resistance Resistance Resistance Resistance Resistance Temp at T at T+1°F at T+2°F at T+3°F at T+4°F at T+5°F at T+6°F at T+7°F at T+8°F at T+9°F... -
Page 100: Replacing Rtds
Rep lacin g RTDs WA R NIN G : H ot Sur faces Allow the RQT Premium to cool to below 100°F {38°C} before servicing the unit. NOTE: Refer to the “Zero Energy State (ZES)” Section of this manual for more “Lock Out Turn Off” information. To replace an RTD: Disconnect and lockout the main power. -
Page 101: Repairing Cooling Valves
R e pa irin g C ool i ng Va l ve s Every RQT Premium has a valve assembly that controls the cooling water out flow. Oc- casionally, this valve assembly may need to be cleaned, if clogged with debris, or replaced. The steps below details these procedure. -
Page 102: Replacing Immersion Heaters
Rep lacin g Im m ers ion Hea te rs WA R NIN G : Elect r ical Shock and Hot Sur fac e Hazar d Before attempting maintenance of any kind on the RQT Premium, you must stop the unit; disconnect and lockout the main power supply; and allow the unit to cool to 100°F {38°C}. - Page 103 = Torque R e pla cin g I mmer s i on He a t e rs (Conti nue d) Add‐On Heater Termination Studs To Re-install add-on heater termination stud use a nut driver and use the same torque you would use to tighten the standard stud nut. Do not overtighten! ...
- Page 104 Rep lacin g Im m ers ion Hea te rs (C o n ti n u e d ) Pa r t s Description Usage Small Add-On Heater Termination Stud For #8 & #6 wires. Medium Add-On Heater Termination Stud For #4 wires.
- Page 105 R e pla cin g I mmer s i on He a t e rs (Conti nue d) Lift the heating element out of the heater tank. Lift the element straight up. Heater Lid Immersion Heater Heater O-ring Flange and O-ring Clean the heater tank.
-
Page 106: Removing The Pump
Re mo vin g the Pu mp WA R NI NG : E lect r ical Shock and Hot Sur face Hazar d Before attempting maintenance of any kind on the RQT Premium, you must stop the unit; disconnect and lockout the main power supply; and allow the unit to cool to 100°F {38°C}. -
Page 107: Timecode Retrieval Procedure
In the event of accidental or incorrect programming of the machine configuration during initial set-up, the RQT Premium controller, in coordination with Thermal Care Customer Service, can be elevated back to factory level security access to allow modifications to machine configuration. To do so, follow the steps shown below. -
Page 108: Ti Mecode R E Tr I E V Al Pr O Ce Du R
You will be prompted with the screen shown to the right where you can enter the password that was generated from Thermal Care Customer Service by the timecode that was submitted earlier. This will elevate the RQT Premium controller back to Factory permissions, which can be confirmed on the controller by the factory icon replacing the user icon in the upper right hand corner. -
Page 109: Appendix
Ap p e n d ix A We’re Her e to He lp Thermal Care has made a large investment in customer support. Our service experts are available to help with any problem you might have installing and operating your equip- ment. - Page 110 A p p e n d i x A...
- Page 111 A p p e n d ix B PI D Pa ra mete r s The Thermal Care RQT Premium features a PID (“proportional-integral-derivative”) control-loop algorithm implemented in the programming of the controller board. This algorithm is used to achieve the proper temperature of the process fluid quickly and ac- curately.
- Page 112 PID Pa ram e te rs (Continued) In t e gr a l Using only proportional control will cause the RQT Premium to have steady-state error (it will never exactly reach setpoint). Integral response is used to eliminate this undesirable condition.
-
Page 113: Pid Parameters
PID Paramete rs (Continued) STEPS: Run a Test - Proportional Start the RQT Premium and observe it attempting to reach setpoint. To access the screen to modify the PID band parameters, go to the Hamburger → Configuration → Setup menu and scroll right (>) until you reach the Control Loop Menu. - Page 114 PID Par ame te rs (Continued) Next, add in PID I-Gain for the PID controller. A default value of “25” is a reasonable starting point. A smaller number will produce a more aggres- sive integral response to eliminate steady state lagging error (however Zero will fully disable all integral response).
-
Page 115: Plumbing Diagram
Ap p e n d ix C Pl um bing D ia gr ams Direct injection In a direct injection arrangement, the cooling fluid is directly injected into the process loop whenever cooling is required. The immersion heater provides heat directly into the process fluid whenever needed. - Page 116 Plu mb ing Diag ra m s ( Cont inue d) Closed-circuit common-source In a closed-circuit common-source arrangement, the cooling fluid mixes with the process fluid only at initial filling. After that, there is very limited interaction of process and cooling water, and the cooling function is achieved by transferring heat through a heat exchanger.
- Page 117 Pl umbi n g Di agr ams ( C onti nue d) Closed-circuit separate-source In a closed-circuit separate-source arrangement, the cooling fluid never mixes with the process fluid. All cooling is achieved by transferring heat through a heat exchanger. The immersion heater provides heat directly into the process fluid whenever needed.
- Page 118 Pl umbin g D iag ra ms ( Conti nue d) Direct Injection - In a direct injection arrangement, the cooling fluid is directly injected into the process loop whenever cooling is required. The immersion heater provides heat directly into the process fluid whenever needed. A p p e n d i x C...
- Page 119 Pl um bing D ia gr ams ( C o nti nue d) Closed-circuit common-source - In a closed-circuit common-source arrangement, the cooling fluid mixes with the process fluid only at initial filling. After that, there is very limited interaction of process and cooling water, and the cooling function is achieved by transferring heat through a heat exchanger.
- Page 120 Pl umbin g D iag ra ms ( Conti nue d) Closed-circuit separate-source - In a closed-circuit separate-source arrangement, the cooling fluid never mixes with the process fluid. All cooling is achieved by transferring heat through a heat exchanger. The immersion heater provides heat directly into the process fluid whenever needed.
-
Page 121: Plumbing Curves
Plum bin g Cur ve s Direct I njection A ppendi x C... - Page 122 Pl umbin g Cur ve s ( C o nt i nue d) Clo s ed C ircuit S ta nd a r d P e r fo rm an c e A p p e n d i x C...
- Page 123 Ap p e n d ix D External In te r face s Proce s s Te mp R et r an smi t / A n a log R emot e Se t poi nt Co nnec ting t o t h e R Q T Pr e mi u m WAR NIN G : Imp r op er i n st a llat ion , oper at i on, or s er v ic - ing ma y r es ul t i n eq ui p ment d amage or per sonal injur y.
- Page 124 Ex ter n al I nte rfa c es (C on tin u e d ) A n al o g R e mo t e Se t p oint For Analog Remote Setpoint, see electrical prints for wiring of this option to the analog input on slot 7 of the controller.
- Page 125 Externa l I nte rfaces ( C on t i nu ed ) S PI Wi ring S che ma t i c For futher information contact Thermal Care Customer Service. A ppendi x D...
- Page 126 Page intentionally left blank. A p p e n d i x D...
- Page 127 Ap p e n d ix E Flowmeter installation instruction sheet PRH021-0915 Fl owmeter In stal lation I nstruc tio n She et 1. Remove the plumbing connection from the unit to the process. PRH 021- 0 9 1 5 2.
- Page 128 Page intentionally left blank. A p p e n d i x E...
- Page 129 Niles, IL 60714 New Equipment Sales Customer Service Parts Department 5680 W. Jarvis Ave. • 847‐966‐2636 847‐966‐9358(fax) 847‐966‐2260 847‐966‐2260 847‐966‐8560 • tcservice@thermalcare.com www.thermalcare.com sales@thermalcare.com tcparts@thermalcare.com February 2023 RQT Premium TCUGH001‐1022-R5 ...
Need help?
Do you have a question about the Aquatherm RQT Premium and is the answer not in the manual?
Questions and answers
What is the proper motor rotation
The proper motor rotation for the Thermal Care Aquatherm RQT Premium is clockwise (L1-L2-L3) phase rotation. A phase rotation meter should be used to verify correct phasing.
This answer is automatically generated