Advertisement
Ice Cream Machine
Operation Manual
Welcome to your machine:
Welcome to your VEVOR Model SS240 ice cream machine.Be cautious and follow instructions
carefully when operating, cleaning, and servicing the machine.
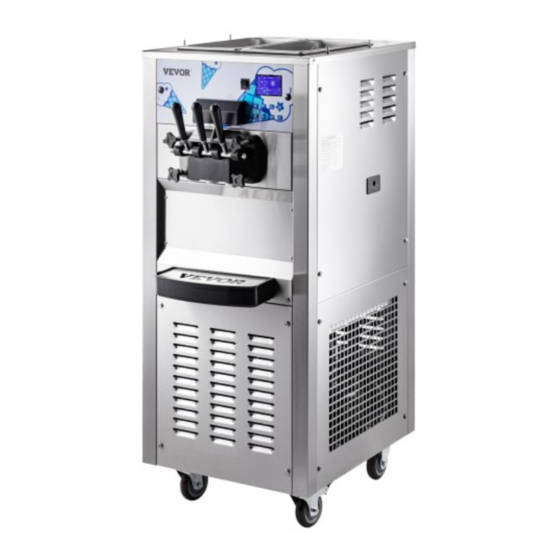
Twin twist flavor floor standing soft ice cream machine
¨
Approved for dairy ,ice cream ,frozen yogurt and so on
¨
Hopper refrigeration to maintain product temperature below
¨
Digital viscosity-control system to adjust and maintain product consistency
¨
40
(
4℃)
°F
Advertisement
Table of Contents

Related Manuals for VEVOR SS240


Summary of Contents for VEVOR SS240
- Page 1 Ice Cream Machine Operation Manual Welcome to your machine: Welcome to your VEVOR Model SS240 ice cream machine.Be cautious and follow instructions carefully when operating, cleaning, and servicing the machine. Twin twist flavor floor standing soft ice cream machine ¨...
-
Page 2: Air Cooling
Air Cooled Units Air cooled units require a minimum of 6’‘ (200 mm) of clearance on all sides of the freezer. Failure to allow for adequate clearance can reduce the refrigeration capacity of the Electrical Hook-Up Installation for 220V-240V, 60 Hertz, 1 Phase Check the data label in the rear panel for electrical specifications. - Page 3 The machine you have purchased has been carefully engineered and manufactured to give you dependable operation. The VEVOR Model SS240 is highly sophisticated pieces of equipment, when properly operated and cared for, will produce a consistent quality product. Like all mechanical products, they will require cleaning and maintenance.
-
Page 4: Mix Information
The Model SS240 will NOT eventually compensate and correct for any errors during the set-up or filling operations. Thus, the initial assembly and priming procedures are of extreme importance. It is strongly recommended that personnel responsible for the equipment’s operation, both assembly and disassembly, go through these procedures together in order to be properly trained and to make sure that no misunderstandings exist. - Page 5 Failure to follow this instruction may cause poor freezer performance and damage to the machine. The machine is designed to operate in normal ambient temperatures of 60°F to 75°F Operating in higher ambient temperatures will result in degraded performance. Display Safety Switch screen Control...
-
Page 6: Wash Button
Hardness level Refrigeration state Cooling progress Hopper temperature and voltage Cylinder temperature and Motor current Motor speed and counter The refrigeration state will blink on the screen during REFRIEGRATION is ON. Press Can exit from Refrigeration state. WASH BUTTON Press WASH button, the machine will be in washing state. -
Page 7: Up And Down Button
UP and DOWN BUTTON UP and DOWN button use for increases and decreases the value SHIFT BUTTON SHIFT KEY use for move the cursor for setting PARAMETER SETTING Press and hold FUNCTION/OFF button for 5 seconds , machine will go to SETTING MENU for parameter setting( Picture 4-1) Picture 4-1 Press... - Page 8 Alarm Records (Picture 4-4) Can record the alarms list for the machine Buzzer function enable (Picture 4-5) Select “YES” can cancel the buzzer Restore Factory defaults (Picture 4-6) Select “YES” can restore factory setting Picture 4-6 ICE CREAM Hardness setting Ice cream hardness from 1 to 20 , number 1 is hardest and number 20 is softest .
- Page 9 Equipment components CAUTION: Please keep the accessories properly to avoid losing the then machine can't running correctly . accessories and Dispensing door Draw valve Retention pin Handle Dispensing door Door gasket Design cap Beater screw Hopper cover Beater gasket Drip tray Internal drip tray Feeding tube Lubricant...
- Page 10 Equipment component installation CAUTION: When installing machine, please make sure that the machine is powered off and step on the caster brake to prevent sliding. a. Unscrew the retention pin screw b.Pull out the retention pin c.Lubricate the o-rings on the draw valve (Note: Draw valve o-rings should be lubricated every time after cleaning the machine ) d.Insert draw valves into dispensing door and...
- Page 11 Frozen product operation Before powering on the machine, check whether all the components are installed in place again! ! Before powering on the machine, please reconfirm whether it meets the equipment CAUTION: wiring standards. If it does not meet the machine standards, it may cause electric shock or damage the machine! ! ! Turn on machine power button 2.Thoroughly mix and prepare at least 1.3 gallons of...
- Page 12 CLEANING 1.机器工作结束,关闭制冷功能 NOTES: To expedite draining, turn off machine 30 minutes prior to soften product. 1.Press Function/OFF button ,turn off all function 2.Press WASH button ,let machine wash for 5 minutes to soften product . 3.Remove the feeding tube inside hopper 4.Pull handle ,draw out all the product 5.Prepare water and pour it into the hopper ( warm water and no more than 122...
- Page 13 Specs—Dispensing door and beater Item Part Description Item Part Description Door screw Handle Retention pin screw Handle seat Retention pin Draw valve-Side Design cap Draw valve-Mid Dispensing door O-O-O ring Beater O-ring Beater gasket Door gasket CAUTION: Please keep the beater ,dispensing door in a dry place , Do not soak in water for long time .
- Page 14 Specs—Internal Parts Item Part Description Item Part Description Item Part Description Condenser-main Dry filter Motor Drip pan Start Capacitor – Motor Fan cover Expansion valve Side Drip Tray switch baseplate Universal caster Spring - Motor Compressor- main Microswitch Condenser-precooling Arm - Return Precooling compressor Run Capacitor –...
-
Page 15: Troubleshooting
Troubleshooting Problem 1 : Product is too so /hard Problem 3 : High voltage / Low voltage Probable Cause 1. The hardness value is set incorrectly Probable Cause 2. Low mix in hopper Voltage too high :Voltage over 242V 3. Improper mixing of product Voltage too low: Voltage lower than 198V 4. - Page 17 The manual is intended to guide users in installation, operation, cleaning and online maintenance procedures. The information contained in this manual may be changed due to the product improvements without notice. Please contact us online or contact VEVOR technical support for information about machine updates and training!
Need help?
Do you have a question about the SS240 and is the answer not in the manual?
Questions and answers