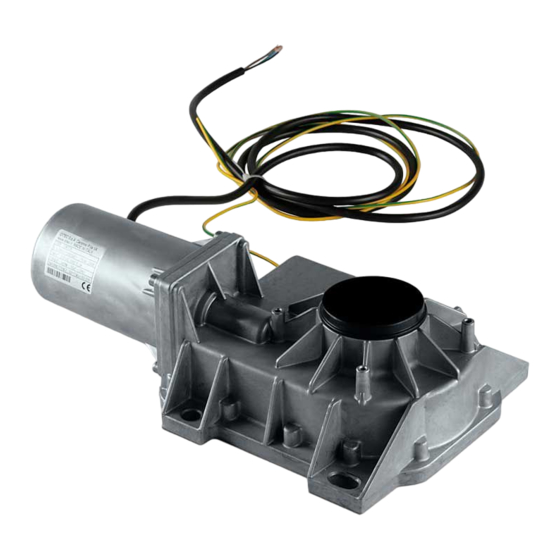
DITEC CUBIC6 Instructions Manual
Swing gates automation
Hide thumbs
Also See for CUBIC6:
- Installation and maintenance manual (16 pages) ,
- Installation and maintenance manual (8 pages)
Summary of Contents for DITEC CUBIC6
- Page 1 Last version of this manual IP1812EN • 2023-03-08 Ditec CUBIC Technical Manual Swing gates automation (Original instructions) www.ditecautomations.com...
-
Page 2: Table Of Contents
Index Subject Page General safety precautions General safety precautions for the user Declaration of incorporation of partly completed machinery Machinery Directive Technical specifications Operating instructions Standard installation Examples applications Installation 6.1 Preliminary checks 6.2 Foundation case installation 6.3 Lever mechanisms installation 6.4 Wing release installation 6.5 Geared motor installation 6.6 Installation with CUBIC6L-CUBIC6LG... -
Page 3: General Safety Precautions
1. General safety precautions ATTENTION! Important safety instructions.Please follow these instructions carefully. Failure to observe the information given in this manual may lead to severe personal injury or damage to the equipment.Keep these instructions for future reference. This manual and those for any accessories can be downloaded from www.ditecautomations.com This installation manual is intended for qualified personnel only •... -
Page 4: General Safety Precautions For The User
General safety precautions for the user These precautions are an integral and essential part of the product and must be supplied to the user. Read them carefully since they contain important information on safe instal- lation, use and maintenance. These instructions must be kept and forwarded to all possible future users of the system. -
Page 5: Declaration Of Incorporation Of Partly Completed Machinery
- the technical documentation complies with Annex VII-B of the Directive 2006/42/EC; - the technical documentation is managed by the Technical Office of Ditec Spa (with headquarters in Largo U. Boccioni 1 – 21040 Origgio (VA) – ITALY) and is available upon request, sending an e-mail to info@ditecautomations.com ;... -
Page 6: Technical Specifications
3. Technical data CUBIC6 CUBI6H CUBIC6HV Power supply 230 V~ 50 Hz 24 V 24 V Absorption 1,5 A 12 A 12 A Couple 340 Nm 340 Nm 220 Nm Capacitor 10 µF Opening time 18 s/90° 12÷25 s/90° 6÷13 s/90°... -
Page 7: Standard Installation
2 x 0,5 mm² * *only if an external power supply is used as an alternative to the battery CUBIC6 4G x 1,5 mm² CUBIC6 with magnetic limit switches 6G x 1,5 mm² Photocells 4 x 0,5 mm² Control panel 3G x 1,5 mm²... -
Page 8: Examples Applications
5. Examples applications CUBIC6L - CUBIC6LG max 110° CUBIC6TC max 180°... -
Page 9: Installation
6. Installation Unless otherwise specified, all measurements are expressed in millimetres (mm). 6.1 Preliminary checks Check that the structure is sufficiently sturdy and that the hinge pivots are properly lubricated. Provide an opening and closing stop. NOTE: if the gate wing is more than 2.5 m wide, an electric lock should be installed. 6.2 Foundation case installation Install the foundation case as indicated in the relevant manual. -
Page 10: Installation With Cubic6L-Cubic6Lg
6.6 Installation with CUBIC6L-CUBIC6LG Insert lever [A] on the gearmotor and position the mechanical stop [B] and [C] and adjust it, as shown in the figure. NOTE: the figure shows the motor installed on the right door wing. 6.7 Installation with CUBIC6TC Insert pinion [A] and join the two pinions by means of the chain [B], as shown in the figure. -
Page 11: Installation Cubic6Fm
(not supplied). In the CUBIC6 gearmotors, the blue wire corresponds to the common contact of the motor phases, and must be connected to the W or Z terminals of the control panel. -
Page 12: Routine Maintenance Plan
8. Routine maintenance plan Perform the following operations and checks every 6 months according to intensity of use of the automation. Without 230 V~ power supply and batteries if present: Lubricate the levers of the gearmotor. Lubricate the rotation pivot of the gate leaf. Lubricate the gate leaf hinges. -
Page 13: Operating Instructions
Operating instructions General safety precautions for the user These precautions are an integral and essential part of the product and must be supplied to the user. Read them carefully since they con- tain important information on safe installation, use and maintenance. These instructions must be kept and forwarded to all possible future users of the system. - Page 14 turer’s indications must be complied with and only qualified personnel must perform routine maintenance on the motorised door or gate. In particular, regular checks are recommended in order to verify that the safety de- vices are operating correctly. Check that the foundation boxes are clean and correctly drained. All installation, maintenance and repair work must be documented and made available to the user.
-
Page 15: Manual Release Instructions
Manual release instructions Fig. 1 Fig. 2 In the event of failure or if there is no voltage: CUBIC6SBL: insert the lock release lever and rotate by 180° (fig.1). Release any electric lock. Manually open the gate. CUBIC6SBD: insert the lock release key in the lock and rotate by 180° (fig.2). Release any electric lock. - Page 16 All the rights concerning this material are the exclusive property of ASSA ABLOY Entrance Systems AB. Although the contents of this publication have been drawn up with the greatest care, ASSA ABLOY Entrance Systems AB cannot be held responsible in any way for any damage caused by mistakes or omissions in this publication.


Need help?
Do you have a question about the CUBIC6 and is the answer not in the manual?
Questions and answers