Table of Contents
Advertisement
Quick Links
Advertisement
Table of Contents

Subscribe to Our Youtube Channel
Related Manuals for Enel X JuicePedestal


Summary of Contents for Enel X JuicePedestal
- Page 1 JuicePedestal User Manual ENGLISH...
-
Page 2: Table Of Contents
Table of contents Welcome Site Design Guide Installation Area Installation Replace a JuiceBox Replace Retractor Unattended Payment Terminal (UPT) Enterprise Setup Introduction Quick Guide for Administrators... -
Page 3: Welcome
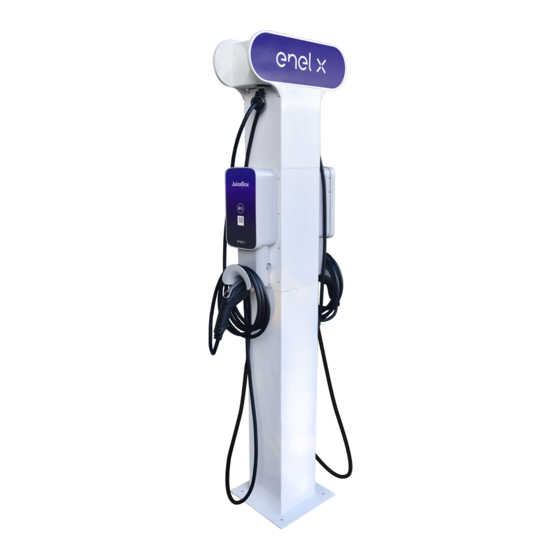
Welcome This manual explains how to install the JuicePedestal. Site Design Guide For more details, refer to Site Design Guide. -
Page 4: Installation Area
NOTE: > The JuicePedestal must be installed in accordance with the National Electrical Code (NFPA 70) and all applicable local jurisdiction requirements. > Junction Boxes must be UL Listed or UL Certified for outdoor-use due to local regulations, if necessary. - Page 5 5. Release the 10 fasteners that secure the back plate to the pedestal. Remove the back plate.
- Page 6 6. For each JuiceBox, install a waterproof junction box to house the connection. NOTE: The JuiceBox flex conduit has a diameter of 1 in. 7. Connect the mains power wires to the charging station wires. BLACK GREEN Ground 8. Reinstall the back plate (refer to step 5). 9.
-
Page 7: Replace A Juicebox
Replace a JuiceBox This section describes how to replace a JuiceBox which is installed on a JuicePedestal. NOTE: Do not discard any parts or fasteners unless explicitly instructed to do so. 1. Turn off all the circuit breakers that supply power to the pedestal. - Page 8 b. Open the junction box within the pedestal and disconnect the connecting means within the junction box. c. Use a multimeter to ensure that there is no power at the hardwire connections. WARNING: Do not continue with this procedure until the multimeter shows that there is no power at the hardwire connections to mains.
- Page 9 d. Disconnect the JuiceBox wiring from the incoming power wiring in the junction box. 4. If the JuiceBox is connected to the UPT, disconnect the Ethernet cable(s) from the back cover of the payment terminal.
- Page 10 5. If the JuiceBox is connected to the JuiceRouter, disconnect the Ethernet cable from the port on the base of the JuiceRouter. 6. Release the screw that secures the cable holder ring, and then release the cable holder ring from the retractor.
- Page 11 7. Use a flat head screw driver to remove the locking rings from the cable holder ring. Remove the cable holder ring from the cable. 8. Release the 2 phillips head screws that secure the JuiceBox to the side panel of the pedestal.
- Page 12 9. Remove the Ethernet cable and conduit gland of old JuiceBox from the holes on the side panel. Remove the old JuiceBox. NOTE: Carefully remove the ethernet cable from the hole on the side panel to avoid any damage to the connector.
- Page 13 10. Route the Ethernet cable and the conduit gland of the new JuiceBox into the holes on the side panel. Position the JuiceBox onto a pedestal (refer to step 9). 11. Reinstall the 2 phillips head screws to secure the JuiceBox to the side panel of the pedestal (refer to step 8).
- Page 14 14. Connect the Ethernet cable to the port on the base of the JuiceRouter (refer to step 5). 15. Connect the Ethernet cable(s) to the back cover of the payment terminal (refer to step 16. To connect the electrical connection to the JuiceBox, do the following steps: a.
-
Page 15: Replace Retractor
Replace Retractor This section describes how to replace a retractor. NOTE: Do not discard any parts or fasteners unless explicitly instructed to do so. 1. Release the 10 fasteners that secure the back plate to the pedestal. Remove the back plate. - Page 16 3. Use a T9 Torx Security bit to release the fasteners that secure the top plate. 4. Release the screw that secures the cable holder ring, then release the cable holder ring from the retractor. 5. Use a flat head screw driver to remove the locking rings from the cable holder ring. Remove the cable holder ring from the cable.
- Page 17 6. While restraining the nut on the opposite side, use a 5/64 in hex key to release the fastener that secures the upper pole bracket to the pedestal. Remove the upper pole bracket from the pedestal. 7. Release the fasteners (x4) that secure the lower pole bracket from the pedestal. NOTE: Do not remove the lower pole bracket at this time.
- Page 18 8. Remove the retractor assembly by lifting it upwards, then out of the pedestal. NOTE: The bracket from step 7 is removed as part of the retractor assembly. 9. While restraining the nut on the opposite side, use a 3/16 in hex key to release the fastener that secures the lower pole bracket to the retractor assembly.
- Page 19 10. Transfer the lower pole bracket to the new retractor assembly. 11. Position the retractor assembly within the pedestal (refer to step 8). 12. Reinstall the fasteners that secure the lower pole bracket to the pedestal (refer to step TIP: Hand tighten the front (visible) fasteners before installing the rear (hidden) fasteners.
- Page 20 a. Pull down on the retractor cord until you feel the tension from the counterweight, then pull the retractor cord out 1 additional inch. Hold the cord in this position. b. While continuing to hold the cord in place from the previous step, install the stopper onto the retractor cord.
- Page 21 g. Cut any excess cord away from the base of the stopper. Use a lighter to melt the end of the cord to prevent fraying. h. Let go of the cord so that the stopper rests inside its housing on the pedestal. 16.
-
Page 22: Unattended Payment Terminal (Upt)
You can use Apple Pay, Google Pay, tap with the credit card, insert or swipe your credit card to pay for the charging of your EV through UPT. You can upgrade the JuicePedestal to include a UPT. This manual explains how to install an Unattended Payment Terminal (UPT) to the JuicePedestal. - Page 23 2. Hold the UPT assembly near the JuicePedestal. 3. Connect the serial cables from both the JuiceBox to the RJ45 adapters on the back cover. Turn the cable connectors clockwise until they are latched. 4. Connect the SMA plug from the antenna to the SMA bulkhead on the back of the UPT and make sure the connection is tight.
- Page 24 5. Place the whole UPT assembly on the JuicePedestal.
-
Page 25: Enterprise Setup
6. Install the screws (x8) from both the sides to secure the UPT assembly to the JuicePedestal. NOTE: Apply the torque of 5.2 in lbs to tighten the screws. For more information, refer to Frequently Asked Questions of UPT. Enterprise Setup... - Page 26 1. Create a rate. Rates are payment structures. JuiceBox OpenPay can charge customers a flat fee for charging, or can charge based on the length of charging time or amount of electricity used. Refer to Create Rate in the JuiceNet Enterprise Manual. 2.
- Page 27 c. Open the welcome email from Heartland, where you can find your Heartland account information (Site ID, License ID, Device ID, Login, and Password). d. In the "Terminal ID" dropdown menu, select your terminal ID. e. Input your Heartland account information (Site ID, License ID, Device ID, Login, and Password) into JuiceNet Enterprise, then select Save.
Need help?
Do you have a question about the JuicePedestal and is the answer not in the manual?
Questions and answers