Computherm Q3 Operating Instructions Manual
Hide thumbs
Also See for Q3:
- Operating instructions manual (17 pages) ,
- Operating instructions manual (20 pages)

Related Manuals for Computherm Q3


Summary of Contents for Computherm Q3
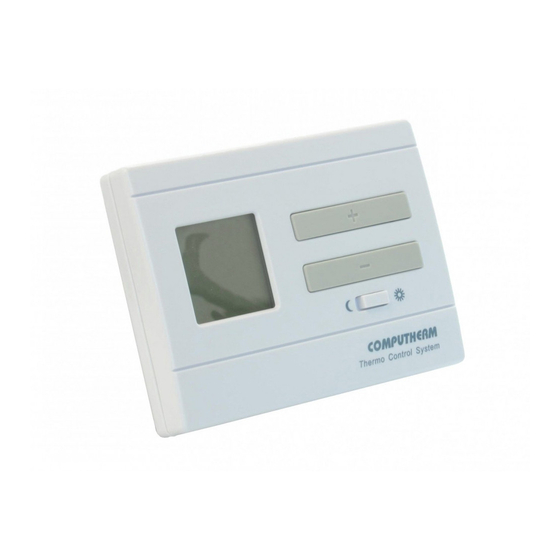
- Page 1 COMPUTHERM Q3 digital room thermostat Operating Instructions You can watch the most important aspects of the usage of this thermostat on our video presentation at www.computherm.info...
- Page 2 GENERAL DESCRIPTION OF THE THERMOSTAT COMPUTHERM Q3 type switched-mode room thermostat is suitable to regulate the overwhelming majority of boilers and air conditioners available in Hungary. It can be easily connected to any gas boiler having a two-wire thermostat connection point...
- Page 3 simple, conventional thermostats. In heating mode, in accordance with the selected switching sensitivity, the thermostat switches the boiler or any other appliances on and off below and above the adjusted temperature, respectively, and contributes to reduce energy costs while maintaining comfort. In cooling mode it switches the opposite way. The information shown on the liquid crystal display of the thermostat includes the following: Temperature...
- Page 4 The simultaneous use of several COMPUTHERM room thermostats and one COMPUTHERM Q4Z zone controller provides the possibility for the thermostats to also control a pump or a zone valve in addition to starting the heater or cooler. This way it is easy to divide a heating...
-
Page 5: Installation Of The Thermostat
IMPORTANT WARNING! If the radiator valves in your flat are equipped with a thermostatic head, adjust it to maximum temperature or replace the thermostatic head of the radiator valve with a manual control knob in the room where the room thermostat is to be located, otherwise the thermostatic head may disturb the temperature control of the flat. - Page 6 • To install the thermostat, detach the rear panel of the thermostat from the front panel by pressing the lock on the upper side of the housing of the thermostat, as shown in the figure. • With the help of the screws provided and some tools fasten the rear panel of the device to the wall.
- Page 7 would like to operate an old boiler or any other device that has no connection points for thermostats, then the 1 (NO) and 2 (COM) connection points of the thermostat should be connected to the mains cable of the device, similarly as a switch would be connected. •...
- Page 8 3. PUTTING THE THERMOSTAT INTO OPERATION The battery compartment is in the inner side of the front panel of the housing. Insert 2 AA alkaline batteries (LR6 type) in accordance with the diagram in the battery compartment. Warning! Alkaline batteries may only be used for this appliance. Carbon- zinc batteries known as durable or long life batteries and chargeable accumulators are not suitable for the operation of this appliance.
-
Page 9: Basic Settings
4. BASIC SETTINGS After removing the rear panel of the device, the following factory default settings can be modified by relocating the jumpers (black plugs) and/or changing the position of the orange-colored potentiometer located on the main panel. 4.1 Selecting the Displayed Temperature The temperature(s) to be shown on the display can be selected and set by the left jumper. - Page 10 measured room temperature value, while the notice “ROOM” appears in the bottom right corner of the display. In this case, the adjusted temperature is visible only during the adjustment process, for approximately 6 seconds after the last button has been pushed. By relocating the plug onto the bottommost and central pins the displayed temperature can be modified so that the display alternately shows the current room temperature and the adjusted temperature...
- Page 11 temperature the thermostat switches on/off the device connected to With factory default settings the jumper is located on the central and the uppermost pins, resulting in a switching sensitivity of ±0.2 °C. It can be modified to ±0.1 °C by relocating the jumper onto the bottommost and central pins.
- Page 12 systems with high thermal inertia (e.g. underfloor heating), and the ±0.2 °C switching sensitivity (factory default setting) for heating systems with low thermal inertia (e.g. flat panel radiators). You can read more about switching sensitivity in Chapter 5. 4.3 Switching between the Heating and Cooling Mode The heating or the cooling mode of the thermostat can be selected by the right jumper.
- Page 13 4.4 Calibration of the thermometer of the thermostat You can calibrate the thermometer of the appliance (to correct measured temperature). To this end all you have to do is change the position of the orange-colored potentiometer by a Phillips screwdriver. When you adjust the potentiometer clockwise then the displayed temperature will be lower than that measured initially, and when you adjust it anticlockwise the displayed temperature will be higher than that.
- Page 14 5. OPERATION OF THE INSTALLED THERMOSTAT The thermostat controls the device connected to it (e.g. gas boiler or pump) based on the temperature measured by it and the currently set temperature, taking into account the switching sensitivity of the thermostat (factory default ±0.2 °C). This means that if the thermostat is set to heating mode and 22 °C, then with a switching sensitivity of ±0.2 °C the connection points 1 (NO) and 2 (COM) of the output relay are closed below 21.8 °C (heating is turned on) and...
- Page 15 Below the temperature adjustment buttons ) a switch is located. For both the economy ( ) and the comfort ( ☼ ) positions of the switch a different temperature can be set between 5 °C and 40 °C, in steps of 0.5 °C. After setting the economy and comfort temperatures, the temperature desired at the moment can be selected using the switch.
-
Page 16: Setting The Desired Temperature
the set comfort temperature (e.g. daytime temperature) to be maintained at the place where the thermostat has been installed. 6. SETTING THE DESIRED TEMPERATURE After putting the thermostat into operation and adjusting the basic settings the thermostat is ready for operation and the adjustment of the temperature can be started. - Page 17 • Move the switch according to the temperature you would like to change (economy ( w ) or comfort ( ☼ )). • Press the button, after which the notice “ROOM” disappears, the notice “SET” (adjusted value) appears in the bottom right corner of the display.
-
Page 18: Battery Replacement
display, and once again the current room temperature and the notice “ROOM” are displayed. • The previously set temperature can be freely changed any time using the buttons. Always the last set temperatures are in effect. 7. BATTERY REPLACEMENT The average lifetime of the batteries is 1 year. The icon alternately replacing the temperature value on the display indicates low battery voltage. - Page 19 Warning! Alkaline batteries may only be used for this appliance. Carbon-zinc batteries known as durable or long life batteries and chargeable accumulators are not suitable for the operation of this appliance. Icon appearing on the display to indicate low battery voltage warns reliably that the batteries should be replaced only when alkaline batteries are used.
-
Page 20: Frequently Asked Questions
The vast majority of the problems encountered can be solved easily by using the hints available on our website, without seeking... - Page 21 PRODUCT INFORMATION DATA SHEET: • Trademark: • Model identifier: Q3 • Temperature control class: I. class • Contribution to the efficiency of seasonal space heating: 1%...
- Page 22 • Using programmable thermostats you can ensure that every room (zone) is just heated according to a timetable preset in accordance with the demands. (You can obtain information on the services provided by COMPUTHERM Q7; Q7RF and Q8RF programmable room thermostats on our website).
-
Page 23: Technical Data
TECHNICAL DATA — switchable voltage: max. 30 V DC / 250 V AC — switchable current: 8 A (2 A inductive load) — temperature measurement range: 3 to 45 °C (in 0.1 °C increments) — adjustable temperature range: 5 to 40 °C (in 0.5 °C increments) —... - Page 24 COMPUTHERM Q3 type thermostat complies with the requirements of directives EMC 2014/30/EU, LVD 2014/35/EU and RoHS 2011/65/EU. QUANTRAX Ltd. Manufacturer: Fülemüle u. 34., Szeged, H-6726, Hungary Phone: +36 62 424 133 • Fax: +36 62 424 672 E-mail: iroda@quantrax.hu Web: www.quantrax.hu • www.computherm.info designed in the EU, manufactured in China Origin: Please watch our video presentation of the most important aspects of the usage of this thermostat at our websites! Copyright ©...
Need help?
Do you have a question about the Q3 and is the answer not in the manual?
Questions and answers