Table of Contents
Advertisement
Quick Links
Advertisement
Table of Contents

Related Manuals for Kawai CA401


Summary of Contents for Kawai CA401
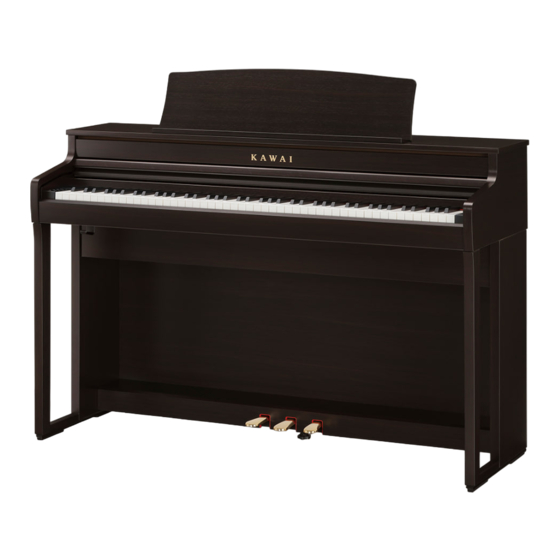
- Page 1 DIGITAL PIANO CA401 Owner’s Manual...
-
Page 2: Important Information
Important Information Important Safety Instructions Be sure to read these Safety Precautions carefully before using this instrument to ensure correct use. When using this electronic musical instrument, please observe the following precautions for safety. When this instrument is used by small children, please ensure safe use under the supervision of a parent. Warnings, cautions, and symbols have the following meanings CAUTION: TO REDUCE THE RISK OF ELECTRIC SHOCK, DO... -
Page 3: Volume And Headphones
Important Information CAUTION Doing so may cause a fall, damage, breakdown, injury, Health damage. Keep the power cable plug in a state where it can Do not press your ngernails, sharp objects, or be disconnected from the outlet easily. hard objects strongly against the surface of the display. - Page 4 Important Information Règles de sécurité (Supplémentairespour le Canada) Exemples de symboles graphiques A A ERTISSEMENT Indique que des précautions doivent être prises. Indique un risque potentiel qui peut entraîner la mort, ou de graves lésions, si l’appareil n’est pas manipulé correctement. Indique une manipulation interdite.
- Page 5 This device complies with Part 15 of the FCC Rules. Operation is subject to the following two conditions: (1) this device may not cause harmful interference, and (2) this device must accept any interference received, including interference that may cause undesired operation. This applies only to products distributed by Kawai America Corporation.
-
Page 6: Introduction
Bluetooth corresponds to the number assigned SIG, Inc. and any use of such marks by Kawai to the corresponding operation. Musical Instruments Mfg. Co., Ltd. is under license. -
Page 7: Table Of Contents
Important Information Table of Contents Important Information Adjustments & Settings Important Safety Instructions Settings Menu Introduction Entering the Settings Menu T T ble of Contents Reverb Transpose Preparation T T ne Control Low Volume Balance Part Names and Functions Dual Key Cover and Music Rest 4 Hands Pedals... -
Page 8: Preparation
Preparation Part Names and Functions... - Page 9 Preparation [POWER] button [UP] button This button is used to turn the digital piano on/o . This button is used to move the menu up or Be sure to turn o the instrument aft f f er playing. increase the setting values. [MASTER VOLUME] slider [DOWN] button This slider controls the master volume level of the...
- Page 10 Preparation Opening/Closing the Key Cover T T open the key cover, r r gently lift f f it with both hands. T T close the key cover, r r gently lower it with both hands. CHECK When opening the key cover, r r do not place anything on top of it. Items may fall inside the instrument, causing electric shock, shorts, re, or malfunction.
-
Page 11: Pedals
Preparation Pedals As with a grand piano, this piano features three pedals. These pedals produce the following e ects. Damper pedal (right pedal) Depressing this pedal sustains the sound aft f f er one’s hands have been lift f f ed from the keyboard – greatly enriching the piano sound, while also assisting smooth “legato”... -
Page 12: Power
Preparation Power 1. Connecting the AC adaptor to the main body Plug the supplied AC adaptor into the power cable and insert it into the [DC IN] jack located on the underside of the main body. . Connecting the plug into an outlet Connect the power cable to an AC power outlet. - Page 13 Preparation Volume and Headphones Adjusting the volume Use the [MASTER VOLUME] slider located on the right side of the main body to adjust the volume. Move the slider up to increase the volume and down to decrease the volume. Adjust the volume while listening to the sound by striking the keys.
-
Page 14: Home Screen
Preparation Home screen The rst screen that appears when the instrument has started up aft f f er power-on is called the Home screen. The Home screen is the initial menu of the operation. -
Page 15: Basic Operation
Basic Operation Sounds This is used to access the sounds of grand pianos and upright pianos, including SK-EX pianos, as well as a variety of sounds unique to a digital piano. Method 1 Press the [UP]/[DOWN] buttons on the Home screen to select sounds. Press the [UP]/[DOWN] buttons simultaneously to restore the default setting “SK-EX Competition Grand Piano | Concert”. -
Page 16: Metronome
Basic Operation Metronome The Metronome function provides a steady beat to aid practicing the piano. Turning the Metronome on/o Press the [METRONOME] button. The LED for the [METRONOME] button turns on and the metronome sound begins. Pressing the [METRONOME] button again will stop the metronome and turn o the LED indicator for the [METRONOME] button. -
Page 17: Recorder
Basic Operation Recorder This instrument allows songs to be recorded and played back. Recording a song 1. Press the [REC] button to enter the Recorder screen. The LED indicator for the [REC] button will start to ash once the Recorder screen opens. 2. -
Page 18: Music Menu
Basic Operation Music Menu The built-in songs/pieces included in this instrument can be listened to in a variety of ways that are unique to a digital piano. Item Description emo Songs This instrument includes demo songs for each sound. Lesson This instrument has a collection of lesson songs stored in memory. -
Page 19: Lesson
Basic Operation Lesson Lesson song books US, Canada, Australasia Rest of the World lfred’s Basic Piano Library Lesson Book Level 1A Beyer 106 (Vorschule im Klavierspiel, Opus 101) Alfred’s Basic Piano Library Lesson Book Level 1B Burgmüller 25 (25 Etudes Faciles, Opus 100) Beyer 106 (Vorschule im Klavierspiel, Opus 101) Czerny 30 (Etudes de Mécanisme, Opus 849) Burgmüller 25 (25 Etudes Faciles, Opus 100) -
Page 20: Concert Magic
Basic Operation Concert Magic Arrangement types Type Description Example ‘Für Elise’ Ta T T p out a constant, steady beat on Easy Beat (EB) any key of the keyboard. ‘Twinkle, Twinkle, Little Star’ Ta T T p out the rhythm of the melody Melody Play (MP) on any key of the keyboard. - Page 21 Basic Operation Setting a Concert Magic song 1. On the Concert Magic screen, press the [1] button. 2. Press the [UP]/[DOWN] buttons to select the setting. 3. Press the [1] button. 4. Press the [UP]/[DOWN] buttons to select the type. Demo Mode list Item Playback method...
-
Page 22: Adjustments & Settings
Adjustments & Settings Settings Menu The following settings can be changed in the Settings menu. Function Description Reverb The Reverb setting adds reverberation to the sound. The Transpose setting allows players to transpose without changing the keyboard Transpose key currently used. The To T T ne Control setting allows players to optimise the sound quality in order to T T ne Control... -
Page 23: Entering The Settings Menu
Adjustments & Settings Entering the Settings Menu 1. On the Home screen, press the [1] button to enter the Settings Menu. 2. Press the [UP]/[DOWN] buttons to select a function to use. 3. Press the [1] button. 4. Press the [UP]/[DOWN] buttons to set the value and type. -
Page 24: T T Ne Control To
Adjustments & Settings T T ne Control The To T T ne Control setting allows players to optimise the sound quality in order to achieve the best sound quality within the area that the instrument is located. Type E ect Flat T T ne control adjustment is not applied. -
Page 25: Dual
Adjustments & Settings Dual The Dual function allows two sounds to be layered together. r r Expand the range of musical expression by playing two sounds simultaneously to create a duet of a melody, or by mixing sounds of a similar type to create a thicker sound. -
Page 26: Hands
Adjustments & Settings 4 Hands The Four Hands function divides the keyboard into left f f and right sections, each of which can be played in the same key range. In 4 Hands Mode, the sustain (right) pedal and soft f f (left f f ) pedal act as separate damper pedals for the respective right and left f f sections of the keyboard. -
Page 27: T T Uch Curve To
Adjustments & Settings T T uch Curve The To T T uch Curve setting allows the relationship between the strength/velocity of playing the keyboard and the volume/tonal character of the sound produced to be adjusted. As with an acoustic piano, the digital piano produces a louder sound when the keys are struck with force, and a soft f f er sound when the keys are played gently. -
Page 28: Key Volume
Adjustments & Settings Key Volume The Key Volume setting allows players to adjust the volume of each of the 88 keys. 1. On the Key Volume screen, press the [1] button. 2. Press a key to adjust its volume. 3. Press the [UP]/[DOWN] buttons to adjust the volume. The adjusted volume value will be saved automatically by exiting the Key Volume function. -
Page 29: Spatial Headphone Sound
Adjustments & Settings Spatial Headphone Sound Spatial Headphone Sound is a feature that enhances the depth and realism of the acoustic piano sound through earphones or headphones. MEMO The display shows “Spatial HP”. Type E ect Disables the Spatial Headphone Sound feature. Forward Provides front focuses, somewhat narrow spatial positioning. -
Page 30: Bluetooth
Connection method Installing a Bluetooth MIDI compatible application on a smart device will allow users Ta T T p "CA401 MIDI" on the connection screen of Bluetooth MIDI to operate the digital piano from the the Bluetooth MIDI compatible application. -
Page 31: Auto Display O
Adjustments & Settings Auto Display O The Audio Display O setting can be used to automatically turn o the display when the control panel is not being operated. The Auto Display O setting can be set to 15 seconds, 5 minutes, or 30 minutes. Aft f f er the display has turned o , pressing any of the control buttons will turn on the display again. -
Page 32: Factory Reset
Adjustments & Settings Factory Reset The Factory Reset function restores the instrument back to its factory default con guration. Initialised settings Recorder songs stored in internal memory Settings stored using the Startup Settings function. Auto Power O setting Key Volume setting On the Factory Reset screen, press the [1] button to execute Factory Reset, or press the [2] button to cancel. -
Page 33: Appendix
Appendix Troubleshooting Power The instrument does not turn on. Check that the power cable is correctly connected on both the outlet side and the instrument side. It may be connected on one end, and disconnected on the other. r r Try disconnecting and then reconnecting the power cable. - Page 34 Appendix The sound distorts when performing certain pieces or in certain registers If the volume is increased, the sound may be distorted when performing certain pieces. In this case, turn down the volume before playing the instrument. The volume di ers depending on the key pressed Adjust the volume of keys as needed using the Key Volume setting.
- Page 35 Appendix Connectivity P. P P 30 Bluetooth® The instrument cannot connect to the smart device/app via Bluetooth Check that the instrument's Bluetooth function is turned on. Bluetooth MIDI should be connected from the settings in the app, not from the Bluetooth settings of the smart device.
-
Page 36: Internal Songs List
EX Concert Grand Piano Concert Hungarian Rhapsodies No.6 / Liszt Upright Piano Classic Alpenglühen Op.193 / Oesten SK-EX Competition Grand Piano Jazz Original / Kawai EX Concert Grand Piano Pop Original / Kawai SK-EX Competition Grand Piano Mellow Sonata No.30 Op.109 / Beethoven... - Page 37 Appendix oncert Magic Songs List Children’s Songs American Classics Song Name Composer Song Name Composer Twinkle, Twinkle, Little Star French folk song When The Saints Go Marching In American folk song I’m A Little Te T T apot Traditional The Entertainer S.J .
-
Page 38: Connecting To Other Devices
Appendix Connecting to Other Devices PHONES (Headphones jacks) These jacks are used to connect headphones. Up to two sets can be connected. PEDAL (Pedal connector) This connector is used to plug the pedal cable attached to the pedal unit. USB to HOST This port is used connect the instrument to a computer or smart device using a standard USB cable. - Page 39 The USB-MIDI driver to use is di erent depending on the computer’s operating system. For more information, please refer to the following page of the Kawai Global website: https://www.kawai-global.com/usb...
-
Page 40: Assembly Instructions
Appendix Assembly Instructions CAUTION Please ensure that two or more people work on assembling the digital piano. When moving the digital piano, lift f f it horizontally and be careful not to pinch your hands or ngers or drop it on your feet. Included parts Before attempting to assemble the digital piano, con rm that all of the parts are included. - Page 41 Appendix 1. Attaching the side panels (B and C) 2. Attaching the back board (D) to the pedal board (E) Stand the assembled structure of the pedal board (E) and side panels (B and C) upright Unfasten and extend the pedal connection cable (vertically) on the oor as shown in the illustration attached to the bottom of the pedal board (E).
- Page 42 Appendix 3. Mounting the main body (A) onto 4. Fastening the main body (A) to the the stand stand Lift f f the main body (A) and carefully place it onto Loosely fasten the main body (A) to the stand the stand.
- Page 43 Appendix 5. Connecting the cables 6. Attaching the front under board (F) Pass the pedal connection cable coming out of Attach the front under board (F) to the metal the pedal board (E) through the aperture of the brackets located underneath the main body using back board (D) to the back of the instrument, and the two at headed screws connect it to the PEDAL terminal on the bottom of...
-
Page 44: Information About Adaptor Speci Cations
Appendix Information about Adaptor Speci cations This adapter speci cation table conforms to the requirements of EU Commission Regulation (EU) 2019/1782. -
Page 45: Eu Declaration Of Conformity
Appendix EU Declaration of Comformity... -
Page 46: Speci Cations
Appendix Speci cations Grand Feel Compact with Let-O , Triple Sensor, r r and Counterweights Keyboard 88 wooden keys with Ivory To T T uch key surfaces Display 128 x 128 dots OLED Polyphony Max. 192 notes (depending on the selected sound) Sounds 19 sounds Metronome... - Page 48 SP00001688 Printed in Indonesia Copyright © 2022 Kawai Musical Instruments Mfg. Co.,Ltd. All Rights Reserved.
Need help?
Do you have a question about the CA401 and is the answer not in the manual?
Questions and answers