Table of Contents
Advertisement
Quick Links
Advertisement
Table of Contents

Related Manuals for Kawai CA901


Summary of Contents for Kawai CA901
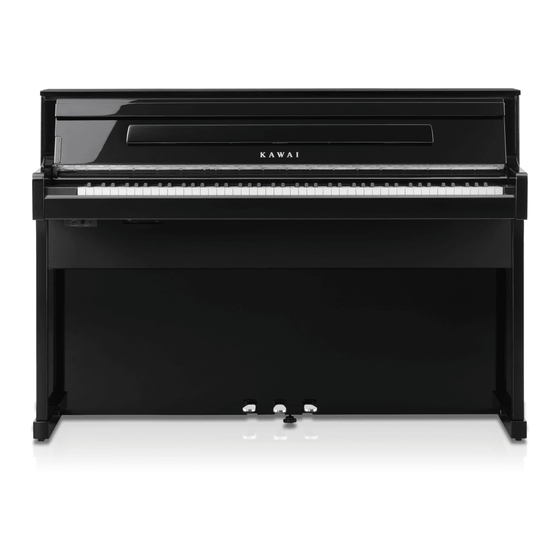
- Page 1 DIGITAL PIANO CA901/CA701 Owner's Manual...
-
Page 2: Important Information
Important Information Important Safety Instructions Be sure to read these Safety Precautions carefully before using this instrument to ensure correct use. When using this electronic musical instrument, please observe the following precautions for safety. When this instrument is used by small children, please ensure safe use under the supervision of a parent. Warnings, cautions, and symbols have the following meanings CAUTION: TO REDUCE THE RISK OF ELECTRIC SHOCK, DO... - Page 3 Important Information CAUTION Doing so may cause a fall, damage, breakdown, injury, Health damage. Keep the power cable plug in a state where it can Do not press your ngernails, sharp objects, or be disconnected from the outlet easily. hard objects strongly against the surface of the display.
- Page 4 Important Information Règles de sécurité (Supplémentairespour le Canada) Exemples de symboles graphiques A A ERTISSEMENT Indique que des précautions doivent être prises. Indique un risque potentiel qui peut entraîner la mort, ou de graves lésions, si l’appareil n’est pas manipulé correctement. Indique une manipulation interdite.
- Page 5 Important Information Notes on Repair Should an abnormality occur in the product, immediately turn the power OFF, disconnect the power cable plug, and then contact the shop from which the product was purchased. Information on disposal for users If your product is marked with this recycling symbol it means that, at the end of its life, you must dispose of it separately by taking it to an appropriate collection point.You should not mix it with general household waste.
-
Page 6: Introduction
The Bluetooth® word mark and logos are di er. r r registered trademarks owned by the Bluetooth SIG, Inc. and any use of such marks by Kawai Musical Instruments Mfg. Co., Ltd. is under Indicates reference pages. license. - Page 7 Important Information M E M O...
-
Page 8: Table Of Contents
Important Information Table of Contents Important Information Adjustments & Settings Important Safety Instructions Editor Introduction Accessing the Editor screen T T ble of Contents Piano Variation Main Sound Preparation Sub Sound Part Names and Functions Ambience Opening/Closing the Key Cover Reverb Music Rest E ect... - Page 9 Important Information Adjustments & Settings Menu Menu Item List Speaker/Headphone settings 4 Hands Mode settings Bluetooth settings USB Memory Recorder Settings User Data Settings System Settings Appendix Troubleshooting Sound List Drum Rhythm List Sound Demo Song List Connecting to Other Devices Assembly Instructions Speci cations...
-
Page 10: Preparation
Preparation Part Names and Functions... - Page 11 Preparation [POWER] button Headphone hook This button is used to turn the digital piano on/o . This hook can be used to hang headphones when Be sure to turn o the instrument aft f f er playing. not in use. [MASTER VOLUME] slider [LINE IN] jacks This slider controls the master volume level of the...
-
Page 12: Opening/Closing The Key Cover
Preparation Opening/Closing the Key Cover CA901 CA701 T T open the key cover, r r gently lift f f it with both T open the key cover, r r gently lift f f it with both hands. hands, and then slowly push it back into the T T close the key cover, r r gently lower it with both instrument's body. -
Page 13: Music Rest
Preparation Music Rest A901 CA701 Use the music rest by tilting it forward. 1. Raise the music rest forward. 2. Fix the metal ttings on the back of the music rest in the desired location on the holder on top of the instrument. -
Page 14: Pedals
Preparation Pedals As with a grand piano, this piano features three pedals. These pedals produce the following e ects. Damper pedal (right pedal) Depressing this pedal sustains the sound aft f f er one’s hands have been lift f f ed from the keyboard – greatly enriching the piano sound, while also assisting smooth “legato”... -
Page 15: Power
Preparation Power 1. Connecting the power cable to the instrument CA901 CA701 Insert the included power cable into the [AC INLET] Connect the included power cable to the underside terminal at the bottom of the back of the body of of the body of the instrument. -
Page 16: Volume And Headphones
Preparation Volume and Headphones Adjusting the volume The [MASTER VOLUME] slider controls the volume. Move the slider up to increase the volume, and down to decrease the volume. Adjust the volume by checking the sound while playing the keyboard. Using headphones Connect the headphones to the [PHONES] jacks on the underside of the instrument. - Page 17 Preparation M E M O...
-
Page 18: Home Screen
Preparation Home screen The digital piano’s user interface is arranged into three di erent “home” screens, which are selected by tapping the corresponding Piano, Sound, and Music tabs shown at the bottom of the touchscreen display. T T uchscreen Operations Icon Operation Description Ta T T p... -
Page 19: Piano Ta T T B
Preparation Status bar Piano Ta T T b This area indicates the status of connected devices This tab is used to access all of the available (headphones, USB, Bluetooth). acoustic piano sounds. This tab is recommend for acoustic piano performance. ... - Page 20 Basic Operation Piano Tab This tab is used to access all of the available acoustic piano sounds. This tab is recommend for acoustic piano performance. Piano Selection area Operation : The name and picture of the currently selected piano is shown in this area. The sound can be changed by tapping or swiping.
-
Page 21: Piano Selection Area List
Basic Operation Piano Selection area List SK-EX Competition Grand SK-EX Concert Grand A concert grand piano with a tone similar to that A concert grand piano with a clear tonal color and heard in international piano competitions. rich powerful bass. EX Concert Grand SK-5 Grand Piano A concert grand piano with an elegant detailed... -
Page 22: Sound Ta T T B
Basic Operation Sound Tab This tab is used to access all of the available sounds, including acoustic pianos, electric pianos, organs, strings, etc. Category Selection area Operation: The name and picture of the currently selected sound category is shown in this area. The sound can be changed by tapping or swiping. -
Page 23: Category Selection Area List
Sounds that have been selected previously (up using the Piano Editor/Sound Editor. r r to 30 sounds). P. P P 23 Favorite Recommended Classic Sounds (30 sounds) that are recommended by Sounds that are suitable for playing Classical Kawai. music. - Page 24 Basic Operation Jazz Sounds that are suitable for playing Jazz music. Sounds that are suitable for playing Pop music. CHECK The “User” and “Favorite” categories will only be displayed if a User sound has been stored or a sound has been speci ed as a Favorite. The “Recently Played”...
- Page 25 Basic Operation M E M O...
-
Page 26: Music Tab
Basic Operation Music tab This tab is used to access a wide range of music built into the instrument. This tab is also used to play music stored on a USB memory device, or recorded to the internal memory. Category selection Operation : This area provides access to the various built-in songs/pieces organised by category, as well as songs recorded to the instrument's internal memory or a USB memory device. -
Page 27: Category Selection List
Basic Operation Category selection List Favorite Recently Played Songs/pieces that have been speci ed as a Songs/pieces that have been played previously (up Favorite. to 30 pieces). Composer Lesson Book Songs/pieces sorted by composer. r r Songs/pieces sorted by lesson book. Genre Sound Demo Songs/pieces sorted by musical genre. -
Page 28: Playing A Song/Piece
Basic Operation Playing a song/piece 1. Ta T T p and select a category corresponding to the 2. Ta T T p the song/piece to be played. song/piece to be played. 3. The Mini player will appear and play the selected song/piece. -
Page 29: Changing The Sound And Playing A Song
Basic Operation Changing the Sound and Playing a Song The piano's built-in songs can be played using sounds selected with the Piano tab and Sound tab. CHECK Sound Demo songs cannot be played using changed sounds. Example Playing the built-in song "La Candeur" with the "Celesta" sound 1. -
Page 30: Metronome
Basic Operation Metronome The Metronome function provides a steady beat to aid practicing the piano. Turning the Metronome on/o Ta T T p the (gray) button to start the metronome counting. Ta T T p the (blue) button again to stop the metronome counting. Metronome mode settings screen Rhythm mode settings screen... -
Page 31: Settings Screen Operation
Basic Operation Settings screen operation Beat indicator Time signature/Rhythm This area indicates the current beat of the bar by Operation: ashing sections of the background in sequence. This area indicates the current Metronome time and drum Rhythm signature. Swipe up/down to T T mpo scroll through the list, then tap the desired time signature to select it. -
Page 32: Recorder
Basic Operation Recorder This instrument allows songs to be recorded and played back. Mini Recorder screen The Mini Recorder appears as the button on the right side of the Selection bar, r r on the Piano/Sound tab home screens. This button provides a quick way to start and stop recording without opening the main Recorder screen. -
Page 33: Recording A Song
Basic Operation Recording a song 1. Ta T T p the button on the Piano/Sound tab home Ta T T p the button, or press a key on the screen. keyboard to start recording. The button will change to to indicate that the Recorder is in standby mode. - Page 34 Basic Operation Internal Recorder This instrument allows up to 10 songs to be recorded and stored in internal memory. The total recording capacity of this instrument is approximately 90,000 notes. Performances are recorded until immediately before the recorder stops. The Recorder will capture sound changes during recording. The Recorder will capture switching to Dual or Split playing mode.
-
Page 35: Editor
Adjustments & Settings Editor The Editor allows various aspects of the current piano sound to be adjusted. Accessing the Editor screen Access the Editor screen by tapping the selected content bar on the Piano tab screen or Sound tab screen. -
Page 36: Piano Variation
Adjustments & Settings Piano Variation CHECK "Piano Variation" is only shown when the Piano tab is selected. Changing Piano Variation In "Piano Variation", tap the buttons to change the piano sound. SK-EX Competition Grand / SK-EX Concert Grand Piano Variation Description Rendering Classic... - Page 37 Adjustments & Settings EX Concert Grand Piano Variation Description Concert A luxurious and uent grand piano sound. Mellow A soft f f and warm grand piano sound. Standard A distinctive and bright grand piano sound. A bright and powerful grand piano sound. Bright A bright and exciting grand piano sound with a characteristic attack.
-
Page 38: Main Sound
Adjustments & Settings Main Sound CHECK "Main Sound" is displayed only when the Sound tab is selected. Main Sound settings 1. In "Main Sound", swipe the icons left f f /right to scroll 2. Ta T T p the buttons to change the selected through the available instrument types, then tap the sound. -
Page 39: Sub Sound
Adjustments & Settings Sub Sound CHECK "Sub Sound" is only shown when an item other than a Rendering is selected in the Sound tab. Dual mode The Dual playing mode allows two sounds to be layered together, r r creating a more complex sound. For example, a piano sound layered with strings, or a church organ combined with a choir, r r etc. - Page 40 Adjustments & Settings Dual mode advanced settings When Dual playing mode is selected, the following settings can be changed. Balance This setting is used to adjust the volume balance between the Main and Sub sounds. Drag the Balance slider right/left f f to increase the volume of the Main/Sub sounds. Octave Shift f f This setting is used to lower/raise the pitch of the Sub Sound in octave steps.
- Page 41 Adjustments & Settings Split mode The Split playing mode divides the keyboard into two sections, allowing each section to be played with a di erent sound. For example, a bass sound in the left f f section, and a piano sound in the right section. 1.
- Page 42 Adjustments & Settings Split mode advanced settings When Split playing mode is selected, the following settings can be changed. Balance This setting is used to adjust the volume balance between the Main (right section) and Sub (left f f section) sounds. Drag the Balance slider right/left f f to increase the volume of the Main/Sub sounds.
-
Page 43: Vpa
Adjustments & Settings An experienced piano technician is essential to fully realise the potential of a ne acoustic piano. In addition to meticulously tuning each note, the technician also performs numerous regulation and voicing adjustments that allow the instrument to truly sing. The VPA (Virtual Piano Artisan) of the digital piano simulates these re nements digitally, allowing performers to shape various aspects of the instrument’s character to suit their personal preferences. - Page 44 Adjustments & Settings Presets Item Description Default The default piano sound without additional adjustments. A preset that eliminates the mechanical noises produced when the damper pedal is depressed Noiseless and keys are released. Deep Resonance A preset that emphasises damper and string resonances. Light Resonance A preset that reduces damper and string resonances.
-
Page 45: Ambience
Adjustments & Settings Ambience This function can be used to apply Ambience to the current sound, in order to simulate various di erent virtual environments. CHECK "A " mbience" is only shown when a Rendering sound is selected in Piano Variation. Changing Ambience 1. - Page 46 Adjustments & Settings Ambience types Type Description Natural Simulates the ambience of a natural environment. Small Room Simulates the ambience/reverberation of a small room. Medium Room Simulates the ambience/reverberation of a medium-sized room. Large Room Simulates the ambience/reverberation of a large room. Mellow Lounge Simulates the soft f f ambience/reverberation of a lounge.
-
Page 47: Reverb
Adjustments & Settings Reverb This function can be used to apply Reverberation to the current sound, in order to simulate various di erent virtual environments. CHECK "Reverb" is only shown when an item other than a Rendering sound is selected in Piano Variation. Changing Reverb 1. - Page 48 Adjustments & Settings Reverb types Type Description Simulates the reverb of a small rehearsal room. Lounge Simulates the reverb of a piano lounge. Small Hall Simulates the reverb of a small hall. Concert Hall Simulates the reverb of a concert hall or theatre. Live Hall Simulates the reverb of a live hall or stage.
-
Page 49: E Ect
Adjustments & Settings E ect This function can be used to apply a variety of e ects to the current sound, in order to simulate various di erent digital and analogue e ects units. CHECK "E ect" is only shown when an item other than a Rendering sound is selected in the Sound tab. Changing E ect 1. - Page 50 Adjustments & Settings E ect types Type Description Mono Delay Applies an echo e ect to the sound, playing through both speakers simultaneously. Applies a “ping pong” echo e ect to the sound, giving the impression that it is “bouncing” from PingPong Delay left f f to right.
- Page 51 Adjustments & Settings E ect parameters Delay Dry / Wet: Moving the slider to the right adjusts the intensity of the e ect. Time: Moving the slider to the right adjusts the interval time between each delay. Chorus / Ensemble Dry / Wet: Moving the slider to the right adjusts the intensity of the e ect.
-
Page 52: Tuning
Adjustments & Settings Tuning Adjust the overall pitch of the current sound. This setting may be useful for matching the pitch when playing with an ensemble or playing along with a CD or other audio source. Changing Tuning Ta T T p the [ ] [ ] buttons to change the values in "Tuning". Values can be changed in 0.5 Hz increments within the range of 427~453 Hz. -
Page 53: Sound Management
Adjustments & Settings Sound Management Favorite 2. The current sound is added to the "FAV A A ORITE" 1. Ta T T p the button in the bottom left f f of the screen. category in the Sound tab. ... - Page 54 Adjustments & Settings Saving User sounds 1. When sound setings are edited on the Editor screen, 2. Ta T T p the button, then enter the desired name for button will be shown in the lower right corner the edited sound.
- Page 55 Adjustments & Settings Changing the name of a User sound 2. Ta T T p "Rename". 1. Ta T T p the button for the sound to be renamed. 3. Change the name, then tap "Save". The User sound name will be renamed.
- Page 56 Adjustments & Settings Deleting User sounds 1. Ta T T p the button for the User sound to be deleted. 2. Ta T T p "Delete Sound". 3. Ta T T p "Delete". The User sound will be deleted.
-
Page 57: Vpap Detailed Settings
Adjustments & Settings VPA Detailed Settings n experienced piano technician is essential to fully realise the potential of a ne acoustic piano. In addition to meticulously tuning each note, the technician also performs numerous regulation and voicing adjustments that allow the instrument to truly sing. The VPA (Virtual Piano Artisan) settings of the digital piano simulate these re nements digitally, allowing performers to shape various aspects of the instrument’s character to suit their personal preferences. - Page 58 Adjustments & Settings Item Description Operation While the fundamental sound of an acoustic piano is produced by vibrating strings, transmitting energy through a spruce soundboard, the cabinet of the instrument itself also contributes a variety of subtle tonal characteristics that Cabinet Resonance enrich the playing and listening experience.
- Page 59 Adjustments & Settings Item Description Operation The Te T T mperament setting allows the tuning system used by the digital piano to be Te T T mperament changed from the modern “Equal Te T T mperament” standard to one of the various temperaments popularised during the Renaissance and Baroque periods.
-
Page 60: Accessing The Vpa Detailed Settings Screen
Adjustments & Settings ccessing the VPA P P Detailed Settings Screen 1. Ta T T p [Edit] in the VPA area. 2. Set the value and type for each item in the detailed settings. 3. Ta T T p to return to the Editor screen. - Page 61 Adjustments & Settings T T uch Curve Type E ect Light touch curves require less striking force to achieve a forte note, and are therefore recommended for Light players with a delicate touch such as children or organ players. The key touch will become progressively (4/3/2/1) lighter as the number increases.
- Page 62 Adjustments & Settings Voicing Type Description Normal The normal tonal character of an acoustic piano throughout the entire dynamic range. Mellow 1 A soft f f er, r r more mellow tonal character throughout the entire dynamic range. Mellow 2 An even soft f f er tonal character than Mellow 1. A tonal character that changes dramatically from mellow to bright, depending on the strength of key Dynamic strike.
- Page 63 Adjustments & Settings Resonance Rendering Value Description Resonance will not be applied to the selected sound. A small amount of resonance will be applied to the selected sound. A large amount of resonance will be applied to the selected sound. Damper Noise Value Description...
- Page 64 Adjustments & Settings Cabinet Resonance Value Description Cabinet Resonance will not be applied to the selected sound. A small amount of Cabinet Resonance will be applied to the selected sound. A large amount of Cabinet Resonance will be applied to the selected sound. Key-o E ect Value Description...
- Page 65 Adjustments & Settings T T pboard Type Description Open3 Simulates the character of a fully open topboard, with maximum sound proj o ection. Open2 Simulates the character of a half open topboard, with reduced sound proj o ection. Open1 Simulates the character of a partially open topboard, with limited sound proj o ection. Closed1 Simulates the character of a closed rear topboard, but open front topboard, with limited sound proj o ection.
- Page 66 Adjustments & Settings Stretch Tuning Type Description Stretch tuning is disabled. Normal Normal stretch tuning is applied, with a lower low end and a higher high end. Wide Wide stretch tuning is applied, with a lower low end and a higher high end than Normal. User A custom tuning method, allowing the pitch of each key to be individual tuned.
- Page 67 Adjustments & Settings T T mperament Type Description qual This temperament is the most popular tuning method, and divides the scale into Te T T mperament twelve equal semi-tones. This produces the same chordal intervals in all twelve keys, (Equal) and has the advantage of limitless modulation of the key.
- Page 68 Adjustments & Settings User Te T T mperament 1. Ta T T p [Edit] in the User Te T mperament area to display the 2. Ta T T p the [–] and [+] buttons in the Key area to select the Te T T mperament Editor screen.
- Page 69 Adjustments & Settings Key Volume Type Description ormal An evenly balanced volume throughout the keyboard. High Damping Gradually reduces the volume of the keyboard towards the treble region. Low Damping Gradually reduces the volume of the keyboard towards the bass region. High &...
- Page 70 Adjustments & Settings Half- f f Pedal Adjust Value Description This setting allows the half- f pedal to start at the earliest point. This setting allows the half- f pedal to start at the latest point. This setting is intended for using the pedal as a MIDI controller. r r The maximum value can be reached easily, without pressing the damper pedal fully.
-
Page 71: Other Sound Settings (Sound Tab Only)
Adjustments & Settings Other Sound Settings (Sound tab only) hen a sound other than a piano is selected, the sound can be edited by tapping the [Edit] button. The settings are the same as the VPA settings. CHECK The items that can be adjusted di er depending on the sound. Damper Hold (Other Sound Settings only) Type Description Organ, strings, etc. -
Page 72: Player Detailed Functions
Adjustments & Settings Player Detailed Functions The player can play the following types of les. Songs built into the instrument Songs that were recorded and saved on the instrument SMF les (format 0, format 1) on a USB memory device mp3 les on a USB memory device (bitrate: 8k to 320bps, sampling rate: 44.1 kHz/48 kHz/32 kHz, stereo) Wav les on a USB memory device (sampling rate: 44.1 kHz, 16-bit, stereo) Sound Demo is not supported in Concert Magic or Lesson mode. -
Page 73: Player Screen
Adjustments & Settings Player Screen Player mode Playing position Operation: Operation: Built-in songs can be played using any of three This area displays the playing position of the functions: Player, r r Lesson, or Concert Magic. current song/piece. Drag the slider right/left f f to change the current playing position. -
Page 74: Lesson
Adjustments & Settings Lesson Accessing the Lesson Screen Ta T T p the button for Player mode on the Player screen to access the Lesson screen. Lesson functions Function Description Operation Te T T mpo Adjust the playback tempo of the current song/piece. Metronome Volume Adjust the volume of the Metronome. - Page 75 Adjustments & Settings T T mpo Drag the "Te T T mpo" slider right/left f f to adjust the tempo. Drag the slider to the right to increase the tempo, and to the left f f to decrease the tempo. Metronome Volume Drag the "Metronome Volume"...
-
Page 76: Concert Magic
Adjustments & Settings Concert Magic The Concert Magic function allows complete beginners to enjoy playing the piano by simply tapping the keyboard with a steady rhythm and tempo. Accessing the Concert Magic Screen Ta T T p the button for Player mode on the Player screen to access the Concert Magic screen. Performing With a song/piece selected, play the keyboard with the appropriate rhythm to proceed with the performance. -
Page 77: Recorder Detailed Functions
Adjustments & Settings Recorder Detailed Functions Recorder screen This screen is dedicated to the Recorder. r r Recording time can be checked, and overdubbing and various Recorder functions can be used on this screen. Recording time Playback button This area indicates the recording time. Operation: This button is used to play the song that has been Recording status... -
Page 78: Overdubbing
Adjustments & Settings Overdubbing Method 1 1. Record a performance in the normal way, then tap the 2. Ta T T p to enter the Standby state. [Overdub] button on the Recording completed screen. The Recording start screen will appear. r r 3. - Page 79 Adjustments & Settings Method 2 1. Double tap 2. Ta T T p the Select button to access the Song selection screen. The Recording start screen will appear. r r 3. Ta T T p the song to be overdubbed to. Subsequent operations are the same as operations 2 to 5 in Method 1.
-
Page 80: Menu
Adjustments & Settings Menu The Menu contains a variety of options to adjust the digital piano’s operation and sound. These settings are grouped by category, providing convenient access to relevant controls. Ta T T p to access the Menu screen. Menu Item List Item Description... -
Page 81: Speaker/Headphone Settings
The Wall EQ setting adjusts the character of the digital piano’s speaker Wall EQ system in order to achieve optimum sound when the rear of the instrument is placed in front of a wall. (CA901 only) Spatial Headphone Sound is a special feature of the digital piano that Spatial Headphone Sound enhances the depth and realism of the acoustic piano sound when listening through headphones or earphones. - Page 82 Adjustments & Settings T T ne Control Type Description Flat T T ne control adjustment is not applied. Brilliance Adjusts the overall brightness of the sound. Bass Boost Emphasises low-range frequencies, creating a deeper sound. Bass Cut Reduces low-range frequencies, creating a clearer sound. Mid Boost Emphasises mid-range frequencies, creating a harder sound.
- Page 83 Adjustments & Settings User To T T ne Control 1. Ta T T p [Edit] in "User To T T ne Control" to access the To T T ne 2. Ta T T p the buttons to select the desired Control Editor screen.
- Page 84 Adjustments & Settings Low Volume Balance Type Description Low Volume Balance adjustment is not applied. When the Master Volume is set to a low level, a small amount of Low Volume Balance adjustment will be Ty T T pe 1 applied.
- Page 85 Adjustments & Settings Spatial Headphone Sound Type Description Disable the Spatial Headphone Sound feature. Forward Front focused, somewhat narrow spatial positioning. Normal Naturally balanced spatial positioning that is neither forward nor wide. Wide Wide, very open spatial positioning. CHECK This setting does not a ect the speaker or Line Out output. Phones Type Type Description...
-
Page 86: Hands Mode Settings
Adjustments & Settings 4 Hands Mode settings 1. Ta T T p "4 Hands Mode" menu item to enable 4 Hands 2. Swipe the icons left f f /right to scroll through the Mode. available instrument types, then tap to select the The keyboard will be divided into right and left f f desired icons for the right side and the left f f side. - Page 87 Adjustments & Settings 4 Hands Mode Detailed Settings The following settings can be changed in 4 Hands Mode. Balance This setting is used to adjust the balance between the volume of the left f f section and the right section. Drag the Balance slider left f f /right to increase the volume of the left f f /right section.
-
Page 88: Bluetooth Settings
When using a smart device app that Enable the smart device's Bluetooth function, launch an supports Bluetooth MIDI, this function app that supports Bluetooth MIDI, then select "CA901 Bluetooth MIDI allows the instrument to be controlled MIDI" or "CA701 MIDI" from the app's connection setting by an app, or send/receive MIDI data screen. - Page 89 This setting turns the digital piano's Bluetooth MIDI and Bluetooth Audio functions on and o . Bluetooth Audio pairing If "CA901 Audio" or "CA701 Audio" does not appear as a pairing option on the smart device, tap the Pairing button to reset the current Bluetooth Audio connection and place the instrument in Pairing mode.
-
Page 90: Usb Memory Recorder Settings
Adjustments & Settings USB Memory Recorder Settings Information about USB memory devices Connect the USB memory device to the [USB TO DEVICE] port located on the front of the digital piano. The USB memory device should be connected directly to the instrument, and not via an extension cable or any other auxiliary devices. - Page 91 Adjustments & Settings CHECK Be careful when formatting, as data that is not displayed on the digital piano may be stored in the USB Memory device speci ed by other devices. The "USB Memory Rec." menu item is only displayed when a USB memory device is connected to the [USB TO DEVICE] port.
-
Page 92: User Data Settings
Adjustments & Settings User Data Settings User Data Item Description All of the sounds registered in the "Favorite" category of the Sounds tab can be reset Favorite (Sounds) (removed). All of the sounds registered in the "Recently Played" category of the Sounds tab can be Recently Played (Sounds) reset (removed). - Page 93 Adjustments & Settings CHECK T T use an edited sound as a startup setting, rst save the edited sound as a User sound. P. P P 54 Saving User sounds The "Startup Screen" setting is given priority over the the "Startup Settings" setting. Example Setting an edited "Tine Electric Piano"...
-
Page 94: Appendix
Appendix Troubleshooting Power The power does not turn on Check that the power cable is correctly connected on both the outlet side and the instrument side. It may be connected on one end, and disconnected on the other. r r Try disconnecting and then reconnecting the power cable. - Page 95 Appendix The sound distorts when performing certain pieces or in certain registers If the volume is increased, the sound may be distorted when performance certain pieces. In this case, turn down the volume before playing the instrument. The volume di ers depending on the key pressed Adjust the volume of the problematic key using the Key Volume parameter in the VPA advanced settings menu.
- Page 96 Appendix Connectivity The instrument cannot connect to the smart device/app via Bluetooth Check that the instrument's Bluetooth function is turned on. Bluetooth MIDI should be connected from the settings in the app, not from the Bluetooth settings of the smart device. Cannot connect to a connected smart device If the connection is immediately disconnected, turn the Bluetooth settings o and then on again, and retry the connection.
- Page 97 Appendix Song Playback There is no sound even when playing a song (MP3, WA W W V A A ) Check that the volume of the USB recorder is not set to the lowest position. Songs saved on a USB memory device cannot be played back The song may be in a format that cannot be played back.
-
Page 98: Sound List
Appendix Sound List Piano Electric Piano SK-EX Competition Grand Piano Rendering Classic Tine Electric Piano SK-EX Competition Grand Piano Rendering Brilliant Reed Electric Piano SK-EX Competition Grand Piano Rendering Romantic Modern Electric Piano SK-EX Competition Grand Piano Rendering Rich Electric Grand SK-EX Competition Grand Piano Rendering Vintage Tine Electric Piano 2... - Page 99 Appendix Harpsichord Harpsichord New Age Pad Harpsichord Octave Square Pad Harpsichord 2 Itopia Atmosphere Mallets Brightness Vibraphone New Age Pad 2 Marimba Brass Pad Celesta Bowed Pad Bell Split Bright Warm Pad Strings Bass Slow Strings Wood Bass String Pad Electric Bass Warm Strings Electric Bass 2...
-
Page 100: Drum Rhythm List
Appendix Drum Rhythm List 8 Beat 8 Beat Ballad 8 Beat Swing Beat 1 Pop Ballad 1 Swing Beat 8 Beat 2 Pop Ballad 2 Motown 8 Beat 3 Pop Ballad 3 Country 2 Beat Pop 1 Rock Ballad 1 Boogie Pop 2 Rock Ballad 2... -
Page 101: Sound Demo Song List
Classic / Chopin Tine Electric Piano Original / Kawai Modern Electric Piano Original / Kawai Modern Electric Piano 2 Original / Kawai Jazz Organ Original / Kawai Blues Organ Original / Kawai Drawbar Organ Original / Kawai Chorale Prelude “Wachet Church Organ auf, f ruft f f uns die Stimme.”... -
Page 102: Connecting To Other Devices
Appendix Connecting to Other Devices CHECK Turn o the power to the digital piano before connecting to other devices. Do not connect the digital piano's LINE IN and LINE OUT directly with a cable. Doing so may cause feedback noise and damage the digital piano. - Page 103 The USB-MIDI driver to use is di erent depending on the computer’s operating system. For more information, please refer to the following page of the Kawai Global website: https://www.kawai-global.com/usb...
-
Page 104: Assembly Instructions
Appendix Assembly Instructions CAUTION Please ensure that two or more people work on assembling the digital piano. When moving the digital piano, lift f f it horizontally and be careful not to pinch your hands or ngers or drop it on your feet. Included parts Before attempting to assemble the digital piano, con rm that all of the parts are included. - Page 105 Appendix 1. Attaching the side panels (B and C) 2. Attaching the back board (D) to the pedal board (E) Stand the assembled structure of the pedal board (E) and side panels (B and C) upright Unfasten and extend the pedal connection cable (vertically) on the oor as shown in the illustration attached to the bottom of the pedal board (E).
- Page 106 Appendix 3. Mounting the main body (A) onto 4. Fastening the main body (A) to the the stand stand Lift f f the main body (A) and carefully place it so Loosely fasten the main body (A) to the stand that the top surface of the left f f and right side using four screws (with washer) panels (B and C) are visible when viewed from...
- Page 107 Appendix 5. Connecting the cables 6. Attaching the headphone hook Pass the pedal connection cable coming out of Attach the headphone hook to the underside of the pedal board (E) through the aperture of the the main body using the two installation screws back board (D) to the back of the instrument, and provided as shown in the illustration below.
- Page 108 Appendix EU Declaration of Comformity...
-
Page 109: Speci Cations
Tuning, Transpose, Favorite, Save Sound, Damper Hold, To T T ne Control, Low Volume Balance, Speaker Volume, Speaker Character, r r Wall EQ (CA901 only), Bluetooth Settings Other Functions Function, MIDI Settings Function, Screen Brightness, Display Size, Auto Display O , Auto... - Page 110 SP00001537 Printed in Indonesia Copyright © 2022 Kawai Musical Instruments Mfg. Co.,Ltd. All Rights Reserved.
Need help?
Do you have a question about the CA901 and is the answer not in the manual?
Questions and answers
How to access the VPA on ca901