Table of Contents
Advertisement
Available languages
Available languages
Quick Links
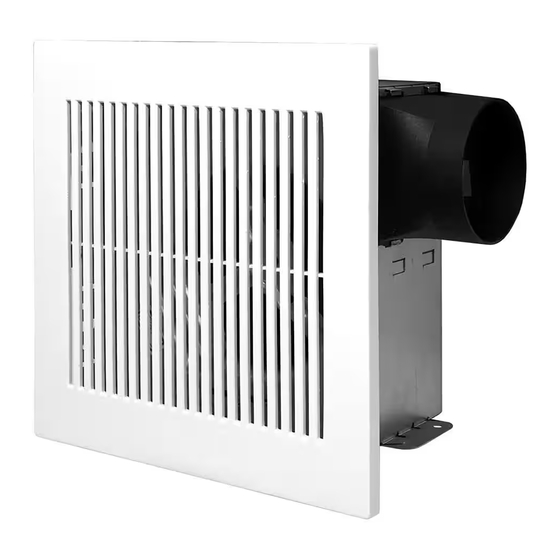
RVP50 Installation Guide
Read and Save These Instructions
Watch the Installation
reventfans.com/pro50install
Safety Information
1.) WARNING - TO REDUCE THE RISK OF FIRE, ELECTRIC SHOCK,
OR INJURY TO PERSONS, OBSERVE THE FOLLOWING:
a) Installation work and electrical wiring must be done by qualified person(s) in
accordance with all applicable codes and standards, including fire-rated
construction.
b) Sufficient air is needed for proper combustion and exhausting of gases
through the flue (chimney) of fuel burning equipment to prevent back drafting.
Follow the heating equipment manufacturer's guideline and safety standards,
such as those published by the National Fire Protection Association (NFPA), the
American Society for Heating, Refrigeration and Air Conditioning Engineers
(ASHRAE), and the local code authorities.
c) When cutting or drilling into wall or ceiling, do not damage electrical wiring and
other hidden utilities.
d) Ducted fans must always be vented to the outdoors.
e) If this unit is to be installed over a tub or shower, it must be marked as
appropriate for the application and be connected to a GFCI (Ground Fault Circuit
Interrupter) - protected branch circuit.
2.) Use this unit only in the manner intended by the manufacturer. If you have
questions, contact the manufacturer.
3.) Before servicing or cleaning unit, switch power off at service panel and lock the
service disconnecting means to prevent power from being switched on accidentally.
When the service disconnecting means cannot be locked, securely fasten a
prominent warning device, such as a tag, to the service panel.
4.) This ventilation fan is approved for use over a bathtub or shower when installed
in a GFCI protected circuit. Do not use unapproved fans over a bathtub or shower
that are not approved for that application.
5.) Install ductwork in a straight line with minimal bends.
6.) Use 120 V, 60 Hz for the electrical supply and properly ground the unit. Follow
all local safety and electrical codes.
7.) Do not use this fan with any solid-state control device; such as a dimmer switch.
Solid-state controls may cause harmonic distortion, which can cause a motor
humming noise, as well as increase risk of fire or electric shock.
8.) To reduce the risk of fire or electric shock, do not block air entry shield.
9.) Mount with the lowest moving parts at least 8.2 ft above floor or grade level.
10.) Never place a switch where it can be reached from a tub or shower.
11.) Type IC for use in direct contact with thermal insulation not to exceed R-50.
12.) Not for use in kitchens.
13.) This product must properly connect to the grounding conductor of the supply
circuit.
Follow the heating equipment manufacturer's guideline and safety standards, such
as those published by the National Fire Protection Association (NFPA), the
American Society for Heating, Refrigeration and Air Conditioning Engineers
(ASHRAE), and the local code authorities.
WARNING: Not suitable for use as a range hood.
CAUTION: For General Ventilating Use Only - Do Not Use To Exhaust Hazardous
Or Explosive Materials And Vapors.
CAUTION: Do not install in locations where the temperature will exceed 104°F
(40°C).
IMPORTANT: Exercise care to not damage existing wiring when cutting or drilling
into walls or ceilings.
NOTE: Make sure duct work size is a minimum of the discharge. Do not reduce.
Reducing the duct size can increase fan noise.
IMPORTANT: You may want to consult with a qualified licensed electrician
regarding the wiring of your ventilation fan.
WARNING: To reduce the risk of electric shock, please disconnect the electrical
supply circuit before servicing.
CAUTION: This product must be properly grounded.
Go to reventfans.com to obtain a copy of this manual.
WARNING: Disconnect all AC Power Breakers or Fuses before attempting
to cut into your ceiling.
Specifications
Sound: 3.0 sone
Watts: 37.9 W
Fan Weight: 3.05 lbs
Airflow: 50 CFM
Voltage: 120 V
Housing Dimensions: 7.5"x7.25"x3.75"
Duct Size: 3 in
Frequency: 60 Hz
Grille Dimensions: 9.25"x9"
1-Year Limited Warranty
GTR Technologies Inc. (GTR) warrants to the original purchaser of its products that
such products will be free from defects in materials and workmanship for a period
of one years from the date of original purchase. There are no other warranties,
express or implied, including but not limited to, implied warranties of
merchantability or fitness for a particular purpose. During this one-year period,
GTR will, at its option, repair or replace, without charge, any product or part which
is found to be defective under normal use and service. This warranty does not
extend to lighting such as LED's, Fluorescent, Incandescent, tubes, starters or
bulbs. This warranty does not cover: (a) normal maintenance and service or (b)
any maintenance or repair, faulty installation or installation contrary to
recommended installation instructions. The duration of any implied warranty is
limited to the three-year period as specified for the express warranty. Some areas
do not allow limitation on how long an implied warranty lasts, so the above
limitation may not apply to you. GTR's obligation to repair or replace, at GTR's
option, shall be the purchaser's sole and exclusive remedy under this warranty.
GTR shall not be liable for incidental, consequential, or special damages arising
out of or in connection with product use or performance. Some areas do not allow
the exclusion or limitation of incidental or consequential damages, so the above
limitation may not apply to you. This warranty gives you specific legal rights, and
you may also have other rights, which vary from area to area. This warranty
supersedes all prior warranties. This warranty is only valid inside the boundaries of
the USA and Canada. To qualify for warranty service, you must: (a) notify GTR via
phone at 1-877-543-8698 or via email at info@reventfans.com, (b) give the model
number identification, and (c) describe the nature or any defect in the product or
part. At the time of requesting warranty service, you must provide evidence of the
original purchase receipt.
Wiring
SWITCH NOT INCLUDED, MUST BE PURCHASED SEPARATELY
Always follow all safety instructions included with the switch you purchase.
Do not exceed maximum electrical ratings.
Remove the electrical cover
Pull motor panel off
ReVent
®
Connect wiring. Match
wire colors as shown:
line
ground
fan
ground
housing
ground
line in
neutral
ground
white
neutral
line in
fan
black
fan
120V line AC
Plan Your Installation
Select a set of holding tabs, depending on the thickness of your drywall. In the
ceiling, 5/8 inch drywall is the most common.
1/2
5/8
1/2 in
holding tab
final
5/8 in
securing
holding tab
holding tab
tab
Roomside Installation
(1) Place the provided drywall cutout template on ceiling where you wish the fan to
be (damper and electrical positions shown on template). We suggest using
painter's masking tape to hold the template in place while cutting. If there is a
pre-existing fan opening, use aligning windows to find it's edges. Either cut through
the provided guide slots in the template, or mark your cut lines with a pencil and
remove the template. Use a drywall jab saw to cut your fan opening in the ceiling.
(2)
mount
fold ceiling joist
mounts flush with fan
(3)
(4)
attach conduit
with wiring
Set fan in
ceiling opening
(5)
New Construction Installation
fan
framing joist
mount
(1)
fan
black
fan switch
(purchased separately)
(2)
attach conduit
with wiring
(3)
5/8
1/2
Finish Your Installation
1/2 in
holding tab
(1)
5/8 in
Bend the holding tabs
(3)
final
securing
tabs
fan
apply even pressure to
each side of securing tab
(4)
mounting springs
once fan is installed,
attach grille using
Remove damper
mounting springs
from fan at notch
ReVent
is a product of GTR Technologies Inc. All rights reserved. USA and
®
International Patents and Patents Pending See Patents at www.ReVentfans.com
Connect damper and
ducting with duct tape
fan
3 in ducting
Place damper
inside ceiling opening
Reattach damper to fan inside ceiling
Place the drywall holding tabs against the
bottom of the joist. Attach fan to framing
joist using roundhead wood screws.
fan
framing joist
framing joist
holding tabs flush
to bottom of joist
fan
damper
framing joist
Connect damper and
ducting with duct tape
3 in ducting
(2)
Set fan into place in the
opening using holding tabs, or
for new construction set drywall
into place around the fan
you selected outward
holding tabs
ceiling
ceiling
grille
PART# RVP-135-WH-04 101322
mount
Advertisement
Table of Contents

Subscribe to Our Youtube Channel
Related Manuals for REVENT RVP50


Summary of Contents for REVENT RVP50
- Page 1 Wiring RVP50 Installation Guide Connect damper and ducting with duct tape Read and Save These Instructions SWITCH NOT INCLUDED, MUST BE PURCHASED SEPARATELY Always follow all safety instructions included with the switch you purchase. attach conduit 3 in ducting Do not exceed maximum electrical ratings.
- Page 2 Cableado RVP50 Guía de instalación conecte el regulador y los conductos con cinta para ductos ventilador Lea y guarde estas instrucciones LOS INTERRUPTORES NO SE INCLUYEN. DEBEN COMPRARSE POR SEPARADO. Siempre siga todas las instrucciones de seguridad incluidas conecte conducto de con el interruptor que compre.
Need help?
Do you have a question about the RVP50 and is the answer not in the manual?
Questions and answers