Table of Contents
Advertisement
Quick Links
Advertisement
Table of Contents

Subscribe to Our Youtube Channel
Related Manuals for REVENT RVLH50


Summary of Contents for REVENT RVLH50
- Page 1 #RVLH50, RVLH70, RVLH80, RVLH90, RVLH110, RVLH130, RVLH150 Installation Guide Read and Save These Instructions Need Help? Watch the installation video at: reventfans.com/install Questions? Call 1-877-543-8698 (English) or 1-800-615-5439 (French)
-
Page 2: Specifications
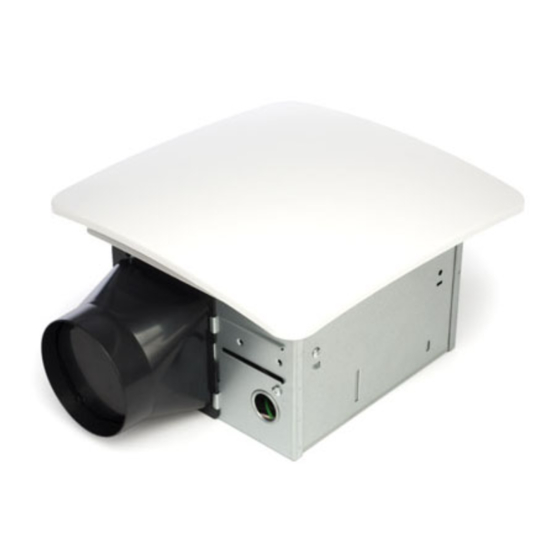
Air Drafts In Wall Enclosure ..Frequently Asked Questions page 24-26 page 27 ..... 3-Year Limited Warranty Specifications RVLH50, RVLH70, RVLH80 Duct Exhaust Diameter 4 in ( 10.2 cm ) Voltage 120 V Frequency 60 Hz Fan Watts 13 W, 16 W, 20 W LED Watts 13.4 W... - Page 3 Housing Depth* ” in ( 13 cm ) *This may require modification of your current opening. Some hand tools required. Power tools may also be necessary. RVLH90, RVLH110 Duct Exhaust Diameter 4 in ( 10.2 cm ) Voltage 120 V Frequency 60 Hz Fan Watts...
-
Page 4: What's Inside The Box
Regardez la vidéo | Ver el video: reventfans.com/install CUTOUT TEMPLATE, PERFECT CUT EVERY TIME! GABARIT DE DÉCOUPAGE, POUR UNE DÉCOUPE PARFAITE PLANTILLA DE RECORTE ¡CORTE PERFECTO SIEMPRE! models #RVLH50, RVLH70, RVLH80, RVLH90, RVLH110, RVLH130, RVLH150 Installation Guide Read and Save These Instructions Sheetrock Jab Saw Scie pour plaque de plâtre... -
Page 5: Safety Information
Safety Information 1.) WARNING - TO REDUCE THE RISK OF FIRE, ELECTRIC SHOCK, OR INJURY TO PERSONS, OBSERVE THE FOLLOWING: a) Installation work and electrical wiring must be done by qualified person(s) in accordance with all applicable codes and standards, including fire-rated construction. -
Page 6: Planning Your Installation
Planning Your Installation When installing the ventilation fan in a new construction site, install the main body of the FAN and duct work during the rough-in construction of the building. The GRILLE should be installed after the finished ceiling is in place. When installing in existing construction, use the provided cutout TEMPLATE for the ceiling. -
Page 7: Connecting The Duct
Fans installed with existing ducts may not achieve their ● rated airflow. ● For models RVLH50, RVLH70, RVLH80, RVLH90, or RVLH110, 4 in (10.16 cm) ● round is recommended for best performance. For models RVLH130 or RVLH50, ●... -
Page 8: Removing Your Old Fan
Removing Your Old Fan 1.) Disconnect the electrical power supply and lock out the service panel for the existing fan. 2.) Remove the grille from the existing fan. Pull the grille down to expose it’s two springs. Squeeze each spring together and pull down again to release the springs from the motor plate slots. - Page 9 SheetLock Easy Roomside Installation Watch the video: REVENTFANS.COM/INSTALL WARNING: Disconnect all AC Power Breakers or Fuses before attempting to cut into your ceiling. 1.) Place the provided sheetrock cutout TEMPLATE on ceiling where you wish the FAN to be (DAMPER and electrical positions shown on TEMPLATE). We suggest using painter’s masking tape to hold the template in place while cutting.
-
Page 10: Fan Damper
3.) Attach DAMPER to ducting. Tape DAMPER to ducting with duct tape. Set the connected DAMPER and ducting in the ceiling opening, then set the FAN in the ceiling opening as well. Connect DAMPER and ducting with duct tape ducting DAMPER Place FAN and DAMPER ceiling... - Page 11 WARNING: Disconnect the AC power before any work is done to any part of the circuit ReVent is connected to. If you do not understand this warning, seek the services of a qualified licensed electrician. WARNING: Copper to copper only. Do not use aluminum wire.
- Page 12 LIGHT SWITCH NOT INCLUDED, MUST BE PURCHASED SEPARATELY Always follow all safety instructions included with the switch you purchase. Do not exceed maximum electrical ratings. ReVent fan light white ground white black black /red DewStop...
- Page 13 11.) Once connected, reattach the electrical enclosure. plug in connectors reattach set screw 12.) Press and bend the final securing tabs flat against ceiling to lock the FAN in place. final securing tabs apply even sheetrock pressure to (ceiling) each side of securing tab 13.) Align TRIM RING notch to vent (DAMPER) position.
- Page 14 14.) Connect GRILLE wire to FAN. Attach the GRILLE by squeezing the mounting springs together and inserting the springs into the spring guides in the FAN. ceiling TRIM RING spring guide spring guide mounting springs GRILLE wire GRILLE...
- Page 15 Construction Framing NOTE: Even with new construction, you can use the SheetLock™ installation method; however, ReVent can still be installed using a method home builders would be more familiar with, as outlined in this section. WARNING: Disconnect all AC Power Breakers or Fuses before attempting to cut into your ceiling.
- Page 16 3.) Attach FAN to ceiling joists with BRACKETS using ROUNDHEAD WOOD SCREWS, then install the sheetrock for your ceiling. conduit ducting SHORT BRACKET (can be cut down) framing joist framing joist SHORT LONG BRACKET BRACKET ROUNDHEAD WOOD SCREW 1/2" x #6 Qty:6 BRACKET (use 2 per...
- Page 17 WARNING: Disconnect the AC power before any work is done to any part of the circuit ReVent is connected to. If you do not understand this warning, seek the services of a qualified licensed electrician. WARNING: Copper to copper only. Do not use aluminum wire.
- Page 18 LIGHT SWITCH NOT INCLUDED, MUST BE PURCHASED SEPARATELY Always follow all safety instructions included with the switch you purchase. Do not exceed maximum electrical ratings. ReVent fan light white ground white black black /red DewStop light switch switch (purchased separately) DewStop ®...
- Page 19 9.) When sheetrock is in place, p ress and bend the final securing tabs flat against ceiling to lock the FAN in place. final securing tabs apply even sheetrock pressure to (ceiling) each side of securing tab 10.) Align TRIM RING notch to vent (DAMPER) position. Attach TRIM RING to FAN.
-
Page 20: Care And Cleaning
11.) Connect GRILLE wire to FAN. Attach the GRILLE by squeezing the mounting springs together and inserting the springs into the spring guides in the FAN. ceiling TRIM RING spring guide spring guide mounting springs GRILLE wire GRILLE Care and Cleaning WARNING: To reduce the risk of electric shock, fire, or injury to persons, disconnect or turn off the breaker and lock the power supply at the panel to prevent the power from being turned on before servicing or cleaning the unit. -
Page 21: Installing The Control
Installing The Control WARNING: Turn off circuit breaker or remove fuse(s) and test that power is off before wiring. Wiring the control live can cause serious risk of electrical shock and/or damage the control, voiding the warranty. For safety, this product must be installed in a grounded wall enclosure. -
Page 22: Mounting Screw
connect same power to light if fan and light work together power to fan CONTROL WIRE Qty:4 DewStop ® FS-300-W6 www.dewstop.com GTR Technologies Inc. U.S.A. & International Patent Pending Brevet américain et international en instance Electrical Input: 120 volts @ 60Hz Entrée électrique : 120 volts @ 60 Hz Maximum Fan Load: 3 Amps Charge maximale du ventilateur : 3 A... -
Page 23: Using The Control
Using The Control BLUE LED LIGHT: Lets you know when your fan is on (especially useful for fans with low sound levels). CONDENSATION SENSOR: Senses condensation SENSITIVITY (humidity) in the room and turns your fan on and off automatically. TIMER AND SENSOR SETTINGS: Countdown timer TIMER / MINUTERIE SENSIBILITÉ... -
Page 24: Testing The Control
Manual On/Off: Press the FAN ON/OFF button once to manually turn fan on, and again to turn fan off. Countdown Timer: When the fan is turned on manually, the countdown timer will run your fan for your selected period of time, then turn your fan off. -
Page 25: Frequently Asked Questions
Air Drafts In Wall Enclosure Older homes may experience air flowing (drafts) from the inside wall cavity into or out of the wall enclosure depending on the draft situation. If this CONTROL is experiencing problems sensing condensation, sealing any enclosure openings is needed. - Page 26 Q: Why do the windows and mirrors fog even when the FAN is running? A: If windows and mirrors are very cold, condensation can still form on those surfaces. If the bathroom is sealed tightly, replacement air may not be entering the room fast enough to displace moist air.
- Page 27 Q: If I disable the CONDENSATION SENSOR, can I still operate the fan manually? A: Yes. Disabling the sensor effectively turns the CONTROL into a manual on/off switch that runs and then shuts off on the adjustable timer setting. Q: I use an air conditioner during the day in the summer, then turn it off at night. When I do this my fan comes on, what’s happening? A: Sometimes, when the air conditioning is turned off, the house will start to attract condensation (humidity).
-
Page 28: Year Limited Warranty
Watch the installation video at: reventfans.com/install Questions? Call 1-877-543-8698 (English) or 1-800-615-5439 (French) info@reventfans.com ReVent and DewStop are products of GTR Technologies Inc. All rights reserved. USA Patent No. US 9,360,228 B2. Other USA and international patents pending. PART# RVP-130-WH-01 R1.0 120718...
Need help?
Do you have a question about the RVLH50 and is the answer not in the manual?
Questions and answers