Sharp UX-B700 Operation Manual
Hide thumbs
Also See for UX-B700:
- Service manual (138 pages) ,
- Operation manual (122 pages) ,
- Service manual supplement (8 pages)

Related Manuals for Sharp UX-B700


Summary of Contents for Sharp UX-B700
- Page 1 MODEL UX-B700 FACSIMILE OPERATION MANUAL 1. Installation 2. Sending Faxes 3. Receiving Faxes 4. Making Copies 5. Answering Machine Connection 6. Special Functions 7. Printing Lists 8. Maintenance 9. Troubleshooting...
- Page 2 (3) Telephone number of either the sending machine, business, business entity or individual. In order to program this information into your facsimile machine, please refer to the appropriate instructions in the operation manual." As an NERGY partner, SHARP has determined that this product meets the NERGY guidelines for energy efficiency.
- Page 3 Recording system Thermal inkjet Halftone (grayscale) 64 levels Compression scheme MR, MH, MMR *When Ink Save mode is enabled. **Based on Sharp Standard No. 1 Chart at standard resolution, excluding time for protocol signals (i.e., ITU-T phase C time only).
- Page 4 Paper tray capacity Letter: Approx. 200 sheets (20-lb. copier paper at room temperature; maximum stack height should not be higher than the line on the tray) Legal: 100 sheets Recommended paper weight: 20-lb. Copy Bond Compatibility ITU-T (CCITT) G3 mode Input document size Automatic feeding: Width: 5.8 to 8.5"...
- Page 5 As a part of our policy of continuous improvement, SHARP reserves the right to make design and specification changes for product improvement without prior notice. The performance specification figures indicated are nominal values of production units. There may be some deviations from these values in individual units.
- Page 6 Never install telephone jacks in wet locations unless the jack is specifically designed for wet locations. Never touch bare telephone wires or terminals unless the telephone line has been disconnected at the network interface. Use caution when installing or modifying telephone lines. Avoid using a telephone (other than a cordless type) during an electrical storm.
- Page 7 Table of Contents A Look at the Operation Panel 1. Installation Unpacking Checklist ........9 Attachments .
- Page 8 Table of Contents 5. Answering Machine Connection Connecting an Answering Machine ......66 Using the Answering Machine Connection ....67 Optional A.M.
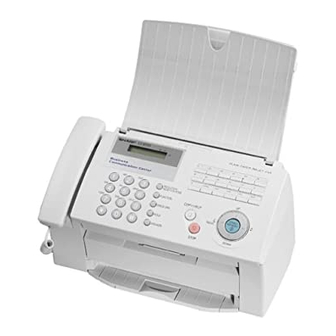
- Page 9 A Look at the Operation Panel PLAIN PAPER INKJET FAX 16/POLL 17/G1 18/G2 RESOLUTION/ RECEPTION MODE FUNCTION COPY/HELP START/ SPEED DIAL MEMORY PQRS WXYZ REDIAL HOLD DOWN SPEAKER STOP PANEL RELEASE Display This displays messages and prompts to help you operate the machine. FUNCTION key Press this key followed by the arrow keys to select special functions and settings.
- Page 10 SPEAKER key Press this key to listen to the line and fax tones through the speaker when faxing a document. Note: This is not a speakerphone. You must pick up the handset to talk with the other party. HOLD key Press this key to put the other party on hold during a phone conversation.
- Page 11 1. Installation Unpacking Checklist If any are missing, Before setting up, contact your make sure you dealer or retailer. have all of the following items. Document Print Paper tray Document tray Paper tray exit support cartridge cover Handset Handset Rapid Key Telephone Operation cord...
- Page 12 Attachments Attachments Points to keep in mind when setting up Do not place the Keep dust away from Do not place the machine near heaters the machine. machine in direct or air conditioners. sunlight. About condensation If the machine is moved from a cold to a warm place, it is possible that condensation may form on the scanning glass, preventing proper scanning of documents for transmission.
- Page 13 Attachments Close the printer cover. Connecting the handset Connect the handset as shown and place it on the handset rest. ♦ The ends of the handset cord are identical, so they will go into either jack. Make sure the handset cord goes into the jack marked with a handset symbol on the side of...
- Page 14 Attachments Attaching the paper trays Attach the paper tray. Pull the paper plate toward you and attach the paper tray cover. Paper plate Attach the document tray.
- Page 15 Attachments Pull out the received document tray. Attach the document exit support.
- Page 16 Loading Printing Paper Loading Printing Paper You can load letter or legal size paper in the paper tray. Recommended paper weight is 20-lb. Copy Bond. The maximum number of sheets is as follows: Approx. Letter size: 200 sheets (20-Ib. copier paper at room temperature; maximum stack height should not exceed line on tray) Legal size: Approx.
- Page 17 Loading Printing Paper Pull the paper plate toward you and replace the paper tray cover. Place the LETTER cover using the LEGAL appropriate notch for the size of paper loaded...
- Page 18 Connecting the Power Cord Connecting the Power Cord Plug the power cord into a 120 V, 60 Hz, grounded AC (3-prong) outlet. Caution! ♦ Do not plug the power cord into any other kind of outlet. This will damage the machine and is not covered under the warranty. ♦...
- Page 19 Installing the Print Cartridge Installing the Print Cartridge When replacing the print The initial starter print cartridge, use a SHARP cartridge included with UX-C70B cartridge. One your fax can print about cartridge can print about 300 letter-size pages. 600 letter-size pages.
- Page 20 Installing the Print Cartridge Open the print compartment cover. • Press as shown and pull the cover toward you. Remove only the tape from the the new cartridge. • Important: Make sure you remove all of the tape. • CAUTION! DO NOT touch the gold contact area of the cartridge.
Need help?
Do you have a question about the UX-B700 and is the answer not in the manual?
Questions and answers