Table of Contents
Advertisement
Quick Links
Advertisement
Table of Contents

Related Manuals for ETOE A1212


Summary of Contents for ETOE A1212
- Page 3 Catalog English 01 - 14...
- Page 4 Safrty Instructions Read all instructions before you use this device. Do not make any changes that are not described in this manual. If physical injury, loss of data, or damage is caused by failure to follow instructions, the warranty does not apply.
-
Page 5: Power Supply
Power Supply • Use only the provided power adapter. • Power off the device before removing the power supply from the socket. • Protect the power cord from being walked on or pinched, particularly at plugs, convenience receptacles, and the point where they exit from this device. -
Page 6: What's Included
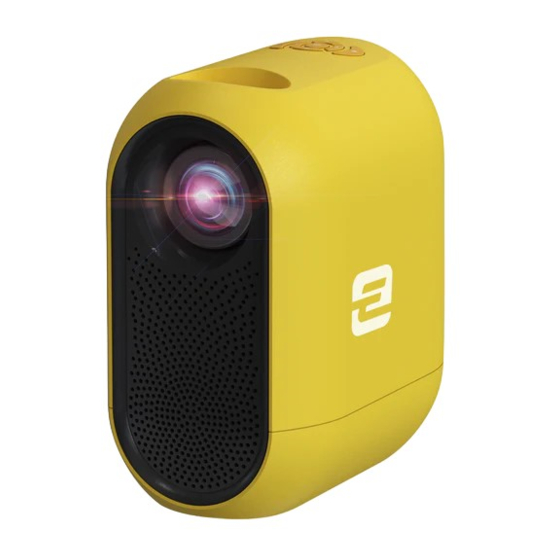
What’s included Projector x 1 Adapter x 1 Travel Case x 1 Remote control x 1 User manual x 1 Overview Front view Rear view 1. Lens 4. Speaker 7. HDMI 1.4 2. Air ventilation(outlet) 5. AUX port 8. IR receiver 3. - Page 7 Top view Press the button once: power on Press the button twice: power off Press to confirm a selection or entry Navigate menus or adjust the selected content When playing videos/music: Press “ ”/“ ” button to volume up / down Long-press “...
-
Page 8: Get Started
Get Started Placement ① Place the projector right towards the projection surface to get a rectangle picture. ② The distance between the projector and the projection surface determines the picture size. ③ Check the projection distance and screen size on specifications part. Prepare the Remote Control Install the remote control batteries (batteries not included). -
Page 9: Select Your Language
Focus ① Place the projector towards a suitable projection surface or wall, adjust the distance for a proper size of picture. ② Scroll the [Focus Adjusting Knob] left or right until the picture is crystal clear. Select Your Language When start the projector for the first time, you will be guided to a page to select language, use remote control to select your language. - Page 10 Go through the set-up process when you turn on the projector for the first time. Projection Projection Mode Zoom in/out Use the remote control to resize the picture size from 50% to 100% without moving the projector. Keystone correction This Projector support digital keystone correction and remote four-point keystone correction.
- Page 11 Horizontal Correction • Four point Correction If the projected image is stretched or distorted along both axes due to the angle of the projection, go to [Settings] -> [Projection] -> [Four point Correction], choose the corner you want and press left or right button on the remote control to adjust.
-
Page 12: App Manager
Bluetooth speaker mode The projector works as a Bluetooth speaker. ① Press the button ② Select "Bluetooth speaker" and stay on this page. ③ Turn on the Bluetooth of the Phone/Pad/PC and click on "LED_Projector_xxxx“ for the connection. ④ You can turn off the screen. Press a random button on the remote control to turn on the screen again. -
Page 13: App Management
App Management Please go to [Settings] -> [Network] to connect to the network before use. Install ① Go to [Homepage], select [App Store]. ② Click "Search" to enter the app name or view "category" to find the app you want to install. ③... -
Page 14: Wireless Connection
Connections Make sure your device and projector are connected to the same Wi-Fi network. Wireless Connection For Android devices: ① Press the button to go to projector homepage, select WiFi-Cast. ② Tap the Screen Cast button and choose the “LED_Project_xxxx”. Wireless Projection LED_Project_xxxx CANCEL... -
Page 15: Wired Connection
Wired Connection Connect to a HDMI playback device This projector supports connections with various HDMI playback devices such as PC, TV stick, TV box, DVD player, set-top box (STB), game console or other devices. ① Connect this projector to an HDMI playback device with an HDMI cable. ②... -
Page 16: Shortcut Menu
Shortcut menu • Long-press the menu button to pop up the shortcut menu. Keeps natural looking colors with Standard a balance of warm and cool tones Provides more picture details and Light color sharpness Image Mode Provides warm colors with Soft lower light Manually set the Brightness,... -
Page 17: Specifications
12-Month Warranty for Quality-Related Issues Every ETOE product comes with one year of quality-related issues coverage. If you submit a claim to our support mail, ETOE will, at its option: 1. Replace the ETOE Product with a replacement product of the same model and cover any return shipping costs. - Page 18 This device complies with part 15 of the FCC Rules. Operation is subject to the following two conditions: (1) This device may not cause harmful interference, and (2) this device must accept any interference received, including interference that may cause undesired operation.
- Page 19 Model: A1212 © ETOE Technology Limited. All rights reserved. ETOE and the ETOE logo are trademarks of ETOE Technology Limited, which is registered in the United States and other countries. All other trademarks are the property of the irrespective owners.
Need help?
Do you have a question about the A1212 and is the answer not in the manual?
Questions and answers