Table of Contents
Advertisement
Available languages
Available languages
Quick Links
Advertisement
Table of Contents

Related Manuals for ETOE A1332


Summary of Contents for ETOE A1332
- Page 1 Projector A1332 User Manual...
- Page 3 Catalog English 01 - 14 Deutsch 15 - 28 Español 29 - 42 日本語 43 - 56...
-
Page 4: Safety Instructions
Safety Instructions Read all instructions before you use this device. Do not make any changes that are not described in this manual. If physical injury, loss of data, or damage is caused by failure to follow instructions, the warranty does not apply. -
Page 5: Power Supply
Power Supply • Use only the provided power adapter. • Power off the device before removing the power supply from the socket. • Protect the power cord from being walked on or pinched, particularly at plugs, convenience receptacles, and the point where they exit from this device. -
Page 6: What's Included
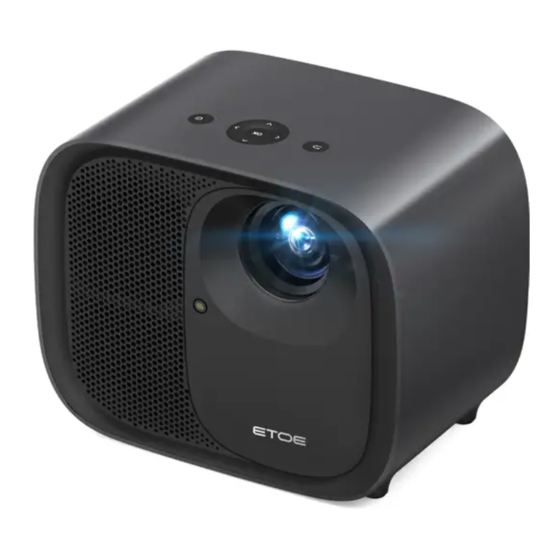
What’s Included Projector x 1 Adapter x 1 Adapter AC cord x 1 Remote control x1 User manual x 1 User Manual Overview Projector Front View Rear View Air ventilation Tripod screw hole HDMI Port ① ④ ⑦ Lens DC -in IR receiver ②... - Page 7 Press the button once: power on • Press the button twice: power off • Mutes the projector’s audio Press to confirm a selection or entry Navigate menus or adjust the selected content When playing videos/music: Press button to volume up / down Long-press button to fast forward / backward Return to the previous menu...
-
Page 8: Get Started
Get Started Placement ① Place the projector right towards the projection surface to get a rectangle picture. ② The distance between the projector and the projection surface determines the picture size. ③ Check the projection distance and screen size on the specifications part. Prepare the Remote Control Install the remote control batteries (batteries not included). -
Page 9: Select Your Language
Focus Auto Focus Place the projector towards a suitable projection surface or wall, the projector will automatically focus the image. Manual Focus You can also manually focus through the remote control. Press the button on the remote control, and press the button, until the picture is clear. - Page 10 Set up Android TV Follow the setup wizard on Android TV, select your language, set up a Wi-Fi connection, sign in to a Google account, and carry out other related procedures. When you complete the Android TV setup wizard, the Android TV home screen will appear.
- Page 11 Settings Android TV Setting Bluetooth Pairing If you want to connect to Bluetooth speakers/headphones on the Android Settings→Remotes&Accessories→Add accessory TV interface, select then select the device to be connected. Bluetooth connection only works while on the Android TV system. Android TV Remote App The Android TV system could be controlled by downloading the remote app on a smartphone.
- Page 12 Zoom in/out Use the remote control to resize the picture size from 50% to 100% without moving the projector. Keystone Correction This Projector support Auto keystone correction, digital keystone correction, and remote four-point keystone correction. • Auto Keystone Correction When the projector image is distorted, it will perform auto keystone correction to restore the image to a rectangle.
-
Page 13: Other Settings
Horizontal Correction • Four Point Correction If the projected image is stretched or distorted along both axes due to the angle of the projection, press the button to go to projector homepage, and select [Settings] -> [Projection Settings] -> [Four point Correction], choose the corner you want and press left or right button on the remote control to adjust. - Page 14 Chromecast (Wireless Connection) The Chromecast feature only works while you are in the Android TV system. • Cast from Chromecast-enabled Sites/Apps (for Android/iOS devices) ① Make sure your device and the Android TV (HAKO mini) are connected to the same Wi-Fi network, and that you are running the latest version of the Chromecast-enabled app.
-
Page 15: Wired Connections
Wired Connections 1. Connect to an HDMI Playback Device This projector supports connections with various HDMI playback devices such as PC, TV stick, TV box, DVD player, set-top box (STB), game console or other devices. ① Connect this projector to an HDMI playback device with an HDMI cable (not provided). -
Page 16: Shortcut Menu
Shortcut Menu Long-press the button to pop up the shortcut menu • Press navigation button to select the option • Press button to go to the next page • Press button to adjust parameter • Press "OK" button to save Keeps natural looking colors with Standard a balance of warm and cool tones... -
Page 17: Specifications
12-Month Warranty for Quality-Related Issues Every ETOE product comes with one year of quality-related issues coverage. If you submit a claim to our support mail, ETOE will, at its option: 1. Replace the ETOE Product with a replacement product of the same model and cover any return shipping costs. - Page 18 Sicherheitsanweisungen Lesen Sie alle Anweisungen, bevor Sie dieses Gerät verwenden. Nehmen Sie keine Änderungen vor, die nicht im vorliegenden Benutzerhandbuch beschrieben sind. Wenn Körperverletzungen, Datenverluste oder Schäden durch Nichtbeachtung der Anweisungen verursacht werden, gilt die Garantie nicht. Einstellung • Um die Gefahr eines Brandes und/oder elektrischen Schlages zu minimieren, darf das Gerät weder Regen noch Feuchtigkeit ausgesetzt werden, und stellen Sie keine mit Flüssigkeiten gefüllten Gegenstände wie z.
- Page 19 Plastiktüte, bevor Sie es in einen anderen Raum bringen, und warten Sie ein bis zwei Stunden, bevor Sie das Gerät aus der Tüte nehmen. Stromversorgung • Verwenden Sie ausschließlich den mitgelieferten Netzadapter. • Schalten Sie das Gerät aus, bevor Sie das Netzteil aus der Steckdose ziehen.
- Page 20 Lieferumfang Projektor x 1 Adapter x 1 Adapter AC-Kabel x 1 Fernbedienung x 1 Benutzerhandbuch x 1 User Manual Übersicht Projektor Frontansicht Rückansicht ① Belüftung ④ Stativgewindebohrung ⑦ HDMI-Anschluss ② Objektiv ⑤ Gleichstromeingang ⑧ IR-Empfänger ③ Tof (Autofokus) ⑥ USB-Anschluss ⑨...
- Page 21 • Einmaliges Drücken der Taste: Einschalten • Zweimaliges Drücken der Taste: Ausschalten Den Ton des Projektors stumm schalten Im IR-Modus,Lange drücken um das On-Screen -Einstellungsmenü des Projektors zu starten. Drücken Sie, um eine Auswahl oder Eingabe zu bestätigen Navigieren in Menüs oder Anpassen des ausgewählten Inhalts Taste zum Erhöhen/ Verringern der...
-
Page 22: Fernbedienung Vorbereiten
Inbetriebnahme Aufstellen Platzieren Sie den Projektor auf der Projektionsfläche, um ein rechteckiges ① Bild zu erhalten. Der Abstand zwischen Projektor und Projektionsfläche bestimmt die ② Größe des Bildes. Überprüfen Sie den Projektionsabstand und die Bildschirmgröße im ③ Spezifikationsbereich. Fernbedienung vorbereiten Installieren Sie die Batterie der Fernbedienung (ohne Batterie). - Page 23 Fokus Automatischer Fokus Richten Sie den Projektor auf die richtige Projektionsfläche oder Wand aus, sodass das Bild automatisch fokussiert wird. Manueller Fokus Sie können die Fernbedienung auch manuell aktivieren. Drücken Sie die Taste auf der Fernbedienung und anschließend die Taste oder bis das Bild klar ist.
- Page 24 Stellen Sie Android TV ein Folgen Sie dem Einrichtungsassistenten auf Android TV, wählen Sie Ihre Sprache aus, stellen Sie eine Wi-Fi-Verbindung ein, melden Sie sich bei einem Google-Konto an und führen Sie andere zugehörige Verfahren aus. Wenn Sie den Einrichtungsassistenten für Android TV abgeschlossen haben, wird der Startbildschirm von Android TV angezeigt.
- Page 25 Einstellungen Android TV-Einstellung Bluetooth-Kopplung Wenn Sie eine Verbindung zu Bluetooth-Lautsprechern/Kopfhörern auf der Android TV-Oberfläche erzeugen möchten, wählen Sie Einstellun- gen→Fernbedienungen&Zubehör→Zubehör hinzufügen und dann das zu verbindende Gerät aus. Die Bluetooth-Verbindung kann nur auf dem Android TV-System funktionieren. Android TV Remote App Das Android-TV-System könnte durch Herunterladen der Remote-App auf ein Smartphone gesteuert werden.
- Page 26 Rein/ Raus zoomen Nuten Sie die Fernbedienung, um die Bildgröße von 50 % auf 100 % zu ändern, ohne den Projektor zu bewegen. Trapezkorrektur Der Projektor unterstützt die automatische Trapezkorrektur, die digitale Trapezkorrektur und die Remote-Vier-Punkte-Trapezkorrektur. • Automatische Trapezkorrektur Wenn das Projektorbild verzerrt ist, führt es eine automatische Trapezkorrektur durch und stellt das Bild als Rechteck wieder her.
-
Page 27: Weitere Einstellungen
Horizontale Korrektur • Vier-Punkte-Korrektur Wenn das projizierte Bild aufgrund des Projektionswinkels entlang beider Achsen gestreckt oder verzerrt ist, gehen Sie zu [Einstellungen] -> [Projektion] -> [Vier-Punkt-Korrektur], wählen Sie die gewünschte Ecke und drücken Sie die linke oder rechte Taste auf der Fernbedienung einzustellen. - Page 28 Chromecast (Drahtlose Verbindungen) Die Chromecast-Funktion funktioniert nur, wenn Sie sich im Android TV-System befinden. Übertragen von Chromecast-fähigen Websites/Apps (für Android-/iOS-Geräte). ① Stellen Sie sicher, dass Ihr Gerät und der Android TV (HAKO mini) mit demselben Wi-Fi-Netzwerk verbunden sind und dass Sie die neueste Version der Chromecast-fähigen App ausführen.
- Page 29 ④ Drücken Sie [OK], um mit der Wiedergabe zu beginnen. 3. Anschluss an einen Kopfhörer über AUX-Kabel Sie können auch einen Kopfhörer oder Lautsprecher über ein AUX-Kabel an den ETOE Projektor anschließen. ① Stecken Sie den 3,5 mm AUX-Kabelstecker in den AUX-Anschluss des ETOE-Projektors.
- Page 30 Shortcut Menu Drücken Sie lange auf die Taste , um das Kontextmenü aufzurufen • Drücken Sie die Navigationstaste, um die Option auszuwählen • Drücken Sie die Taste , um zur nächsten Seite zu gelangen • Drücken Sie die Taste oder , um den Parameter anzupassen •...
-
Page 31: Spezifikationen
Bei nicht qualitätsbezogenen Garantieansprüchen ist der Käufer für die Versandkosten verantwortlich. 12-Monate-Garantie für qualitätsbezogene Probleme Jedes ETOE-Produkt wird mit einer einjährigen Garantie für qualitätsbezo- gene Probleme geliefert. Wenn Sie eine Reklamation an unsere Support-Mail senden, wird ETOE nach eigenem Ermessen: 1. -
Page 32: Instrucciones De Seguridad
Instrucciones de Seguridad Lea todas las instrucciones antes de usar este dispositivo. No realice ningún cambio que no se describa en este manual. Si la lesión física, la pérdida de datos o los daños son causados por no seguir las instrucciones, la garantía no se aplica. -
Page 33: Seguridad Auditiva
Suministro de energía • Utilice únicamente el adaptador de corriente proporcionado por el fabricante. • Apague el dispositivo antes de quitar la fuente de alimentación del enchufe. • Proteja el cable de alimentación para que no se pise ni se pellizque, especialmente en los enchufes, receptáculos de conveniencia y el punto por donde salen de este dispositivo. -
Page 34: Qué Está Incluido
Qué está incluido Proyector x 1 Adaptador x 1 Adaptador de cable de CA Control remoto x 1 Manual de usuario x 1 User Manual Descripción general Proyector Vista frontal Vista trasera ① Ventilación de aire ④ Agujero para el trípode ⑦... - Page 35 • Presione el botón por una vez: para encender • Pulse el botón dos veces: para apagar Silencia el audio del proyector En modo IR, mantenga presionado para iniciar el menú de configuración en pantalla del proyector. Pulse para confirmar una selección o entrada Navegar por los menús o ajustar el contenido seleccionado Pulsar...
- Page 36 Empezar a trabajar Colocación ①Coloque el proyector justo hacia la superficie de proyección para obtener una imagen rectangular. ② La distancia entre el proyector y la superficie de proyección determina el tamaño de la imagen. ③Compruebe la distancia de proyección y el tamaño de la pantalla en la parte de especificaciones.
- Page 37 Enfoque Enfoque automático Coloque el proyector hacia una superficie de proyección adecuada o hacia la pared, que enfocará automáticamente la imagen. Enfoque manual También puede enfocar manualmente a través del mando a distancia. Pulse el botón del mando a distancia, y pulse el botón , hasta que la imagen sea clara.
- Page 38 Configurar Android TV Siga el asistente de configuración en Android TV, seleccione su idioma, configure una conexión Wi-Fi, inicie sesión en una cuenta de Google y realice otros procedimientos relacionados. Cuando complete el asistente de configuración de Android TV, aparecerá la pantalla de inicio de Android TV.
- Page 39 Configuraciones Impostazioni Configuración de Android TV Emparejamiento Bluetooth Si desea conectarse a altavoces/auriculares Bluetooth en la interfaz de Android TV, seleccione Configuración→Controles remotos y accesorios→Agregar accesorio, luego seleccione el dispositivo que desea conectar. La conexión Bluetooth solo puede funcionar en el sistema Android TV.
- Page 40 Acercar/ alejar Use el control remoto para cambiar el tamaño de la imagen del 50 % al 100 % sin mover el proyector. Corrección trapezoidal Este proyector admite la corrección trapezoidal automática, la corrección trapezoidal digital y la corrección trapezoidal remota de cuatro puntos. •...
-
Page 41: Otros Ajustes
Correccióon horizontal • Corrección de cuatro puntos Si la imagen proyectada se estira o distorsiona a lo largo de ambos ejes debido al ángulo de proyección, vaya a [Configuración] -> [Proyección] -> [Corrección de cuatro puntos], elija la esquina que desee y presione el botón izquierdo o derecho en la pantalla. - Page 42 Chromecast (conexión inalámbrica) La función Chromecast solo funciona mientras estás en el sistema Android Transmitir desde sitios/aplicaciones habilitados para Chromecast (para dispositivos Android/iOS). ① Asegúrese de que su dispositivo y Android TV (HAKO mini) estén conectados a la misma red Wi-Fi y que esté ejecutando la última versión de la aplicación habilitada para Chromecast.
- Page 43 ④ Press [OK] to start playing. 3. Conéctese a un auricular mediante un cable AUX También puede conectar un auricular o un altavoz al proyector ETOE mediante un cable AUX. ① Conecte el conector del cable AUX de 3,5 mm al puerto AUX del proyector ETOE.
- Page 44 Menú abreviado Pulsar prolongadamente el botón para que aparezca el menú contextual • Pulse el botón de navegación para seleccionar la opción • Pulse el botón para ir a la página siguiente • Pulse el botón para ajustar el parámetro •...
-
Page 45: Especificaciones
Probleme geliefert. Wenn Sie eine Reklamation an unsere Support-Mail senden, wird ETOE nach eigenem Ermessen: 1. Ersetzen Sie ETOE-Produkt durch ein Ersatzprodukt desselben Modells und die Kosten für die Rücksendung übernehmen. 2.Tauschen Sie das ETOE-Produkt gegen eine Rückerstattung des Kaufpreises aus. - Page 46 安全規約 このデバイスを使用する前に、取扱説明書をよくお読みください。このマニ ュアルで指示されていない限り、この製品に変更を加えないでください。指 示に従わなかったために人身傷害、データ損失、または損傷が発生した場合 は、保証の対象外です。 設定 • 火災や感電の危険を減らすために、デバイスを雨や湿気のある環境にさら したり、液体を含む物体(花瓶など)をデバイスの上に置いたりしないで ください。 • テーブルクロスやカーペットなどの柔らかい面にデバイスを置かないでく ださい。火災の原因となる可能性があります。 • ほこりや汚れが付着しやすい場所や、強磁場が発生する機器の近くに置か ないでください。 • 過熱を防ぐために、通気口を塞いだり塞いだりしないでください。限られ たスペースにデバイスを置かないでください。機器の周囲には常に十分な 換気スペースを残してください。 • 直射日光、高温、大きな温度変動、湿度から機器を保護してください。 • デバイスが長時間動作していて表面が熱くなっている場合は、デバイスの 電源を切り、電源コードを抜いてください。機器が冷却されて初めて、動 作を再開できます。 • 機器は常に慎重に取り扱ってください。レンズに触れないでください。 • デバイスや電源コードの上に重いものや鋭利なものを置かないでください 。感電を防ぐため、分解しないでください。 • メーカーが指定したアタッチメントまたはアクセサリのみを使用してくだ さい。激しい振動は避けてください。内部部品を損傷する可能性がありま す。子供が無人で機器を操作することを許可しないでください。 • 次の状況では、湿気の層がデバイスの内部に現れ、誤動作を引き起こす可 能性があります。 a) 機器を寒い場所から暖かい場所に移動した場合。 b) 冷蔵室が加熱された後。 c) 機器が湿気の多い部屋に置かれている場合。 湿気を避けるため、デバイスを別の部屋に移動する前にビニール袋に密封 し、1〜2時間待ってからバッグから取り出してください。...
- Page 47 電源 • 付属の電源アダプターのみを使用してください。 • ソケットから電源を抜く前に、デバイスの電源を切ってください。 • 特にプラグ、便利なコンセント、およびデバイスから出る場所で、電源コ ードを歩いたり挟んだりしないように保護してください。 • 雷雨が発生したり、長期間使用しない場合は、デバイスのプラグを抜いて ください。 • 電源プラグまたはアプライアンスカプラーを切断デバイスとして使用する 場合、切断デバイスは操作しやすい状態を維持する必要があります。 • 接続を確立または変更する前に、すべてのデバイスが電源コンセントから 切断されていることを確認してください。 • 濡れた手で電源コードや電源コネクタに触れないでください。 聴覚の安全性 難聴を防ぐため、大音量で長時間聴かないでください。 音量を安全なレベルに設定します。 クリーニング • 表面を掃除する前に、デバイスの電源を切り、電源から取り外してくださ い。 • 柔らかく、糸くずの出ない布を使用してください。液体、ガス、または可 燃性の洗浄剤(スプレー、研磨剤、研磨剤、アルコールなど)は使用しな いでください。表面をやさしく拭きます。表面を傷つけないように注意し てください。 • レンズの保護コーティングを損傷する可能性があるため、レンズのクリー ニングに液体クリーナーを使用しないでください。レンズクリーニングペ ーパーを使用して、プロジェクターのレンズをクリーニングします。 修理 • 機器のメンテナンスはご自身で行わないでください。認定されたサービス センターによってのみデバイスを修理してください。 • 不適切なメンテナンスは、人身傷害または機器の損傷を引き起こす可能性 があります。 • すべての修理を資格のあるサービス担当者に提供します。 注意: •操作ビームを見つめないでください。明るい光は目を痛める可能性があり ます。...
- Page 48 含まれているもの アダプター x 1 アダプターAC電源コー プロジェクター x 1 ド x 1 ユーザーマニュアル x 1 リモコン x 1 User Manual 概要 プロジェ クター 正面図 背面図 ① 通気換気 ④ 三脚ネジ穴 ⑦ HDMIポート ② レンズ ⑤ イン・DC ⑧ R受信機 ⑨ セカンダリポート ③ TOF (オートフォーカス) ⑥ USBポート ⑩ 裏面の包装 注: • レンズに直接目を向けないように注意してください。 • 換気を妨げないでください。 ...
- Page 49 •ボタンを押します:電源を入れます •ボタンを2回押します:電源を切ります プロジェクタのオーディオをミュートする IRモードの場合、長押ししてプロジェクターの 画面設定メニューを起動します。 を押して、選択または入力を確認します メニューをナビゲートするか、選択を調整しま す プレス ボタンをボリュームアップ/ダウン ロングプレス ボタンを早送り/後方に 前のメニューに戻る グーグルアシスタント、つまりグーグル の音声駆動仮想アシスタントサービスを 有効にする。 ボタンを1回押して、Android TV ホームペ ージにアクセスする。 ボリュームを上げる/下げる プリセットNetflixボタン プリセットPrime Videoボタン プロジェクタのフォーカスを調整する。 ボタンを1回押して、プロジェクタのホー ムページにアクセスする...
- Page 50 始める 配置 ① プロジェクタを投影面に向けて矩形状にする。 ② プロジェクタと投影面との距離は画像の大きさを決定する。 ③ 仕様書の投影距離と画面サイズを確認してください。 リモートコン トロールの準備 リモートコントロールバッテリー (バッテリーを除く) をインストールします。 ① 図に示すように、 電池カバーをプレスして開く 。 ②それが適所にクリックするまで、 バッテリー ・ カバー を取り替えてください。 ③それが適所にクリックするまで、 バッテリー ・ カバー を取り替えてください。 リモートコントロールとプロジェクターの間の距離 ④ は、 10 m / 33 ftを超えてはならない。 電源オン • 電源ボタンを 1 回押して電源を入れます。 • 電源ボタンを 2 回押して、 電源を切ります。...
- Page 51 フォーカス オートフォーカス オリエントは、 適切な投影面や壁に向かって、 自動的に画像をフォーカスする プロジェクター。 マニュアルフォーカス また、 リモートコントロールを手動でフォーカスすることができます。 リモート コントロールの ボタンを押すと、 または ボタンを押すと、 画像がクリ アされるまで。 注意 : 投影距離は1.1 mと4.1 mの間でなければなりません。 言語を選択してく ださい プロジェクタを初めて起動すると、 言語を選択するページに移動し、 リモコン またはリモコン を使用して言語を選択し、 次に右ボタン を押して 「完了」 を 選択し、 次のページに入る。 リモコンをBluetoothモードでペアリングします 言語を選択すると、 ブルートゥースリモートペアリングページに入り、 ページの指 示に従って操作する。 ① リモコンをプロジェクターに近づけてください ② [音量-]キーと[OK]キーを同時に約10秒間押し続けます ③ 画面に 「接続済み」 と表示されると、 リモコンのLEDインジケーターが青色に変 わり、 リモコンのペアリングに成功した。...
- Page 52 Android TVをセッ トアップ Android TVのセッ トアップウィザードに従い、 言語を選択し、 Wi-Fi接続をセッ ト アップし、 グーグルアカウントにサインインし、 その他の関連操作を行ってくださ い。 Android TVセッ トアップウィザードが完了すると、 Android TVホームスクリーン が表示されます。 ストリーミングアプリをダウンロードすることで、 お気に入りの 番組を見ることができる。...
- Page 53 設定 Impostazioni AndroidTV設定 ブルート ゥースペアリング Android TV インターフェースでブルートゥーススピーカー/ヘッ ドフォンに接 続する場合は、 設定→リモコンとアクセサリ→アクセサリを追加を選択し、 接 続するデバイスを選択する。 Bluetooth接続はAndroid TVシステムでのみ機 能します。 Android TVリモートアプリ Android TV システムは、 スマートフォンにリモートアプリをダウンロードする ことで制御することができる。 デバイスがプロジェクターと同じWi-Fiネッ トワークに接続され、 ブルートゥー スがオンになり、 Android/iOSデバイスが最新バージョンに更新されているこ とを確認してください。 • Androidデバイス : Google Playから 「Android TV Remote」 アプリをダウンロードし、 アプリを開き 、 「 Remote」 タブで 「HAKO mini」 を選択し、 「 connect」 をクリックして、 プロジェ クタ画面に表示される認証コードを入力してください。...
- Page 54 ズームイン/ズームアウ ト プロジェクターを動かさずに、 リモコンを使用して画像のサイズを50%から 100%に変更します。 キース トーン補正 プロジェクターは自動キー補正、 デジタルキー補正、 リモート4点キー補正をサ ポートしています。 • 自動キーストン修正 プロジェクタ画像が歪んだときは、 自動キー補正を行い、 画像を矩形に復元す る。 あなたが自動キーストン修正が以前として働く ことができないとわかるな らば、 最適化するために以下の指示に従ってください。 このボタン を押してプロジェクターのホームページに入り、 [設定]-> ① [投影設定]-> [アライメン ト設定]を入力します。 選択[キーストーンベンチマーク補正]と正しいイメージを得るためにプロ ② ジェクターを調整します。 • デジタルキーストーン補正 プロジェクタを固定する場合は、 デジタルキーを使用して修正してください。 プ ロジェクターホームページを入力するには、 このボタン を押して[設定 ]-> [ プロジェ ク ト設定 ]-> [垂直補正]/ [水平補正]を選択し、 リモートコントロ ールの左または右ボタンを押して調整します。...
- Page 55 水平修正 • 4点補正 投影角度により、 投影画像が 2 つの軸に沿って伸びたり歪んだりする場合は、 [設定] -> [投影] -> [4 点補正] に移動し、 必要なコーナーを選択し、 リモコンの 左または右ボタンを押して調整します。 4点補正 キース トーン補正リセッ ト キーストーン補正リセッ トを選択し、 「 OK」 を押すとデフォルト設定に戻りま す。 その他の設定 スク リーンセーバー プロジェクタがデフォルトの時間でアイドル状態になっているときにスクリーン セーバーが自動的に起動します。 あなたは、 デフォルトの時間を変更すること ができますまたはそれをオフにします。 スク リーンセーバータイムアウ トシャ ッ トダウン タイマーをオフに設定プロジェクター。 言語設定 画面表示言語を選択します。 工場の設定を復元する デバイスをリセッ トし、 工場の設定を復元します。...
- Page 56 Chromecast(ワイヤレス接続) クロームキャスト機能は、 Android TV システムを使用している場合にのみ機能 する。 クロームキャス ト対応のサイ ト/アプリからのキャス ト (Android / iOSデバイス の場合) 。 ① デバイスとAndroid TV (HAKO mini) が同じWi-Fiネッ トワークに接続され ていることを確認し、 およびクロームキャスト対応アプリの最新バージョンを 実行していることを確認してください。 ② クロームキャスト対応のサイト/アプリを起動する。 ③ キャストボタン をタップしてHAKOminiを選択する。 Chromeブラウザタブからのキャスト (パソコン用) ① コンピューターとプロジェクターを同じWi-Fiネッ トワークに接続する。 ② グーグルブラウザタブの右上の の 「キャスト」 をクリックし、 ソースから タブと画面のどちらをキャストするかを選択する。 ③ キャストするHAKO miniを選択する。 Androidデバイスからのミラー ① AndroidデバイスがAndroid TV ( HAKO mini) と同じWi-Fiネッ トワーク上 にあることを確認してください。 ②Androidデバイスに 「Googleホーム」 アプリ をダウンロードする。 ③...
- Page 57 このプロジェクターは、 PC、 TVスティック、 TVボックス、 DVDプレーヤー、 セッ ト トッ プボックス (STB) 、 ゲーム機、 その他のデバイスなど、 さまざまなHDMI再生デバ イスの接続をサポートしています。 ①. このプロジェクターをHDMI再生機器に接続するには、 HDMIケーブル (付属 していません) を使用してください。 ②. リモコンのボタン を押してプロジェクターのホームページに入り、 [HDMI]を選択して押す。 2. フラッシ ュ ドライブに接続します このプロジェクターを使用すると、 USBストレージデバイスに保存されている音 楽、 ビデオ、 および写真を楽しむことができます。 ① USBストレージデバイスを挿入します。 ② リモコンのボタン を押してプロジェクターのホームページに入り、 [USB]を選択して押す。 ③ ファイルとフォルダのメニューで再生するファイルを選択します。 ④ [OK] を押して再生を開始します。 3. AUXケーブルでヘッ ドホンに接続する ヘッ ドホンやスピーカーをAUXケーブルでETOEプロジェクターに接続すること もできます。 ① 3.5mmAUXケーブルコネクタをETOEプロジェクターのAUXポートに挿入しま す。 ② 3.5mmAUXケーブルのもう一方のコネクタをイヤホンまたはスピーカーに差 し込みます。 ③ プロジェクターでメディアを再生する...
- Page 58 ショートカットメニュ ロング ボタンを押してショートカッ トメニューを開く •ボタンを押してオプションを選択します •を押して ボタンを次のページに移動します • または ボタンを押して、 パラメータを調整する •を押して“OK”ボタンを保存する 暖色と寒色のバランスをと って自然 標準 な色を維持 より詳細な画像と色の鮮明さを提 光 供します 画像モード 暖色と低照度を提供 柔らかい 明るさ、 コントラスト、 彩度、 シャー 個人的 プネス、 色相を手動で設定 寒い クールな色温度を提供 正常 冷温と常温を提供 色温度 暖かい温度と冷たい温度を提供し 暖かい ます 赤、 緑、 青を手動で設定 役割 利用可能な標準トーン 標準 より詳細なサウンドを提供 音楽...
- Page 59 台形補正 : ±45° 、 自動台形補正対応 推奨環境 : 41° F〜95° F / 5° C〜35° C 相対湿度 : 15%〜85% (結露なきこと) 保証 何らかの理由で30日間の返金保証 損傷していない製品とパッケージは、 購入後30日以内に返品して、 理由を問わず 全額返金することができます。 品質に関連しない保証請求の送料は、 購入者の負担となります。 品質関連の問題に対する12か月の保証 すべてのETOE製品には、 品質関連の問題を1年間カバーしています。 サポートメ ールに申し立てを送信すると、 ETOEはオプションで次のことを行います。 1. ETOE製品を同じモデルの交換製品と交換し、 返品の送料を負担します。 2. 購入価格の払い戻しのためにETOE製品を交換します。 投影距離と画面サイズ スク リーンサイズ 高さ 距離 距離 幅...
- Page 60 FCC Notice This device complies with the FCC rules, Part 15. Operation is subject to the following two conditions: (1) This device may not cause harmful interference, and (2) This device must accept any interference received, including interference that may cause undesired operation. Changes or modifications not expressly approved by the partly Warning: responsible for compliance could void the user’s authority to operate the...
Need help?
Do you have a question about the A1332 and is the answer not in the manual?
Questions and answers