Table of Contents
Advertisement
Quick Links
Advertisement
Table of Contents

Related Manuals for ETOE A1172


Summary of Contents for ETOE A1172
-
Page 2: Safety Instructions
Safety Instructions Read all instructions before you use this device. Do not make any changes that are not described in this manual. If physical injury, loss of data, or damage is caused by failure to follow instructions, the warranty does not apply. -
Page 3: Power Supply
Power Supply • Use only the provided power adapter. • Power off the device before removing the power supply from the socket. • Protect the power cord from being walked on or pinched, particularly at plugs, convenience receptacles, and the point where they exit from this device. -
Page 4: What's Included
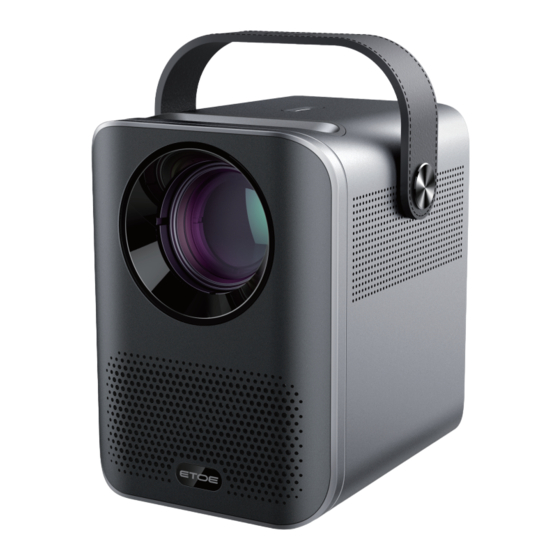
What's included Adapter x 1 Adapter AC cord x 1 Remote control x1 User manual x 1 � � Overview Front View Rear View CD Lens @ Air ventilation (outlet) @DC in @) USB 2.0 port. @ HDMI 1.4 port @Indicator Cz) IR receiver @3.5mmAUX... -
Page 6: Bluetooth Mode
The remote controls the projector and built-in Android TV system. Icon IR Mode Bluetooth Mode [0 :::J/tl Click to switch to Click to switch to IR mode. Bluetooth mode. Press button When Press button When the the indicator turns red, indicator turns blue, •··... -
Page 7: Get Started
Get started Placement (I) Place the projector right towards the projection surface to get a rectangle picture. ® The distance between the projector and the projection surface determines the picture size. ® Check the projection distance and screen size on the specifications part. Prepare the Remote Control Install the remote control batteries (batteries not included). -
Page 8: Select Your Language
Select Your Language When start the projector for the first time, you will be guided to a page to select language, use remote controlAorVto select your language. Then ► press the right button and select "Complete" to enter the next page. Language settings Pair Remote Control in Bluetooth Mode After selecting a language, you will be at a Bluetooth remote pairing page,... - Page 9 Settings Android TV Setting Bluetooth pairing If you want to connect to Bluetooth speakers/headphones on the Android TV interface, select Settings-Remotes&Accessories-Add accessory, then select the device to be connected. Android TV Remote App The Android TV system could be controlled by downloading the remote app on a smartphone.
- Page 10 Desktop Rear Projection Ceiling Rear Projection Zoom in/out Use the remote control to resize the picture size from 50% to 100% without moving the projector. Keystone correction A 1172 projector supports digital keystone correction and remote four-point keystone correction. The keystone effect refers to when the projected image is noticeably wider at one side.
-
Page 11: Other Settings
@ If the projected image is stretched or distorted along both axes due to Settings----> Four Point Correction, the angle of the projection, select choose the corner you want to adjust, and follow the on-screen instructions to correct the image. Four Point Correction Keystone correction reset Keystone Correction Reset... - Page 12 Chromecast (wireless connection) The Chromecast feature only works while you are in the Android TV system. Cast from Chromecast-enabled sites/apps (for Android/iOS devices) Q) Make sure your device and the Android TV (HAKO mini) are connected to the same Wi-Fi network, and that you are running the latest version of the Chromecast-enabled app.
-
Page 13: Wired Connections
@ Press [OK] to start playing. 3. Connect to a headphone via AUX cable You can connect a headphone or speaker to ETOE Projector via AUX cable as well. 00 Plug in the 3.5mm AUX cable connector to ETOE projector AUX port. -
Page 14: Specifications
Specifications CPU: ARM Quad 64-bil Cortex-A53 Android OS: Android TM 10.0 Bluetooth: Bluetooth 5.1 Wi-Fi: 2.4G/5 G Hz 802.11 a/b/g/n/ac Native Resolution: 1920*1080 Throw ratio: 1.22 Contrast ratio: 3000:1 Aspect Ratio: 16:9 / 4:3 Adaptive Speaker: 3W*2 Stereo Speaker Connection port: HDMl*1; USB*1; AUX*1 Projection size: 40"-200"... -
Page 15: Warranty
12-Month Warranty for Quality-Related Issues Every ETOE product comes with one year of quality-related issues coverage. If you submit a claim to our support mail, ETOE will, at its option: 1. Replace the ETOE Product with a replacement product of the same model and cover any return shipping costs. - Page 16 Model: A1172 © ETOE Technology Limited. All rights reserved. ETOE and the ETOE logo are trademarks of ETOE Technology Limited, which is registered in the United States and other countries. All other trademarks are the property of the irrespective owners.
Need help?
Do you have a question about the A1172 and is the answer not in the manual?
Questions and answers
etoe a1172遙控器方向鍵變成聲音源鍵怎麼辦
To fix the directional keys on the ETOE A1172 remote control that have changed to sound source keys, go to:
Settings → Keystone Correction → Reset → OK
This will restore the default settings for the directional keys.
This answer is automatically generated