Gozney Dome Technical Manual
Hide thumbs
Also See for Dome:
- Technical manual (76 pages) ,
- Technical manual (72 pages) ,
- Technical manual (74 pages)
Table of Contents
Advertisement
Advertisement
Table of Contents

Related Manuals for Gozney Dome


Summary of Contents for Gozney Dome
- Page 1 Technical Manual...
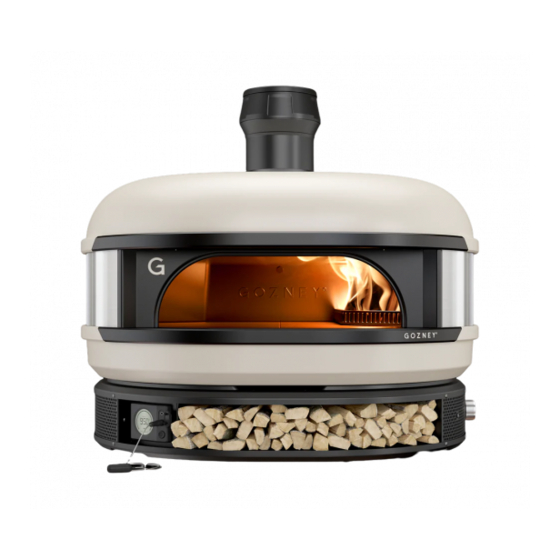
- Page 3 Wood-fired cooking made easy.
- Page 4 Introduction DANGER If you smell gas: Shut gas off to the appliance. Extinguish any open flame. If odour continues, keep away from the appliance and immediately call your fire department. WARNING Do not store or use gasoline or other flammable liquids or vapors in the vicinity of this or any other appliance.
- Page 5 This instruction manual contains important information necessary for the proper assembly and safe use of the appliance. Read and follow all warnings and instructions before assembling and using the appliance. Follow all warnings and instructions when using the appliance. Keep this manual for future reference.
-
Page 6: General Advice
GENERAL ADVICE Dome gets extremely hot and should Do not over fill Dome or cover the burner. not be used by children. Do not allow children near the device during or after Do not use an unlined masonry chimney operation. Dome can stay hot for a few as the flue for this appliance. - Page 7 This appliance shall only be used in an Warning: Do not use the gas or wood above ground open-air situation with appliance of Dome in enclosed or on natural ventilation, without stagnant small balconies. areas where gas leakage and products of combustions are rapidly dispersed by wind and natural convection.
- Page 8 Product Overview - What's in the Box Oven Dock Storage Eye Bolts & Chain (use with the stand only) Gas Hose & Regulator Gas Control Dial Flue Top Flue Cap Flue Pipe...
- Page 9 Flue Outlet Ø127mm Steamer Input Gas Inlet Ash Tray Steam Plug Thermometer Air Inlet Puck Burner Guard Stone Puck...
- Page 10 Data Plate Gozney Limited, Units 18 & 19, Radar Way, Christchurch, Dorset, BH23 4FL UK. Appliance name: Gozney Dome Model/type No.: 4555-V1-03 Trade name: Gozney Dome Gas pressure: 2.75 kPa Gas rate: 30 MJ/h Gas type: ULPG Jet orifice: 1.52mm...
- Page 12 This section details the correct operation and install of a Gozney Dome.
-
Page 14: Safety Considerations
WARNING: Keep away from children and pets. Do not use or store flammable materials in or near this appliance. The Dome unit and the burner must WARNING: Contact your local munici- always be well ventilated. pality for any building codes applicable... -
Page 15: Carbon Monoxide
• Depressed heart action, slowed able, thoroughly soak the area around respiration the appliance. When spraying water on Dome itself, do not use a strong jet of If the exposure has been severe it may water, as this may cause splashing of cause death. - Page 16 This section details the set up of the oven and the accessories included with your Dome.
- Page 18 Please remove them once the oven is located to its final location and use hand holds below. Do not move Dome whilst in operation or when it is still hot.
- Page 19 Never attempt to move the oven on your own. Two people should pick up the oven lifting from under the rounded ends of the oven, do not use the mouth of the oven as a lifting point. Remove anything loose and all transit packaging in the oven before moving.
-
Page 20: Oven Placement
732mm OVEN PLACEMENT When deciding where to place Dome ensure the area is large enough to 630mm accommodate the oven with 5cm around the base of the dock for air intake. It is important nothing is blocking the meshed panels as this will affect the performance of Dome. - Page 21 We recommend the height of the floor to be around the level of the bottom of the users elbow (usually around 120cm from the ground) Ensure the surface the oven is being placed on is completely level, stable and capable of easily holding the weight of the oven - 60kg.
-
Page 22: Flue Assembly
The flue is designed to have a rain guard which has a 5mm gap from the Dome. FLUE ASSEMBLY The rain cap prevents moisture from getting into the oven and should only be used when the oven is cooled and not in use. - Page 23 STEAM PLUG The steam plug should always be inserted into Dome unless you are using the oven in conjunction with the steamer accessory. ASH TRAY Before firing the oven, make sure you have removed the ash tray and disposed of any packaging. The ash tray should always be inserted into its slot when the oven is in use.
- Page 24 Gas bottle setup WARNING It is important for the safe usage of Dome that the gas bottle is secured to the oven as specified in the instructions below. ULPG BOTTLE SETUP Remove F003 and replace with the eye bolt and chain that is in the box with the gas regulator.
-
Page 26: Digital Temperature Display
Digital Temperature Display... - Page 27 SET UP After installing the batteries hold the SECONDS power button down until the display turns on. Find the sensors jack by removing the plastic cap and plug it into the rear of the display, the screen will then show OVEN T the temperature from within the oven.
- Page 28 OVEN T OVEN T °F °c PROBE T ll OVEN T °F PROBE T ll...
-
Page 29: Using The Probes
OVEN T °F USING THE PROBES When the temperature probes are connected to the screen, the display will automatically begin to cycle through the temperatures of the oven and the two probes. OVEN T °F °F PROBE T ll °F PROBE T ll... - Page 30 Digital Temperature Display Troubleshooting OVEN T °F PROBE T ll E1 ERROR CODE If the thermometer is displaying an error code E1. This is caused by either: 1) A loose connection where the jack plug connects to the thermometer. Please ensure the jack plug is pushed fully in to the socket on the back of the thermometer.
- Page 31 °F PROBE T ll E2 ERROR CODE If the thermometer is displaying an error code E2. This is caused by either: 1) A loose connection where the jack plug connects to the thermometer. Please ensure the jack plug is pushed fully in to the socket on the unit.
- Page 32 Probes Guidelines When using a meat probe the aim is to get the sensor to the coldest part of the meat to ensure the meat is cooked through. PROBES CARE & USAGE Before the first use and after subsequent uses, clean the probes with hot soapy water and dry thoroughly.
- Page 33 FDA Safe Minimum Internal Temperatures (as measured with a food thermometer) FOOD TYPE INTERNAL TEMP. Ground Meat Beef, Pork, Veal, Lamb 75˚C (160 Turkey, Chicken 75˚C (165 Fresh Meat Beef*, Veal*, Lamb*, Pork* 63˚C (145 Poultry 75˚C (165 63˚C (145 Fish with fins * Minimum rest time of 3 minutes...
- Page 34 Your guide to burning gas.
-
Page 36: Connecting To Gas
We recommend using 9kg gas bottle in conjunction with Dome. Connect the regulator to the gas cylinder, following the instructions for your regulator accordingly. Do not force the regulator as this could damage the gas bottle. - Page 37 WARNING: If at any point you smell gas: Shut off the gas from the cylinder, turn off the switch on Dome and extinguish any open flames. If odour continues, move away from the Dome and gas supply then contact your gas supplier or fire service.
-
Page 38: Gas Safety
Remove all packaging before attempting Do not touch! The Dome can get to light the gas burner. extremely hot when in operation. Be sure to wear protective gloves when operat- Please take a moment to review all of ing the oven. - Page 39 Keep the cylinder outdoors in its upright position. Do not connect multiple gas cylinders to Dome or store a spare within the same vicinity. Never use a naked flame to check for gas leaks. Use only hose and regulator supplied with appliance.
- Page 40 PUCK CONFIGURATION (GAS) When firing the oven on gas you should have the burner guard over the burner and the stone puck covering the ash shoot.
- Page 41 INSTALLING THE IGNITER BATTERY Before using the gas burner for the first time you’ll need to install an AAA battery into the ignition module. To do this remove the rear panel on the dock to find the module. Unscrew the cap and place the battery in (negative end first).
- Page 42 CONNECTING THE GAS HOSE To attach the quick connection gas hose to your Dome pull the collar back on the connector and place the hose onto the gas inlet. When you release the collar it should return to its original position freely.
- Page 43 ANTICLOCKWISE REGULATOR Ensure the gas bottle is turned off. Align the regulator and the gas bottle threads and carefully begin to tighten ensuring the threads aren’t crossed. Continue to tighten until a tight fit has been made. This connection must be tested for leaks before using the oven.
-
Page 44: Testing For Leaks
Testing For Leaks If there is a leak at the hose to oven WARNING connection, re-tighten the fitting with a spanner and check for leaks by apply- You should always check for gas leaks ing a soap-and-water solution to the every time you disconnect and recon- highlighted areas with a brush. - Page 45 Pilot Light Ignition To ignite the pilot light press the control knob in until you hear a constant clicking sound. Then, still pressing, turn the knob 90˚ and hold it there until the pilot light is lit. You may not be able to see the naked flame but there should be clear reflections of it on the internal sides of the oven.
-
Page 46: First Firing
First Firing Only when you have a pilot light, turn the control dial anti-clockwise and the burner should light. On your first firing we highly recommend to put the burner on a medium to low flame for 30 minutes to help cure the oven before moving to a high flame. - Page 47 Gas Flame The flame should be yellow in colour and roll along the top of the oven.
- Page 48 5 minutes and retry ignititing it. If the problem persists still review the cleaning and maintenance instructions to remove debris in the burner. If the problem persists after trying the following solutions please contact Gozney for further support.
- Page 49 After cooking, be sure to turn off the gas from the gas cylinder first before turning of the Dome. This will allow any gas left in the burner or pipe to be used up safely. Three minutes after turning the gas off...
-
Page 50: Maintenance
Maintenance CLEANING THE VENTURI If your burner’s flame is overly yellow or making more noise than usual you may have debris blocking the venturi. When the oven is turned off and cool, remove the maintenance hatch and use a vacuum cleaner with a long plastic nose to remove any debris. - Page 52 This section details safety considerations and how to get the most from your oven when firing on wood.
- Page 54 First Firing WARNING: Before lighting the oven, ensure you have adhered to the extrac- tion specified in this manual. If you are unsure, do not use the oven. Never use flammable liquids including, but not limited to, barbecue lighting fluid, petrol or lighter fluids to start or boost a fire in this oven.
- Page 55 Wood To Use 140mm 20-50mm 20-50mm Wood is the most important factor when firing the oven on wood. It will determine the level of performance you will get from the oven. SIZE WOODS TO USE Smaller is better, we recommend using •...
- Page 56 Wood Fire Set Up When firing the oven on wood you should have the stone puck covering the burner hole and the mesh puck over the ash shoot.
- Page 57 Fire Starting On first fire up follow the below procedure but ensure the fire kept at a moderate level for 30-60 mins. Natural Odour Free Firelighter...
- Page 58 Moving The Fire Minutes Approx Once the fire has established itself in the centre of the oven push it over to the left and continue to feed it for approx- imately 30 minutes or until the oven is fully saturated. Then move the fire to the right of the oven (over the mesh puck).
- Page 59 The flame from the wood fire should roll across the length of the oven’s roof. Avoid overfeeding the fire, there should never be flames coming out the mouth of the oven. If you are struggling to get a good flame, ensure the wood you are using follows our guidelines at the begin- ning of this chapter.
- Page 60 Ash Tray FLAME TYPE AND TEMPERATURE Large rolling flames. Temperatures of 400˚C+ Small flames. Temperatures of ˚ C - 350 ˚ C After moving the fire over the mesh puck turn the control dial on the ash tray to the fully open position. This allows more oxygen to get to the fire and will help Embers, fires died down.
- Page 61 Only solid fuels that have been HACCP certified (Hazard Analysis and Critical Control Point) are permitted to be stored in commercial kitchen locations. Please contact Gozney Ovens for more information on HACCP certified fuels. RECIPE WOOD SIZE EXAMPLES...
-
Page 62: Ash Disposal
ASH DISPOSAL Ensure you wait until the oven is cool before attempting to remove the ash. Don’t dispose of ash near or into anything flammable. -
Page 63: Fuel Overloading
FUEL OVERLOADING CLEANING THE OVEN Overloading is dangerous and can cause The oven floor should reach tempera- excess smoke and flame. There should tures of 343˚C to start “self-cleaning”. never be flames coming out the mouth To do this raise the temperature of the of the oven, if this happens step away oven to above 343˚C for a period of from the oven and wait for the fire to die... - Page 64 Your guide to general maintenance.
- Page 66 Cleaning The Oven INTERNAL The best way to clean the inside of the Dome is to burn off any food debris or soot that is left behind. When the oven is over 343˚C it will start self cleaning and any burnt on food will burn off after a period of four hours.
- Page 67 When the oven isn’t in use it should be kept under cover away from rain. If you are placing a cover directly on Dome, ensure it’s completely cooled down before covering. When using the oven after a long spell of no use, we recommend firing the oven as if it is a first firing.
-
Page 68: Replacing The Probe
Replacing The Probe Only when the oven is cold, remove the rear panel to access the probe terminal. The terminal is held with a magnet so can be removed from the dock easily to gain better access. Lift all the levers on the left hand side of the terminal to release the probe wires. - Page 69 Push the new probe's wires into the hole and feed them through until they are visible from inside the rear panel. Hand tighten the probe in place, avoid using a spanner as you may damage the probe. BEWARE: Don’t over tighten probe.
- Page 70 To wire the new probe, lift all the levers on the left hand side up and insert the wire into the holes on the side of the junction. The pattern/colour of the wire should match the corresponding wire on the opposite side of the junction. When the wire is fully inserted, push the lever back to its original position to clamp the wire in place.
- Page 71 Double check the probe is functioning by checking the digital temperature display and return the panel to the back of the oven.
Need help?
Do you have a question about the Dome and is the answer not in the manual?
Questions and answers