POWERSIDE PQube 3 Installation Manual
Hide thumbs
Also See for PQube 3:
- Operation and reference manual (49 pages) ,
- Installation manual (47 pages) ,
- Quick start manual (2 pages)

Related Manuals for POWERSIDE PQube 3


Summary of Contents for POWERSIDE PQube 3
- Page 1 ® PQube 3 Portable 480V Installation Guide Powerside 980 Atlantic Ave., Suite 100 Alameda, CA 94501, USA Tel +1-510-522-4400│Powerside.com...
- Page 2 Functional earth terminal not relied on for safety © 2008–2022 Powerside All rights reserved. No parts of this document may be copied, reproduced, or translated to another language without the prior written consent of Powerside “PQube 3” is a registered trademark of Power Standards Lab. “Windows” “Excel,” and “PowerPoint” are registered trademarks of Microsoft Corporation. All...
-
Page 3: Table Of Contents
Installation Procedures ..........................8 1. Turn off the Mains supply power at the measurement site ..................... 8 2. Choose a suitable location to install your PQube 3 Portable 480V ................... 8 3. Install current transformers: model PQ3iaB-Portable-4V8I-480V-000-XXXX ................ 9 4. Install the voltage sensing wires ............................10 5. -
Page 4: Introduction
If you have remote communication enabled, you can receive reports from the PQube 3 as soon as it is powered up. The PQube 3 can send events and trends via email to your laptop or smartphone - no software required. -
Page 5: What's Included - Model Pq3Iab-Portable-4V8I-480V-000-Xxxx
What’s Included - Model PQ3iaB-Portable-4V8I-480V-000-XXXX Before installation, verify the contents of your PQube 3 Portable 480V package. Please note variations is model number may reflect a variation in the supplied components. A. (1) Heavy duty carrying case B. (1) PQube 3 Portable 480V C. -
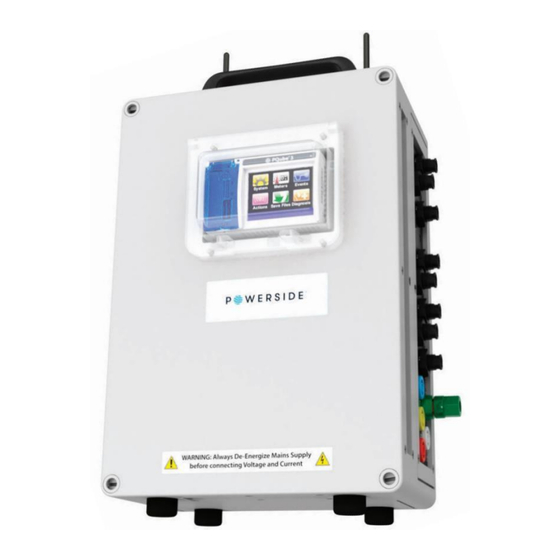
Page 6: Overview Of Connections
Overview of Connections Right Side – Voltage and Current Terminals Earth terminal – Functional. Used as L1, L2, L3 voltage inputs. Rated for the reference point for voltage 100 to 480 Vac nominal, 50/60Hz. measurements. Inputs for CT sensors – nominal 0.333 V Neutral terminal –... -
Page 7: Portable Pqube 3 480V Installation
Always De-Energize the Mains Supply Before Connecting Voltage and Current Probes. Your PQube 3 Portable 480V is rated for up to 480 VAC. Do not install it at circuits that exceed these ratings. Do not attempt to connect leads to a live circuit. This could result in damage to your equipment and/or injury. -
Page 8: Installation Procedures
2. Choose a suitable location to install your PQube 3 Portable 480V Determine where you want to install your PQube 3 Portable 480V. Find a flat, level surface in a secure area, accessible by authorized personnel only. -
Page 9: Install Current Transformers: Model Pq3Iab-Portable-4V8I-480V-000-Xxxx
Ensure the arrow points towards the source. Load Source Connect the secondary wires of the CTs to the PQube 3 Portable 480V to the bayonet style terminals (see picture below). L1, L2, L3 current flexible CT outputs connect to terminals I1, I2, I3. -
Page 10: Install The Voltage Sensing Wires
4. Install the voltage sensing wires Your PQube 3 Portable 480V includes voltage sensing leads (wires) with built in fuses on the red, yellow, and blue leads. To access the fuse, twist the banana plug from the thick end of the cable. Ensure a fuse is installed inside each of the three wires before installation. -
Page 11: Install The Power Supply (If Applicable)
6. Verify connections Double check and ensure all voltage sensing leads are installed on the correct wires, and all CTs are clamped around the correct conductors. Ensure all connections to the PQube 3 Portable 480V are secure. 7. Secure the area After verifying all connections, close all cabinets and ensure all hazardous circuits are protected from unauthorized access. -
Page 12: Verify Meter Readings
Configuration can be done by copying the PQube 3 setup.ini file onto a USB drive and inserting into the USB port (next to the color display). Configuration can also be done remotely by connecting to the PQube 3 Ethernet Port and configuring via the PQube 3 Configurator software.
Need help?
Do you have a question about the PQube 3 and is the answer not in the manual?
Questions and answers